LG WT8400C Series Owner's Manual
Hide thumbs
Also See for WT8400C Series:
- Owner's manual (56 pages) ,
- Owner's manual (56 pages) ,
- Owner's manual (56 pages)
Table of Contents
Advertisement
Advertisement
Table of Contents

Related Manuals for LG WT8400C Series


Summary of Contents for LG WT8400C Series
- Page 1 Scan to see the online manual. OWNER'S MANUAL WASHING MACHINE Read this owner's manual thoroughly before operating the appliance and keep it handy for reference at all times. ENGLISH WT8400C* / WT8405C* www.lg.com MFL72042041 Copyright © 2023 LG Electronics Inc. All Rights Reserved. Rev.00_120723...
-
Page 2: Table Of Contents
Sorting Laundry Loading the Washer Adding Cleaning Products Control Panel Wash Cycles Cycle Modifiers Options and Extra Functions 29 SMART FUNCTIONS LG ThinQ Application Smart Diagnosis Function 33 MAINTENANCE Regular Cleaning Periodic Maintenance Care in Cold Climates 38 TROUBLESHOOTING Before Calling for Service... -
Page 3: Important Safety Instructions
IMPORTANT SAFETY INSTRUCTIONS IMPORTANT SAFETY INSTRUCTIONS READ ALL INSTRUCTIONS BEFORE USE Safety Messages Your safety and the safety of others are very important. We have provided many important safety messages in this manual and on your appliance. Always read and follow all safety messages. - Page 4 • If the product has been submerged in water, sitting in standing water, or waterlogged, do not come in contact with the product and immediately contact an LG Electronics customer information center for instructions before resuming use.
- Page 5 IMPORTANT SAFETY INSTRUCTIONS • Do not modify or extend the power cord. • If the electrical supply cord is damaged, it must only be replaced by the manufacturer or its service agent or a similar qualified person in order to avoid a hazard. •...
-
Page 6: Caution Statements
IMPORTANT SAFETY INSTRUCTIONS CAUTION STATEMENTS CAUTION • To reduce the risk of minor or moderate injury to persons, malfunction, or damage to the product or property when using this product, follow basic precautions, including the following: Installation • Install the product on a firm and level floor. Operation •... -
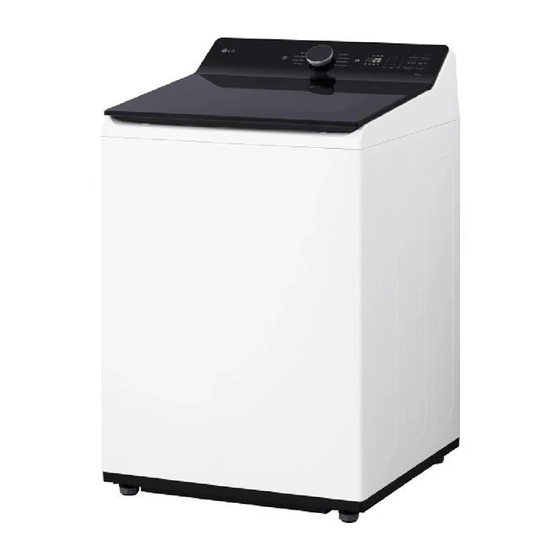
Page 7: Product Overview
• For your safety and for extended product life, use only authorized components. The manufacturer is not responsible for product malfunction, property damage or bodily injury caused by the use of separately purchased unauthorized components, parts, or non-LG products. Front View... - Page 8 PRODUCT OVERVIEW Accessories Included Accessories Tie Strap † Leg Holders † Refer to the installation guide included with the leg holders for instructions on proper usage. Required Accessories (sold separately) Hot and Cold Water Hoses Product Specifications The appearance and specifications listed in this manual may vary due to constant product improvements. Model WT8400C* / WT8405C* Electrical Requirements...
-
Page 9: Installation
INSTALLATION INSTALLATION Before Installing WARNING • Moving or installation of the appliance requires two or more people. Failure to follow these instructions may result in injury. • Store and install the appliance where it will not be exposed to temperatures below freezing or exposed to outdoor weather conditions. -
Page 10: Choosing The Proper Location
10 INSTALLATION Connecting to the Power Supply Final Installation Check Tools Needed • The washer must be installed on firm flooring to minimize vibration during the spin cycle. Concrete flooring is best, but a wood floor is sufficient, provided it is built to FHA standards. •... -
Page 11: Unpacking And Removing Shipping Material
• Do not reuse old hoses. Use only new hoses when installing the washer. Old hoses could leak or burst causing flooding and property damage. Contact an LG Customer Information Center for assistance in buying hoses. Remove the foam tub insert. -
Page 12: Connecting The Drain Hose
12 INSTALLATION After the hoses are connected, turn on the NOTE water faucets and flush out any foreign • If your water supply contains a lot of debris, a substances such as dirt, sand, or sawdust. whole home water filter may help to remove the Foreign substances can damage washer inlets debris from the water before it reaches the and lead to leakage. -
Page 13: Leveling The Washer
INSTALLATION • The end of the drain hose should be located a NOTE minimum of 29.5 inches (75 cm) and a maximum of 96 inches (244 cm) above the • If the drain is large enough for the flange on the bottom of the washer. -
Page 14: Final Installation Check
14 INSTALLATION the top of the lid. Using these surfaces will result NOTE in the washer being unlevel. • Before installing the washer, make sure that the floor is clean, dry and free of dust, dirt, water and oil so the washer feet cannot slide easily. Feet that move or slide on the floor can contribute to excessive vibration and noise. - Page 15 INSTALLATION • Make sure that the appliance is grounded. • : Previous test ended with an error. 1N sE • Connect this appliance to a grounded outlet • The indication is different for each model. conforming to the rating prior to use. Failure to do so may result in fire, electric shock, or malfunction.
-
Page 16: Operation
16 OPERATION OPERATION Before Use • The Normal cycle must be selected in order to change its default settings. • Pressing the Start/Pause button without WARNING selecting a cycle immediately starts the • To reduce the risk of fire, electric shock, or injury Normal cycle with the default settings. -
Page 17: Loading The Washer
OPERATION Fabric Care Labels Colors Sort articles by color. Wash dark clothes separately Many articles of clothing include a fabric care label. from light colors or whites. Mixing dark clothes Using the chart below, adjust the cycle and option with light clothes can result in dye transfer or selections to care for your clothing according to discoloration of the lighter clothes. -
Page 18: Adding Cleaning Products
18 OPERATION Small Items • For best results, load dry items only. If washing very wet items, wring out excess water before • Do not wash a single small item. Add enough loading, or run a Spin Only cycle to extract similar items to the load to prevent an out-of- excess water before adding detergent and balance load. - Page 19 OPERATION • For proper wash performance, always measure • Liquid fabric softener detergent using the measuring device provided • Liquid or powdered detergent for main wash by the detergent manufacturer. For an average load, use less than half of the recommended CAUTION maximum.
- Page 20 20 OPERATION • It is normal for a small amount of water to • Never add more than one cup of bleach and do remain in the dispenser compartments at not exceed the maximum fill line since this can the end of the cycle. cause the bleach to be dispensed immediately.
-
Page 21: Control Panel
OPERATION Control Panel Control Panel Features Power On/Off Button • Press this button to turn the washer on or off. • Pressing this button during a cycle will cancel that cycle and any load settings will be lost. • The door will unlock after a brief pause. NOTE •... - Page 22 22 OPERATION Time and Status Display Estimated Time Remaining • When a cycle is selected, the default time for that cycle is displayed. This time will change as modifiers or options are selected. • If the display shows , then the time will be displayed after the load sensing has detected the load size.
-
Page 23: Wash Cycles
OPERATION Wash Cycles The wash cycles are designed for specific types of wash loads. Select the cycle that best matches the load contents for maximum wash performance and fabric care. See the Sorting Laundry section for best results, and follow the fabric care labels on your garments. For a guide to fabric care symbols, see the Sorting Laundry section. - Page 24 24 OPERATION Cycle Bedding Description Suitable for washing blankets or bulky items which have difficulty absorbing water, such as pillows, blankets, comforters, sheets or pet bedding. • Do not use this cycle to wash a mixed load of bedding and non-bedding items. •...
- Page 25 • The default cycle is Delicates, suitable for washing dress shirts/blouses, nylons, lingerie, or sheer and lacy clothes which can easily be damaged. (less than 8 lb) • Refer to the LG ThinQ application to see the cycles available for download. Wash Temp.
-
Page 26: Cycle Modifiers
26 OPERATION Cycle Modifiers Spin Higher spin speeds extract more water from clothes, reducing drying time and saving energy. About Modifier Buttons • Press the Spin button repeatedly until the Each cycle has default settings that are selected desired speed is selected. automatically. - Page 27 OPERATION Rinse+Spin Press and hold the Deep Fill button for 3 seconds to activate this function. Select this option to rinse and spin a load separately from a regular cycle. This can be helpful in preventing fresh stains from setting in fabrics. Unlocking the Control Panel Turn on the power.
- Page 28 28 OPERATION Spin Only Use this option to spin clothes and drain the water from the tub. • Use this option to drain water if the wash cycle is interrupted by a power failure or to spin dry hand-washed items. Press the Power button to turn on the washer.
-
Page 29: Smart Functions
- Allows you to set various options on the appliance and in the application. Run the LG ThinQ app and sign in with your • Push Alerts existing account or create an LG account to - When the cycle is complete or the appliance sign in. - Page 30 Internet service provider or refer to your wireless router manual. Press the Power button. • LG ThinQ is not responsible for any network connection problems or any faults, malfunctions, or errors caused by network connection. Press and hold the Remote Start button for 3 •...
- Page 31 SMART FUNCTIONS Radio Equipment Specifications FCC RF Radiation Exposure Statement To identify the RF module installed in the appliance, refer to the label attached to the This equipment complies with FCC radiation appliance. exposure limits set forth for an uncontrolled environment.
-
Page 32: Smart Diagnosis Tm Function
If you experience a problem with your Wi-Fi equipped appliance, it can transmit troubleshooting data to a smartphone using the LG ThinQ application. • Launch the LG ThinQ application and select the Smart Diagnosis feature in the menu. Follow the instructions provided in the LG ThinQ application. -
Page 33: Maintenance
MAINTENANCE MAINTENANCE WARNING • To reduce the risk of fire, electric shock, or injury to persons, read this entire owner’s manual, including the SAFETY INSTRUCTIONS, before operating this appliance. • Unplug the appliance before cleaning to avoid the risk of electric shock. Failure to follow this warning can cause serious injury, fire, electric shock, or death. - Page 34 34 MAINTENANCE Leaving the Lid Open • For other tub cleaning products, follow the cleaner manufacturer’s instructions and After you finish using the washer, leave the lid recommendations. open overnight to allow air to circulate and dry the • Do not exceed the maximum fill line when tub.
- Page 35 MAINTENANCE Wipe off any moisture with a dry towel or Turn off the washer, and unplug the power cloth after cleaning. cord. To clean the drawer opening, use a small, Turn off hot and cold water faucets. non-metal brush to clean the recess. Remove all residue from the upper and lower parts of the recess.
-
Page 36: Care In Cold Climates
36 MAINTENANCE Care in Cold Climates Turn off the washer and unplug the power cord. Storing the Washer If the washer will not be used for an extended Dry the tub interior with a soft cloth, and close period of time and is in an area that could be the lid. - Page 37 MAINTENANCE Press and hold the Spin button for 3 seconds to run the Spin Only cycle for draining and spinning. Press the Start/Pause button and check that the water fills properly. When the Drain Hose is Frozen Pour hot water in the washer tub and close the lid.
-
Page 38: Troubleshooting
38 TROUBLESHOOTING TROUBLESHOOTING The washer is equipped with an automatic error-monitoring system to detect and diagnose problems at an early stage. If the washer does not function properly or does not function at all, check the following before you call for service. Before Calling for Service Error Messages Problem... - Page 39 TROUBLESHOOTING Problem Possible Cause & Solution The control lock function is on to prevent anyone from changing cycles or operating the washer. CONTROL LOCK • Turn off the control lock function in the control panel. See Control Lock under Options FUNCTION and Extra Functions.
- Page 40 • Mechanical failure CLUTCH ERROR • Unplug the washer and call for service. Supply voltage is not correct. • Please call LG service center. You can find your local LG service center phone number on SUPPLY VOLTAGE the back cover page. ERROR...
- Page 41 TROUBLESHOOTING Problem Possible Cause & Solution Vibrating noise Not all leveling feet are resting firmly and evenly on the floor. • See Leveling the Washer in INSTALLATION. Floor is not rigid enough. • Make sure that the floor is solid and does not flex. See Flooring in INSTALLATION. Squeaking noise Packaging materials were not removed.
- Page 42 42 TROUBLESHOOTING Problem Possible Cause & Solution Washer will not turn Power cord is not properly plugged in. • Make sure that the plug is plugged securely into a grounded, 3-prong, 120-VAC, 60 Hz outlet. House fuse is blown, circuit breaker has tripped, or power outage has occurred. •...
- Page 43 TROUBLESHOOTING Problem Possible Cause & Solution Washer will not Extremely low water pressure. operate. • Check another faucet in the house to make sure that household water pressure is adequate. Washer is too cold. • If the washer has been exposed to temperatures below freezing for an extended period of time, allow it to warm up before pressing the Power button.
- Page 44 • Find the Wi-Fi network connected to your smartphone and remove it, then connect your not connected to the appliance on LG ThinQ. Wi-Fi network. Mobile data for your smartphone is turned on. • Turn off the Mobile data of your smartphone and connect the appliance using the Wi-Fi network.
- Page 45 Move the location of the router so that it is closer to the appliance. LG ThinQ is asking for a password to connect to the product. • If you are asked to provide a password to connect to the product (not to your home network) during the Wi-Fi setup, enter the last 4 characters of the network name, repeated twice, with no spaces.
-
Page 46: Limited Warranty
Should your LG Washer (“Product”) fail due to a defect in materials or workmanship under normal and proper use, during the warranty period set forth below, LG will, at its option, repair or replace the Product. This limited warranty is valid only to the original retail purchaser of the Product (“You”) and applies only when purchased lawfully and used within the United States including U.S. - Page 47 Notice of Dispute. In the event you intend to commence an arbitration proceeding, you must first notify LG in writing at least 30 days in advance of initiating the arbitration by sending a letter to LG at LG Electronics USA, Inc. Attn: Legal Department- Arbitration 111 Sylvan Avenue, Englewood Cliffs, NJ 07632.
- Page 48 If you and LG are unable to resolve the dispute within 30 days, either party may proceed to file a claim for arbitration.
- Page 49 LIMITED WARRANTY You may only opt out of the dispute resolution procedure in the manner described above (that is, by e-mail or telephone); no other form of notice will be effective to opt out of this dispute resolution procedure. Opting out of this dispute resolution procedure will not affect the coverage of the Limited Warranty in any way, and you will continue to enjoy the full benefits of the Limited Warranty.
-
Page 50: Canada
ARE NOT PERMITTED. PLEASE SEE THE SECTION TITLED “PROCEDURE FOR RESOLVING DISPUTES” BELOW. Should your LG Washer ("Product") fail due to a defect in materials or workmanship under normal and proper use, during the warranty period set forth below, LG Electronics Canada, Inc. ("LGECI") will, at its option, repair, replace or pro rate the Product upon receipt of proof of the original retail purchase. - Page 51 (ASC), as determined by LG Canada. If your Product is located outside a 150 km radius from a ASC, as determined by LG Canada, it will be your responsibility to bring the Product, at your sole expense, to the ASC for in-warranty repair.
- Page 52 If you and LG are unable to resolve the dispute within 30 days of LG’s receipt of the Notice of Dispute, the dispute shall be resolved by binding arbitration in accordance with the procedure set out herein.
- Page 53 Except as otherwise provided for, LG waives any rights it may have to seek attorneys’ fees and expenses from you if LG prevails in the arbitration.
- Page 54 54 Memo...
- Page 55 Memo...
- Page 56 LG Customer Information Center For inquiries or comments, visit www.lg.com or call: U.S.A. 1-800-243-0000 1-888-542-2623 CANADA Register your product Online! www.lg.com...
Need help?
Do you have a question about the WT8400C Series and is the answer not in the manual?
Questions and answers
How do I set a delicate cycle on the WT8400C? Also, what setting should I use for towels. My old washer had setting for both of these needs. Thank You ,
To set a delicate cycle on the LG WT8400C washer:
1. Press the Power button to turn on the washer.
2. Turn the cycle selector knob or press the cycle button repeatedly to select the Gentle/Delicate cycle.
3. The washer will use slow agitation and/or reduced wash time by default.
4. Adjust wash temperature, spin speed, and soil level if needed.
To set a towel cycle:
The washer does not have a specific "Towel" cycle. Use the Normal cycle for towels:
1. Press the Power button to turn on the washer.
2. Select the Normal cycle (suitable for cotton, linen, and jeans).
3. The default settings are: Wash Temp – Warm, Spin Speed – Med. High, Soil Level – Normal.
4. Adjust settings if necessary based on towel soil level.
Use warm or hot water and avoid mixing with delicates.
This answer is automatically generated
How do I set permanent press cycle on LG Model WT 8405C
How Can I turn the music off on my wt8400c. Or can you change the music played