
Related Manuals for Korg Tastiera i3


Summary of Contents for Korg Tastiera i3
- Page 1 Questo manuale d’istruzione è fornito da trovaprezzi.it. Scopri tutte le offerte per Korg Tastiera i3 cerca il tuo prodotto tra le migliori offerte di Strumenti Musicali...
-
Page 2: Table Of Contents
i3 Owner’s Manual Table of Contents Introduction Changing the Style Settings ...........19 Turning the accompaniment part on/off, changing the volume and sounds ................19 Main Features ..............3 Selecting effects for the accompaniment parts ......19 Adjusting the volume balance between the keyboard and Part Names ................ -
Page 3: Introduction
Introduction Main Features Main Features Thank you for purchasing the Korg i3 Music Workstation. To help you get the most out of your new instrument, please read this manual carefully. Playing with different sounds About this Manual The i3 features a large number of sounds from... -
Page 4: Part Names
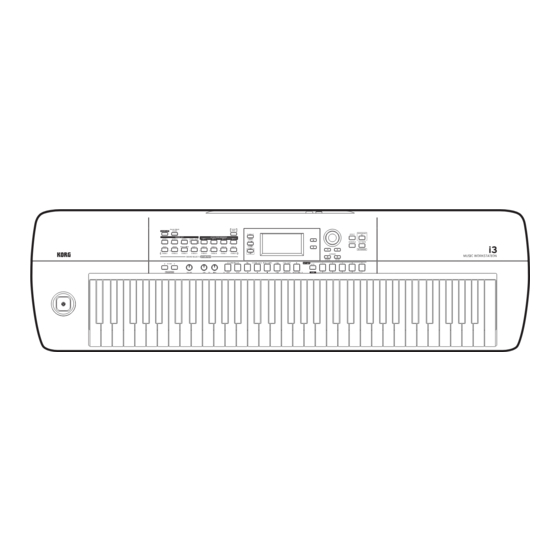
Introduction Part Names Part Names Front panel Control panel (page 5) Display (page 6) Joystick (page 11) Keyboard Rear panel 1. Cord hook .....................page 7 Bottom side 2. DC 12V jack ( ..............page 7 3. Power button ( ) ................page 10 4. -
Page 5: Control Panel
Introduction Part Names Control panel 10 11 1. SOUND SET button 12. EFFECT button ..............page 12 ................. page 14, 19 2. GRAND PIANO/SOUND button 13. PERFORMANCE REC button ..........page 12 ..........page 21 14. TAP TEMPO button ..............page 11, 17 3. -
Page 6: Display
Introduction Part Names Display 1. MEASURE 9. Item to set, number Displays the current measure of the auto-accompaniment Displays the name and number of the setting shown in the (style) or song. The symbol will light up when the first display. -
Page 7: Getting Ready To Play
Introduction Getting Ready to Play Getting Ready to Play Connecting the AC adapter Replacing the batteries A battery indicator is shown at the upper right-hand corner of Make sure that the power on the i3 is turned off. the display. Note: This indicator will not be displayed when the i3 is con- Connect the DC plug of the included AC adapter to the DC... -
Page 8: Using Headphones
Connecting a foot controller Turn the dial or press the + button to select “Media For- mat”. Connect a Korg EXP-2 foot controller to control the volume of “Push[ENTER]” will appear on the display. the keyboard part (page 12). Press the CATEGORY u (ENTER) button. -
Page 9: Connecting An Audio Player
Introduction Getting Ready to Play Using a MIDI tone generator Turn the dial to select “Yes,” and press the CATEGORY u (ENTER) button. You can play a MIDI tone generator using the i3’s keyboard by When the message “Completed!” is displayed, press the connecting it to the MIDI OUT connector on the rear panel. -
Page 10: Basic Operations
Introduction Basic operations Basic operations Turning the power on/off Modes of operation on the i3 Turn the VOLUME knob of the i3 to the left to turn the The i3 has four operating modes. Use the front panel buttons volume all the way down. to switch between modes. -
Page 11: Selecting Parameters On The Display And Changing Values
Introduction Basic operations Selecting parameters on the display Adjusting the tonal character and changing values (equalizer) Use the buttons shown below to select parameters or change You can use the equalizer to adjust the tonal character of the values on the display. i3’s sound as you like. -
Page 12: Performance Mode
Performance Mode Playing the Keyboard Playing the Keyboard Selecting sounds These keyboard parts can be individually turned off (muted) (page 13). The status of each part will change depending on the sound set you select. Press the GRAND PIANO/SOUND button. y Upper parts This lets you play the sound of the grand piano in sound set These parts are played in the high note range of the key-... -
Page 13: Changing The Sound Set Settings
Performance Mode Changing the sound set settings Changing the sound set settings You can freely change the settings of a sound set that you have Use the dial, +/– button and CATEGORY t, u buttons to selected. Here, we will try making changes to the content of a select the sound set you want to play. -
Page 14: Changing The Octave
Performance Mode Changing the sound set settings Changing the key (transpose) Making the lower part recognize chords only (split hold) You can play in different keys on the keyboard, by changing When split hold is on, the range of the lower part will be used the key. -
Page 15: Adding Harmony To A Melody (Ensemble)
Performance Mode Changing the sound set settings Changing how the effect is applied This changes the how effects 1 and 2 are applied (specifically, their send levels). These settings can be set for each keyboard part (lower, upper 1–3). Press the EFFECT button. Effect 1 can be set. -
Page 16: Using The Set Lists
Performance Mode Using the set lists Using the set lists Saving the set list (WRITE) You can save your favorite settings (sound sets, styles, tempo, effects, etc.) together as a set list. This also allows you to quick- ly recall your favorite settings. There are ten banks of set lists The changes you have made will revert to their default (A–J), and five settings can be saved in each bank (for a total state once you turn off the power. -
Page 17: Playing Along With Auto-Accompaniment (Styles)
Performance Mode Playing along with auto-accompaniment (styles) Playing along with auto-accompaniment (styles) Playing with a style you choose The style function automatically plays accompaniment to match the chord that you specify. The i3 features accompa- niment patterns in many different styles. The sounds used by styles consist of eight parts (bass, drums, percussion and other y When the LOWER/SPLIT button lights up green: parts 1–5). -
Page 18: Changing The Accompaniment Pattern
Performance Mode Playing along with auto-accompaniment (styles) Tip: You can make playback start automatically when the Press the INTRO/ENDING button to select the intro. tempo changes (tap tempo start). To enable this feature, set Each press of the button will switch between intro 1 and 2. “Tap Auto Start”... -
Page 19: Changing The Style Settings
Performance Mode Changing the Style Settings Changing the Style Settings Selecting effects for the You can freely change the settings of the styles you select. Feel free to change the style settings to match your preferences. accompaniment parts The changes you have made will revert to their default state once you turn off the power. -
Page 20: Adjusting The Volume Balance Between The Keyboard And Accompaniment Parts
Performance Mode Changing the Style Settings Adjusting the volume balance between the keyboard and accompaniment parts You can adjust the volume balance between the keyboard and accompaniment parts as you like. y To make the keyboard part softer: Turn the dial to the left while holding down the SOUND SET button. -
Page 21: Recording Your Performance
Note that you may not be able to correctly record the data when using certain USB flash drives. For details, Press the u/„ button to make it light up. Recording will see the Korg website. begin. Play a melody in your right hand while playing chords with your left hand. -
Page 22: Sequencer Mode
Sequencer Mode Playing Back and Editing Songs Playing Back and Editing Songs Songs (music files) that can be Playing a song played back You can play the keyboard while a song is playing back. Try playing back different songs and playing along. The following types of songs can be played back when the i3 is To play back songs stored on a USB flash drive, first con- in Sequencer mode. -
Page 23: Playing Back Using Different Methods
Sequencer Mode Playing Back and Editing Songs Playing back using different Press the u/„ button to play back the song. methods Rewinding, fast-forwarding or pausing a song 2,3,4 Fast-forward Pause Rewind Play, stop Press the A1 B button at the start of where you want to begin the loop (the button will blink). - Page 24 Sequencer Mode Playing Back and Editing Songs To listen back to what you overwrote, press the u/„ but- Deleting a user song ton. Select the user song you want to delete. Overwriting example (sound set) Press the ˜ OVER DUB and ˜ OVER WRITE buttons together.
-
Page 25: Settings Mode
No Assign: Select this when you are not using a pedal. Damper: This is the factory default setting. Select this when using a pedal switch like the Korg PS-1, PS-3 or DS-1H. Expression: Select this when using an expression pedal like the Korg EXP-2. -
Page 26: List Of Setting Mode Functions
01–12: Sets the pitch in units of semitones (12=±1 octave). Pedal Function No Assign See “Changing the pedal function” (page 25). Damper* Expression Pedal Polarity –(KORG)* See “Changing the pedal polarity” (page 25). +(Reverse) MasterTuning 427.5...440.0*...452.9 Hz Sets the overall tuning for the instrument (drums excepted). Chord Detect Fingered1* Sets the method of chord recognition. - Page 27 Settings Mode Making Settings on the i3 Number Menu Settings Contents of settings MIDI Clock Internal* Sets whether the MIDI clock of the i3 is controlled by the internal clock (Internal) or by an External external clock (External). Local Control Sets whether the sound generator of the i3 will make a sound (“On”...
-
Page 28: Media Mode
Loading user styles You can load and use styles (user styles) made for the i3. For details, see the Korg website. Copy the user styles (files with an .STY extension) and the user programs (files with a .PCG extension) to a USB flash drive, and then load them into the i3. -
Page 29: List Of Media Mode Functions
When recording a performance, you may not be able to correctly record STYLE data to USB flash drives that have a slow write speed. For details, see the Korg website. USER01.STY (901. −916.) Media Format Format the USB flash drive. USER02.STY (917. −932.) See “Formatting a USB flash drive”... -
Page 30: Other Settings
Other settings Appendix Appendix Checking the software version Press the u/„ button. When the calibration is done, the word “Completed” will be shown on the display. Hold down the EXIT (SHIFT) button and press the power button. Turn off the power, and then turn it on again. When the i3 starts up, the display will show the software Try operating the pedal to make sure that it is working as version. - Page 31 Other settings Appendix The pitch is off. … Is the transpose function set correctly? … Has “MasterTuning” in Setting mode been set correctly, as well as the keyboard part’s octave and other parameters? … Is the scale set correctly? Check the settings for “Upper Scale Type” (page 26), “Style Scale Type”...
-
Page 32: List Of Chords Recognized
Other settings Appendix List of chords recognized When the chord recognition type is set to a value besides “Fingered2” you can specify chords by playing the keys shown below. Tip: You can change the chord recognition type by changing the “Chord Detect” setting in Setting mode (page 26). Major Major 6th 3-note... -
Page 33: List Of Shortcuts
Other settings Appendix List of shortcuts You can quickly change settings for some of the functions on the i3 by combining the use of the buttons and the dial. For details on which functions support shortcuts, please refer to the explanations for each function. EXIT (SHIFT) button Dial Shortcuts that use the EXIT (SHIFT) button... -
Page 34: Specifications
Other settings Specifications Specifications Function Function 61 keys FOOT 6.3 mm phone jack (half-damper CONTROLLER Keyboard Soft (light), medium (standard), not supported) Touch control jack hard (heavier), fixed AUDIO IN jack 3.5 mm stereo mini-phone jack Sound Stereo PCM sound generator OUTPUT L/ 6.3 mm TS phone jack generator... -
Page 35: Midi Implementation Chart
*4: Depending on the selected program, there may be cases in which it is not possible to sound the whole range. O: Yes Mode 1: Omni On, Poly Mode 2: Omni On, Mono X: No Mode 3: Omni Off, Poly Mode 4: Omni Off, Mono Consult your local Korg distributor for more information on MIDI implementation. - Page 36 © 2019 KORG INC. Published 01/2020...
Need help?
Do you have a question about the Tastiera i3 and is the answer not in the manual?
Questions and answers