Table of Contents
Advertisement
Quick Links
Advertisement
Table of Contents

Related Manuals for TUCOR RKS+


Summary of Contents for TUCOR RKS+
- Page 1 RKS+ Installation and troubleshooting...
- Page 2 Address: 330 Perry Highway Harmony Pa 16037 Phone: 800‐272‐7472 724‐935‐6850 Fax: 724‐935‐8233 Email: tucormail@tucor.com 450-230-0015/B...
-
Page 3: Table Of Contents
RKS+ Installation and troubleshooting Content Chapter 1: Introducing RKS+ ....................3 The Controller ..................3 Irrigation Features ..................3 Chapter 2: System Installation ....................5 Mounting the Controller ................. 5 Marking up the mounting holes ............... 6 Connecting the Controller ................8 Grounding the Controller ................. - Page 4 RKS+ Installation and troubleshooting Connecting an Alarm ..................37 Connecting a Moisture sensor ..............38 Connecting, Configuring and Using Moisture Sensors ........38 Connecting and configuring a moisture sensor ........39 Assigning an ID to a soil moisture sensor ..........39 Configuring a soil moisture sensor ............
-
Page 5: Chapter 1: Introducing Rks
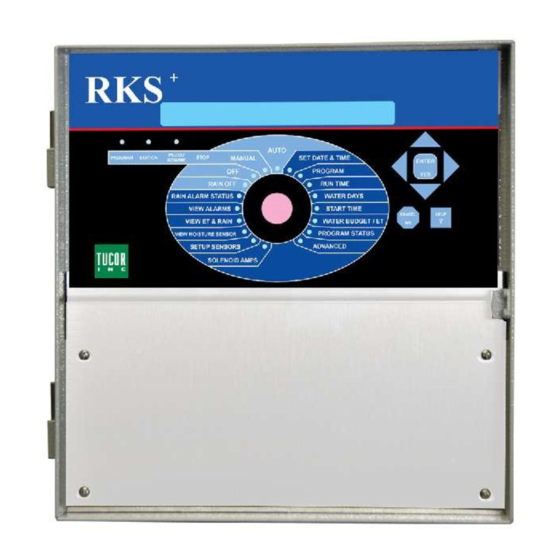
RKS+ Installation and troubleshooting Chapter 1: Introducing RKS+ The RKS+ is a microprocessor based irrigation control system. A central controller and up to 100 field stations comprise a complete system. In addition the controller will accept input from several external sensors in order to adjust its irrigation to the local weather conditions. - Page 6 RKS+ Installation and troubleshooting • All programs have 12 start times per day. • All programs can run simultaneously (to capacity of the transformer anc connection board). • You configure each program to run on any selection of days in a 14 day period, or on odd/even dates.
-
Page 7: Chapter 2: System Installation
RKS+ Installation and troubleshooting Chapter 2: System Installation Mounting the Controller Though the RKS+ is designed to resist both rain and direct sun light, you should place it in a friendlier environment if possible. Installing the RKS+ inside a utility room or a shed is the perfect solution, but if this is not possible, try to place it somewhere dry and out of sight. -
Page 8: Marking Up The Mounting Holes
RKS+ Installation and troubleshooting Marking up the mounting holes 1 Make sure the bracket is in level. Mark up the mounting holes. - Page 9 RKS+ Installation and troubleshooting Use a pen to put marks on the wall through the hole in the back of the controller cabinet. If you're placing the controller on a concrete wall, take down the controller, drill out the hole, put in the wall anchor, and put back the controller on the wall.
-
Page 10: Connecting The Controller
RKS+ Installation and troubleshooting Now the controller should be mounted firmly on the wall. After mounting the controller, it's time to connect the power and connect boards ‐ follow the instructions in the next section to do this. Connecting the Controller Grounding the Controller To secure your RKS+ against lightning, you must ensure that the controller is grounded through a ground rod connected to the ground lugs. - Page 11 RKS+ Installation and troubleshooting Connecting the conventional field wires...
-
Page 12: Connecting Sensors
RKS+ Installation and troubleshooting Connecting Sensors The RKS+ takes input from different sensor types: ET devices, rain sensors, flow sensors and regular auxiliary alarms. This sections shows you how to connect these sensors to the controller. Connecting an ET Device The RKS+ supports ET in two ways: 1. -
Page 13: Using A Connected Device (Weather Station)
RKS+ Installation and troubleshooting Important! Be aware of the polarity when you connect devices to the RKS+: Connect plus to plus and minus to minus or you won't see the expected behavior from the connected devices. Using a Connected Device (Weather Station) Connecting an ET device on‐site gives you the most accurate adjustments as the ET device will monitor the exact weather condition right where irrigation will take place. - Page 14 RKS+ Installation and troubleshooting Now the display looks like this: Use the item selectors to select and push the 3. Intelliset ENTER button. Now you'll see the following screen: Select . Now the display will look like this: 6. Device Setup...
- Page 15 RKS+ Installation and troubleshooting Select . Now the display will look like this: 1. ET Input Method Use the item selectors to select and push Local Weather Station button. ENTER Select from the menu and push the 3. ET Base Setup ENTER button.
- Page 16 RKS+ Installation and troubleshooting Push the CANCEL button once to return to the main Intelliset™ menu. 10 Use the item selectors to select 2. ET Limits (Min and Max) push the button. Now you'll see the following screen: ENTER 11 Now use the item selectors to determine the two values and push to save your settings: ENTER •...
- Page 17 RKS+ Installation and troubleshooting Now the display looks like this: 13 Use the item selectors to select and push the button. 1. ET ENTER Now the display looks like this: 14 Now you can choose between four settings: ET device (Pulses) Select this if you use a connected ET device that provides dynamic ET data for the controller (ET 300‐w) ET enabled (N/O or N/C)
- Page 18 RKS+ Installation and troubleshooting Use the item selectors to locate the setting you want and if you chose anything but ET device (Pulses) , push the ENTER button to save your selection and the SENSORS button to exit sensor configuration. If you chose ET device (Pulses), you need to tell the controller how many inches to the current ET figure per pulse it receives ‐...
-
Page 19: Checking The Current Aggregated Et And Rain
RKS+ Installation and troubleshooting 17 Select Now the display will look like this: 6. Device Setup. 18 Select Now you'll see 2. ET and Rain Inch/Pulse Settings. something like this: 19 Use the item selectors to set your values and push the button ENTER to save your settings. -
Page 20: Reading Current Aggregated Et And Rain Figures
RKS+ Installation and troubleshooting Reading current aggregated ET and Rain figures 1 Turn the dial to ADVANCED Now the display looks like this: Use the item selectors to select and push the 3. Intelliset ENTER button. Now you'll see the following screen: Select from the menu and 1. -
Page 21: Connecting A Rain Sensor
RKS+ Installation and troubleshooting These figures will be reset at midnight when they'll be used to calculate tomorrow's ET budget. Note: If you use a custom irrigation period, this happens at the start of your irrigation period, which might not be midnight. See more in the NCL User Manual. - Page 22 RKS+ Installation and troubleshooting Important! Be aware of the polarity when you connect devices to the RKS+: Connect plus to plus and minus to minus or you won't see the expected behavior from the connected devices. The RKS+ can accept input from an external rain sensor or a tipping rain bucket, and react in three ways: •...
-
Page 23: Configuring For A Rain Sensor
RKS+ Installation and troubleshooting The following procedure walks you through configuring the controller for rain sensor input ‐ it is identical to parts of the procedure for ET. Configuring for a Rain Sensor 1 Before moving on, make sure you have connected the rain sensor. For more information refer to the separate Installation and Troubleshooting manual. - Page 24 RKS+ Installation and troubleshooting Now the display looks like this: Now you can choose between three settings: Rain gauge (Pulses) If your rain sensor provides dynamic data in the sense that it sends a pulse for each unit of rain it detects, select Pulses Rain contact (N/O or N/C) If your rain sensor simply tells the controller whether to irrigate or not (if...
- Page 25 RKS+ Installation and troubleshooting Important! If you want to receive remote rain data from an ET server, you must disable your local rain sensors. Turn the dial to ADVANCED Now the display looks like this: Use the item selectors to select and push the 3.
- Page 26 RKS+ Installation and troubleshooting Select . Now the display will look like this: 6. Device Setup Select and then 2. ET/Rain Setup 2. ET and Rain Inch/Pulse Now you'll see something like this: settings. Use the item selectors to set your values and push the button ENTER to save your settings.
-
Page 27: Setting Hourly Maximum Rain And Rain Alarm Level
RKS+ Installation and troubleshooting Setting Hourly Maximum Rain and Rain Alarm Level The RKS+ allows for two precautions when you experience rain: You can set a threshold value for how much it should rain before the rain alarm will be activated. Here is how this calculation is done: •... -
Page 28: Setting The Hourly Max. Rain And Rain Alarm Level
RKS+ Installation and troubleshooting tomorrow's ET figure ‐ it will "cut off" the amount of rain to subtract at the hourly maximum. Example: If the hourly maximum is 0.02" and it rains 0.03" per hour for three hours, only 0.06" and not 0.09" will be subtracted from tomorrow's ET budget. - Page 29 RKS+ Installation and troubleshooting Use the item selectors to select and push the 3. Intelliset ENTER button. Now you'll see the following screen: Select Now the display will look like this: 1. ET. Select from the 3. Max Hourly Rain and Rain Alarm Limit menu and push the button.
-
Page 30: Connecting A Flow Sensor
RKS+ Installation and troubleshooting Note: Be aware that testing the tipping rain bucket input by flipping the "spoon" will accumulate "rain" in the controller. Do it with caution as it can't be deleted by cycling the power. Use the item selectors to set the desired values and push the button ENTER to save your settings. -
Page 31: Enabling Flow Sensor Input (Pulses)
RKS+ Installation and troubleshooting A photo diode type flow sensor is also connected to the “Flow” terminal, and via the “V‐Aux” terminal through a resistor. Recommended resistor values: • 9V: 330 Ohm, 0.25 Watt • 12V: 470 Ohm, 0.5 Watt Enabling Flow Sensor Input (pulses) By default flow sensor input is enabled in the RKS+. - Page 32 RKS+ Installation and troubleshooting Now the display looks like this: Use the item selectors to select item number 3. Alarm/Flow you'll see the default setting for sensor setup, Flow (Pulses) Push the button to save your selection. ENTER Now the RKS+ is ready to accept input from your flow sensor, but before you can use it to anything meaningful you need to configure threshold values and actions ‐...
-
Page 33: Configuring For Flow Sensor Input
RKS+ Installation and troubleshooting Configuring for Flow Sensor Input In the previous section you enabled the RKS+ to accept flow sensor input ‐ now you need to configure what to do with it and this section walks you through the relevant procedures. Selecting Sensor Type By telling the RKS+ which type of sensor you are using, the controller can calibrate the input it receives from the input terminals. - Page 34 RKS+ Installation and troubleshooting Select and push the button. 4. Flow Sensor Setup, ENTER Now you'll see this display: Choose by pushing the button. 1. Flow Sensor Type ENTER Now you'll see this display: Use the item selectors to select one of the 13 built‐in profiles: •...
- Page 35 RKS+ Installation and troubleshooting 1 Turn the dial to , use the item selectors to scroll to item ADVANCED number and push the button. 3. FloGuard, ENTER Now you'll see this display: Select and push the button. 4. Flow Sensor Setup, ENTER Now you'll see this display: Use the item selectors to locate the...
-
Page 36: Setting The Flow Sensor Adjustment
RKS+ Installation and troubleshooting ActualFlow = K * (Pulses + Offset) About the two values you need to enter: • The "Offset" value is to correct the input from your sensor. • • The "K" value can be looked up in the data sheet for your sensor. Use the item selectors to enter your values and push the ENTER button to save your settings. -
Page 37: Adjusting The Flow Sensor Input
RKS+ Installation and troubleshooting Select , and push the button. 4. Flow Sensor Setup ENTER Now you'll see this display: Choose Now you'll see the screen 2. Flow Sensor Adjustment. for adjusting the flow sensor input: Use the item selectors to set your adjustment factor. Push the button to save your selection. -
Page 38: Viewing The Current Flow
RKS+ Installation and troubleshooting 1 Turn the dial to , use the item selectors to scroll to item ADVANCED number and push the button. 3. FloGuard, ENTER Now you'll see this display: Select , and push the button. 4. Flow Sensor Setup ENTER Now you'll see this display: Select... -
Page 39: Connecting An Alarm
RKS+ Installation and troubleshooting Connecting an Alarm The grey terminals labeled "AUX" are intended for a regular auxiliary alarm. Note: An alarm is used instead of a Flow Sensor. Turn the dial and select eller SENSOR SETUP... -
Page 40: Connecting A Moisture Sensor
RKS+ Installation and troubleshooting Connecting a Moisture sensor Connecting, Configuring and Using Moisture Sensors This section describes how you actually get the moisture sensors ready for use and how they can improve your irrigation. Note: The SMS are pre‐programmed, so programming is not necessary. -
Page 41: Connecting And Configuring A Moisture Sensor
RKS+ Installation and troubleshooting Connecting and configuring a moisture sensor Before you can enjoy the benefits of moisture sensor input you must connect it to the moisture sensor wire, obtain a license from your distributor and perform some basic configuration. Follow this procedure to get your moisture sensor up and running: Note: You must have entered a license key for the controller... - Page 42 RKS+ Installation and troubleshooting Use the item selectors to select 3. Intelliset and push the ENTER button. Now you'll see the following screen: 4. Moisture Sensor Id Assign ENTER Select and push the button. Now the display looks like this: Select and push the button.
-
Page 43: Configuring A Soil Moisture Sensor
RKS+ Installation and troubleshooting Now the controller will first check that there are no existing moisture sensors with the ID you chose: If no clashes in ID numbers are found, the controller moves on to detect the new sensor: If all goes well you will see the following message in the display: Once your moisture sensor has an ID you need to tell the controller what type of type of soil it is placed. - Page 44 RKS+ Installation and troubleshooting Now the display looks like this: Use the item selectors to select 3. Intelliset and push the ENTER button. Now you'll see the following screen: Select 2. Moisture and push the ENTER button. Now the display looks like this:...
- Page 45 RKS+ Installation and troubleshooting Select 2. Moisture Sensor Setup and push the ENTER button. Now the display looks like this: Use the item selectors to select the ID of the sensor you wish to configure (You assigned the ID in the previous procedure: For more information turn to Capter 2: Assigning an ID to a soil moisture sensor on page 39 and then adjust each column: Column...
- Page 46 RKS+ Installation and troubleshooting Column Description The type of soil in which the sensor is placed. Options are: Soil type • Clay • Sand • Loam • Standard Push the button to save your configuration. ENTER Repeat steps five and six for all sensors you wish to configure. Now the moisture sensors are ready to use, and the next sections go into detail on how you assign them to control your irrigation schedules.
-
Page 47: Chapter 3: System Activation
RKS+ Installation and troubleshooting Chapter 3: System activation The default license that ships with your controller allows for only one station. Note: The RKS+ comes predefined with the station license you have purchased. Further licenses are only needed if the system is expanded or moisture sensors are added. - Page 48 RKS+ Installation and troubleshooting The display looks like this: Press the arrow key down to , and you will see a display 9. License like this (your ID will be different): Note To obtain a license key for more stations you need to know the ID you see in this display ‐...
-
Page 49: Moisture License
RKS+ Installation and troubleshooting your license code is correct, you will see a message like the following: In this case the license is valid for 36 stations. Your new license will take effect immediately and you can start building irrigation programs with all your licensed stations right away. After pressing any key to continue you will be back at this display: Moisture license Repeat 1 og 2. - Page 50 RKS+ Installation and troubleshooting If your license code is correct, you will see a message like the following: In this case the license is valid for three moisture sensors.
-
Page 51: Chapter 4: Troubleshooting From The Controller
RKS+ Installation and troubleshooting Chapter 4: Troubleshooting from the Controller Testing Stations This section describes the various ways you can troubleshoot your controller and stations. Enabling current readings The most important tool in day to day troubleshooting is the built‐in current readings. - Page 52 RKS+ Installation and troubleshooting Select and push the 8. Enable/Disable line mA display ENTER button. Use the item selectors to select and push the again. Enable ENTER When you return to either mode, you'll see the line status AUTO MANUAL in the upper right hand corner: Note The display will return to showing the time if you power down the...
-
Page 53: Running The "Electrical Test
RKS+ Installation and troubleshooting Running the "Electrical Test" The RKS+ has a built‐in test that will activate each station in turn for just one second in order to check if they are responding correctly. The stations must be connected to the solenoids that activate valves in the landscape, and the test can tell whether the stations and solenoids are working correctly in conjunction. - Page 54 RKS+ Installation and troubleshooting If the station is ok, the display will look something like this: In this case the station is pulling a current of 238mA to keep the valve open, which is ok since this is typically in the 200‐400 mA range. Note: The number before the slash is the current on the wire before trying to activate the station ‐...
-
Page 55: Special Current Readings From The Station Test
RKS+ Installation and troubleshooting Note Note: There are a few special readings that you should be aware of: Special current readings from the station test Reading Meaning There is a short on the terminal (on the controller) -1mA / -1mA Important If you experience a short on the terminal and fix it, you must restart the electrical test, or all following stations will... - Page 56 RKS+ Installation and troubleshooting Push the button, locate the "Test" program (called "T") and PROGRAM push the ENTER Now you can set the time each valve should be pulled open, and which station you wish to start from. The interval must be between 10 and 990 seconds. Once you've set the interval time, push the button to start the test ENTER...
-
Page 57: Testing Programs
RKS+ Installation and troubleshooting Note: All 100 station identities will activate in turn ‐ this means that if you don't have connected stations to all slots in the connection boards, you will experience "empty" intervals where no stations react to the instructions. Note: The test will include the Master Valve but not Booster Pumps. - Page 58 RKS+ Installation and troubleshooting Tip: If you don't want to wait the entire program out just to see that everything activates in the right order, you can decrease the water budget to 1 percent before running the program. This way you can "follow" the program by walking from station to station in the terrain as they activate for just one percent of the original run time.
- Page 59 RKS+ Installation and troubleshooting Glossary Term Description Cable Two wires surrounded by insulation. Two-wire Synonym for a cable. Wire An individual copper wire.
- Page 60 Tucor, Inc. 330 Perry Highway Harmony Pa 16037 Phone: 8002727472 7249356850 Fax: 7249358233 Email: tucormail@tucor.com...
Need help?
Do you have a question about the RKS+ and is the answer not in the manual?
Questions and answers