Table of Contents
Advertisement
Quick Links
Advertisement
Table of Contents

Related Manuals for RAEDIAN NORA


Summary of Contents for RAEDIAN NORA
- Page 1 ENERGIZE THE FUTURE OF EMOBILITY INSTALLATION MANUAL NORA SOCKET VARIANT...
-
Page 2: Safety Notice
Safety Notice It's crucial to familiarize with this manual and abide by all safety precautions outlined, including those indicated by safety markings on the equipment. General safety first While this manual provides helpful guidance, it's not exhaustive. Always prioritize general safety requirements, design, production, and established safety standards when operating the charger. - Page 3 Once the charger is registered in the APP, please reset a PIN Code. The information in this document may be subject to change without prior notice. © Copyright 2024 RAEDIAN. All rights reserved.
-
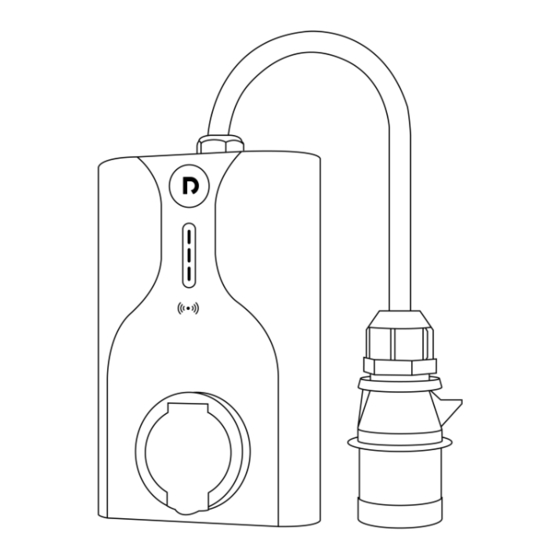
Page 4: Product Overview
1. Product overview Logo LED Status LED RFID area Type 2 socket CEE plug 2. Accessories Travelling bag Wall bracket X1 Wall mounting screw X4 Plastic anchor X4 Security screw X2 RFID card X2... -
Page 5: Specification
3. Specification Feature and Function Socket Charging mode AC Mode 3 Charging connector Type 2 socket AC power output 7/22KW Mounting options Wall mounted or pedestal Logo LED, Status LED Load management Via APP Communication Interface Wi-Fi, BLE,4G(optional) User authentication RFID, APP, Plug and Charge Backend protocol OCPP 1.6 JSON... -
Page 6: Installation Planning
The installer needs to evaluate the available electrical capacity at the installation site to ensure that it can handle the installation of an EV charger. Protection limit is based on max. 80% of the fuse rating, which can be set in the RAEDIAN APP. Rated Power... -
Page 7: Installation Instructions
4.4 Suggested Installation Tools Power drill Multimeter Tape measure Marker Phillips screwdriver Hex wrench M4 (3/32) 5. Installation instructions 5.1 Positioning Ensure that the installation surface is solid enough to hold the charger. It is recommended that the wall have a bearing capacity of at least 100 kg. Place the backplate on the wall, keep it horizontal, and use a marker/pencil to ... - Page 8 Use four wall-mounting screws to fasten the wall bracket. Hang the charger on the wall bracket. Use two security screws to tighten the device. Plug into CEE socket ...
- Page 9 6. Installation Acceptance Inspection 6.1 Power On Power on the charger. The logo LED will be steady on after booting. 6.2 LED indicators Logo LED Status LED Status Logo LED Description Status LED Description Standby, available for charging White, steady Cable plugged in, waiting for Blue, steady Blue,running...
- Page 10 6.4 Connect with your phone Scan the following QR code and download RAEDIAN APP. Open the Bluetooth of your mobile phone and get close to the charger and get connected. Scan the QR code Find out more about Nora's APP Zhejiang Raedian New Energy Technology Co., Ltd...
Need help?
Do you have a question about the NORA and is the answer not in the manual?
Questions and answers