Table of Contents
Advertisement
Quick Links
Advertisement
Table of Contents

Related Manuals for Siemens WQ35G2DMFG


Summary of Contents for Siemens WQ35G2DMFG
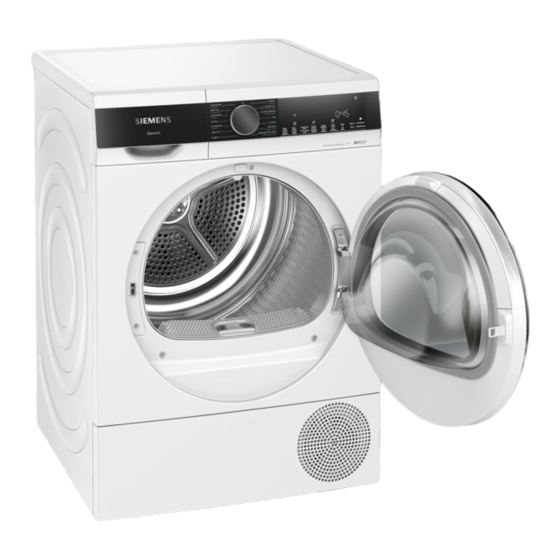
- Page 1 Translated from Dutch to English - www.onlinedoctranslator.com Clothes dryer WQ35G2DMFG User manual and install ation instructions Register your product on My Siemens and discover exclusive services and off to/welcome siemens-home.bsh-group.c The future moving in. Siemens Home Appliances...
-
Page 2: Table Of Contents
Refer to the Digital User's Guide for more information. Index 1 Safety..........4 9 Programs ........ 24 1.1 General instructions ....4 9.1 Automatic programs ..24 1.2 Destination of the device 9.2 Time programs........ 25 rate ........4 10 Accessories........ 27 1.3 Restriction of users .. - Page 3 15.4 Intensive device maintenance on the device preparing ........ 36 15.5 Carrying out intensive device maintenance ....... 37 15.6 Ending intensive device maintenance ....38 16 Cleaning and maintenance ..40 16.1 Tips for cleaning and maintenance....40 16.2 Humidity sensor ....40 16.3 Filter of the condensed water tank ......
-
Page 4: Safety
NLSafety 1 Safety Observe the following safety regulations. 1.1 General instructions sRead this manual carefully. sKeep the operating instructions and product information for future reference. for use or for subsequent owners. sDo not connect the device in case of transport damage. 1.2 Destination of the device Only use the device: sto use dryer-safe and water-washed textiles... -
Page 5: Secure Installation
SafetyNL 1.4 Secure installation WARNING ‒ Risk of electric shock! Improper installations are dangerous. ▶ Only connect and use the device in accordance with the information on the type plate. ▶ Only connect the device to a mains supply with alternating current via a properly installed earthing socket. - Page 6 NLSafety ▶ Use only manufacturer-approved adapters and power cords. ▶ If the power cord is too short and a longer power cord is not available, contact an electrical retailer to adjust the home installation. WARNING ‒ Risk of injury! The heavy weight of the device can cause injuries when lifted. ▶...
-
Page 7: Safer Use
SafetyNL There is a tripping hazard with incorrectly laid hoses and mains connection cables. ▶ Lay the hoses and connection cables in such a way that they cannot be tripped over. If the appliance is moved by protruding parts, such as the loading door, the parts can break off. - Page 8 NLSafety WARNING ‒ Risk of health hazard! Children can lock themselves in the appliance and endanger their lives. ▶ Do not install the appliance behind a door that blocks or prevents the opening of the appliance door. ▶ In the case of discarded appliances, remove the plug of the mains cable from the socket, then cut the mains cable and damage the lock of the appliance door so that the appliance door no longer closes.
- Page 9 SafetyNL WARNING ‒ Risk of fire! The refrigerant R290 in this appliance is environmentally friendly but flammable and can ignite on contact with open flames or ignition sources. ▶ Open flames and other ignition sources away from the hold device. WARNING ‒...
-
Page 10: Safe Cleaning And Maintenance
NLSafety The appliance may tip over when sitting or leaning on the open door. ▶ Do not sit or lean on the appliance door. ▶ Do not place any objects on the appliance door. Reaching into the rotating drum can cause injury to hands. ▶... -
Page 11: Avoiding Material Damage
Avoid material damageNL ▶ Do not use hard scouring or 2 Material damage dishwashing sponges. avoid Clean the device only with water ▶ and a soft, damp cloth. ▶ Remove all detergent residues, spray PAY ATTENTION! Incorrect dosage of fabric softeners, mist residues or residues immediately detergents, care products and upon contact with the appliance. -
Page 12: Energy Saving Mode
NLSet up and connect → "Disposal of the packaging", Observe the maximum load for the Page 11 programmes. → "Programs", Page 24 Check the device for visible damage. aExceeding the maximum Open the appliance door. male load quantity extends the →... -
Page 13: Installation Site Requirements
Set up and connect 4.3 Installation site installation site To demand requirements This device al- borrow a washing machine from the- PAY ATTENTION! If the device is tilted more than 40°, same manufacturer residual water can run out of the place. - Page 14 NLSet up and connect The connection data of the device can be found in the technical data → Page 49 . Check the mains plug for tightness.
-
Page 15: Getting To Know Your Device
Getting to know your deviceNL 5 Getting to know your device 5.1 Device Here you will find an overview of the components of your device. Depending on the device type, details in the picture may differ, e.g. the color and the shape. Vent Condensate tank →... -
Page 16: Control Panel
NLGetting to know your device 5.2 Control panel You can set all functions of your device and obtain information about the operating status via the control panel. Programs → Page 24 Program selector → Page 28 Display → Page 17 Buttons →... -
Page 17: Display
DisplayNL 6 Display The display shows the current setting values, options or information texts. Example display indication name Description Indication 0:40 Expected program duration or remaining Program duration / remaining time of time of the program in hours and minutes. the program 1:25 Time program... - Page 18 NLDisplay name Description Indication The drying target is activated. Drying purpose cabinet- → "Buttons", Page 21 The drying target is activated. Drying purpose cabinet- → "Buttons", Page 20 dry Plus Drying target The custom drying target is activated. → "Drying target", Page 23 suits The anti-crease function is activated.
- Page 19 DisplayNL name Description Indication Program status Drying purpose iron Program status Drying purpose cabinet- Program status Anti wrinkle Pause Program status Program end Program status Example...
-
Page 20: Buttons
NLButtons 7 Buttons Here you will find an overview of the buttons and their setting options. Knob Description Choice Start/Pause//Départ/ sstart Start program, an- pause zero or pause. sCancel spause sactivate Activate or deactivate the child lock. sdeactivate The control panels secure against accidental operation. - Page 21 ButtonsNL Knob Description Choice sCupboard dry/Prêt à ran- Cupboard dry/Prêt à ranger sWith the selection Cabinet- dry/Prêt à ranger the drying target is activated. Laying the drying target determine how damp or dry the laundry is at the end of the programme →...
- Page 22 NLButtons Knob Description Choice Gentle drying/Séchage sactivate Activate soft drying or deactivate. sdeactivate delicate The temperature becomes lowered for sensitive textiles, e.g. for polyacrylic or elastane. The program duration is extended. sProgram end sThe program end Ready in/Fin dance sProgram duration to establish.
-
Page 23: Drying Target
Drying targetNL 8 Drying target A drying target is specified for each automatic programme. The drying target determines how dry or damp your laundry is after the program has ended. laundry Drying result Drying target The laundry is dry. Multi-layer thick laundry Cupboard Dry plus/Pret à... -
Page 24: Programs
NLPrograms 9 Programs You can dry your textiles with either an automatic program or a timed programme. 9.1 Automatic programs Tips Automatic programs in which moisture sensors measure the sChoose the drying target according to residual moisture of the laundry adjust the textile or the desired during drying. -
Page 25: Time Programs
ProgramsNL Program Description Max. bela- thing (kg) outdoor Dry waterproof and outdoor clothing with a membrane layer and water-repellent textiles. Pillow/Oreiller Dry pillows with down filling or synthetic fibres. pillow Remark:To distribute the filling and remove moisture build-up, shake the pillows after the end of the program. - Page 26 NLPrograms Program Description Max. bela- thing (kg) Time program warm/ Dry all textiles except wool and silk. Minuterie chaud Suitable for pre-dried or slightly damp laundry and for post-drying multi-layered, thicker laundry.
-
Page 27: Accessories
accessoriesNL 10 Accessories Use only original accessories. These are adapted to the device. Remark:Some accessories are available in other colours. Contact the → "Customer Service", page 47 . Usage Order number Device space saving WZ27410 Connection set run on a suitable washing machine of the same the manufacturer and with the same width and... -
Page 28: Laundry
NLlaundry 1 2 The Operation in es- 11 Laundry sentie 11.1 Preparing the laundry 12.1 Switch on device PAY ATTENTION! Objects left in the laundry can Required:The device is correctly set damage the laundry and the drum. up and connected. →... -
Page 29: Starting The Program
ServiceNL 12.4 Starting the program 12.7 Remove laundry Open the door. Remove the laundry from the Required:A program is set. drum. → "Set program", page 28 12.8 Switching off the device onStart/Pause//Départ/Pause to ▶ press. Set the program selector to . ▶... - Page 30 NLService Remove the two-piece fluff filter. Open both fluff filters. Remove the fluff. Remove the fluff from the recess. Thoroughly clean both fluff filters with running warm water and dry Make sure that no fluff falls into them. the air duct. Detach the two-piece fluff filter.
-
Page 31: Condensate Tank
ServiceNL Close and connect the two fluff Requirements filters. sThe display shows after drying: "end" sor the display shows during usage: . Pull out the condensed water container horizontally. Install the two-piece fluff filter. Empty the condensed water container. Close the door. 12.10 Condensate tank During drying, condensation is Regularly check the filter of the... -
Page 32: Child Lock
NLChild lock Push in the condensation container Push in the condensed water ▶ container as far as it will go. 13 Child Lock Secure your device against unwanted operation via the controls. 13.1 Activate child lock Both keys ▶ approx. 3 seconds the impressions. -
Page 33: Basic Settings
Basic settingsNL 14 Basic Settings You can configure the basic settings of your device according to your needs. 14.1 Overview of the basic settings Program- Description Basic setting Where the ling position Signal 0 (off) Adjust the volume of the signal 1 (soft) after the program has ended. -
Page 34: Changing Basic Settings
NLDevice maintenance Remove the laundry. 14.2 Changing basic settings Set the program selector to position 1. Close the appliance door. Pull out the condensed water container horizontally. PressIron dry/Prêt à repasserand at the same time turn the program selector to position 2. aThe display shows the current value the on. -
Page 35: Starting Device Maintenance
Device maintenanceNL the start and after the program end 15.2 Device maintenance the tip "CrE" for 5 seconds. The start message is displayed several times until the simple device maintenance Requirements has been completed. sThe appliance is prepared for the device maintenance. →... -
Page 36: Maintenance On The Device
NLDevice maintenance PressStart/Pause//Départ/Pause . Push in the condensed water container until it locks into place. aThe device maintenance starts and there a signal sounds. aThe display shows "End" on the end of device maintenance and a signal sounds. Pull out the condensed water container horizontally. -
Page 37: Maintenance
Device maintenanceNL A bottle of the original care Requirements sThe appliance is prepared for product → the device maintenance. "Accessories", Page 27 and fill → "Preparing the device for device approx. 1 ½ liters of warm tap water maintenance", into the condensate container. Page 34 . -
Page 38: Ending Intensive Device Maintenance
NLDevice maintenance Pull out the condensed water Carefully tilt the condensed water container horizontally and empty container horizontally and empty it to remove the remnants of the original care product. Approx. Fill 1 ½ liters of warm tap water into the condensate container. 15.6 Ending intensive device maintenance Approx. - Page 39 Device maintenanceNL Push in the condensed water Emptying the condensed water container → Page 31 . container until it locks into place. PressStart/Pause//Départ/Pause . Push in the condensed water container until it locks into place. aThe device maintenance is continued. After the end of the device maintenance, the display shows "End"...
-
Page 40: Cleaning And Maintenance
NLCleaning and maintenance the residual moisture of the laundry, 16 Cleaning and care the appliance changes the duration loves of the automatic programme. Clean Humidity Sensor Carefully clean and maintain your Remains of limescale, detergents and appliance to ensure that it continues to care products can build up on the work properly for a long time. -
Page 41: Filter Of The Condensed Water Tank
Cleaning and maintenanceNL Remove the filter. 16.3 Filter of the condensed water container During drying, fluff from the laundry ends up in the condensation water. The filter in the condensed water container protects the device against fluff. Clean the filter in the condensation container. -
Page 42: Troubleshooting
NLTroubleshooting 17 Troubleshooting You can remedy minor faults on the device yourself. Before contacting customer service, please refer to the troubleshooting information. This way you avoid unnecessary costs. WARNING Risk of electric shock! Improper repairs are dangerous. Only trained specialist personnel may carry out repairs on the device. ▶... - Page 43 TroubleshootingNL Cause and Troubleshooting Malfunction device pauses, Cooling process active. but the drum No error - no action required. ▶ running. wrinkling. The load quantity is too high. Pay attention to the maximum load of the ▶ → "Programs", Page 24 . The laundry is left in the drum for too long after drying.
- Page 44 NLTroubleshooting Cause and Troubleshooting Malfunction Condensate pump active. Pump sound. No error - normal operating noise. ▶ Buzzing sound. Compressor venting active. No error - normal operating noise. ▶ Fluff filter is dirty. Drying time is too long. → "Cleaning the fluff filter", Page 29 ▶...
- Page 45 TroubleshootingNL Cause and Troubleshooting Malfunction Laundry is too damp. Remove the laundry from the drum immediately after drying. Spread out the items to let them cool. Inappropriate drying target set. → "Change Drying Target", Page 23 . ▶ Drying target not adjusted. →...
-
Page 46: Dispose Of
NLTransport, storage and disposal 18.2 Disposal of your old 18 Transport, on- device hit and drain Environmentally friendly disposal allows valuable raw materials to be 18.1 Preparing the device for reused. transport WARNING Risk of health hazard! PAY ATTENTION! If the device is used immediately after transport, the refrigerant in the Children can lock themselves in the device may cause damage to the... -
Page 47: Customer Service
customer serviceNL 19.1 Product number (E no.) This appliance is marked in accordance with and production number ming with the European (FD) Directive 2012/19/EU on waste The product number (E-Nr.) and the electrical and electronic production number (FD) can be found equipment (waste on the type plate of the device. -
Page 48: Consumption Values
NLConsumption values 20 Consumption values The program Cotton Eco/Co Depending on the type of textiles, the tons of Eco (indicated by "arrow") is composition of the laundry to be suitable for drying cotton laundry dried, residual moisture in the textiles, with normal humidity and from the the degree of dryness set, load point of view of the combined energy... -
Page 49: Technical Data
Technical dataNL End- Out- Pro- Program bela- centri- energy- gangly gram- fugue thing gibberish moisture (kg) maduur revving vigilance moisture (h:min) (kWh/ vigilance number (t/ min) cycle) 1000 1:59 0.84 Cotton Eco/Coton 3:17 1.60 Cotton Eco/Coton 2:10 0.94 Cotton Eco/Coton 12.0 1400 1:56... - Page 50 NLTechnical data This product contains light sources of Maximum load 8.0kg energy class F. The light sources are thing available as spare parts and may only 220-240V, mains voltage be replaced by a trained technician. 50 Hz 10 A Minimum input installation fuse You can find more information about your model on the Internet at https://...
- Page 52 BSH Hausgeräte GmbH Carl-Wery-Straße 34 81739 Munich, GERMANY siemens-home.bsh-group.com Manufactured by BSH Hausgeräte GmbH under the trademark license of Siemens AG * 9001699094* 9001699094 (020912)
Need help?
Do you have a question about the WQ35G2DMFG and is the answer not in the manual?
Questions and answers