Advertisement
Quick Links
Technical Support and E-Warranty Certificate www.vevor.com/support
BREAD MAKER
MODEL:BM8902-A
We continue to be committed to provide you tools with competitive price.
"Save Half", "Half Price" or any other similar expressions used by us only represents an
estimate of savings you might benefit from buying certain tools with us compared to the major
top brands and does not necessarily mean to cover all categories of tools offered by us. You
are kindly reminded to verify carefully when you are placing an order with us if you are
actually saving half in comparison with the top major brands.
Advertisement

Related Manuals for VEVOR BM8902-A

Summary of Contents for VEVOR BM8902-A
- Page 1 Technical Support and E-Warranty Certificate www.vevor.com/support BREAD MAKER MODEL:BM8902-A We continue to be committed to provide you tools with competitive price. "Save Half", "Half Price" or any other similar expressions used by us only represents an estimate of savings you might benefit from buying certain tools with us compared to the major top brands and does not necessarily mean to cover all categories of tools offered by us.
- Page 2 This is the original instruction, please read all manual instructions carefully before operating. VEVOR reserves a clear interpretation of our user manual. The appearance of the product shall be subject to the product you received. Please forgive us that we won't inform you again if there are any technology or software updates on our product.
-
Page 3: Important Safeguards
Warning-To reduce the risk of injury, user must read instructions manual carefully. Indoor Use Only Correct Disposal This product is subject to the provision of European Directive 2012/19/EC. The symbol showing a wheelie bin crossed through indicates that the product requires separate refuse collection in the European Union. - Page 4 5. Do nottouch hot surfaces. Use handles or knobs. Always use oven mitts to handle hot bresd pan orhotbread. 6. Do not put hand inside oven chamber after bread pan is removed. Hesting unit wil stil be hot. 7. Toprotect sgsinst electic shock do notimmerse cord, plugs, orbread mskerin wateror otheriquid.
- Page 5 21.Do not operste the appliance for other than intended use. 22.Clean oven inteniorcarefuly. Do not scratch ordamsge hestingelementtube. SAVE THESE INSTRUCTIONS HOUSEHOLD USE ONLY a) A short power-supply cord should be used to reduce the risk resulting from becoming entangled in ortripping overa longercord. b) Longer extension cords are available and may be used if care is exercised in their use.
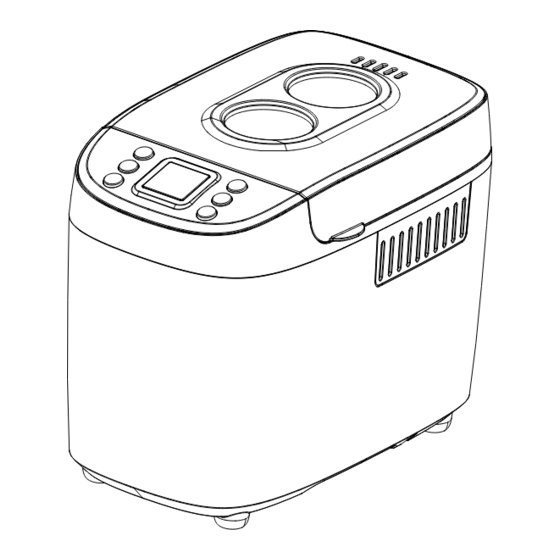
- Page 6 Accessories:knead blade*3,Cup*1, Spoon*1,Hook*1,glove*1 Control panel: After power-up As soon as the bread maker is plugged into the power supply, a beep will be heard and “3:00” will be displayed. But the colon between the “3” and “00” don’t flash constantly. And “1” is the default program. The arrows point to “1500g”...
- Page 7 To start a program, press the START/STOP button once. A short beep will be heard, the indicator will light up, and the two dots in the time display begin to flash and the program starts. Any other button is inactivated except the START/STOP button after a program has begun.
- Page 8 will be light and airy. Program 5: Buttermilk Bread Kneading, rise and baking loaf with butter and milk to make bread. Program 6: Gluten free Kneading, rise and baking GLUTEN-free loaf, normally for gluten-free flour, rice flour, sweet potato flour, corn flour and oat flour. Program 7: Super rapid Kneading, rising and baking loaf within a time less than basic bread.
- Page 9 pressing COLOR, it will display these 4 modes in the circle. Menu 1 to 4 with Rapid bread for selection; quick bread without crust color for choice; direct with “Δ”. The default crust color is Medium, but not available for Rapid bread in Menu 1 to 4.
-
Page 10: Warning Display
Keep warm function Bread can be automatically kept warm for 1 hour after baking. LCD will show 0:00. During keeping warm, “ ►“ indicates to KEEP WARM until 60min keep great time complete. ENVIRONMENT Suggest the room temperature should be within the range of 15 ℃ to 34℃ to use the appliance. - Page 11 Figure 1 Figure 2 BEFORE THE FIRST USE The appliance may emit a little smoke and/or odor when you turn it on for the first time. In manufacturing, it is necessary to lightly grease some parts of the appliance. This is normal. 1.
- Page 12 4. Press the MENU button until your desired program is displayed. 5. Press the CRUST to move the arrow to desired setting: Light, Medium, or Dark crust. 6. Press the WEIGHT to move the arrow to desired weight. 7. If desired, set the DELAY TIMER button. Press the + and – buttons to increase the cycle time shown on the LCD.
-
Page 13: Cleaning And Maintenance
Note: If the kneading blade remains in the bread, gently pry it out using a hook, don’t take it by hand in case of scald. CLEANING AND MAINTENANCE 1. Disconnect the machine from the power outlet and let it cool down before cleaning. - Page 14 made with the Quick settings. Bread flour is better suited for yeast bread. 3. Whole-Wheat Flour Whole-wheat flour is ground from the entire wheat kernel. Bread made with all or part whole-wheat flour will have higher fiber and nutritional content. Whole-Wheat flour is heavier, so loaves may be smaller in size and have a heavier texture.
- Page 15 1 tsp dry yeast =5ml Before using, check the expiration date and storage time of yeast. Return to the refrigerator immediately after each use. The fungus will be killed at high temperatures. Usually, the failure of bread rising is caused by bad yeast.
- Page 16 recipes may call for milk or other liquids purpose of enhancing bread flavor. Never use dairy with the Delay Timer option. USE EXACT MEASUREMENT TIPS: One of the most important steps in making good bread is the proper measurement of ingredients. Measure each ingredient carefully and add to your bread pan in the order given in the recipe.
- Page 17 cup or pack down. HINT: Before measuring, stir the flour to aerate it. When measuring small amounts of dry ingredients, such as salt or sugar, use a measuring Tsp, making sure it is leveled off. Accessories Instruction Measuring cup: In the Recipe, measuring unit “CUP” means full cup, 240ML; below is a picture for reference.
-
Page 18: Troubleshooting
Hook Sometimes, the kneading blade would stay in the bread when putting out the bread. Use the hook to pull out the blade. Hook TROUBLE SHOOTING Below trouble shooting only for your reference when during in the use, if appliance has damage, for avoid danger or more loss, please send to maintenance station or dial advice line for help. - Page 19 1.selected program menu is Select the proper program improper menu 2.after operating, open Stir cover several times and Don’t open cover at the ingredients bread is dry, no brown crust last rise not evenly color and bake Check kneader hole, then 3.Stir resistance is too large badly take bread pan out and...
- Page 20 Dough is The amount of liquids is so Reduce the amount of so large to much as to make dough liquids and improve dough overflow soft and yeast is also rigidity bread pan excessive. 1.used flour is not strong Use bread flour or strong powder and can’t make Bread powder.
- Page 21 Check water and 2.stir not adequately for mechanical construct of short of water bread maker If baking color is too dark Crust is too for the recipe with thick and excessive sugar, press baking Different recipes or START/STOP to interrupt color is too ingredients have great the program ahead...
- Page 22 milk 3 Tbsp 4 Tbsp 5 Tbsp powder put on the dry flour, instant 0.5 Tsp 0.8 Tsp 1 Tsp don't touch with any yeast liquid bread 1250g/2.5L 1500g/3L 1000g/2LB weight water 350ml 430ml 520ml salt 1 Tsp 2 Tsp 3 Tsp put on the corner sugar...
- Page 23 put on the dry instant 1 Tsp 1.5 Tsp 1.75 Tsp flour,don't touch with yeast any liquid。 milk 3 Tbsp 4 Tbsp 4 Tbsp powder bread 1250g/2.5L 1500g/3L 1000g/2LB weight water 330ml 420ml 510ml salt 0.5 Tsp 1Tsp 1.5 Tsp put on the corner sugar 0.25 cup...
- Page 24 high gluten 4 cups 5 cups 6 cups flour put on the dry flour, instant 1Tbsp 1.5 Tbsp 1.75 Tbsp don't touch with any yeast liquid. bread 1250g/2.5L 1500g/3L 1000g/2LB weight water 350ml 430ml 520ml salt 1Tsp 2Tsp 3 Tsp put on the corner sugar 2Tbsp...
- Page 25 high 4 cups/ 5 cups/ 6 cups/ gluten 560g 700g 840g flour put on the dry instant 1.5Tsp 2 Tsp 2.5 Tsp flour,don't touch with yeast any liquid. time 1:35 dissolve sugar in egg water 30ml and water,mix well by electric egg-beater to as a bulk, then put 8 pcs...
- Page 26 time 1:40 water 610ml salt 3 Tsp put on the corner 5 Tbsp Dough high 7cups/ gluten 890g flour put on the dry instant 2 Tsp flour,don't touch with yeast any liquid. time 0:15 water 620ml salt 1Tsp Pasta dough 3Tbsp high gluten...
- Page 27 pulp 5 cups stir to mushy, can put some water or not starch 1 cups sugar 1cups up to flavor time 1:00 adjust baking temperature by pressing crust Bake button :100°C(light);150°C(medium);200°C(dark),default 150 °C Press this button enter to home-made menu.,in this menu, user Home can set each process’...
- Page 28 Technical Support and E-Warranty Certificate www.vevor.com/support Made In China...
Need help?
Do you have a question about the BM8902-A and is the answer not in the manual?
Questions and answers
Need the part# for the paddles. BM8902-A
Where can I buy the drive belts for BM8902 in Thailand?
When the progam is finished I need to get the baking pan with the bread out of the machine. This is very difficult because the hooks are no aligned with the locks below. Pressing ON/OFF for three seconds does not help.