Table of Contents
Advertisement
Quick Links
Advertisement
Table of Contents

Related Manuals for DeLonghi BRAUN KF 9050


Summary of Contents for DeLonghi BRAUN KF 9050
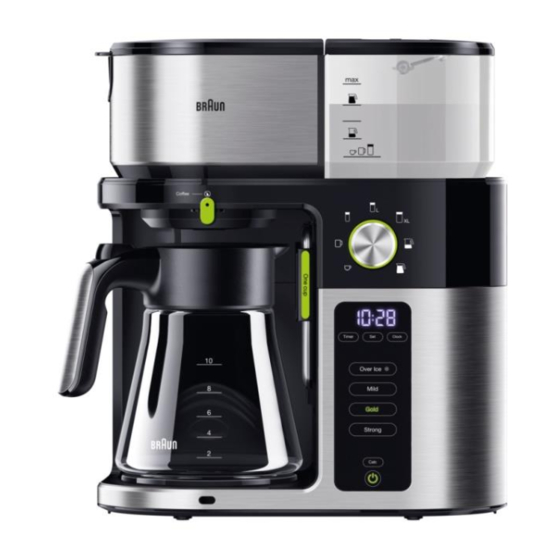
- Page 1 BRAUN Coffee Maker KF 9050 / 9170...
-
Page 2: Table Of Contents
Contents Introduction Tools Functional Test 6-10 Dismount Body > Bottom > Backplate 13-14 > Temp. Sensor > Heater 16-17 > Waterpump / Flowmeter 18-21 > Knob > Additional Informations... - Page 3 Contents Dismount Top > Service Hatch 25-26 > Filter Basket 27-30 > Lever > Filter Housing 32-33 > Three Way Valve > Hall Sensor 35-36...
-
Page 4: Introduction
Introduction This document is aimed to provide useful technical informations about De’Longhi appliances to authorized engineers. Is always required to operators, to follow these preliminary steps before proceed any other operation: 1. Switch OFF the Coffee Maker before working! Caution! CM could be hot! 2. -
Page 5: Tools
Tools -Torx 15 with hole -Screwdriver slit -Ratchet -Long Cross Screwdriver -Long nose pliers -Pincer pliers -Plastic wedge... -
Page 6: Functional Test
Functional Test Two modes are available to check if the machine is ready for use. The first mode “PCB TEST” tests all the parameter and functionality of the sensors. The second mode is a “BREW TEST” for the correct brewing. This tests should be helpful for a test after repair. - Page 7 1. PCB TEST Go-In PCB TEST mode 1. Lever “Drip-Stop” 2. Selector “Full Caraffe” 3. Push & Hold 4. LCD Display shows Timer + Clock for software version more than 3sec...
- Page 8 1. PCB TEST Step Press Button What was Tested All LED LED of each button will be on one by one, Heater will brew on, (heater temperature >75C will switch off). CARRAFFE IS Timer NEEDED! All LED switch off, LED screen will display AD value of rotary switch, turn lever to coffee position, LED screen display " 00C",turn lever to hot water position LED screen display "00A", LED screen display 004,PTC,electromagetic valve, pump will all switch on, when open lid, LED screen will display LID.
- Page 9 2. BREW TEST Go-In BREW TEST mode 1. Lever “Coffee” 2. Selector “Small Mug” 3. Push & Hold 4. Gold LED will glow Timer + Clock for more than 3sec...
- Page 10 2. BREW TEST Step Press Button What happens Brew coffee, LED screen display "run". Gold After brew, the screen will display 6pcs date rolling, if the display shows "PAS". Press power key and then return to stand by mode. By pressing gold button the machine start to brew all the 300ml (with hot water 12oz 95°C settings). Automatic 6pcs date rolling Enable also the PTC and control it at a 100°C.
- Page 11 Dismount Body...
-
Page 12: Dismount Body
Dismount Body > Bottom To dismount the bottom unloose the two Torx 15 Screws (pic 1 yellow mark). Torx has a pin in the Middle. The other four screws are Cross screws. Explodedview Nr.: 26 Pic 1... -
Page 13: Backplate
Dismount Body > Backplate Pic 1 Pic 2 Remove the four plastic plugs For a free of damage dismounting, (pic 1). the best way is to use a sharp cutter knife (pic 2). - Page 14 Dismount Body > Backplate Pic 1 Pic 2 Remove the four cross screws Lose the three cross screws to (pic 1). remove the backplate (pic 2).
-
Page 15: Temp. Sensor
Dismount Body > Temp. Sensor To dismount the Temp Sensor, the two cabel fixer (red mark) have to remove. Follow the black cabel from the Temp Sensor (red yellow arrow) to the PCB from the touch panel and remove the plug. Explodedview Nr.: 22 Pic 1... -
Page 16: Heater
Dismount Body > Heater To dismount the Heater unloose four cross screws. Two of the screws shown on pic 1 red mark. The other two screws are Pic 1 beside the Heater. Pic 2 red mark shows the screw beside the right side of the Heater. - Page 17 Dismount Body > Heater To remove the heater out off the Body, loose the cable fixer (red mark) to disassemble the silicone tube. Pic 1...
-
Page 18: Waterpump / Flowmeter
Dismount Body > Waterpump / Flowmeter To dismount the Waterpump unloose two cross screws (pic 1 red mark). loose the cable fixer to remove the silicone tube. Explodedview Nr.: 24-23 Pic 1... - Page 19 Dismount Body > Waterpump / Flowmeter The silver cooling corpus (red mark pic 1) is easy to remove. The corpus has no other fixation. Pic 1...
- Page 20 Dismount Body > Waterpump / Flowmeter Remove the four cross screws from the flowmeter bracket (pic 1 yellow mark). Pic 1...
- Page 21 Dismount Body > Waterpump / Flowmeter Pic 1 Pic 1 shows the white flowmeter with bracket.
-
Page 22: Knob
Dismount Body > Knob Pic 1 Pic 2 To dismount the Knob use a flat and thin screwdriver and lever the knob out as shown (pic 1; 2). Explodedview Nr.: 25... -
Page 23: Additional Informations
Dismount Body > Additional Informations Pic 1 Pic 1 shows the inside of the body. PCB and Cupshelf are easy to dismount yet. The Touchpanel conectors get PokaYoke for a better assemble. -
Page 24: Dismount Top
Dismount Top... -
Page 25: Service Hatch
Dismount Top > Service Hatch Pic 1 To open the service hatch (yellow mark pic 1), remove the water tank. - Page 26 Dismount Top > Service Hatch Pic 2 Pic 1 Use a flat and thin screwdriver to lever the hatch plate out. (pic 1; 2)
- Page 27 Dismount Top > Filter Basket Pic 1 To lose the three screws from the filter basket, first lever out the caps (red mark pic 1). Explodedview Nr.: 8...
- Page 28 Dismount Top > Filter Basket Pic 1 To lose the three screws from Pic 2 the filter basket, first lever out Use a long screwdriver to the caps (pic 1). remove the three cross screws (pic 2).
- Page 29 Dismount Top > Filter Basket Pic 1 To dismount the filterbasket Pic 2 detach the cable fixer from Use a plastic wedge to lever the silicon tube (pic 1). out the filterbasket (pic 2). Afterwards remove the siliconetube.
-
Page 30: Filterbasket
Dismount Top > Filter Basket Pic 1 Be aware of the Hallsensor from the Lid (red mark pic 1) until removing the Filterbasket. Explodedview Nr.: 9... -
Page 31: Lever
Dismount Top > Lever Pic 1 Pic 2 To disassemble the Lever (pic 2) remove the four cross screws (redmark pic 1). Explodedview Nr.: 7... -
Page 32: Filter Housing
Dismount Top > Filter Housing Pic 1 Six cross screws (red mark pic 1) have to remove bevor the Filterhousing can be removed. - Page 33 Dismount Top > Filter Housing Pic 1 Pic 2 Six cross screws (red mark The yellow/green grounding pic 1) have to remove bevor cabel is soldered on the Filter the Filterhousing can be Housing (red mark pic2). removed. Be aware while dismounting.
-
Page 34: Three Way Valve
Dismount Top > Three Way Valve Now the three-way-valve with all water in-/out-lets are very easy to dismount (pic 1). Explodedview Nr.: 11 Pic 1... -
Page 35: Hall Sensor
Dismount Top > Hall Sensor Pic 1 Pic 2 Six cross screws (red mark Curve the plastic cover up pic 1) have to remove bevor with a plastic wedge (pic 2). the plastic cover can be curved up to disassemble the Hall Sensors. - Page 36 Dismount Top > Hall Sensor Now the Hall Sensors are very easy to dismount (pic 1). Explodedview Nr.: 5-6 Pic 1...
Need help?
Do you have a question about the BRAUN KF 9050 and is the answer not in the manual?
Questions and answers