Table of Contents
Advertisement
Quick Links
Advertisement
Table of Contents

Subscribe to Our Youtube Channel
Related Manuals for Oracle Red Bull Racing RBS 01


Summary of Contents for Oracle Red Bull Racing RBS 01
- Page 1 Oracle Red Bull Racing eScooters RBS#01 User Manual...
- Page 3 Your Oracle Red Bull Racing RBS#01 eScooter Now that you are the proud owner of the Oracle Red Bull Racing eScooter, we want to keep you safe whilst you experience a whole new level of eScooter riding. We have created this owners manual to provide important safety, performance and maintenance information about your new eScooter.
-
Page 5: Table Of Contents
Contents 1. Safety and Disclaimer 3.3.3 Lights 1.1 Safe riding 3.4 How to ride your eScooter 20-25 1.2 Different riding conditions 3.5 Riding mode - cruise control 1.3 Liability and waivers 4 Maintaining your RBS#01 eScooter 26-27 1.3.1 Foot board grip 4.1 Servicing 1.3.2 Helmet 4.1.1 Foot board grip... -
Page 6: Safety And Disclaimer
Like any sport, riding an eScooter involves risk of Adhere to local regulations regarding eScooter use. injury. By choosing to ride an Oracle Red Bull Racing It is the customer's sole responsibility to ensure that eScooter, you assume the responsibility for that risk. -
Page 7: Liability And Waivers
1.3 Liability and waivers Whether you're a pro or brand new to riding, it's always important to ride safely. Here are a few tips to ensure that you and your Oracle Red Bull Racing eScooter stay safe. 1.3.1 Foot board grip Your Oracle Red Bull Racing eScooter is shipped with a foot board grip. -
Page 8: Assembly
2. Assembly Tools required: 4mm torque wrench preset to 12Nm 10mm hex head key 10mm hex key Step 1 Carefully remove packing tape to open up the external cardboard box. Step 2 Lift the cardboard tab on the internal cardboard box. - Page 9 WARNING: Take care to lift the eScooter out from the cardboard packaging with two people, as the total weight is 40 kg.
- Page 10 Step 3 Open up the internal cardboard box, revealing the internal packaging for the scooter.
- Page 11 Step 4 Remove the top layer of packaging, taking care to ensure the steerer for the scooter remains lying flat on the packaging beneath. Remove the packaging containing the front wheel.
- Page 12 Step 5 Carefully lift the scooter steerer and handlebar assembly to an upright position. Line up the holes on the handlebar and steerer assembly with the front wheel mount (shown in purple).
- Page 13 Step 6 Ensuring the steerer and steerer knuckle (shown in black) are aligned, place the two 10mm steerer external bolts (shown in blue) into the two holes from the outside face of the steerer. Fit the two 4mm hex head bolts (shown in green) using the 4mm hex key preset torque wrench and whilst holding the external bolts in place using the 10mm hex key wrench, tighten the steering column to...
- Page 14 Step 7 Taking care to align the wheel axle and the wheel, slide the front wheel onto the wheel axle. Step 8 Using the 10mm hex wrench, fix the front wheel to the front wheel axle using the front wheel bolt. Tighten by hand.
- Page 15 Step 9 Remove the top packaging cover from the scooter. Step 10 Remove the second side packaging cover from the scooter.
- Page 16 Step 11 Remove the packaging from between the rear light vane and the rear tire. Step 12 Carefully roll the scooter out from the packaging base.
- Page 17 Step 13 Prior to riding your scooter, affix the rubber grip provided in the scooter accessories pack to the foot board. Ensuring there is no dust or debris on the foot board, remove the adhesive backing from the foot board grip and install to the foot board, ensuring that you do not cover any of the foot board bolts.
-
Page 18: How To Ride Your Rbs#01 Escooter
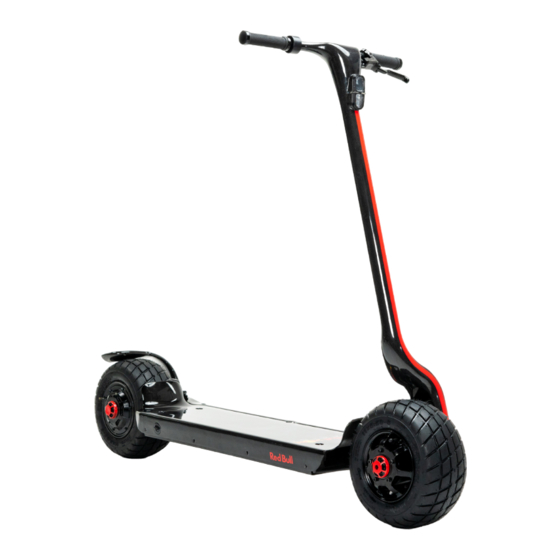
3. How to ride your RBS#01 eScooter 3.1 Your RBS#01 eScooter 1. Steerer 2. Handlebars 3. Deck/foot board 4. Rear motor 5. Braking system 6. Rear vane 7. Front light 8. Brake light 9. Charging point 10. Brake lever 11. Display 12. -
Page 19: Know Before You Ride
When the display is on, single press the power button to switch the levels between ECO, D and S. The Oracle Red Bull Racing eScooter has been designed to provide a stable, fast and incredible riding ECO - 9 mph experience. -
Page 20: Lights
3.3.3 Lights Turn on the scooter and check the power indicator. When the display is on, double press the power button to turn on the front and rear lights. The light icon on the display will light up accordingly. Use the same method (double press the power button) to turn off the front and rear lights. - Page 21 Once the scooter begins to coast, place both feet on To turn the scooter, lean slightly towards the direction the deck and gently press the throttle away from you you wish to travel and turn the handlebars gently. to engage the motor. The eScooter motor will engage when the scooter exceeds 1.8 mph.
- Page 22 To slow, reduce pressure on the throttle and then WARNING: Do not ride your eScooter in the rain. release all pressure on the throttle. The motor will cut Traction (grip) and eScooter handling performance out and the scooter will begin to slow. Apply gentle are hampered by adverse weather conditions.
- Page 23 WARNING: Do not ride through standing water. WARNING: Take care when riding through openings. Never ride your eScooter through doorways or into elevators. WARNING: Slow your speed to between 3.1 - 6.2 mph when riding over speed bumps.
- Page 24 WARNING: Do not accelerate downhill. WARNING: Do not press the throttle when you are walking with your eScooter. WARNING: Always steer clear of obstacles. WARNING: Do not ride your scooter up or down steps.
-
Page 25: Riding Mode - Cruise Control
WARNING: Do not hang bags off the handlebars. WARNING: Keep both feet on the deck at all times Steering may be adversely affected and lead to whilst riding the eScooter. injury. 3.5 Riding mode - cruise control WARNING: Do not ride with anybody else on the Cruise control can be engaged by holding the throttle eScooter with you, including children. -
Page 26: Maintaining Your Rbs#01 Escooter
Doing regular safety checks will help extend the life of the recommended tire pressure of 50 PSI. Maximum tire your Oracle Red Bull Racing eScooter. pressure for the tires is 57 PSI. We recommend that you carefully inspect your eScooter... -
Page 27: Brake Pads And Brake Rotor
1.5mm in width. Brake pads should also be replaced when the brake pad wears Use only the Oracle Red Bull Racing eScooter charger to below the recommended dimension of 1.5mm. provided with your eScooter to charge the battery. -
Page 28: Warnings
5. Warnings 5.1 Error Codes WARNING: If any of these error codes display on your eScooter handlebar display, please cease using the eScooter immediately and contact support. Please reach out to our Support team via our website and provide the applicable error code so we are able to best assist you. -
Page 29: Warranty
6. Warranty Your Oracle Red Bull Racing eScooter is covered under Consumer's remedies to replacing or repairing the warranty for a period of two (2) years from the date of Goods or reimbursing the Consumer for the cost of purchase. - Page 30 • use of any of the battery or electrical systems in a (7) Our guarantee is valid only for the original Consumer manner which is not expressly specified; who purchased the goods. • modifications to the Goods which are not expressly specified;...
- Page 32 Oracle Red Bull Racing eScooters www.rbr-escooter.com Need Assistance? support@rbr-escooter.com US: +1 833 631 0071...
Need help?
Do you have a question about the Red Bull Racing RBS 01 and is the answer not in the manual?
Questions and answers