Table of Contents
Advertisement
Quick Links
User manual
Welcome to Your new washer-dryer!
Congratulations on your selection of a new Servis brand washer-dryer for your laundry needs.
We are confident you will enjoy the superior performance and reliability.
Please do not hesitate to contact our Customer Service department if you have any questions
or comments with your new washer-dryer. Email service@shomar.ie
Thank you for choosing Servis brand washer-dryer.
Washer-Dryer
Model:
S328514MLW
Advertisement
Table of Contents

Related Manuals for SERVIS S328514MLW


Summary of Contents for SERVIS S328514MLW
- Page 1 S328514MLW Welcome to Your new washer-dryer! Congratulations on your selection of a new Servis brand washer-dryer for your laundry needs. We are confident you will enjoy the superior performance and reliability. Please do not hesitate to contact our Customer Service department if you have any questions or comments with your new washer-dryer.
-
Page 2: Table Of Contents
Contents Safety instructions. 2-3-4-5 Safety instructions Disposal Installation. 6-7-8-9-10-11-12 Unpacking, Carrying the appliance What’s included Removing the transport bolts Choosing the Right Location Levelling the appliance Connecting the water supplies and electricity Technical date Description of the appliance. 13-14 Control panel Display Preparing and sorting laundry. -
Page 3: Safety Instructions
Safety instructions 1 Do not machine wash fiberglass materials (such as When properly cared for, your new appliance has curtains and windows coverings that use fiberglass been designed to be safe and reliable. Read and materials). Small particles may remain in the washer understand all safety instructions before using the and stick to fabrics in subsequent wash loads causing appliance. -
Page 4: Safety Instructions
Safety instructions two or more persons – risk of injury. Use protective 1 Due to the use of the condensation principle in gloves to unpack and install – risk of cuts. drying, please keep the connected water tap open 1 Keep children away from the installation site. during the drying process. - Page 5 Safety instructions 1 The appliance must not be installed behind a 1 In order to ensure your safety, you must plug the lockable door, a sliding door or a door with a hinge cable into a socket which connected to earth. And on the opposite side to that of the appliance, in please check your socket to make sure that it is such way that a full opening of the appliance door is...
- Page 6 Safety instructions SERVICE 1 Cleaning and user maintenance must not be carried out by children without supervision. 1 Do not repair or replace any part of the appliance 1 Keep all laundry aids (including detergent, bleach, fabric softener, etc.) out of the reach of children. or attempt any service unless specifically stated in the user manual.
-
Page 7: Installation
Installation Carrying the appliance 1 This user manual should be kept in a safe place for future reference. If the washer is sold, transferred or moved, make sure that the user manual remains with 1 Don’t do it by yourself alone. the machine so that the new owner is able to Tilt the appliance backward. -
Page 8: What's Included
Installation What’s included Description of the parts Accessories... -
Page 9: Removing The Transport Bolts
Installation Removing the transport bolts - The transport bolts are reinstalled. - The power cord is secured to the back of the washer. CAUTION Choosing the right location DAMAGE TO THE APPLIANCE OR INJURY POSSIBLE The appliance is secured for transport with Locations requirement ●... -
Page 10: Levelling The Appliance
Installation Leveling the Appliance Procedure for adjusting the appliance feet: Importance of leveling the appliance 1. After determining which the appliance feet need The appliance uses high spin speeds to remove water to be extended, have someone lift up on the at the end of the wash cycle. -
Page 11: Connecting The Water Supplies And Electricity
Installation Connection the water supplies and electricity 1 If the hose is not long enough, contact a specialized shop or an authorized technician. Connecting the water inlet hose 1 Never use second-hand water inlet hose. 1. Connect one end of the water inlet hose to a cold 1 Use the new water inlet hose supplied with the appliance water tap and tighten by hand (see figure). - Page 12 Installation ■ Sink siphon 1 We advise against the use of drain hose extensions; in case of absolute need, the extension must have the same diameter as the original hose and must not exceed 250cms in length. Secure the drain hose to the sink siphon using a Ǿ...
-
Page 13: Technical Date
Technical date by a qualified electrician. 1 WARNING----THIS APPLIANCE MUST BE EARTHED. S328514MLW Model THE FOLLOWING OPERATIONS SHOULD BE CARRIED OUT BY A QUALIFIED ELECTRICIAN. Rated washing capacity (kg) -
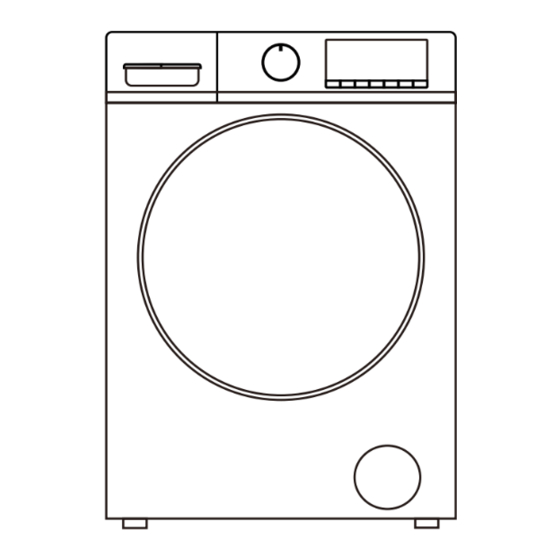
Page 14: Description Of The Appliance
Description of the appliance Control panel D---DRYING button: Press to set the drying type A---WASH CYCLE SELECTOR knob: Used to set the or drying time as needed, and the drying type or desired wash cycle (see “Table of wash cycles”). drying time appears on digital display. - Page 15 Description of the appliance M---Display The display is useful when programming the machine and provides a great deal of information. 5---DELAY END indicator 1---Temperature indicator The lit indicator light indicates the DELAY When a program is selected, the default temperature value indicator light of this END function is activated.
-
Page 16: Preparing The Laundry
Description of the appliance Preparing the laundry for drying Preparing the laundry Only tumble-dry textiles which have been washed, Notice: Damage to the appliance/fabric rinsed and spun. Foreign objects (e.g. coins, paper-clips, needles, nails) Remove as much water as possible from the may damage the laundry or components in the laundry. -
Page 17: Sorting The Laundry According To Colour And Degree Of Soiling
Preparing and sorting the laundry include working clothes such as overalls and Sorting the laundry according to jeans and other clothing worn for outside work colour and degree of soiling and activities. Sort laundry items according to color, degree of soiling and recommended wash temperature range. -
Page 18: Sorting Laundry According To Their Care Label Specifications
Preparing and sorting the laundry Sorting laundry according to their care label specifications The symbols on labels of your garments will help you in choosing the suitable wash program, the right temperature, wash cycles, and ironing methods. Don’t forget to give a glance to these useful indications! -
Page 19: Various Cycles And Functions
Various cycles and functions Table of wash cycle Max.Load(kg) Kind of detergent Temp. Wash Specification Detergents Wash- Dry- ℃ cycle Softener (Max) Universal Special For washing lightly to normally soiled mixed load of cotton and L / P synthetic fabrics, white and colored For daily items of cotton, linen and Cotton L / P... -
Page 20: M-Smart Wash Cycle
Various cycles and functions Various cycles automatically activated at the end of the washing program. M-Smart wash cycle 2、To set the Drying Only program The Drying Only program is suitable for drying clothes of cotton. Do not dry clothes that are prone M-Smart wash cycle can intelligently detect the to deformation or shrinkage. -
Page 21: Drying Channel Cleaning
Various cycles and functions Drying channel cleaning After setting the wash cycle and option, before start, long press this button for 3 seconds, the machine will enters the "Drying channel cleaning" program, the digital display shows the running time of the "Drying channel cleaning"... -
Page 22: Delay End
Various cycles and functions Child lock Various functions 1. Setting the Child lock function can avoid children's Delay end miss-operation and external interference to the washing procedure. Press DELAY END button to set the program end 2. During operation, long press the SPEED button for (Delay end) time in one hour increments to a 3 seconds to set or cancel the Child lock function. -
Page 23: Cancelling The Buzzer
Various cycles and functions Downlight Cancelling the buzzer Downlight is always on during program or function Press and hold the SPEED button and ONE TOUCH setting. button together at the same time for at least 3 When the program is suspended, the downlight seconds, you can turn off the buzzer that sounds can be lit by opening the machine door. -
Page 24: How To Use The Appliance
How to use the appliance How to use the appliance Before loading your first load of laundry 1. Load laundry Open the door and load the laundry. Load the articles one at a time loosely into the drum, Your new appliance was tested before leaving the without overfilling. - Page 25 How to use the appliance ! Use powder detergent for white cotton garments, !If the selected option is incompatible with the program set, the incompatibility will be signaled by a for pre-washing, and for washing at temperatures over 60℃. buzzer and the corresponding option indicator light will flash.
- Page 26 How to use the appliance Pause a running program and open the door, if needed Press START/PAUSE button to pause a running program. If the water level and/or temperature in the drum are/is not high, the DOOR LOCK indicator light turns off.
-
Page 27: Care And Maintenance.26-27-28
Care and maintenance Cleaning the drum Your appliance is designed to give you years of service. Observe the following instructions to maintain and protect your appliance and keep it in Metallic debris left in the drum can product rust top operating condition. spots on the drum. -
Page 28: Checking The Water Inlet Hose
Care and maintenance Cleaning the mesh filter in the water inlet Checking the water inlet hose hose and the water inlet valve 1. Close water tap and unscrew the water inlet hose. Check the water inlet hose at least once a year. If there are any cracks, it should be replaced immediately, during the wash cycle, water pressure is very strong and a cracked water inlet hose could... -
Page 29: Cleaning The Drain Pump
Care and maintenance 4. Use the pull-out drain hose located in the pump Cleaning the drain pump access opening to drain the remaining water into a suitable container (up to 5.3U.S.gallon/20 liters WARNING of water may be drained). Pull the sealing cap RISK OF SCALDING from the hose and lay the hose over the side of Risk of hot water injury to skin! -
Page 30: Troubleshooting
Troubleshooting Your appliance could occasionally fail to work. Before contacting the service center, make sure that the problem cannot be solved easily using the following list. Problem Possible cause / solutions There are color spots and The appliance requires a service wash. Run a “Drum Clean” wash cycle with oil stains in the drum no detergent and no laundry. - Page 31 Troubleshooting This is not a fault. Please do not open the door to pour the water directly Discharge the water when into the drum before the program runs, otherwise the machine may the program is started discharge the water which has been poured into the drum when the program is started, Problem Possible cause / solutions...
- Page 32 Troubleshooting Program times will vary due to water pressure, the incoming water temperature and if the wash load goes out of balance. This will increase The program takes too long program times accordingly (see “The high-speed spinning needs to be repeated many times”...
- Page 33 Troubleshooting Problem Possible cause / solutions The top of the drain hose is too low – It must be fitted at a height between 65 and 100 cm from the floor (see “Installation”). The machine continuously The end of the drain hose has been pushed too far down the standpipe, fills with water...
- Page 34 Troubleshooting In case of the following faults, the fault state will be detected by the microcomputer system, with the buzzer sounds issued and the following fault codes display in the control panel: Fault codes Fault type Possible cause / solutions ...
- Page 35 Product fiche Supplier's name or trade mark(a),(d):Servis Supplier's address(a),(d):Western Ind Est Dublin 12 S328514MLW Model identifier(a): Parameter Value Parameter Value Rated capacity ( Height Rated capacity (kg) Dimensions in cm ( Rated washing Width Depth capacity ( 69,0 Energy Efficiency Index...
- Page 36 Product fiche Entry method for new standard energy efficiency (EN60456:2016 + FprAA:2020) Eco 40-60, (Parameters are not adjusted by default) 8kg BLDC 20 ℃ Cotton Wool Quick wash Rated capacity / kg Program duration 0:39 0:57 0:50 0:15 ( h:min ) Energy consumption 0.24 1.25...
- Page 37 Product fiche The Eco 40-60 program is able to clean normally soiled cotton laundry declared to be washable at 40℃ or 60℃, together in the same cycle, and that this program is used to assess the compliance with the EU eco-design legislation; ...
- Page 38 Product fiche Spin speed in the spinning phase of the eco 40-60 programme at rated capacity (S) 1400 Spin speed in the spinning phase of the eco 40-60 programme at half rated capacity (S) 1400 Spin speed in the spinning phase of the eco 40-60 programme at quarter rated capacity (S) 1400 Weighted remaining moisture content after washing (D) 59,9...
- Page 39 Product fiche...
Need help?
Do you have a question about the S328514MLW and is the answer not in the manual?
Questions and answers