Table of Contents
Advertisement
Quick Links
1
4
WOODWORKING KIT
STEP 1:
Set Up Your Pocket-Hole Jig
A
A
Use Material Thickness Gauge / Hex Wrench to measure material thickness (3/4").
B
Set jig material thickness to ¾".
C
Set drill bit stop collar to ¾" (loosen and tighten stop collar with Hex Wrench.
Optional: Use pocket-hole jig adapter included with VersaGrip™ clamp.
WARNING!: Improper assembly or excessive weight applied to the fi nished stool could result in injury. Follow all instructions
provided for assembly. Kreg is not responsible for injuries as a result of improper assembly or use. Max load rating for this
step stool is 250 lbs max.
Prop 65 Warning: Drilling, sawing, sanding or machining wood products can expose you to wood dust, a substance known
to the State of California to cause cancer. Avoid inhaling wood dust or use a dust mask or other safeguards for personal
protection. For more information go to www.P65Warnings.ca.gov/wood.
3
2
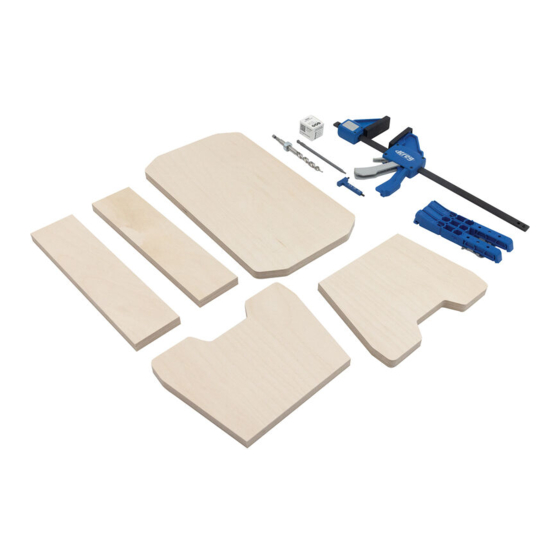
STEP STOOL BUNDLE
B
5
C
1 Horizontal Support
2 Horizontal Support
3 Top
4 Stool Leg
5 Stool Leg
BEFORE YOU
GET STARTED
We want to make sure
have you the guidance
and resources you
need to be successful
with this project.
Simply scan the QR
code below for tips and
tricks on setting up
your jig, drilling pocket
holes, and more.
Advertisement
Table of Contents

Subscribe to Our Youtube Channel
Related Manuals for Kreg Woodworking Kit Step Stool


Summary of Contents for Kreg Woodworking Kit Step Stool
- Page 1 WARNING!: Improper assembly or excessive weight applied to the fi nished stool could result in injury. Follow all instructions provided for assembly. Kreg is not responsible for injuries as a result of improper assembly or use. Max load rating for this step stool is 250 lbs max.
- Page 2 STEP 2: Drill Pocket Holes in Stool Legs (x2) Align jig so the drill guide holes are centered between the guide lines on fi rst Stool Leg. Clamp jig to Stool Leg. Note: Guide lines are marked on the inside of the workpieces Drill two pocket holes.
- Page 3 STEP 4: Assemble Stool Legs and Horizontal Supports (x2) Optional: Workpiece edges and pocket holes can be Ensure all pocket holes are facing the correct sanded prior to assembly. direction, as indicated in photo D. Locate guide lines on fi rst Stool Leg and align inside Use a #2 driver to drive included 1 1/4"...
- Page 4 STEP 6: Finish with Paint or Stain Take a photo and post it with the #builtwithkreg hashtag to show your work and see what others are building with Kreg. LEARN MORE WOODWORKING TIPS Scan here to discover helpful how-to articles and videos fi...
Need help?
Do you have a question about the Woodworking Kit Step Stool and is the answer not in the manual?
Questions and answers