Table of Contents
Advertisement
Quick Links
ELECTRIC & GAS COOKER
USER MANUAL
36QMS5GP48
Warning notices: Before using this product, please read this manual carefully and keep it for future reference.
The design and specifications are subject to change without prior notice for product improvement. Consult
with your dealer or manufacturer for details.
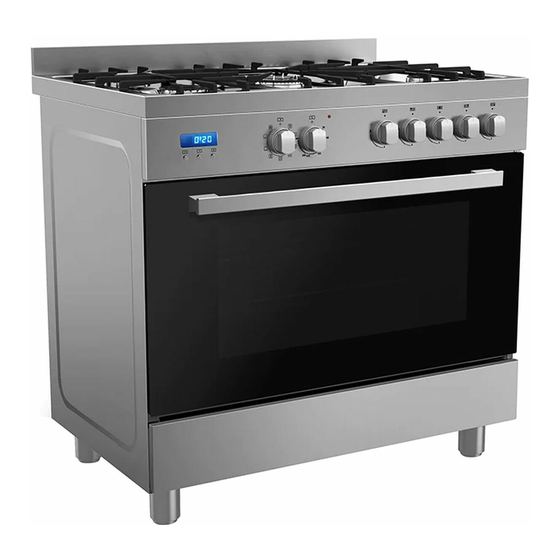
The diagram above is just for reference. Please take the appearance of the actual product as the standard.
Advertisement
Table of Contents

Related Manuals for Midea 36QMS5GP48


Summary of Contents for Midea 36QMS5GP48
- Page 1 ELECTRIC & GAS COOKER USER MANUAL 36QMS5GP48 Warning notices: Before using this product, please read this manual carefully and keep it for future reference. The design and specifications are subject to change without prior notice for product improvement. Consult with your dealer or manufacturer for details.
-
Page 2: Table Of Contents
THANK YOU LETTER THANK YOU LETTER Thank you for choosing Midea! Before using your new Midea product, please read this manual thoroughly to ensure that you know how to operate the features and functions that your new appliance offers in a safe way. -
Page 3: Safety Instructions
SAFETY INSTRUCTIONS SAFETY INSTRUCTIONS Intended Use The following safety guidelines are intended to prevent unforeseen risks or damage from unsafe or incorrect operation of the appliance. Please check the packaging and appliance on arrival to make sure everything is intact to ensure safe operation. If you find any damage, please contact the retailer or dealer. - Page 4 IMPORTANT INFORMATION • Read the instructions for use carefully. This will enable you to operate your appliance safely and correctly. • This manual is valid for several models. Variations in details for each cooker are possible. • Please keep the instruction manual, installation instructions and the various accessories in a safe place.
- Page 5 SAFETY PRECAUTIONS • This appliance is intended for domestic use only. This appliance must only be used for food preparation. • Adults and children must not operate the appliance without supervision if: - they do not have the physical or mental ability; - or they lack the knowledge and experience required to operate the appliance safely and correctly.
- Page 6 • Risk of fire. Never leave flammable objects on the hob or in the storage compartment, or keep them in the cooking compartment. • Risk of short-circuit. Never trap the mains cable of electrical appliances in the appliance door when it is hot or pull the cable over burners when they are hot.
- Page 7 Inadequate ventilation when using gas burners • Never use the gas burners in unventilated rooms. Cooking with gas burners releases extra heat and moisture. During prolonged cooking and baking times, switch on the extractor hood or make sure that the area is well ventilated.
- Page 8 - put out naked flames and cigarettes immediately - switch off electrical appliances, even lamps - open windows and ventilate the room well call the after-sales service or your gas supplier. Safety valve • Close the safety valve on the gas supply line if The cooker will not be used for a prolonged period.
- Page 9 • Do not use a roasting dish which has to be heated using two burners. This will cause heat to accumulate. This could damage the appliance. • Please note that appliances with a hob cover may only be used with the hob cover open. Damage to the oven •...
-
Page 10: Specification
SPECIFICATION MODEL 36QMS5GP48 VOLTAGE/FREQUENCY 220-240V~ 50-60Hz ELECTRIC POWER 2.94kW... -
Page 11: Product Overview
PRODUCT OVERVIEW Your New Appliance Get to know your appliance. You will find information about the control panel and hob, as well as the oven, types of heating and accessories. Control panel Door Storage The Control Panel Heatel Control knobs Display indication lamp Gas burners... - Page 12 The Hob Standard burner (1.75 kW) Steam outlet Pan support Economy burner (1.0 kW) High output burner Wok burner (3.0 kW) (3.6 kW) Gas Burnes Gas burners Pot or pan diameter Economy burner 8-16 cm Standard output burner 12-20 cm High output burner 20-23 cm Wok burner...
- Page 13 The Oven Always keep small children away from the oven while it is in use. Before cooking for the first time switch the oven on and allow it to heat up while empty. At this point you may notice a slightly odour, this is perfectly normal and occurs as the protective covering which surrounds the insulating panels is gently removed.
- Page 14 Fan assisted grilling : Caution: In this function the temperature control knob must be set from 50 ° C to Grill position. The top heating element is used in conjunction with the fan circulating the air inside the oven. Ideal for cooking thicker food stuffs, whole pieces of meat such as roast pork, poultry, etc.
- Page 15 Accessory Description Baking and roasting shelf For ovenware, cake tins, roasts, grilling and frozen meals. Enamelled baking tray For moist cakes, pastries, frozen meals and large roasts. Can also be inserted underneath the wire rack or rotary spit and used as a drip tray to collect fat. Rotary spit For roasts and large pieces of poultry.
-
Page 16: Product Installation
PRODUCT INSTALLATION Safety Precautions This manual is valid for several models. Variations in details for each cooker are possible. The safe operation of this appliance can only be guaranteed if it has been professionally assembled and installed in accordance with these instructions. The individual who assembled and installed the appliance is liable for damage or faults resulting from incorrect assembly or installation. - Page 17 Appliance dimensions NOTE: the specified dimensions. A = 89 -149 m m 40mm 597mm 770m m 895mm Adjacent units Adjacent units must be made of non-combustible material. The fronts of adjacent units must be resistant to temperatures up to at least 90 °C. If the appliance is fitted close to other units, the minimum distances specified in the picture must be maintained.
- Page 18 Rating plate The technical data for the appliance can be found on the rating plate on the back plate inside of the storage compartment flap. Never remove the rating plate from the appliance. The setting values are specified on a label on the appliance packaging.
- Page 19 Fitting The Adjustable Feet Beforehand: • Remove all parts that are not permanently fixed, especially the pan supports and burners. • Remove the accessories from the oven. Proceed as follows: • Tilt the appliance by raising one side slightly from the floor.
- Page 20 Stability Bracket Bracket Existing slot in rear of cooker Dotted line showing the position of the cooker when fixed Wall Fixing Electrical Connection • This appliance must be earthed by law. Before connecting the appliance to the electrical supply, check that the earth system in your house is working correctly. •...
- Page 21 • H05RRF • H05VVF 3 x 1.5 mm • • 230 V~ Leave the mains cable slightly overlong so that you can pull out the appliance for cleaning purposes. Proceed as follows: • Remove the rear backboard. • Undo the screw on the terminal block that fixes the cable in place. •...
- Page 22 Default setting of the burners The burners are set up for G30 liquefied gas (27.5 mbar) on delivery. A nozzle set for G20 natural gas (10 mbar) is suppl ed with the appliance. Country-specific connection ISOO 228-1 ISO 7-1...
- Page 23 Connecting to liquefied gas If you connect the appliance to liquefied gas, you must always install a suitable gas pressure regulator. Use the total gas consumption of the appliance stated on the rating plate to select a suitable gas pressure regulator. Only use connecting lines or flexible hoses which comply with the applicable regulations and which are approved for this purpose.
- Page 24 Safety valve The installation of a safety valve for opening and closing the gas supply is a compulsory requirement Fit the safety valve between the gas connecting line to the appropriate room and the hob. Ensure unhindered access to this valve. Checking for leaks After connecting the gas line, check the connections for leaks using soapy water.
- Page 25 • Place each burner sprayer (B) on the burner (C). • Position the relevant burner cap (A) exactly on top of the cup. • Refit the pan supports. Adjusting the low flame Proceed as follows: • Open the appliance door. Press the control knob for the oven in and turn it anti-clockwise to the maximum setting 250.
- Page 26 General Nozzle Table Nozzle no. Output Type of gas Type of burner (MJ/h) Nozzle Bypass High output 11.7 burner Standard output Liquefied burner 2.75 Economy burner Wok burner Nozzle no. Output Type of gas Type of burner (MJ/h) Nozzle Bypass High output 150 H3 burner...
- Page 27 Positioning And Levelling Positioning the appliance When installing the appliance, make sure that there is enough space in the final installation location to pull the appliance forwards for cleaning and maintenance work. The ground underneath must be hard and stableThe wall immediately behind the appliance must be made from non-flammable material, e.g.
-
Page 28: Operation Instructions
OPERATION INSTRUCTIONS Before Using For The First Time Please read the following instructions before using your appliance for the first time. Remove the appliance packaging and dispose of this appropriately. Baking out the oven Cooking compartment initial cleaning Remove the accessories from the cooking compartment. Completely remove any leftover packaging, e.g. - Page 29 Cleaning The Burner Lids And Cups Proceed as follows: 1. Clean the burner lids (A) and sprayers (B) with water and washing-up liquid. Dry the parts off well. 3. Place the burner sprayers (B) on the cup (C). 4. Place the burner lid (A) exactly on top of the burner sprayers (B).
- Page 30 Switching O The Gas Burner Turn the control knob for the required burner to position . If The Flame Goes Out Switch off the control knob. Wait for one minute and repeat steps 1 to 2. If the flame goes out, gas will escape. Never leave the gas burner unattended during operation.
- Page 31 Inserting The Rotary Spit Insert the rotary spit as follows: 1. Hook the spit holder into the bracket on the ceiling of the cooking compartment. If you require to preheat the oven, hook in the holder before preheating. Risk of burns Never touch the hot surfaces of the cooking compartment or the heating elements.
- Page 32 Removing The Rotary Spit Risk of burns Never touch the hot surfaces of the cooking compartment or the heating elements. Children must be kept at a safe distance from the appliance at all times. Open the appliance door carefully. Hot steam may escape. Risk of burns Never touch the rotary spit or other accessories directly when they are hot.
- Page 33 Duration setting 1. Press button 2, choose ‘duration’ function, duration icon will flash, “0:00” will display. Press button 2 and 3 to set duration time, adjusting range is “0:01~23:59”. Press once to plus or minus 1, hold for 3 seconds for quick adjust. The flashing will last for 5 seconds, so the settings must be done within this time frame or the time of day will show again.
-
Page 34: Cleaning And Maintenance
CLEANING AND MAINTENANCE Cleaning And Care Never use high-pressure cleaners or steam jets. Risk of short circuit. Never use caustic or abrasive cleaning agents. These could damage the surface. If such an agent gets on the front of the appliance, wipe it off immediately with water. - Page 35 Using The Correct Cleaning Agent Do not use cleaning agents that contain abrasive substances or acids, or cleaning aids such as steel wool or stainless steel sponges. These could damage the surfaces. Appliance parts Cleaning agent and cleaning aid • Use glass cleaner. Risk of injury.
- Page 36 Cleaning The Interior Glass Of The Oven The interior glass of the oven door can be removed: with the door in a semi-open position, use both hands to remove the glass. After cleaning, refit the glass by proceeding in reverse order. NOTE In some models, the glass is screen printed.
- Page 37 Removing And Fitting The Appliance Door You can remove the appliance door for easier cleaning. The hinges of the appliance door are each secured by a locking lever. When the locking lever is folded in (A), the appliance door is secured. It cannot be unhinged. If the locking lever is open (B), only the hinge is secured, and you can remove the appliance door.
- Page 38 Fitting The Appliance Door Proceed as follows: 1. Hold the appliance door at an angle. 2. Insert both hinges, left and right, into the supports. 3. Position the door so that the hinge grooves engage on both sides. 4. Open the appliance door. 5.
- Page 39 Inserting the hook-in rack To reinsert the hook-in racks, proceed as follows: 1. Insert the upper hooks into the drill holes in the side panel. 2. Pull the hook-in rack slightly downwards and insert the lower hooks into the drill holes...
-
Page 40: Trouble Shooting
TROUBLE SHOOTING Faults And The After-Sales Service Malfunctions often have simple explanations. Please read the following notes before calling the aftersales service. Fault Possible cause Remedial action Normal occurrence; The door panel steams up Not possible; this has no caused by the difference in when the oven is hot. - Page 41 Proceed as follows: Switch off the relevant circuit breaker. 2. Open the appliance door. 3. Lay a tea towel in the cooking compartment if it is cold to prevent damage. 4. Unscrew the glass cover from the bulb inside the cooking compartment by turning it anti-clockwise.
- Page 42 You can find an overview of suitable diameters in the section entitled “Your new appliance - the hob”. The flame of the gas burner must not be larger than the diameter of the cookware. Cookware with lids Use cookware with a flat bottom. If possible, use cookware with lids to save gas.
- Page 43 Bringing to the boil Simmering (high or low, depending on requirement) Searing Longer frying * Depending on the model. Baking tips Approximately 10 minutes before the end of the baking time stated in the recipe, How to confirm whether your sponge cake pierce the highest point of the cake with a is cooked through.
-
Page 44: Trademarks, Copyrights And Legal Statement
Midea may constitute trademark infringement or unfair competition in violation of relevant laws. This manual is created by Midea and Midea reserves all copyrights thereof. No entity or individual may use, duplicate, modify, distribute in whole or in part this manual, or bundle or sell with other products without the prior written consent of Midea. -
Page 45: Data Protection Notice
European Economic Area. Further information are provided on request. You can contact our Data Protection MideaDPO@midea.com. To exercise your rights such as right to object your Officer via personal date being processed for direct marketing purposes, please contact us via... - Page 48 PN:16171100A40759...
Need help?
Do you have a question about the 36QMS5GP48 and is the answer not in the manual?
Questions and answers