Chapters
Table of Contents

Related Manuals for Cuisinart DGB-2 Series


Summary of Contents for Cuisinart DGB-2 Series
- Page 1 User Manual of Product 1: Metabo HPT Cordless Framing Nailer Kit, 18V, Brushless Motor, 2" Up To 3-1/2" Framing Nails, Compact 3.0 Ah Lithium Ion Battery, Lifetime Tool Warranty (NR1890DRS)
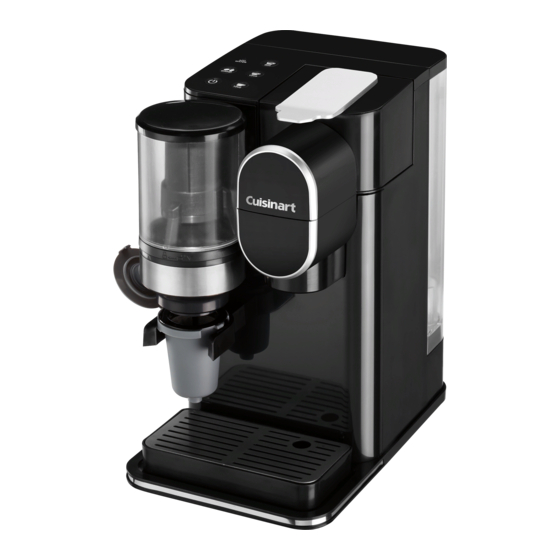
- Page 2 INSTRUCTION BOOKLET DGB-2 Series Grind & Brew Single-Serve Coffeemaker For your safety and continued enjoyment of this product, always read the instruction book carefully before using.
-
Page 3: Important Safeguards
7. The use of accessory attachments not 22. Only use single-serve pods intended recommended by Cuisinart may cause for this appliance. If the pod does not fire, electric shock or injury to persons. fit, do not force the pod into the 8. - Page 4 SAVE THESE SPECIAL CORD SET INSTRUCTIONS INSTRUCTIONS A short power-supply cord is provided to FOR HOUSEHOLD reduce the risks resulting from becoming entangled in or tripping over a longer cord. USE ONLY Longer extension cords may be used if care is exercised in their use. WARNING: RISK OF FIRE OR ELECTRIC SHOCK An extension cord is used, the marked...
-
Page 5: Table Of Contents
Before Brewing ....7 coffee. Cuisinart includes a charcoal water Making Coffee ....7–9 filter to remove chlorine, bad tastes and With Whole Beans . -
Page 6: Features And Benefits
FEATURES 10. Brew Chamber Holds removable capsule holder AND BENEFITS or HomeBarista Reusable Filter Cup ® 1. Removable 48-Ounce 11. Removable Drip Tray Water Reservoir 12. Removable Capsule Holder 2. Control Panel 13. Charcoal Water Filter and Holder See detailed illustration on page 6 Eliminates chlorine, bad tastes and 3. -
Page 7: Getting To Know Your Control Panel
60 days or after 60 uses, and more often if WATER FILTER you have hard water. Replacement filters can be purchased in stores, or by calling Cuisinart Your coffeemaker comes with a charcoal water Consumer Service, or at www.cuisinart.com. -
Page 8: Before Brewing
BEFORE BREWING YOUR MAKING COFFEE FIRST CUP OF COFFEE WITH WHOLE BEANS INITIAL CLEANING Follow instructions in “Before Brewing Your First Cup of Coffee.” Perform an initial cleaning before making your first beverage. Follow the instructions GRINDING INTO below without inserting a pod. THE HOMEBARISTA ®... - Page 9 BREWING WITH HOMEBARISTA ® 1. Remove the water reservoir and fill to max fill line. Replace back into the unit. If water is lower than minimum fill, the Add Water indicator light will illuminate. 2. Open brew head lever and remove the capsule holder from the brewing chamber by pulling toward you.
-
Page 10: With Pods
MAKING COFFEE WITH PODS Follow instructions in “Before Brewing Your First Cup of Coffee,” page 7. 1. Remove the water reservoir and fill to max fill line. Replace back into the unit. If water is lower than minimum fill, the Add Water indicator light will illuminate. -
Page 11: Cleaning And Maintenance
SINGLE-SERVE 3. Cleaning the Exit Needle – The exit needle is located on the inside bottom COFFEEMAKER of the capsule holder assembly. CLEANING AND Should a clog arise because of coffee grounds, it can be cleaned using a MAINTENANCE paper clip or similar tool. Remove CLEANING EXTERNAL PARTS capsule holder from unit, then remove funnel from capsule holder and insert... - Page 12 CLEANING THE BEAN HOPPER Step 2: Fresh Water Rinse & BURR GRINDER • Repeat Step 1 three times using fresh 1. Unlock and remove burr grinder before water in place of vinegar mixture. cleaning the bean hopper. Be sure to •...
-
Page 13: Troubleshooting
If all Brew Size buttons are flashing, the coffeemaker is overloaded. Coffeemaker can be used again after all lights stop flashing. Please return appliance to the nearest Cuisinart Repair Center if all lights don’t stop flashing. Coffeemaker will not brew... -
Page 14: Warranty
® This warranty is available to U.S. consumers Single-Serve Coffeemaker should fail within the only. You are a consumer if you own a Cuisinart ® generous warranty period, we will repair it or, if Grind & Brew Single-Serve Coffeemaker that necessary, replace it at no cost to you. - Page 15 NOTES:...
- Page 16 NOTES:...
- Page 17 ©2021 Cuisinart Stamford, CT 06902 Printed in China 21CE078665 IB-17283-ESP...
- Page 18 MANUAL DE INSTRUCCIONES Serie DGB-2 Cafetera monodosis con molinillo incorporado Grind & Brew Para su seguridad y para disfrutar plenamente de este producto, siempre lea atentamente las instrucciones antes del uso.
-
Page 19: Medidas De Seguridad Importantes
DEBEN SER REALIZADAS POR UN 7. El uso de accesorios no TÉCNICO AUTORIZADO. recomendados o provistos por 18. Evite el contacto con las piezas Cuisinart presenta un riesgo de móviles. incendio, descarga eléctrica o lesiones 19. Compruebe que no hay objetos personales. - Page 20 presencia de instrucciones importantes de 21. No coloque la cafetera encima de un paño/trapo, ni obstruya el flujo de aire uso y mantenimiento (servicio) en la debajo de la unidad de ninguna documentación que acompaña al equipo. manera. USO DE ALARGADORES 22.
-
Page 21: Instrucciones De Desembalaje
Instalación del filtro de agua ..6 agua tiene mal sabor, el café tendrá mal sabor. Por eso Cuisinart equipó su Antes del primer uso ....7 cafetera con un filtro de agua de carbón... -
Page 22: Piezas Ycaracterísticas
PIEZAS Y 9. Tapa de la cámara de preparación CARACTERÍSTICAS 10. Cámara de preparación Para cápsulas monodosis desechable 1. Depósito de agua o cápsula reutilizable HomeBarista ® removible de 48 oz (1.4 L) 11. Bandeja de goteo removible 2. Panel de control 12. -
Page 23: Panel De Control
Filtros de repuesto están disponibles en las Su cafetera cuenta con un filtro de agua tiendas, en www.cuisinart.com, o llamando de carbón que elimina el cloro y el mal olor/ a nuestro servicio de atención al cliente al sabor del agua corriente. -
Page 24: Antes Del Primer Uso
ANTES DEL PRIMER USO CÓMO PREPARAR CAFÉ CON CAFÉ EN GRANO LIMPIEZA INICIAL Limpie la cafetera antes de usarla por Limpie el sistema interno antes del primer primera vez, según se indicó en la sección uso, según se indica a continuación. “Antes del primer uso”. - Page 25 3. Presione el botón de encendido/ 3. Retire la cápsula reutilizable apagado para encender el aparato HomeBarista del portacápsula. ® la luz de encendido y el indicador de Compruebe que el borde de la cápsula molienda se encenderán. está limpio. Cierre la tapa de la cámara de preparación sin presionar.
-
Page 26: Monodosis Pre-Llenadas
vez para empezar otro ciclo de 1. Retire el depósito de agua y llénelo preparación. hasta la línea de llenado máximo. Vuelva a colocar el depósito en la 6. Después del ciclo de preparación, unidad. Si no hay suficiente agua en levante el asa para abrir la cámara el depósito, el indicador “ADD WATER”... -
Page 27: Consejos Ysugerencias
el botón del tamaño de taza usado café, evite exponer los granos al aire, a la otra vez. luz o a la humedad. Al sacar los granos del congelador, mantenga el envase Precaución: El agua que circula dentro cerrado a temperatura ambiente. de la cámara de preparación durante el ciclo de preparación está... - Page 28 2. Limpieza del embudo del 4. Limpieza de la aguja perforadora – portacápsula – Para retirar el embudo La aguja perforadora, ubicada dentro del portacápsula, sosténgalo con una de la cámara de preparación, debe mano mientras, gire ligeramente la limpiarse en caso de atascamiento, parte inferior, y jálelo con la otra mano.
- Page 29 DESCALCIFICACIÓN Con el tiempo, depósitos de calcio/sarro se acumulan en las piezas metálicas de la cafetera. Si todas las luces empiezan a parpadear al encender la unidad, esto significa que debe descalcificar la cafetera. Para un rendimiento óptimo, se recomienda descalcificar la unidad cada mes.
-
Page 30: Resolución De Problemas
RESOLUCIÓN DE PROBLEMAS PROBLEMA: SOLUCIÓN: Los indicadores Si todas las luces de los botones parpadean en secuencia, esto significa que el luminosos están tiempo de descalcificar la cafetera. Véase las instrucciones de descalcificación en parpadeando. la página 11. Cuando el indicador luminoso del botón GRIND empieza a parpadear, esto significa que el molinillo está... -
Page 31: Garantía
Los residentes de California también pueden, si lo desean, mandar el producto defectuoso directamente a Cuisinart para que lo reparen o lo cambien. Para esto, se debe llamar a nuestro servicio posventa al 1-800-726-0190. Cuisinart será responsable por los gastos de reparación, reemplazo, manejo y envío de los productos... - Page 32 NOTAS:...
- Page 33 ©2021 Cuisinart Stamford, CT 06902 Impreso en China 21CE078665 IB-17283-ESP...
Need help?
Do you have a question about the DGB-2 Series and is the answer not in the manual?
Questions and answers
Cuisinart DGB-2 Conical Burr Grind & Brew Single Serve Coffee Maker not dispensing all 12oz of water only dispenses 8oz
The Cuisinart DGB-2 Single-Serve Coffeemaker may only be dispensing 8oz instead of 12oz of water because the water level in the reservoir is too low. The "Add Water Indicator" illuminates red when the water level is low, and the machine will not dispense more water than what is available in the reservoir. Ensure the water reservoir is filled past the minimum level to allow the selected brew size to dispense correctly.
This answer is automatically generated
@Mr. Anderson
The water level is completely full. This problem's been happening for a while. I have decaled the machine. Any other suggestions of course I've checked the water level. That's a stupid answer.@Raynee Ceja