
Related Manuals for Yamaha AP-U70


Summary of Contents for Yamaha AP-U70
- Page 1 U C A PERSONAL AMPLIFIER AP-U70 PERSONAL SOUND PROCESSOR AUX1 DP-U50 AUX2 M U T E SET UP MANUAL MANUEL DE CONFIGURATION...
- Page 2 The owner’s manual for this model consists of two volumes, “SET UP MANUAL” and “OPERATION MANUAL”. Le manuel d'utilisation pour ce modèle se compose de deux volumes, le “MANUEL DE CONFIGURATION” et le “MANUEL D’UTILISATION”. * This manual uses terms utilized by the English operating system as shown on the computer monitor. If the operating system you are using is in another language, please replace the English terms with the terms used in your computer’s operating system.
-
Page 3: Table Of Contents
Ideal for use with computer games, internet music, CD-ROM, DVD, multimedia software, and more. ● Yamaha’s Near-Field Cinema DSP (Digital Sound field Processing) technology provides live music performance and movie theater surround sound. The sound effect of DSP is also available for headphone listening. -
Page 4: Getting Started
GETTING STARTED Unpacking After unpacking, check that the following items are supplied. ● Remote control ● Batteries (AA, R6, UM-3 POWER AUX1 AUX2 HALL JAZZ CHURCH GAME MOVIE LIVE ● USB cable TEST ON/OFF MUTE VOLUME ● CD-ROM The CD-ROM contains the Application Software and online help for controlling this unit from... -
Page 5: Connections
Also, refer to the owner’s manual for other equipment in the system. SUBWOOFER OUTPUT This connector can be connected to an optional subwoofer, such as the Yamaha YST-SW45, for enhanced bass performance. SPEAKERS outputs [AP-U70 only] These connectors are used to connect a pair of speakers, such as the Yamaha NS-U30. -
Page 6: Connecting Your Computer
CONNECTIONS Connecting your computer Audio from your computer can be fed to this unit using any of the following connectors: USB, DIGITAL PC COAX IN, DIGITAL PC OPT IN, or ANALOG PC IN. If you use all of these connectors for connection, you can select the connector(s) to use on this unit’s front panel or the remote control. -
Page 7: Connecting Audio Equipment
However, it’s not necessary to make both connections. Audio connections ● Be careful not to mix up the left and right connections. ● [AP-U70 only] If you wish to record analog sound signals inputted to this unit, connect the analog inputs of a tape deck or MD recorder to this unit’s REC OUT OUTPUT. -
Page 8: Connecting Speakers
CONNECTIONS Connecting speakers [AP-U70 only] Connect this unit to your speakers with speaker cables with a proper gauge (keep them as short as possible). WOOFER OUTPUT SPEAKERS 6 MIN. /SPEAKER – MAIN Speaker Cables Strip 10 mm of insulation off the end of each speaker cable, and then twist the bare wires to prevent lose strands, which can cause short circuits. - Page 9 The use of a subwoofer is also suitable for reproducing the effects of sound field programs. Note The SUBWOOFER OUTPUT is a line-level output. Use a subwoofer which has its own built-in power amplifier, such as the Yamaha YST-SW45. STANDBY/ON HIGH CUT VOLUME 50Hz...
-
Page 10: Plugging In This Unit
CONNECTIONS Recommended Speaker Placement For best performance, place the left and right speakers on either side of your computer monitor, as shown below, and position them so that their fronts are flush with the monitor screen. To get the best from the sound field programs and surround effects, the left and right speakers and the listener should be positioned so as to form a triangle with a 3:4 ratio, so if, for example, the speakers are 60 cm (23.5”) -
Page 11: Installing Usb Driver And Application Software
INSTALLING USB DRIVER AND APPLICATION SOFTWARE When connecting this unit and your computer with the USB cable and controlling this unit from the computer, you must install the following software on your computer. USB driver software: Necessary for this unit to communicate with your computer ... -
Page 12: Installing The Software
INSTALLING USB DRIVER AND APPLICATION SOFTWARE Installing the software Microsoft Windows 98/98SE or Windows Me Installing and checking the USB driver Turn on your computer and, if it’s not running already, start Windows 98/98SE or Windows Me. Plug the AC power cord of this unit into the AC outlet. - Page 13 Make the following settings on your computer after the installation of the driver is finished. Setting of Audio and Audio CD [Windows 98/98SE only] * Terminate all the activated applications. * When using Windows 98SE, restart Windows, first. Click the Windows “Start” button and select “Settings”, and then “Control Panel”.
- Page 14 This section explains how to start the Application Software and view the online help. Click the Windows “Start” button and select “Programs”, “YAMAHA AP-U70 (or DP-U50)”, “AP- U70 (or DP-U50)” in this order. The Application Software starts. To view the online help, click the Windows “Start”...
-
Page 15: Microsoft Windows 2000 Professional
Microsoft Windows 2000 Professional Installing and checking the USB driver Turn on your computer and, if it’s not running already, start Windows 2000 Professional, and log in with Administrator. Plug the AC power cord of this unit into the AC outlet. - Page 16 INSTALLING USB DRIVER AND APPLICATION SOFTWARE Make the following settings on your computer after the installation of the driver is finished. Setting of Audio and Audio CD Click the Windows “Start” button and select “Settings”, and then “Control Panel”. Double-click the “Sounds and Multimedia” icon. Click the “Audio”...
- Page 17 This section explains how to start the Application Software and view the online help. Click the Windows “Start” button and select “Programs”, “YAMAHA AP-U70 (or DP-U50)”, “AP- U70 (or DP-U50)” in this order. The Application Software starts. To view the online help, click the Windows “Start”...
-
Page 18: Macintosh Computer
INSTALLING USB DRIVER AND APPLICATION SOFTWARE Macintosh computer Connections and setup Plug the AC power cord of this unit into the AC outlet. Start the Macintosh. Connect this unit to a USB port on the computer using the supplied USB cable. The driver software for USB audio is automatically installed. - Page 19 Copy the “AP-U70 (or DP-U50) Application” folder in the installation data folder to any hard disk. Copy the “AP-U70 (or DP-U50) Help” folder in the installation data folder to the “Help” folder in the “System Folder” on the startup disk.
-
Page 20: Appendix
Refer to the chart below if this unit does not function properly. If the problem you are experiencing is not listed below or if the instructions given below do not help, disconnect the power cord and contact your authorized YAMAHA dealer or service center. - Page 21 YAMAHA ELECTRONICS (UK) LTD. YAMAHA HOUSE, 200 RICKMANSWORTH ROAD WATFORD, HERTS WD1 7JS, ENGLAND YAMAHA SCANDINAVIA A.B. J A WETTERGRENS GATA 1, BOX 30053, 400 43 VASTRA FRÖLUNDA, SWEDEN YAMAHA MUSIC AUSTRALIA PTY, LTD. 17-33 MARKET ST., SOUTH MELBOURNE, 3205 VIC., AUSTRALIA...
-
Page 22: Operation Manual
U C A PERSONAL AMPLIFIER AP-U70 PERSONAL SOUND PROCESSOR AUX1 DP-U50 AUX2 M U T E OPERATION MANUAL MANUEL D’UTILISATION... -
Page 23: Important Safety Instructions
IMPORTANT SAFETY INSTRUCTIONS CAUTION RISK OF ELECTRIC SHOCK DO NOT OPEN CAUTION: TO REDUCE THE RISK OF ELECTRIC SHOCK, DO NOT REMOVE COVER (OR BACK). NO USER-SERVICEABLE PARTS INSIDE. REFER SERVICING TO QUALIFIED SERVICE PERSONNEL. • Explanation of Graphical Symbols The lightning flash with arrowhead symbol, within an equilateral triangle, is intended to alert you to the... - Page 24 This product, when installed as indicated in the instructions contained in this manual, meets FCC requirements. Modifications not expressly approved by Yamaha may void your authority, granted by the FCC, to use the product. IMPORTANT: When connecting this product to accessories and/or another product use only high quality shielded cables.
-
Page 25: About This Manual
Ideal for use with computer games, internet music, CD-ROM, DVD, multimedia software, and more. ● Yamaha’s Near-Field Cinema DSP (Digital Sound field Processing) technology provides live music performance and movie theater surround sound. The sound effect of DSP is also available for headphone listening. - Page 26 Virtual 3D ... 4 Digital Sound Field Processing (DSP)... 4 CONTROLS AND THEIR FUNCTIONS Front panel & Remote control ... 5 About the display ... 7 BASIC OPERATION Playing a source ... 8 Using sound field programs ... 10 Recording... 11 ADVANCED OPERATION Adjusting surround effect ...
-
Page 27: Caution
Using this unit with a higher voltage than specified is dangerous and may result in fire or other accidents. YAMAHA will not be held responsible for any damage resulting from use of this unit with a voltage other than that specified. -
Page 28: Outline Of This Unit
OUTLINE OF THIS UNIT Main features of this unit Using Yamaha’s unique DSP technology, this unit can bring excitement and realism to any audio source by simulating the acoustic environments of concert halls, movie theaters, and so on with only two speakers. With its stylish, vertical... -
Page 29: Virtual 3D
“sound,” called its “sound field.” At Yamaha, we have measured all the elements that make up a typical sound field—direction and level of the reflections, band-width characteristics, and delay times—at famous concert halls and opera houses around the world. -
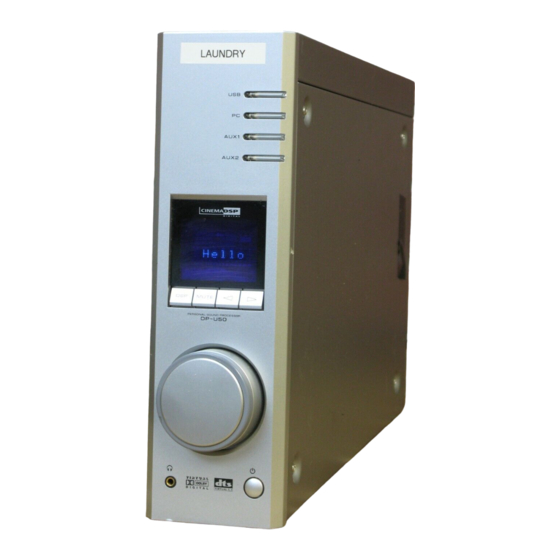
Page 30: Controls And Their Functions
CONTROLS AND THEIR FUNCTIONS Front panel & Remote control Front panel AUX1 AUX2 VIRTUAL D. DSP DIGITAL USB PCM PROLOGIC FM AM ST M U T E CONTROLS AND THEIR FUNCTIONS Remote control POWER AUX1 AUX2 HALL JAZZ CHURCH GAME... - Page 31 CONTROLS AND THEIR FUNCTIONS Input selectors & indicators These four keys, explained below, are used to select the input source. The indicator of the selected source lights up. ● USB key This key selects input signals sent from your computer by way of the USB terminal.
-
Page 32: About The Display
About the display This section explains what the various display indicators mean. VIRTUAL This indicator appears when this unit is using Virtual (DTS) This indicator appears when an input signal is decoded with DTS. This indicator appears when a PCM digital audio signal is selected as the input source. -
Page 33: Basic Operation
BASIC OPERATION BASIC OPERATION Playing a source This section explains how to turn on this unit and select input sources. If any external audio equipment is connected to this unit, turn it on first. AUX1 AUX2 VIRTUAL DIGITAL USB PCM D. - Page 34 Note When an input selector key is pressed, the display shows the name of the selected input source for a short while, and then shows the currently selected sound field program. When no sound field program is selected, “THROUGH” is shown on the display.
-
Page 35: Using Sound Field Programs
These programs create a sound field that feels real, just as if you were actually there. For these sound field programs, a Yamaha DSP effect is applied to Dolby Pro Logic, Dolby Digital, DTS, and other surround sounds for motion-picture audio. -
Page 36: Recording
To turn off the DSP Press the DSP key on the front panel or the ON/OFF key on the remote control. “THROUGH” appears on the display. ON/OFF Front panel Remote control Recording Input sources (e.g., a computer or CD player) selected on this unit can be recorded by an MD recorder, tape deck, etc. - Page 37 ● The sampling frequency and resolution of signals recordable on the computer differ from operating systems. You can refer MUTE VOLUME to the following Yamaha website for details about the related information. AUX1 AUX2 Front panel Remote control...
-
Page 38: Advanced Operation
Adjusting surround effect This unit features YAMAHA’s unique “Virtual 3D” technology, which provides a virtual surround sound effect with only two speakers. In the sound field of the “Virtual 3D” mode, two virtual rear speakers are provided as well as two front speakers (L, R) to achieve the surround-sound effect. -
Page 39: Setting Usb Channel
DVD video on this unit via the USB connection and enjoy it as virtual surround sound. Note that some operating systems and software programs are not multi-channel compatible. Yamaha websites list the names of multi-channel compatible operating systems and software. -
Page 40: Operating This Unit With The Application Software
Operating this unit with the Application Software If this unit is connected to your computer via the USB connection and the Application Software is installed in your computer from the supplied CD-ROM, you can operate this unit with the Application Software from your computer. Moreover, the Application Software, once installed on your computer, offers various settings unavailable from this unit or the remote control. - Page 41 ADVANCED OPERATION Adjusting DSP sound field parameters You can adjust various parameters of the DSP sound field programs. The default parameters of the sound field programs provide great sound, but it is also possible to fine-tune the parameters to suit the acoustics of the room, individual preferences, and program source.
-
Page 42: Operating The Graphic Equalizer
Adjusting the virtual 3D effect The surround sound effect of the virtual 3D sound field is affected by the room configuration and the position of the listener, resulting in sound unique to each environment. The procedure below shows you how to adjust the effect of the virtual 3D to suit your preferences and environment. -
Page 43: Volume Settings
ADVANCED OPERATION Setting adjustment on the Setup panel When you click SETUP of the Main Panel, the Setup panel appears, allowing you to perform the following settings. Edit Names of Input Sources You can assign a name consisting up to seven characters to each input source. -
Page 44: Appendix
Refer to the chart below if this unit does not function properly. If the problem you are experiencing is not listed below or if the instructions given below do not help, disconnect the power cord and contact your authorized YAMAHA dealer or service center. -
Page 45: Specifications
The remote control does not work. The remote control does not function properly. Specifications [AP-U70] Minimum RMS Output Power per Channel 20W + 20W (20 Hz–20 kHz, 6 , 0.4% THD) Maximum Power 26W + 26W (1 kHz, 6 , 10% THD) - Page 46 [DP-U50] Output Level/Output Impedance PRE OUT SUBWOOFER OUTPUT Input Sensitivity/Input Impedance PC IN, AUX1 IN, AUX2 IN (ANALOG) Maximum Input Signal PC, AUX1, AUX2 Headphone Jack Output Level/Output Impedance ANALOG PC IN, etc. 320 mV/61 Frequency Response USB, DIGITAL IN (PC, AUX1) to PRE OUT 20 Hz–20 kHz ( 1.0 dB) Total Harmonic Distortion (1 kHz, 20 kLPF) USB, DIGITAL IN (PC, AUX1) to PRE OUT...
- Page 47 YAMAHA ELECTRONICS (UK) LTD. YAMAHA HOUSE, 200 RICKMANSWORTH ROAD WATFORD, HERTS WD1 7JS, ENGLAND YAMAHA SCANDINAVIA A.B. J A WETTERGRENS GATA 1, BOX 30053, 400 43 VASTRA FRÖLUNDA, SWEDEN YAMAHA MUSIC AUSTRALIA PTY, LTD. 17-33 MARKET ST., SOUTH MELBOURNE, 3205 VIC., AUSTRALIA...
Need help?
Do you have a question about the AP-U70 and is the answer not in the manual?
Questions and answers