MrCool Universal Series Service Manual
Inverter packaged heat pump
Hide thumbs
Also See for Universal Series:
- User manual ,
- Owner's manual (45 pages) ,
- Installation & owner's manual (32 pages)
Table of Contents
Advertisement
Universal
Inverter Packaged
Heat Pump
Service Manual
MODEL:
MDPH180604
Read this manual carefully before installation and keep it where
the operator can easily find it for future reference.
Due to updates and constantly improving performance, the
information and instructions within this manual are subject to
change without notice.
Version Date: 1/31/24
Please visit www.mrcool.com/documentation
to ensure you have the latest version of this manual.
Series
®
Advertisement
Table of Contents
Troubleshooting

Related Manuals for MrCool Universal Series


Summary of Contents for MrCool Universal Series
- Page 1 Due to updates and constantly improving performance, the information and instructions within this manual are subject to change without notice. Version Date: 1/31/24 Please visit www.mrcool.com/documentation to ensure you have the latest version of this manual.
-
Page 2: Table Of Contents
3.6 Clearance Requirements ....................24 3.7 Drainage Piping ........................25 3.8 Electrical Wiring .......................26 MAINTENANCE ..........................32 4.1 Error Codes ........................32 4.2 Drive Malfunction Codes ....................35 4.3 Troubleshooting Flowcharts ...................36 4.4 Assembly & Disassembly ....................49 4.5 Exploded Views & Spare Parts List .................68 mrcool.com... -
Page 3: Product Overview
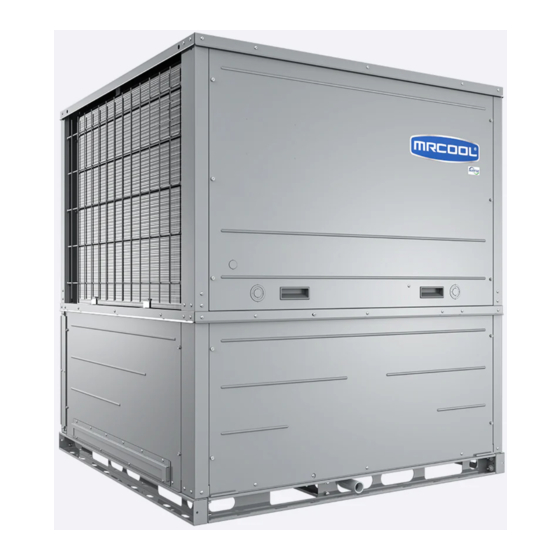
(TON) NAME (V, Ph, Hz) MDPH180244 MDPH180364 208/230 R410A 1Ph~60Hz MDPH180484 MDPH180604 NOTE • Above pictures may be different from actual model. • 1Ton = 12,000Btu/h = 3.517kW 1.2 Product Nomenclature Heat MRCOOL DC Inverter Package SEER2 R410A Pump mrcool.com... -
Page 4: Features
Sound Pressure Volume dB(A) Outline 44-1/8 x 35-3/8 x 49-3/16 44-1/8 x 35-3/8 x 49-3/16 Dimension (WxDxH) Package 44-5/8 x 35-15/16 x 50-13/16 44-5/8 x 35-15/16 x 50-13/16 Net Weight/Gross Weight 523/545 523/545 Loading 40'GP/40'HQ unit 26/52 26/52 Quantity mrcool.com... -
Page 5: Operation Range
The technical parameters can change as the product improves. Refer to the nameplate on the unit for actual data. • Above data is subject to change without notice. 1.5 Operating Range Operating Mode Outdoor Condition °F (°C) Cooling 23°F ~ 125.6°F (-5°C ~ 52°C) Heating -22°F ~ 75.2°F (-30 ~ 24°C) mrcool.com... -
Page 6: Electrical Data
PRODUCT OVERVIEW 1.6 Electrical Data Maximum Over-Current Minimum Circuit Model Power Supply Fuse Capacity (A) Protection (A) Ampacity (A) MDPH180604 208/230V-1Ph-60Hz 39.1 MDPH180484 MDPH180364 208/230V-1Ph-60Hz MDPH180244 1.7 Piping Diagram MDPH180604 / MDPH180484 / MDPH180364 / MDPH180244 mrcool.com... -
Page 7: Operation Flowcharts
Avoid cool wind (only fan run when comp. starts) Temp of Temp of indoor ≥ set Indoor ≤ Set temp temp. Comp. and outdoor Comp. and outdoor fan stop fan stop Comp. stop Comp. stop for 3 min. for 3 min. mrcool.com... -
Page 8: Wired Controller
Currently set fan speed (auto, low, medium and low, medium, medium and high, high, and turbo) No Card No card in gate control system Left & Right Display when left and right swing function is set Swing X-Fan Display when dry function is set Temperature Displays set temperature mrcool.com... -
Page 9: Buttons
Press the up and down arrow buttons again for 5 seconds to quit lock state. Inquiry and While the unit is powered off, press the Mode and Function buttons at the same time for 5 4 & 5 Setting of Wired seconds to set the address. Controller mrcool.com... -
Page 10: Functions & Settings
"00" and press the Swing/Enter button. The function is canceled. When setting the filter clean reminder function, the timer zone will display 2 digits. The first digit indicates the pollution degree of the operating area and the second indicates the accumulated operating time of the indoor unit. mrcool.com... - Page 11 To cancel the filter clean reminder function, press the Function button to select the clean reminder function. The CLEAN icon will blink. Press the up or down arrow buttons to adjust the timer zone to display "00". The accumulated operating time will be cleared. mrcool.com...
- Page 12 Do not cut off power to the unit within 5 seconds of changing memorized content. Modbus Interface The unit features MODBUS interface. If the user needs to connect the unit to the management system of the building, contact MRCOOL Tech Support for the MODBUS protocol. mrcool.com...
- Page 13 3. 255 sets of unit in maximum can be connected in the same network; the unit addresses in the same network must be different. Otherwise, the unit control will be affected. 4. Perform wiring when the unit power is disconnected. mrcool.com...
- Page 14 The temperature at the wired controller is set as indoor ambient temperature (timer area displays "02"). Select the temperature sensor at the air return in cooling, dry, and fan modes. Select the temperature sensor at wired controller in heating and auto modes. mrcool.com...
- Page 15 Mode 2: The compressor electric heating belt starts when the outdoor ambient temperature is below 28.4°F (-2°C) and stops when the outdoor ambient temperature is above 32°F (0°C). When the outdoor ambient temperature is within 28.4°F (-2°C)~32°F (0°C), the belt will keep its previous operational state. mrcool.com...
- Page 16 Indoor ambient temperature compensation can be set through the wired controller (E.g. if 02 is selected, it indicates the compensation temperature is 2°C. If the indoor ambient temperature detected by the temperature sensor at the air return is 84.2°F (29°C), the ambient temperature after compensation is 84.2° mrcool.com...
-
Page 17: Installation Of Wired Controller
Before installation, cut of the power supply of the indoor unit. Pull the 2-core STP from inside the wall through the installing hole, and thread the wire through the connecting hole in the back of the controller's sole plate. mrcool.com... - Page 18 There is no polarity for these two wiring terminals, but it should not be connected to a strong current. Buckle the panel of the wired controller with the sole plate, and installation is complete. Removal of Wired Controller mrcool.com...
-
Page 19: Troubleshooting
4-way valve direction changing protection Drive reset protection Over-current protection Communication error between main control and drive Drive module sensor error Drive module over temperature protection Zero passage protection AC current protection Drive current error Sensor connection protection Temperature drift protection mrcool.com... - Page 20 Overheat protection of fan radiator Fan radiator sensor malfunction Fan drive shortage chip malfunction Fan charge circuit malfunction Fan AC input voltage abnormality Fan drive board environment temperature sensor malfunction Fan AC contactor protection or input zero crossing error mrcool.com...
- Page 21 When there is a malfunction during operation, the error will be displayed on the temperature area of the screen. When several malfunctions occur at the same time, these error codes will be displayed circularly. When there is a malfunction, turn off the unit and request professional assistance. For example, E1 means high pressure protection during operation. mrcool.com...
-
Page 22: Unit Installation
1. Spreader bars are required in order to prevent the rigging straps from damaging the unit. 2. All panels must be in place when rigging. 3. The height between the top of the unit and the rigging cables' connection point should be 36- 54in. (914-1371mm) mrcool.com... -
Page 23: Pedestal Requirements
A return air filter must be included in each installation. This filtering may be performed at the unit or externally such as a return air filter grille. Consider the building's condition and convenience of maintenance when selecting an installation method. mrcool.com... -
Page 24: Dimensions
11-13/16 6-3/16 MDPH180244 (113) (445) (420) (87) (101) (390) (300) (157) MDPH180364 Bottom Air Vents Size of Air Return Size of Air Supply 5-4/16 23-1/16 8-10/16 3-11/16 6-3/16 11-14/16 13-12/16 3-10/16 (149) (586) (219) (93) (156) (302) (350) (92) mrcool.com... -
Page 25: Clearance Requirements
4 (103) (199) (166) (300) (390) NOTE Above diagrams may be different from actual model. 3.6 Clearance Requirements Installation Clearances: in(mm) 24 (600) 43 (1100) 34 (860) 43 (1100) 60 (1524) NOTE Above diagrams may be different from actual model. mrcool.com... -
Page 26: Drainage Piping
Note: P is the absolute pressure inside the unit. The unit of pressure is Pa. After the electrical installation is completed, carry out testing of the drainage system. Condensate Drainpipe NOTE Above diagrams may be different from actual model. Model Drain Connection Size MDPH180244 / MDPH180364 / 3/4" (NPT) MDPH180484 / MDPH180604 mrcool.com... -
Page 27: Electrical Wiring
Keep all cables away from the refrigerant pipe, the compressor, and moving parts such as fans. Do not alter the internal line connections inside the unit. MRCOOL shall not be liable for any loss or abnormal operation arising from incorrect line connections. - Page 28 1. Remove the electrical box cover of the unit. 2. Pass the signal cable of the wired controller through the rubber ring. 3. Connect the signal cable to the H1, H2 terminals. 4. Use a cable fastener to bundle and attach the cable. mrcool.com...
- Page 29 MDPH180244 / MDPH180364 / MDPH180484 / MDPH180604 Without electric heater: The unit has been short circuited before leaving the factory. When needing to connect the emergency stop switch, remove the corresponding short-circuit wire. The unit can only be connected to a thermostat or wired controller. mrcool.com...
- Page 30 UNIT INSTALLATION With electric heater: The unit has been short circuited before leaving the factory. When needing to connect the emergency stop switch, remove the corresponding short-circuit wire. The unit can only be connected to a thermostat or wired controller. mrcool.com...
- Page 31 UNIT INSTALLATION The unit has been short circuited before leaving the factory. When needing to connect the emergency stop switch, remove the corresponding short-circuit wire. The unit can only be connected to a thermostat or wired controller. mrcool.com...
- Page 32 UNIT INSTALLATION The actual wiring should always refer to the wiring diagram of the unit. MDPH180244 / MDPH180364 / MDPH180484 / MDPH180604 NOTE Above data is subject to change without notice. mrcool.com...
-
Page 33: Maintenance
If cut-off of water level switch is detected for 8 seconds Full water Water level successively once energized, the system will enter full water protection switch protection. In this case, switch off the unit and then switch it on to eliminate this malfunction. mrcool.com... - Page 34 If the memory chip of drive board is broken, the unit cannot Malfunction of be started. The unit cannot be recovered automatically. If drive memory Drive board the malfunction cannot be eliminated after switching off chip the unit and then energizing the unit several times, replace the drive board. mrcool.com...
- Page 35 The unit cannot be recovered Main control main control automatically. If the malfunction cannot be eliminated after board memory chip switching off the unit and then energizing the unit several times, replace the outdoor main control board. mrcool.com...
-
Page 36: Drive Malfunction Codes
Condenser Fan DC AC input voltage busbar under-voltage abnormality protection Condenser Fan drive Condenser Fan DC board environment busbar over-voltage temperature sensor protection malfunction Condenser Fan AC Condenser Fan AC current protection contactor protection (input side) or input zero crossing error mrcool.com... -
Page 37: Troubleshooting Flowcharts
The user must clean the filter and check the air outlet and air return pipe periodically to ensure smooth operation. mrcool.com... - Page 38 1. If unit enters refrigerant recycling mode through special operation, the displayed E3 is not an error code. It will be eliminated when exiting refrigerant recycling mode. 2. If you do not want to have low refrigerant protection, enter the debugging mode through the wired controller then cancel the low refrigerant protection mode. mrcool.com...
- Page 39 MAINTENANCE E4 Discharge Protection mrcool.com...
- Page 40 MAINTENANCE E6 Communication Malfunction mrcool.com...
- Page 41 MAINTENANCE F0 Malfunction of Indoor Ambient Temperature Sensor F1 Malfunction of Evaporator Temperature Sensor mrcool.com...
- Page 42 MAINTENANCE F2 Malfunction of Condenser Temperature Sensor F3 Malfunction of Outdoor Ambient Temperature Sensor mrcool.com...
- Page 43 MAINTENANCE F4 Malfunction of Discharge Temperature Sensor F5 Malfunction of Wired Controller Temperature Sensor mrcool.com...
- Page 44 MAINTENANCE F6 Condenser Mid-Tube Thermistor Error mrcool.com...
- Page 45 MAINTENANCE H6 Malfunction of Outdoor Fan Motor mrcool.com...
- Page 46 MAINTENANCE E8 Malfunction of Indoor Fan Motor Troubleshooting Flow Chart of Drive Malfunction • P0 Drive Module Reset • P7 IPM temperature sensor error • PA AC current protection (input side) • PC Current sense circuit error mrcool.com...
- Page 47 MAINTENANCE • PH DC busbar over-voltage protection • PL DC busbar under-voltage protection • P6 Drive-to-main-control communication error • LC Compressor Startup Failure mrcool.com...
- Page 48 MAINTENANCE • P5 Compressor current protection • H7 Compressor motor desynchronizing • H5 IPM Protection • Ld Phase loss mrcool.com...
- Page 49 MAINTENANCE • ee Driving board chip error • H6 DC fan error mrcool.com...
-
Page 50: Assembly & Disassembly
Nozzles • Connect vacuum recovery tank with nozzle for adding freon for 3. Recover recovery of refrigerant. refrigerant in the Note: Recovery work must be system complete as refrigerant is harmful to the environment and animals. mrcool.com... - Page 51 Then, tighten 6. Install a new the fixing nut on the compressor compressor on base with a wrench. the chassis. Note: Keep compressor level and vertical on the base. Never incline or invert it. mrcool.com...
- Page 52 9. Recharge Note: Check the leak after finishing refrigerant the connection pipes. Charge amount should be consistent with the nameplate. 10. Close the • Tighten the bolts. front panel Note: Above diagrams may be different from actual model. mrcool.com...
- Page 53 • Remove the holding bolt of motor first, then remove the motor from 4. Remove the the bracket. motor from the bracket Note: Loosen power cord fixed by bundles before removing motor. mrcool.com...
- Page 54 Close the cover plate of electrical box hermetically. No cable should contact the pipe and moving parts, such as the fan. Note: Above diagrams may be different from actual model. mrcool.com...
- Page 55 Re-assemble the repaired or replaced motor. Installation direction is the 5. Re-Install the same as that of disassembly. Then, motor. screw down the holding bolts with a wrench. mrcool.com...
- Page 56 7. Reinstall the Screw down the 2 bolts clockwise. side and front Note: The sleeve has taper, so the plates. pulleys must be installed first. Ensure the coplanarity of the pulleys and adjust the tightness level of the belt. mrcool.com...
- Page 57 • Remove the screws (indicated by the arrows), then take down the main board. 5. Remove the main board. Note: Power cord may be fixed by bundles, so loosen the bundles before removing the main board. mrcool.com...
- Page 58 • Tighten the screws to attach the electrical box cover (indicated by the arrows). cover. 9. Re-Install the • Put the side plate back and tighten the screws. front plate. Note: Above diagrams may be different from actual model. mrcool.com...
- Page 59 Nozzles • Connect vacuum recovery tank with nozzle for adding freon for 3. Recover recovery of refrigerant. refrigerant in the Note: Recovery work must be system complete as refrigerant is harmful to the environment and animals. mrcool.com...
- Page 60 Note: Pay attention to surroundings to avoid burns. • Unscrew the nuts on the compressor base with a wrench 6. Remove the then remove the compressor compressor from from the base. the chassis. Note: Keep compressor level and vertical. Never invert it. mrcool.com...
- Page 61 The line connection must 9. Reconnect match the schematic diagram. power cord of compressor. Note: The connection box of the compressor must be recovered to resist water. No cable should have contact with the pipe or moving parts. mrcool.com...
- Page 62 Charge amount should be consistent with the nameplate. 11. Close the side • Tighten the bolts. panel. 12. Close the • Tighten the bolts. front panel. Note: Above diagrams may be different from actual model. mrcool.com...
- Page 63 • Remove the holding bolt of motor first, then remove the motor from 4. Remove the the bracket. motor from the bracket Note: Loosen power cord fixed by bundles before removing motor. mrcool.com...
- Page 64 Note: After connection, arrange 8. Reconnect the leading wires and refix them with power cord. bundles at original locations. Close the cover plate of electrical box hermetically. No cable should contact the pipe and moving parts, such as the fan. mrcool.com...
- Page 65 Re-assemble the repaired or replaced motor. Installation direction is the 5. Re-Install the same as that of disassembly. Then, motor. screw down the holding bolts with a wrench. mrcool.com...
- Page 66 Note: The sleeve has taper, so the plates. pulleys must be installed first. Ensure the coplanarity of the pulleys and adjust the tightness level of the belt. Note: Above diagrams may be different from actual model. mrcool.com...
- Page 67 • Remove the screws (indicated by the arrows), then take down the main board. 5. Remove the main board. Note: Power cord may be fixed by bundles, so loosen the bundles before removing the main board. mrcool.com...
- Page 68 • Tighten the screws to attach the electrical box cover (indicated by the arrows). cover. 9. Re-Install the • Put the side plate back and tighten front plate. the screws. Note: Above diagrams may be different from actual model. mrcool.com...
-
Page 69: Exploded Views & Spare Parts List
MAINTENANCE 4.5 Exploded Views & Spare Parts List MDPH180244 / MDPH180364 mrcool.com... - Page 70 Brush-less DC 15010400001403 Motor Terminal Board 4201025502 Condenser 000100060715 Assembly Terminal Board 42200006005405 Electronic 072009060018 Electronic Expansion Valve 072009060033 Expansion Valve Bidirection 0721004401 Nozzle for Adding Strainer 06120012 Freon Rear Grille 01600106015001 Pressure Protect 4602000919 Switch Rear Grille 01600106015001 mrcool.com...
- Page 71 MAINTENANCE MDPH180484 / MDPH180604 mrcool.com...
- Page 72 Pressure Protect Switch 4602000910 One Way Valve 071001060011 Electronic Expansion Valve 072009060008 Electric Expant Valve Fitting 4300034502 Nozzle for Adding Freon 4300034502 Compressor & Fittings 009001060980 Gas-Liquid Separator 035027060001 Gas Tube Filter 072190512 Strainer 035021060018 Evaporator Assembly 011001062607 Main Board 300027063061 mrcool.com...
- Page 73 Centrifugal Fan Housing 1570220301 Rear Grill 01600106012101 Filter Sub Assembly 111001060370 Display Board 300001000204 Sensor Sub Assembly 390002060379 Electrical Heater (Compressor) 7651521216 Electric Expand Valve Fitting 07200206002342 4 Way Valve Coil 07201006000601 Electronic Expansion Valve 072009060011 Plate-Type Heat Exchanger 00904100004 mrcool.com...
- Page 74 Universal Series ® Inverter Packaged Heat Pump The design and specifications of this product and/or manual are subject to change without prior notice. Consult with the sales agency or manufacturer for details.
Need help?
Do you have a question about the Universal Series and is the answer not in the manual?
Questions and answers