
Related Manuals for LFA TDP 6s


Summary of Contents for LFA TDP 6s
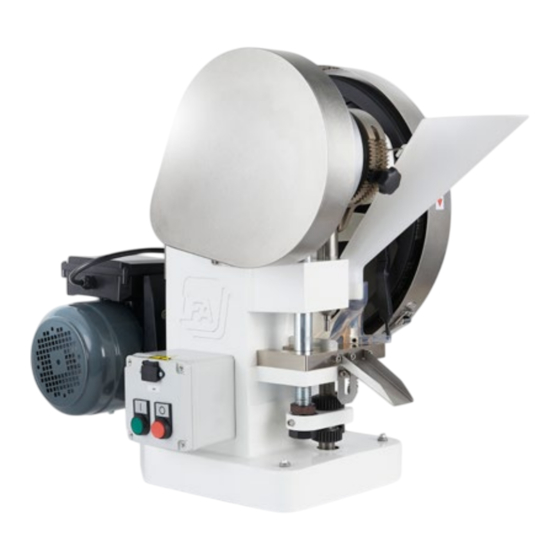
- Page 1 TDP 6s Tablet Press User Manual ® We don’t just sell machines— we provide service.
-
Page 2: Personal Protection
Copyright Notice READ THIS BEFORE OPERATING MACHINE © LFA Machines Oxford Limited, published in 2024 by LFA Machines Oxford Limited 2024. Registered in England and Wales, company number 08428898, registered office for service Demar House 14 Church Road East Wittering, Chichester, West Sussex, PO20 8PS. -
Page 3: Modes For Stopping
Due to the nature and design of this machine and its intended use in an industrial environment, it is important that before use it is installed in a cage with a mode of stopping on the outside of the cage. LFA Machines has decided that we can not possibly foresee all of the environments WARNING... -
Page 4: Table Of Contents
Training via Video Chat/Phone LFA Articles LFA Videos Installation Tools and Materials Needed The Appropriate Workstation for the Machine Assembly Mounting the TDP 6s ® Manual and Electrical Controls Settings and Adjustment Maintenance General Maintenance Prescriptions Lubrication Dismantling for Repair and Replacement... -
Page 5: Tdp 6S ® Parts List
® is popular with a range of industries such as hospitals, research facilities, and laboratories in the pharmaceutical, food, and chemical industries. The purpose of this document is to support your understanding of the TDP 6s ® ’s components, features, functions, and design. With this manual, you will be able to successfully operate and maintain your TDP 6s ®... -
Page 6: Training
• Mounting materials such as: LFA offers free training at our UK, USA, and Taiwan facilities for all our customers and their teams. • Non-slip pad (such as a yoga mat cut to fit the machine's base) OR anti-vibration pads For more information, go to https://www.lfatabletpresses.com/services... - Page 7 1.1 Note: Hammer the clips even further down to aid in removing the shipping container from the base. 2. Lift the top of the shipping container from its base, which is bolted to the TDP 6s ® 3. Remove the plastic wrapping.
-
Page 8: Assembly
Tools and Materials Needed • Engine hoist and lifting strap Instructions 1. Secure the engine hoist onto the eyelet bolt attached to the top of the TDP 6s Base. ® 2. Wrap the lifting strap to support both the bottom and top of the TDP 6s ®... -
Page 9: Manual And Electrical Controls
TDP 6s . There are other options as well that can prevent the TDP 6s from moving, which are ®... - Page 10 Die. • Sterile shoe covers (food grade products only) When the machine is operated by the motor, the Gearing initiates the movement of the Top Cam WARNING: For personal protection while operating the TDP 6s ® , contain long Drive Shaft, which withdraws the Upper Punch from the Die and sets the Lower Punch at the level hair and do not wear loose jewelry.
-
Page 11: Settings And Adjustment
• Disposable latex/rubber gloves (for food grade products and to protect hands from grease) • Hairnet and/or beard net (food grade products only) • Sterile shoe covers (food grade products only) WARNING: To prevent any potential personal injury, unplug the TDP 6s ® from... - Page 12 • Sterile shoe covers (food grade products only) Instructions Note: Wear latex/rubber gloves (and appropriate food grade attire if applicable) during this process. WARNING: To prevent any potential personal injury, unplug the TDP 6s from ® the electrical outlet. 5. Replace the bar in the Lower Drift Pin Assembly Locking Bar with an Allen key.
-
Page 13: Maintenance
0 kN to 60 kN. Regularly greasing your machine is vital to prolonging its operational life. Parts that are not greased properly can make the machine seize up and cause major problems later. LFA recommends maintaining a lubrication schedule for your TDP 6s , which can be found in this ®... - Page 14 4. Lubricate the holes inside of the eccentric sheave with grease. 1. Rub a finger’s worth of grease on the Boot Timing Cam’s side. 1.1 Note: Be sure to lubricate the Boot Timing Cam Runner. 2. Lubricate the Top Cam Drive Shaft's Grease Nipples with the grease gun. 2.1 Note: Rotate the Hand Wheel during this to ensure grease gets in.
-
Page 15: Dismantling For Repair And Replacement
Lower Punch Warranty To access LFA's warranty policy, go to https://www.lfatabletpresses.com/warranty If your part is eligible for warranty, have your part’s serial number on hand and please contact LFA: Tooling (after Storage container Apply after cleaning Mineral oil... -
Page 16: Tooling
If you want to change the shape and diameter of the tablet, or if the Upper Punch, Lower Punch, 3. Loosen the Boot’s set screw with an Allen key. and/or Die you currently have is damaged, it is necessary to change the Tooling. To buy new Tooling from LFA, simply go to https://www.lfatabletpresses.com/products/tablet- press-tooling To watch a video of a TDP ®... - Page 17 Drift Assembly in place with another 22 mm wrench. 14.1 Note: If you cannot remove by hand, carefully use grippers or pliers. Note: To help ensure that the Die is inserted correctly, LFA recommends using an Insertion Ring. You can order the Die Seat Cleaner and Insertion Ring on our website at https://www.
- Page 18 17. Place the Base Plate onto the TDP 6s ® Base. 23. Reinsert the Base Plate's bolts while the Upper Punch is still inside the Die. 18. Insert the new Die into the middle of the Base Plate. 23.1 Note: The Die's set screw can be fully tightened now.
-
Page 19: Boot Timing Bar
4. Remove the top part of Boot Timing Bar from the Boot Timing Cam. 4.1 Note: To make removal easier, turn the Handle to rotate the Boot Timing Cam so you This part can become warped from collision, and it is critical to the TDP 6s ’s operation. If you ®... -
Page 20: Boot
Boot 4. Remove the Boot Bolt and Spring underneath the Boot. Due to its constant movement, the Boot can wear down and prevent granular material from flowing smoothly. Replacing this part is a simple process. To watch a video of Boot removal, go to https:// www.lfatabletpresses.com/videos/how-to-remove-the-boot-timing-bar-on-a-tdp-5 Tools and Materials Needed... -
Page 21: Belts
6s from the electrical outlet when replacing parts. 4. Adjust the nuts on the Motor Support Arm to tighten the V Belts. Instructions 4.1 Note: The further away the Motor Mounting Plate is from the TDP 6s ® , the tighter the V Note: Wear latex/rubber gloves (and appropriate food grade attire if applicable) during this process. -
Page 22: Troubleshooting
Troubleshooting Symptom Possible Cause Possible Solution Sometimes unavoidable issues will occur while operating the TDP 6s ® . Fortunately, there are several methods to remedy these issues. Boot is blocked and not enough Check the Boot for a potential clog. -
Page 23: Common Tablet Issues
If the machine is able to make tablets with LFA's Firmapress , then the problem is ® WARNING: To prevent any potential personal injury, ALWAYS unplug the TDP 6s ® your mix. Adjust your formulation. If still before de-jamming it. -
Page 24: Cleaning
’s operation, excess powder will find its way into parts of the machine, ® particularly in the Base, Hopper, Boot, Base Plate, and Tooling. It is important to clean the TDP 6s ® thoroughly to prevent rusting and cross contamination. To watch a video on how to clean a similar machine, go to https://www.lfatabletpresses.com/videos/cleaning-your-tdp-5-tablet-press... - Page 25 8. Turn the Hand Wheel until the Upper Drift Pin Assembly is lowered. 4. Loosen the Boot’s set screw with an Allen key. 9. Loosen the Upper Punch Die Locking Nut with a wrench while keeping the Upper Punch Drift Assembly in place with another wrench.
- Page 26 18. Rinse the cleaner off with potable water. 19. Sanitize the TDP 6s Base with a clean cloth. ® Note: Before washing the Base Plate, LFA recommends using our Die Seat Cleaner. You can order the Die Seat Cleaner and Insertion Ring on our website at https://www.lfatabletpresses.com/...
-
Page 27: Storing The Tdp 6S
It is important 2.1 Note: Rotate the Hand Wheel during this to ensure grease gets in. to store it in an environment in which the machine is safe from rusting. The TDP 6s ®... -
Page 28: Appendix
The adjustable amount of force that is used to Punch pressure press tablets. LFA trademarked term for desktop tablet press. ® Enables a tablet press to form tablets. It Tooling consists of a Die, Upper Punch, and Lower... - Page 29 Order at https://www.lfatabletpresses.com/boot-timing- cam-tdp-6s-v2 Top Cam Drive Shaft (#AFC0037) All other TDP 6s ® parts are connected to the Top Cam Drive Shaft. As it is turned, all the Upper Drift Pin Assembly (#AFC0002) parts of TDP 6s ®...
- Page 30 Punch and helps push the tablets out of the Die. in place in the Die while the Upper Punch pushes Order at https://www.lfatabletpresses.com/lower- TDP 6s ® Base and can be either 110 v or 220 down to form the tablet in the middle. Order at v.
- Page 31 Drive Belt Pulley (#AFC0059) This Drive Belt Pulley fixes on the Motor's keyed axel and has grooves that the V Belts fits into. The V Belts are also connected to the Hand V Belts (Drive Belt) (#H108013038) Wheel. Order at https://www.lfatabletpresses.
-
Page 32: List Of Electrical Components
List of Electrical Components Maintenance Checklist Name of Part Part Manufacturer Part Serial Number Quantity Link to Manufacturer's Site Before Operation Red Switch Rockwell Automation 800FD-F4X11 Rockwell Automation □ Visually inspect the tablet press and the parts. □ Ensure all locking nuts are tight. Green Switch Rockwell Automation 800FD-F4X11... - Page 33 TDP 6s Tooling Dimensions TDP 6s Mounting Diagram ® ® T D P ® I n t e r n a t i o n a l T o o l i n g S t a n d a r d D i m e n s i o n s...
- Page 34 TDP 6s Exploding Diagram TDP 6s Dimensions ® ®...
- Page 35 TDP 6s Wiring Diagram 1 TDP 6s Wiring Diagram 2 ® ®...
- Page 36 TDP 6s Sub-Assemblies of Parts TDP 6s Sub-Assemblies of Parts ® ®...
- Page 37 TDP 6s Sub-Assemblies of Parts TDP 6s Sub-Assemblies of Parts ® ®...
- Page 38 TDP 6s Sub-Assemblies of Parts TDP 6s Sub-Assemblies of Parts ® ®...
- Page 39 TDP 6s Sub-Assemblies of Parts TDP 6s Sub-Assemblies of Parts ® ®...
- Page 40 TDP 6s Sub-Assemblies of Parts TDP 6s Sub-Assemblies of Parts ® ®...
-
Page 41: Resources
In order to aid you in your tablet production, aid that will hopefully support you in your LFA Machines maintains a website that offers tablet production efforts. To watch our videos, a breadth of useful information about the TDP visit https://www.youtube.com/channel/... - Page 42 LFA MACHINES Copyright © 2024 by LFA Machines www.lfamachines.com Germany Taiwan United Kingdom United States Business Parc Am Unit 4B 6601 Will Rogers Blvd 7F.-5, No. 2, Sec. 2 Trippelsberg 92 Murdock Road Fort Worth Taiwan Blvd., West Dist., Düsseldorf...
Need help?
Do you have a question about the TDP 6s and is the answer not in the manual?
Questions and answers