KKT cBoxX 40 Operating Instructions Manual
Hide thumbs
Also See for cBoxX 40:
- Operating instructions manual (89 pages) ,
- Operating instructions manual (77 pages) ,
- Operating instructions manual (90 pages)

Related Manuals for KKT cBoxX 40


Summary of Contents for KKT cBoxX 40
- Page 1 Compact-Line Healthcare Operating instructions cBoxX 40 cBoxX 60 cBoxX 70 cBoxX 80 cBoxX 100 cBoxX 120 cBoxX 160 cBoxX 180...
- Page 2 5-1-D, No. 333 Xingpu Road Modern Industrial Park Suzhou 215021, Jiangsu Province, P.R.C. S +86 512 6790 3091* F +86 512 6287 1077 service@kkt-chillerscn.com The operating instructions in digital form can be requested under (E info@kkt-chillers.com) 2 / 100 83001602.k...
-
Page 3: Introduction
Introduction These operating instructions have been drawn up by KKT chillers. They contain all important information and instructions for the installation and safe operation of the chiller. It also contains suggestions on how to prevent or correct faults. Please take enough time to carefully read this instruction manual and to process all the information that it contains. -
Page 4: Table Of Contents
Contents Introduction ............................. 3 Product description ........................8 1.1. Intended use ........................8 1.2. Technical data ........................9 1.2.1. Technical data closed loop ..................9 1.2.2. Technical data open loop ..................16 1.3. Elements ........................... 21 1.4. Explanation of terms ......................22 Function and main components ..................... - Page 5 3.12. Seaworthy crate packaging (accessories) ..............32 3.13. Earthquake kit (accessories) ................... 32 3.14. CIP Chiller interface panel (accessories) ................ 33 Safety............................33 4.1. General information ......................33 4.2. Hazard warnings ......................33 4.3. Residual energy........................ 36 4.4. Safety devices, guards and safeguards ................. 37 4.4.1.
- Page 6 Installation ..........................49 6.1. Overview ........................... 49 6.2. Installation site ......................... 49 6.2.1. General information ....................49 6.2.2. Minimum room volume .................... 50 6.2.3. Ambient temperature ....................50 6.2.4. Effect of surrounding air flow .................. 50 6.2.5. Minimum clearances ....................50 6.2.6.
- Page 7 8.7.9. Group fault alarm ..................... 63 8.8. Execution types ........................ 63 8.8.1. ECO mode ......................... 63 8.8.2. Comfort mode ......................63 Cleaning ........................... 63 9.1. Air filter mat ........................63 9.2. Condenser ........................63 9.3. Water filter ........................63 9.4. Complete cleaning of the cold water circuit ..............
-
Page 8: Product Description
Please read all the points in these operating instructions before starting up the machine. You should pay particular attention to the points on safety, commissioning/startup and operation. Should you have any further questions concerning your machine, please contact the KKT chillers Service Team (see Contact details). -
Page 9: Technical Data
796 mm / 1186 mm Socket dimensions (Weight / Length) Net weight without cooling medium 475 kg 480 kg 475 kg 475 kg Pumps Quantity Certificates ETL/CSA ETL/CSA * depending on application, see KKT installation guideline 9 / 100 83001602.k... - Page 10 Net weight without cooling medium 515 kg 540 kg 515 kg 540 kg 540 kg 540 kg 540 kg 584 kg Pumps Quantity CE/ ETL /CSA/ Certificates CE/ETL/CSA CE/ ETL /CSA seismic * depending on application, see KKT installation guideline 10 / 100 83001602.k...
- Page 11 Net weight without cooling medium 680 kg 680 kg 680 kg 680 kg 665 kg 724 kg 665 kg Pumps Quantity CE/ ETL /CSA/ Certificates CE/ ETL /CSA seismic * depending on application, see KKT installation guideline 11 / 100 83001602.k...
- Page 12 830 mm Length Chiller 1.840 mm Socket dimensions 796 mm / 1.786 mm (Weight / Length) Net weight without cooling medium 680 kg 680 kg Pumps Quantity Certificates * depending on application, see KKT installation guideline 12 / 100 83001602.k...
- Page 13 (Weight / Length) Net weight without cooling medium 751 kg 701 kg . 751 kg 751 kg 701 kg Pumps Quantity Certificates ETL /CSA ETL /CSA/seismic ETL /CSA * depending on application, see KKT installation guideline 13 / 100 83001602.k...
- Page 14 1.086 mm / 2.569 mm (Weight / Length Net weight without cooling medium 1.046 kg 1.046 kg 1.046 kg 1.046 kg Pumps Quantity Certificates ETL /CSA ETL /CSA * depending on application, see KKT installation guideline 14 / 100 83001602.k...
- Page 15 3.965 mm Socket dimensions 1.086 mm / 2569 mm 1.086 mm / 3894 mm (Weight / Length) Net weight without cooling medium 1.200 kg 1.300 kg Pumps Quantity Certificates * depending on application, see KKT installation guideline 15 / 100 83001602.k...
-
Page 16: Technical Data Open Loop
Width Chiller 1240 mm Length Chiller 796 mm / 1.186 mm Socket dimensions (Weight / Length) Net weight without cooling medium 540 kg Pumps Quantity CE + ETL/CSA Certificates * depending on application, see KKT installation guideline 16 / 100 83001602.k... - Page 17 Width Chiller 1240 mm Length Chiller 796 mm / 1.186 mm Socket dimensions (Weight / Length) Net weight without cooling medium 620 kg Pumps Quantity Certificates CE + ETL/CSA * depending on application, see KKT installation guideline 17 / 100 83001602.k...
- Page 18 Width Chiller Length Chiller 1840 mm Socket dimensions (Weight / Length) 796 mm / 1.786 mm Net weight without cooling medium 650 kg Pumps Quantity CE + ETL/CSA Certificates * depending on application, see KKT installation guideline 18 / 100 83001602.k...
- Page 19 Width Chiller 1.840 mm Length Chiller 796 mm / 1.786 mm Socket dimensions (Weight / Length) 720kg Net weight without cooling medium Pumps Quantity Certificates CE + ETL/CSA * depending on application, see KKT installation guideline 19 / 100 83001602.k...
- Page 20 1.100 mm 2.665 mm Length Chiller 1.086 mm / 2.569 mm Socket dimensions (Weight / Length) Net weight without cooling medium 1100 kg Pumps Quantity Certificates CE + ETL/CSA * depending on application, see KKT installation guideline 20 / 100 83001602.k...
-
Page 21: Elements
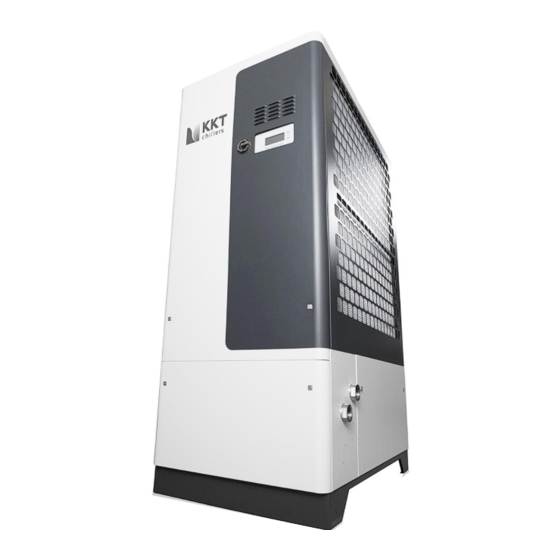
1.3. Elements Figure 1: Elements Cover panel operating side top Safety instructions Cover panel operating side bottom Water connections Cover panel service side top Nameplate Cover panel service side bottom Display Cover panel condenser protection grilles Main switch Cover panels hydraulics 21 / 100 83001602.k... -
Page 22: Explanation Of Terms
1.4. Explanation of terms For the sake of better understanding, we have listed some relevant terms that are used frequently in this document. Table 4: Explanation of terms Term Explanation Application The source of heat hydraulically connected to the chiller. Process circuit Application and piping to the chiller. -
Page 23: Compressor
R410A is a fluorinated greenhouse gas consists of the zeotropic mixture 50% R32 and 50% R125 with virtually negligible temperature glide. R410A has a very high volumetric cooling capacity and has no ozone depletion potential (ODP=0). A corresponding safety data sheet can be requested from our KKT chillers Service Team (see: Contact details). -
Page 24: Filter Dryer
A corresponding safety data sheet can be requested from our KKT chillers Service Team (see: Contact details). 2.7. Filter dryer The task of the filter dryer is to absorb any contamination or moisture from the cooling circuit. Both refrigerant and oil are hygroscopic. -
Page 25: Pump
2.13. Pump The pump of the chiller provides for the necessary circulation of the cold water. 2.14. The fan draws in the cooling air from the environment via the condenser and discharges the heated air upward from the chiller. To prevent injuries, the fan is protected against accidental contact by protective grilles. -
Page 26: Filling A Open Loop Cold Water Circuit
2.16.1. Filling a open loop cold water circuit If the hydraulic installation of the overall system has been completed the chiller can be filled. All shut-off valves in the cold water circuit must be opened. ATTENTION! Only use approved refrigerants, see Chapter 2.18 and 2.19! If there is a risk of frost, note Chapter 11 Taking out of service! All operating liquids must be mixed before they are added to the system! Procedure for chillers with integrated tank:... -
Page 27: Level Package (Accessories)
2.17. Materials used in the water circuit In the standard version, the material compilation is depicted as shown in Table 5: Table 5: Materials used in the standard version Material (cBoxX 40 – cBoxX180) Component Unit connections V2A 1.4305 Evaporator V2A 1.4301 and copper (99.9%) -
Page 28: Water Quality
Furthermore, any occurrence of mucilage bacteria in the cooling water must be ruled out. If this is not possible, KKT chillers can suggest or provide a suitable inhibitor on the basis of a biological water analysis to remove the mucilage agents. -
Page 29: Permitted Coolant Media
The positions marked with "accessory" are included with the device, unattached, and can be re-ordered at any time with the respective product number. The installation of the accessory is the responsibility of the installer of the machine. You can also ask our KKT chillers Service Team to arrange for this installation (see Contact details). -
Page 30: Heater For The Compressor And Control Cabinet
3.1. Heater for the compressor and control cabinet The oil sump heater prevents the deposit of refrigerant in the oil when the temperature is low. When the compressor is started up this refrigerant would be liberated from the oil as gas and make the oil foam up. Under these conditions the lubrication of components subject to friction in the compressor would be poor, which could lead to the damage of the compressor. -
Page 31: Filter Assembly Group Coolant Circuit (Accessories)
adjusted and compensates for floors sloping by up to 5°. The elastic element has a slip-resistant covering. Figure 5: Machine base (foot) - outside view Figure 6: Machine base (foot) - mounting on the baseplate show the installed machine foot – the technical drawing is given in the appendix. (Attention: Not allowed in combination with the earthquake kit) The Seismic feets (Figure 7: Seismic feets are used for seismic and high wind gust... -
Page 32: Special Languages (Accessories)
The remote control panel can be connected to the chiller via the RS485 interface and takes over the complete function of the controller in the main device. By setting the accordant bridge in the control cabinet cabinet of the main device, the required operating place can be chosen. 3.11. -
Page 33: Cip Chiller Interface Panel (Accessories)
3.14. CIP Chiller interface panel (accessories) The CIP accessory is a transfer station that can be installed in the customer's cold-water circuit. The transfer station is made of steel and contains a water filter, a flow rate indicator, inlet and outlet valve, pressure and temperature display as well as a connection to an emergency cooling system. - Page 34 Table 7: Definition of the safety symbols Observe the instruction manual! Before opening the machine, disconnect the machine from the power supply. The machine may only be opened 5 minutes after it has been disconnected from the power supply. Beware of dangerous electrical voltage! If the machine is only turned off by means of the main switch, some of the terminals in the control cabinet will still be under dangerous voltage.
- Page 35 Table 8: Hazard warnings ATTENTION! Work on the chiller must be carried out by properly qualified, competent personnel! The surfaces of pipes and components of the refrigerant and cold water circuit and electrical equipment can be very hot during operation and even for a while after. The surfaces of pipes and components of the refrigerant and cold water circuit and electrical equipment can be very hot during operation and even for a while after.
-
Page 36: Residual Energy
4.3. Residual energy Even if all the hazard warnings in Chapter 4.2 are taken into account, the following residual energy situations can result in a hazard: ▪ Rotational energy of the decelerating fan Despite the installed protective grille, hair or pieces of clothing can still be drawn in and caught. -
Page 37: Safety Devices, Guards And Safeguards
It is part of the safety chain. The PZH is installed on the refrigerant collector for the chiller types cBoxX 40 – cBoxX 180 (see Figure 11: Position of the high pressure limiter (PZH)). -
Page 38: Flow Monitoring
4.4.3. Flow monitoring If the flow rate of the cold water, which is pumped through the evaporator is too low, there is a risk of freezing. For this reason, the pressure at the evaporator inlet is monitored continuously. If the pressure falls below the preset value, the “Flow warning”... -
Page 39: Switching The Chiller On/Off
• Tank min level warning; the chiller continues running but does not switch back on in the event of a stoppage. The water feed solenoid valve (only with optional automatic water top-up) is opened. • Tank max level message; the cold water feed, water feed solenoid valve (only with optional automatic water feed) is closed. -
Page 40: Cold Water Flow Temperature Control
4.5.3. Cold water flow temperature control In the normal case the sensor in the tank (system with tank, with pump) is used to control the cold water feed temperature. If this sensor fails, the control switches internally to the sensor in the cold water return and the target value (setpoint value) is increased by a defined value. -
Page 41: Fan Speed Control
transmitter. This also switches off the compressors if the setpoint is exceeded, but releases them again if the value falls below the release value. Before switching off the, high-pressure transmitter signals a warning. Low pressure is also monitored by pressure transmitters. If the value falls below the setpoint the compressors switch off. -
Page 42: Airborne Sound Emissions
Cleaning and maintenance work in accordance with Chapter 10 Service. Before work is carried out on the chiller the protective equipment described in Table 7: Definition of the safety symbols must be used. Table 9: Personal protective equipment for servicing work Wear foot protection! Wear hand protection! Wear eye protection! -
Page 43: Vibration
Details of your chiller's airborne sound emissions are given in Chapter 4.7. To reduce noise pollution caused by airborne sound emissions it is advisable to install the chiller out of doors and out of the range of workplaces. If this is not possible we recommend that when the unit is installed attention is paid to ensuring that the air intake side is not pointed directly at a workplace/workstation. -
Page 44: Dangerous Substances
ATTENTION! Risk of suffocation if the chiller is installed in a room that is too small please note and follow chapter 6.2.2. ATTENTION! In the EU you must follow the provisions of EN378-3. Please also note and follow the local installation regulations and provisions, especially the ordinance on handling water pollutant substances and BGR500. -
Page 45: Öl Poe 160Sz
Personal protective equipment: ▪ Respiratory protection: not necessary if adequate ventilation available. Self-contained or air-line breathing apparatus within enclosed rooms, if insufficient oxygen supply available, in case of substantial or uncontrollable release. Only use breathing apparatus in accordance with the international / national standards. -
Page 46: Reasonably Foreseeable Misuse
Chillers with refrigerant capacity >12 kg must be declared as dangerous goods in accordance with UN2857. The cBoxX 40 – cBoxX 70 chillers have been specified so that they contain <12 kg refrigerant. This reduces the logistics costs of our customers and final consumers. -
Page 47: Transport
It is possible to transport the machine both in a packed and an unpacked condition by means of fork lift truck. Please note that the centre of gravity may vary depending on the model. Figure 12: center of gravity cBoxX 40 – cBoxX 60 Figure 13: center of gravity cBoxX 70 – cBoxX 100 47 / 100 83000102.Kk... -
Page 48: Unpacking
Figure 14: center of gravity cBoxX 120 – cBoxX 160 Figure 15: center of gravity cBoxX 180 5.3. Unpacking ATTENTION! Packing straps are mechanically stressed and can snap back when cut. Risk of injuries! Remove all straps, films, corner protectors and spacers carefully. Optional accessories may be located under the film. -
Page 49: Storage
Packaging tape Polypropylene Strapping seals Steel, galvanized Untreated raw wood, spruce or pine without Wooden pallet bark 5.4. Storage If the chiller is stored for more than one month, it should remain in the transport packaging or be repacked. The following conditions must be noted for storage: ▪... -
Page 50: Minimum Room Volume
6.2.2. Minimum room volume The refrigerant R410A contained in the system is classified in safety group A1 in accordance with EN 378-1 Table E.2. I.e. the refrigerant is not flammable and has low toxicity. If the chiller is installed in enclosed rooms without additional safety measures a minimum room volume is required. -
Page 51: Surface And Foundation
6.2.6. Surface and foundation The surface on which the machine is installed must be flat and horizontal. All the machine's feet must have uniform contact with the ground. Ensure that the ground/subsoil has sufficient load bearing capacity. According to the installation instructions a continuous concrete foundation with the given minimum size is recommended. -
Page 52: Hydraulic Installation
6.2.11. Hydraulic installation The system designer is responsible for choosing the material and the cross-section of the hydraulic connections between the chiller and the application. Other dependent factors include the accepted pressure loss in the connection lines and the available pump pressure. When designing the connections attention must also be paid to the minimum flow rate to be maintained and sufficient resistance to the maximum pump pressure. -
Page 53: Venting
6.2.14. Venting If your chiller contains a horizontal pump, the pump does not have to be vented. Before switching on the pump the vent plug must be opened at the automatic vent and left open while the unit is running until all air has completely escaped from the pump body (see Figure 16). -
Page 54: Commissioning
The supply cable must be routed into the machine. Cut-outs are provided for this purpose in the baseplate and in the compressor mount (cBoxX 40 – cBoxX 100). Feed the supply cable, protected by rubber grommets, through these openings... -
Page 55: Installation Checklist
7.1. Installation checklist ▪ Unit installed horizontal and stable? ▪ Any vibration damping and floor anchors installed? ▪ Spaces / clearances around the unit are adequate according to the requirements? ▪ Air intake side free from packaging materials, etc.? ▪ Hydraulic connection OK? ▪... -
Page 56: External Release
8.3. External release The contact for external release is bridged in the delivery state. An external control line can be wired instead of the bridge. Please refer to Chapter 6.2.15 Electrical installation for information on installing the external release. Fully automatic operation starts with this external release. 8.4. -
Page 57: Start Screen
Use the "UP" and "DOWN" buttons to select the required menu item. The selected menu item is displayed with inverse text. Press the "OK" button to return to or exit the selected menu. The data is accepted at the end of the menu by selecting the box with the tick/checkmark. In the Start screen the "right" arrow points towards the Main menu. -
Page 58: Main Menu
8.5.2. Main menu Figure 21: Main menu From the Main menu you can move into the submenus or return to the Start screen. For the structure of the individual submenus see Fehler! Verweisquelle konnte nicht gefunden werden. REF _Ref53583081 \h \* MERGEFORMAT Fehler! Verweisquelle konnte nicht gefunden werden., starting on page Fehler! Textmarke nicht definiert.. -
Page 59: Alarm Menu
Sensor configuration 8.5.5. Alarm menu In the alarm menu the alarms are listed. The alarm is acknowledged if the "OK" button is pressed for longer than eight seconds. (after five seconds, the display switches back to the start menu) • active: The alarm is still active. -
Page 60: Controller Description
The specific parameter list for your application is enclosed with the unit. 8.7. Controller description 8.7.1. Thermostatic pump start To save energy, the consumer pump is not operated permanently, but cyclically. An evaporator pump, if present, is also controlled. The tank heater or compressor is released after a short circulation of the cold water. -
Page 61: Cold Water Flow Temperature Control
• Release of the cold water feed or return sensor, • No exceeding of the cold water feed temperature, • Release through tank level monitoring, • Approval by cold water pressure monitoring on evaporator. A primary pump is released if: •... -
Page 62: Compressor Control
Heating = Y- cooling electric controller Compressor 4 on 100 % Compressor 3 on 75 % Compressor 2 on 50 % Compressor 1 on 25 % Compressor 1 off - 25 % Temperature Compressor 2 off - 50 % Compressor 3 off - 75 % Compressor 4 off - 100 %... -
Page 63: Electronic Expansion Valve Control
) must be checked for contamination 3.19 Air filter mat at least once a month. The correct air filter mats can be ordered at any time as an original spare part – please contact our KKT chillers Service Team ( details). Contact 9.2. -
Page 64: Water Filter
9.4. Complete cleaning of the cold water circuit Due to the complexity and diversity of the possible external materials, we recommend that the complete cleaning of the cold water circuit only be carried out by qualified personnel – please contact our KKT chillers Service Team ( details). -
Page 65: Spare Parts
To ensure that the performance of your chiller is not impaired, we recommend that you only use original spare parts purchased from KKT chillers. In this way you ensure the reliability and quality of the machine. For spare parts enquiries, please contact our KKT chillers Service Team spareparts@kkt-chillers.com or (Contact details). -
Page 66: Recycling
A specialised disposal company must be contracted to dispose of these wastes. They issue a proof of disposal which must be archived. The chiller can be returned to KKT chillers for disposal. Please contact our KKT chillers Service Team for details ( details). -
Page 67: Menu Navigation
Menu navigation Attention: The parameters specified here serve only as an example. For the parameterization relevant to your chiller, please refer to the parameter set included in the unit. Main menu Information Information Settings Measuring Measuring Alarm menu Energy meter Pressure pump 1 Control Panel Operating hours... - Page 68 Main menu Information Information Settings Measuring Alarm menu Status Status Control Panel Energy meter DI resetswitch Software update Operating hours DI remote start 1 Datalog export Digital inputs DI remote start 2 Datalog stop Digital outputs DI phase monitoring Analogue inputs DI mpcb Pump 1 Analogue outputs DI flow pump 1...
- Page 69 Main menu Information Information Settings Measuring Alarm menu Status Control Panel Energy meter Energy meter Software update Operating hours U L1 N Datalog export Digital inputs U L2 N Datalog stop Digital outputs U L3 N Analogue inputs I L1 Analogue outputs P L1 N Software status...
- Page 70 Main menu Information Information Settings Measuring Alarm menu Status Control Panel Energy meter Software update Operating hours Datalog export Digital inputs Digital inputs Datalog stop Digital outputs DI1 clip 1,2 Analogue inputs DI1 clip 3,4 Analogue outputs DI1 clip 5,6 Software status DI1 clip 7,8 Test point 1...
- Page 71 Main menu Information Information Settings Measuring Alarm menu Status Control Panel Energy meter Software update Operating hours Datalog export Digital inputs Datalog stop Digital outputs Analogue inputs Analogue inputs Analogue outputs AI1 clip 1,2 Inc. Software status AI1 clip 1,4 Inc.
- Page 72 Main menu Information Information Settings Measuring Alarm menu Status Control Panel Energy meter Software update Operating hours Datalog export Digital inputs Datalog stop Digital outputs Analogue inputs Analogue outputs Software status Software status Test point 1 Display 3.24 Error memory Controller ES910 3.24 Test point 1...
- Page 73 Main menu Information Settings Settings Alarm menu Limit monitoring Limit monitoring Control Panel Control Limit temperature cooling water Software update Control pump Time delay Datalog export Control compressor Outlet temp. Datalog stop Chiller configuration Running delay Sensor configuration Outlet max STOP 32.0 °C Outlet max warning...
- Page 74 Settings Limit monitoring Control Control Control pump Thermost. pump start Thermost. pump start Control compressor Control pump 1 Interval pressure Basics Control pump 2 Time delay pressure Chiller configuration Control cold water Runtime temperature Sensor configuration Control hot gas bypass Minimum Control cold water Setpoint...
- Page 75 Settings Limit monitoring Control Control Control pump Thermost. pump start Control compressor Control pump 1 pressure Basics Control pump 2 pressure Chiller configuration Control cold water Control hot gas bypass temperature Sensor configuration Control hot gas bypass Start relief sec. Control cold water Output control 2point valve...
- Page 76 Superheating min Superheating max 18.0 Number of alarms / hour Start Opening minimum Delay time sec. 76 / 100 83000102.Kk...
- Page 77 Settings Limit monitoring Control Control Control pump Thermost. pump start Control compressor Control pump 1 pressure Basics Control cold water temperature Chiller configuration Control hot gas bypass Sensor configuration Control cold water valve Control tank heating Control EEV superheating Control condensation Control condensation Control cooling water Control cooling water...
- Page 78 Settings Limit monitoring Control Control Control pump Thermost. pump start Control compressor Control pump 1 pressure Basics Control cold water temperature Chiller configuration Control cold water temperature Sensor configuration Control hot gas bypass Control cold water valve Control tank heating Control condensation Control cooling water Control ESS free cooling...
- Page 79 Main menu Information Settings Settings Alarm menu Limit monitoring Control Panel Control Software update Control pump Control pump Datalog export Control compressor Delay control sec. Datalog stop Basics After-run time sec. Chiller configuration Pump after-run time sec. Sensor configuration Switch flow sensor Delay start sec, Delay running...
- Page 80 Main menu Information Settings Settings Alarm menu Limit monitoring Control Panel Control Software update Control pump Datalog export Control compressor Control compressor Datalog stop Basics Compressor type Chiller configuration Year of construction 2018 Sensor configuration Time between 2 starts sec. Min timeout sec.
- Page 81 Main menu Information Settings Settings Alarm menu Limit monitoring Control Panel Control Software update Control pump Datalog export Control compressor Datalog stop Basics Chiller configuration Chiller configuration Sensor configuration Number of compressors 1 Heat exchanger Steel Thermost. Pump start Pump 1? Consumer Pump 1 VFD? Pump 1 flow?
- Page 82 Main menu Information Settings Settings Alarm menu Limit monitoring Control Panel Control Software update Control pump Datalog export Control compressor Datalog stop Basics Chiller configuration Sensor configuration Sensor configuration AI pump pressure 1 Measuring 4 mA -0.5 Measuring 20 mA 10.0 AI pump pressure 2 Measuring 4 mA...
- Page 83 Main menu Information Settings Alarm menu Alarm menu Control Panel AI pump pressure 1 Temp. cooling water on max STOP Software update AI pump pressure 2 Temp. cooling water on min STOP Datalog export AI cold water pressure evaporator Temp. cooling water on max STOP Datalog stop AI press.
- Page 84 Main menu Information Settings Alarm menu Control Panel Control Panel Software update Language Language Datalog export Settings Deutsch Datalog stop IP address English Serial number Français Română Save parameters Čeština Load parameters Password Magyarul Dansk Eesti Português Lietuviskai Polski Slovenščina Svenska Suomi Türkçe...
- Page 85 Main menu Information Settings Alarm menu Control Panel Control Panel Software update Language Datalog export Settings Datalog stop IP address Serial number Serial number Save parameters Entry of serial number Load parameters 9000-0000 Password Result Saving to controller:OK Saving to USB:OK Load parameters XXXXXXXX.par Password...
-
Page 86: Troubleshooting
Troubleshooting Error Display view Type of message Message description Cause of the message Troubleshooting Reaction of the chiller code HP warning Group warning Condensation pressure Condensation pressure Clean the condenser and filter. A compressor is switched off if the number has exceeded the threatens to run against the Check the function of the fan. - Page 87 Error Display view Type of message Message description Cause of the message Troubleshooting Reaction of the chiller code LP STOP Group fault message Pressure has fallen Liquid flow through the Check liquid flow. Check the After the compressor is started, the low below the minimum evaporator is too low.
- Page 88 Error Display view Type of message Message description Cause of the message Troubleshooting Reaction of the chiller code Min tank level warning Group warning Level in the tank is Level in the tank is too low, Fill tank, All components continue to run, approaching the level sensor in the tank is Check the function of the tank...
- Page 89 Error Display view Type of message Message description Cause of the message Troubleshooting Reaction of the chiller code Conductivitymaxwarn. Group warning Conductivity is Conductivity too high. Check the limit default. All components continue to run, approaching maximum If installed: Alarm is saved, design limit.
- Page 90 Error Display view Type of message Message description Cause of the message Troubleshooting Reaction of the chiller code Coldwater press STOP Group fault alarm Cold water pressure at External slide is closed, Open external slide, Compressors switch off immediately. the evaporator is too Filter soiled, Clean filter, Pump 1 &...
- Page 91 Error Display view Type of message Message description Cause of the message Troubleshooting Reaction of the chiller code AI temp outlet Group fault alarm Sensor defective, Sensor defective, Check electrical connections of All components continue to run. from Version 2.60 sensor break sensor break the sensor,...
- Page 92 Error Display view Type of message Message description Cause of the message Troubleshooting Reaction of the chiller code AI pump pressure 1 Group fault alarm Measured value of the Sensor defective, Check electrical connections of Pump 1 & 2 = Consumer pump from Version 2.60 analogue input outside sensor break...
- Page 93 Error Display view Type of message Message description Cause of the message Troubleshooting Reaction of the chiller code AI suction gas temp Group fault alarm Measured value of the Sensor defective, Check electrical connections of Pumps continue to run, from Version 2.60 analogue input outside sensor break the sensor,...
- Page 94 Error Display view Type of message Message description Cause of the message Troubleshooting Reaction of the chiller code DI mpcb Pump 1 Group fault alarm Motor protection switch Motor current above the Check the motor power Pump 1 & 2 = Consumer pump has tripped permissible range, consumption, check the...
- Page 95 Error Display view Type of message Message description Cause of the message Troubleshooting Reaction of the chiller code DI mpcb Pump 2 Group fault alarm Motor protection switch Motor current above the Check the motor power Pump 1 & 2 = Consumer pump has tripped permissible range, consumption, check the...
- Page 96 Error Display view Type of message Message description Cause of the message Troubleshooting Reaction of the chiller code DI mpcb pump freec. Group fault alarm Motor protection switch Motor current above the Check the motor power all components continue to run has tripped permissible range, consumption, check the...
- Page 97 Error Display view Type of message Message description Cause of the message Troubleshooting Reaction of the chiller code DI fan 1 fault Group fault alarm Internal monitoring of Motor runs only on two Check the motor current Pump and compressor continue running the fan has tripped.
-
Page 98: Maintenance Intervals In Accordance With The Vdma
III. Maintenance intervals in accordance with the VDMA Explanation Annual Six- Remark monthly required Compressor Optical check for dirt, damage and corrosion Check fixing, check running noises Measure the intake pressure Measure the suction gas temperature upstream of the compressor Measure the compression end temperature at the discharge port Check the oil level... - Page 99 Explanation Annual Six- Remark monthly required Parts in the refrigeration circuit/water circuit Optical check for dirt, damage and corrosion Check insulation for damage Check filter dryer for blockage Replace filter dryer If com- ponents in the refrig- eration circuit replaced Check all pipes carrying refrigerant for corrosion and damage Fans...
-
Page 100: Product Registration
111 Rating plate and labels are clearly legible Battery - time/date 120 Battery Every 5 years Leakage control of the refrigeration circuit in accordance with (EC) 517/2014 Product registration PDF download at: www.kkt-chillers.com/service/produktregistrierung 100 / 100 83001602.k...
Need help?
Do you have a question about the cBoxX 40 and is the answer not in the manual?
Questions and answers