Table of Contents
Advertisement
Quick Links
Advertisement
Table of Contents

Related Manuals for Novexx Solutions EIDOS XTO2ie


Summary of Contents for Novexx Solutions EIDOS XTO2ie
- Page 1 User Manual XTO2ie-XTO2ce USER MANUAL XTO2ie - XTO2ce Thermal Transfer Overprinter (TTO) Intermittent/Continuous This manual contains the EC Declaration of Conformity Edition B - 01/2024 Original Instructions - keep for future reference RT800...
-
Page 3: Table Of Contents
User Manual XTO2ie-XTO2ce Contents Information ..........................2 NOTES ON THE CORRECT USE OF THE PRINTER ................2 GENERAL NOTES ..........................2 SAFETY NOTICES ..........................3 GENERAL PRECAUTIONS ........................3 DANGEROUS AREAS ON THE PRINTING UNIT .................. 4 PROTECTION ELEMENTS PROVIDED ....................9 Product Description ......................... -
Page 4: Information
User Manual XTO2ie-XTO2ce Information NOTES ON THE CORRECT USE OF THE PRINTER Read these notes together with Chapter “Safety Notices" to ensure that the printer is used correctly. Switching on the printer. • If the printer has been left in a cold or excessively hot environment for a considerable time, wait at least 1 hour before switching it on to prevent humidity collecting on the internal circuits. -
Page 5: Safety Notices
User Manual XTO2ie-XTO2ce How information is represented Explanation of symbols WARNING! A warning symbol refers to risks that can result in severe or fatal injuries! The text within this area contains instructions for preventing damage. ➔ Instructions must be followed without exception. WARNING! The text within this area contains important recommendations as well as additional information or information to use the product correctly and efficiently. -
Page 6: Dangerous Areas On The Printing Unit
User Manual XTO2ie-XTO2ce DANGEROUS AREAS ON THE PRINTING UNIT Dangerous areas on XTO2ie.LH/XTO2ce.LH Front and rear view Figure 1: dangerous areas on XTO2ie.LH/XTO2ce.LH – front and rear views. Side views Figure 2: dangerous areas on XTO2ie.LH/XTO2ce.LH – side views Carriage Figure 3: Dangerous areas on XTO2ie.LH/XTO2ce.LH - carriage Edition B - 01/2024 Information... - Page 7 User Manual XTO2ie-XTO2ce Bottom view Figure 4: Dangerous areas on XTO2ie.LH/XTO2ce.LH -bottom view Note: In intemittent mode (XTO2ie), during the installation it is necessary to fix the printing plate and the printing unit so that the plate prevents finger access to the areas [A] and [B] where the carriage with the print head moves.
- Page 8 User Manual XTO2ie-XTO2ce Dangerous areas on XTO2ie.RH/XTO2ce.RH Front and rear view Figure 6: dangerous areas on XTO2ie.RH/XTO2ce.RH – front and rear views Side views Figure 7: dangerous areas on XTO2ie.RH/XTO2ce.RH – side views Carriage Figure 8: dangerous areas on XTO2ie.RH/XTO2ce.RH – carriage Edition B - 01/2024 Information...
- Page 9 User Manual XTO2ie-XTO2ce Bottom view Figure 9: Dangerous areas on XTO2ie.RH/XTO2ce.RH -bottom view Note: in intemittent mode (XTO2ie), during the installation it is necessary to fix the printing plate and the printing unit so that the plate prevents finger access to the areas [A] and [B] where the carriage with the print head moves.
- Page 10 User Manual XTO2ie-XTO2ce Definitions Movement of the carriage during printing or positioning in the "Service" area. Danger of crushing the fingers Movement of the carriage when returning to Home after printing or during a return from "Service". Danger of crushing the fingers. Access from the lower left side: carriage moving to the left (print - for LH/ return to Home position - for RH.
-
Page 11: Protection Elements Provided
User Manual XTO2ie-XTO2ce PROTECTION ELEMENTS PROVIDED Covers fixed with screws Figure 11: fixed covers WARNING! Disconnect the 48Vdc power supply to the printer before removing the fixed guards [RF1], [RF2], [RF3]. The fixed guards must be removed only for extraordinary maintenance or repairs. - Page 12 User Manual XTO2ie-XTO2ce Monitoring sensors movable guard [RM1] inserted SENS4 Magnetic sensor SENS_C1 Figure 13: monitoring sensors External safety contacts: SAFETY_A and SAFETY_B (SAF_EXT) NOTE: If not used, they must be jumpered. [SAF_EXT] SAFETY_A SAFETY_B SAFETY_SAF Figure 14: safety contacts Not interlocked movable guard [RM2] The guard is accessible only after removing the interlocked mobile guard [RM1].
- Page 13 User Manual XTO2ie-XTO2ce For XTO2ie only: fixed guard but not solidly screwed to the Printing Unit: The Printing Plate [PP] cannot be strongly screwed to the Printing Unit [PU] because it is necessary to leave the passage to the packaging film [PF] to be printed. [PU] [PF] [PP]...
- Page 14 User Manual XTO2ie-XTO2ce Magnets and magnets ring To ensure good fastening of the movable guard [RM1] to the XTO printing unit, magnets [mg1], [mg2] have been provided on the printer body and magnetic rings [am1], [am2] on the ribbon inserter. Figure 18: magnets Warning symbols on the machine CAUTION!
-
Page 15: Product Description
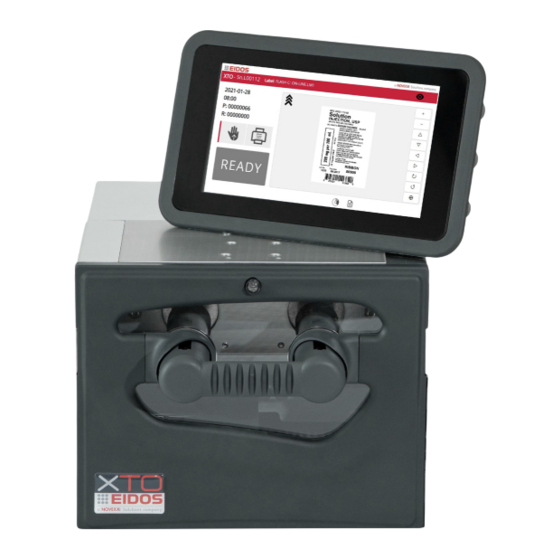
User Manual XTO2ie-XTO2ce Product Description FUNCTIONALITY The XTO is an electronic printer for "thermal transfer to film" that is able to write automatically and directly on the plastic or paper film used in packaging machines. Using the XTO2ie Intermittent, the packaging film must be stationary during printing; the XTO2ce Continuous codes on continuous packaging machines when the printing operation must be performed in motion. -
Page 16: System Models
User Manual XTO2ie-XTO2ce SYSTEM MODELS XTO2ie (LH/RH) Model: 7XTO2I-1/7XTO2IERH-1 XTO2ie 45CV910/1 49KS0162 L = 7 m 45CV914/1 (capacitor kit to be connected on the 48Vdc power supply V+/V- output pins) Model: 7XTO2I-2/7XTO2IERH-2 XTO2ie 49KS0162 Model: 7XTO2I-3/7XTO2IERH-3 45CV910/1 XTO2ie 49KS0162 L = 7 m 45CV914/1 (capacitor kit to be connected on the 48Vdc power supply... - Page 17 User Manual XTO2ie-XTO2ce XTO2ce.LH Model: 7XTO2CELH-1 XTO2ce.LH 45CV910/1 L = 7 m 45CV914/1 (capacitor kit to be connected on the 48Vdc power supply V+/V- output pins ) Model: 7XTO2CELH-2 XTO2ce.LH Model: 7XTO2CELH-3 45CV910/1 XTO2ce.LH L = 7 m 45CV914/1 (capacitor kit to be connected on the 48Vdc power supply V+/V- output pins) Model: 7XTO2CELH-4...
- Page 18 User Manual XTO2ie-XTO2ce XTO2ce.RH Model: 7XTO2CERH-1 XTO2ce.RH 45CV910/1 L = 7 m 45CV914/1 (capacitor kit to be connected on the 48Vdc power supply V+/V- output pins) Model: 7XTO2CERH-2 XTO2ce.RH Model: 7XTO2CERH-3 45CV910/1 XTO2ce.RH L = 7 m (capacitor kit to be connected 45CV914/1 on the 48Vdc power supply V+/V- output pins)
- Page 19 User Manual XTO2ie-XTO2ce XTO2ie IP version Model: 7XTO2I-1IP/7XTO2IERH-1IP XTO2ie (LH/RH) IP 45CV910/1 L = 7 m* (capacitor kit to be connected on L = 7 m the 48Vdc power supply V+/V- output pins) 45CV914/1 Figure 23: XTO2ie - IP configuration XTO2ce IP version Model: 7XTO2CELH-1IP XTO2ce.LH (IP)
- Page 20 User Manual XTO2ie-XTO2ce Tropicalized Led board Tropicalized Tropicalized Power board CPU board Tropicalized print head Tropicalized Encoder board Tropicalized Criptomemory Tropicalized Tropicalized Interface board carriage board Rear cover Touch panel with IP protection and 53SDK20 angled connectors Touch panel 53SDK21 Figure 25: XTO-IP protected parts Touch panel 53SDK21 It is a capacitive 7 "TFT colour graphic display connected via ethernet to the printer, from which it...
-
Page 21: Rear Connection Panel
User Manual XTO2ie-XTO2ce REAR CONNECTION PANEL WARNING! This printer operates using 48Vdc – 220W voltage! Touching live electrical parts may expose you to hazardous electrical currents and may lead to burns. ➔ Make sure that the printer is switched off before connecting the power cable. ➔... -
Page 22: Operating Panel
User Manual XTO2ie-XTO2ce OPERATING PANEL The operating panel is a comfortable external control panel for the XTO, which can be operated display devices. You can use the 59SDK18 device or a PC. Prerequisites • Display device, e.g. 59SDK18, Raspberry, tablet, PC •... - Page 23 User Manual XTO2ie-XTO2ce Zebra/Nicelabel Emulation actives. Shortcut (goes to the page containing the For XTO2ce: “Line Speed” is the speed of the most used commands) packaging line, detected by the encoder. Go to Production Performance page view Shows label or LMT labels (1-2-3- 4) Ready mode Figure 29: ready mode view Remote view status (the black eye appears...
- Page 24 User Manual XTO2ie-XTO2ce Production Performance view [13] In the production view, the print job in progress can be monitored. Data relating to the XTO2ie printer Data relating to the XTO2ce printer Figure 31: production performance page Print counter Current date and time The animation runs when a print command 27a - Print rate: number of prints per minute.
-
Page 25: Basic Settings
User Manual XTO2ie-XTO2ce BASIC SETTINGS Settings in the Parameter Menu Level 0 allows the operator to set the parameters necessary for printing the label. This level is always accessible. Figure 32: level 0 parameters Load new label Set counters Load packaging format Printer Set up Password protection Password protection allows different levels of access to the various operating features of the... - Page 26 User Manual XTO2ie-XTO2ce Load new label Figure 33: load label Select the drive and load new label. You can use an FTP client (such as WinSCP) to copy the desired layout files to the "FLASH C:ftp" subdirectory. The settings to connect to XTO with FTP are: IP: the IP of the XTO Port: 21 User: ftp...
- Page 27 User Manual XTO2ie-XTO2ce By clicking on the second button, you can set the counters. Figure 36: set counters This page is also accessible by the same icon on the Parameters menu. Load Packaging format Click to load the selected PAF Click to select Figure 37: load PAF parameters Select the drive and load the Packaging format (PAF) file.
- Page 28 User Manual XTO2ie-XTO2ce Save as a new PAF Save current PAF Figure 38: PAF creation The printer can print labels on multi tracks packaging film. To do this you must set how many tracks must be printed at each STA print command and the pitch between each printed image on film. Print Home shift: increase this parameter to get a shift of the printed image in the direction of the carriage movement.
- Page 29 User Manual XTO2ie-XTO2ce Printing Num. Every Cycle: it sets a limit to the maximum number of labels printed in case of LMT repetition. For example: you have a .LMT file of 3 labels and you want to repeat it twice but you need only 5 labels instead of 6 (3 x 2);...
- Page 30 User Manual XTO2ie-XTO2ce PRINT X-SHIFT Default value: 0 mm PRINT INTENSITY The print intensity value depends on various factors, including the type of ribbon. You can adjust the intensity in order to obtain homogeneous prints. Default value: 100 PRINT INTELLIGENCE Default value: 100 Edition B - 01/2024 Product DESCRIPTION...
-
Page 31: Operation
User Manual XTO2ie-XTO2ce Operation INSERTING CONSUMABLES How to load the thermal ribbon Figure 40: XTO-LH; ribbon positioning Figure 41: XTO-RH; ribbon positioning Figure 42: ribbon passage Edition B - 01/2024 Operation... - Page 32 User Manual XTO2ie-XTO2ce How to operate • Remove the front cover and place it on a flat and clean surface. • Insert the empty cardboard core with biadhesive layer on shaft [A1] and the ribbon core on shaft [A2]. If you want to use the cover as a drawer to extract the ribbon, insert the bracket [b]. •...
-
Page 33: The Thermal Ribbons
User Manual XTO2ie-XTO2ce THE THERMAL RIBBONS Smart-Black - XTO series ribbon The XTO ribbons selection include two different wax-resin products (standard and special) available in 1200m length and two different resin alternatives (standard and special) available in 1000m length. Moreover, is possible to print on craft films by a special ribbon. All the ribbons are winded on 1 inch plastic core, ink IN. -
Page 34: Printing
User Manual XTO2ie-XTO2ce PRINTING Description of operation (Refer to Chapter “Product Description – Operating Panel” of this manual.) Switch on the printer and wait for the programme loading phase. The printer can receive the commands from the production line if it is in READY (automatic) status. Load the label to be printed. -
Page 35: Creation And Sending Of The Label With Easycode
User Manual XTO2ie-XTO2ce Starting and Monitoring a Print Job The printer starts to print, as soon as the following conditions are met: • The display shows the “READY” screen • An STA digital input pulse is received If the printer shows the “MAN” screen: ➔... - Page 36 User Manual XTO2ie-XTO2ce Label transmission to XTO with LAN connection With the EASYCODE software license "R" version, you can create, modify, save labels and send them to EIDOS and no-EIDOS printers by means of their Windows driver via LAN network connection. How to operate ➔...
-
Page 37: How To Store Label Files (.Lm1)
User Manual XTO2ie-XTO2ce HOW TO STORE LABEL FILES (.LM1) Insert the memory key containing the label .LM1 files. Put the printer in MANUAL mode and enter the Parameter Setting. • Click on “File management” button • Click on “Copy files”. •... -
Page 38: Setting And Monitoring
User Manual XTO2ie-XTO2ce SETTING AND MONITORING Printer Parameters: general information From the main menu, with the printer in the MAN position, you access the parameter page, where you can adjust the printer. Figure 50: Login To access the desired level, select the level (from 0 to 3) on the left of the screen, enter username and password and press Login. - Page 39 User Manual XTO2ie-XTO2ce Add user and password At the first installation, access to levels 1 and 2 will be password-free. If you want to restrict access to users, you must set a level 2 password. Afterwards, only by logging in with this password, it will be possible to create additional level 1 and 2 passwords for the desired users.
- Page 40 User Manual XTO2ie-XTO2ce Printer Parameters: added with Level 1 File management Copy files or folders Disk A and Disk B are the USB memory key inserted in the USB-A and USB-B connectors. Create directory Disk C: is the internal printer CPU disk. Font C: folder containing the fonts, on the printer.rt Copy All menu...
- Page 41 User Manual XTO2ie-XTO2ce Back up Figure 56: back up Insert the memory card on which to store the data and click on "Make Back up” button. Repeat the back-up procedure periodically and in any case, after making substantial changes to the parameters Note: folders are highlighted in yellow.
- Page 42 User Manual XTO2ie-XTO2ce Update File System Upgrade Procedure → Copy the pxtox_x.x.xxxx.tar file containing the software update onto the USB key and insert it into the USB port of the printer. Note: Do not unpack the file but use it as a .tar. The file can be copied to the root directory or to a subfolder.
- Page 43 User Manual XTO2ie-XTO2ce → Answer "YES" to the question Wait a few minutes. At the end of the operation the printer will automatically restart with the new software aboard. → If the update was not carried out correctly, the error is indicated with the X icon in a red field. In this case repeat the operation by clicking again on the "Update"...
- Page 44 User Manual XTO2ie-XTO2ce Set Printer Parameters This menu allows adjustment of the basic parameters. after making the desired adjustments, press the save button to make them effective. Printer parameters in INTERMITTENT mode (XTO2ie ) Figure 59: Printer Parameter - part A Edition B - 01/2024 Operation...
- Page 45 User Manual XTO2ie-XTO2ce Figure 60: Printer parameter - part B NOTE! The description of the parameters is in the Technical Manual (RT804) and, by clicking on the button you can view the help of each parameter. ➔ by clicking on the pencil symbol it will be possible to set the value step by step as an alternative to the adjustment bar.
- Page 46 User Manual XTO2ie-XTO2ce Printer parameters in CONTINUOUS mode (XTO2ce) Figure 61: Printer Parameter - part A Edition B - 01/2024 Operation...
- Page 47 User Manual XTO2ie-XTO2ce Figure 62: Printer parameter - part B NOTE! The description of the parameters is in the Technical Manual (RT804) and, by clicking on the button you can view the help of each parameter. ➔ by clicking on the pencil symbol it will be possible to set the value step by step as an alternative to the adjustment bar.
- Page 48 User Manual XTO2ie-XTO2ce Label Parameters view Figure 63: label parameters view The label parameters are automatically updated in the printer every time a new .LM1 file is loaded. These label dimensions and parameters must be set (with EASYCODE program) during the label creation.
- Page 49 User Manual XTO2ie-XTO2ce Set Date/Time Figure 64: calendar Printer diagnostic Figure 65: diagnostic menu The buttons on the first grey strip allow you to view and adjust the diagnostic parameters. Load new label: a new label is loaded Label preview: the label is displayed System diagnosis: (see following pages) Edition B - 01/2024 Operation...
- Page 50 User Manual XTO2ie-XTO2ce C1-2 Figure 66: diagnostic - main page Press to activate/deactivate an OUTPUT Green = Output ON Grey = Output OFF Yellow = Input ON Grey = Input OFF [Only for XTO2ce] ENCODER: status of PHASE A and PHASE B of the encoder port on the rear panel of the printer unit.
- Page 51 User Manual XTO2ie-XTO2ce Figure 68: diagnostic Printer parameters in INTERMITTENT mode (XTO2ie) Press to activate/deactivate the Green lamp on front switch button Press to make ON the Press to activate/deactivate the Red internal led lamp lamp on front switch button Yellow = Input ON Grey = Input OFF Figure 69: XTO2ie - diagnostic page...
- Page 52 User Manual XTO2ie-XTO2ce Printer parameters in CONTINUOUS mode (XTO2ce) Press to activate/deactivate the Green lamp on front switch button Press to make ON the Press to activate/deactivate the Red internal led lamp lamp on front switch button Yellow = Input ON Grey = Input OFF Figure 70: XTO2ce (LH) - diagnostic page Repositioning the carriage in the Home position...
- Page 53 User Manual XTO2ie-XTO2ce The buttons on the bottom strip allow you to test the printer. Print grid: Print test to check if the print head has some broken dots or if the print head and the print plate or roll are perfectly aligned in the whole print area size. In case of white lines in print direction it means that some dots are probably broken, or that the print head could be dirty.
- Page 54 User Manual XTO2ie-XTO2ce Printer Parameters: added with Level 2 Set I/O parameters. Only for Continuous mode Only for Intermittent mode Figure 72: I/O management Print Command “STA” 0 = Front OFF-ON (default) 1 = Front ON-OFF 2 = Level ON 3 = Level OFF Print command check Enable this flag to get an error message when a new print command...
- Page 55 User Manual XTO2ie-XTO2ce In presence of many print command signal bounces, it is advised to increase this parameter value over 2 to filter more the print command signal. In case the number of bounces received is still higher than the number set the E232 will appear. End of Print (FAP) output type Pulse (default).
- Page 56 User Manual XTO2ie-XTO2ce Deactivate Print Command whit C2S When this function is enabled the print STA digital command is rejected as long as C2S input is activated and warning appears on the screen. Set IP parameters: Figure 73: communication parameters If the Wait Ready function is enabled, W character is emitted when the print cycle starts and R character is emitted when the print cycle is finished (before the carriage comes back to home) or immediately when an error occurs during print.
- Page 57 User Manual XTO2ie-XTO2ce Set TPH calibration in INTERMITTENT mode (XTO2ie) Shows the %value during the calibration Shows the current value during the calibration Figure 74: XTO2ie - TPH calibration IMPORTANT! it is advised to make the TPH calibration with the packaging film overposed on the printing plate to take in account the thickness of the film.
- Page 58 User Manual XTO2ie-XTO2ce Press the relative “calibration” key to move the carriage at the desired position (SERVICE/MIDDLE/HOME) and start the calibration. If the indication under the symbol is green, the calibration is OK. If it is red, the calibration is not OK. The value detected is coloured red when it is 2% higher or lower than the average value between the 3 values detected (SERVICE-MIDDLE-HOME).
- Page 59 User Manual XTO2ie-XTO2ce Set TPH calibration in CONTINUOUS mode (XTO2ce) WARNING! This operation must be performed with the packaging line stopped. Shows the % value during the calibration Shows the current value during the calibration Figure 76: XTO2ce - TPH calibration move TPH down (Ready to print position) move TPH up (Ribbon change operation position) move TPH in print position for 5 seconds...
- Page 60 User Manual XTO2ie-XTO2ce always carry out a print test to find the point of tangency of the print head to the roller that offers the best print quality. After performing a calibration, the “TPH FORCE” Print parameter will be set at the value detected by the calibration, with the possibility of reducing the value or increase the value in a range of +/- This could be done in the "Printer Parameter"...
- Page 61 User Manual XTO2ie-XTO2ce • NiceLabel Emulation setting Figura 78: emulators setting NiceLabel Emulation: enable this function to receive files as NICELABEL ZPLII protocol. The label transmission can only take place via Ethernet LAN (not managed from USB key). If Nicelabel emulation is active, the setting parameter is also displayed in the Manual mode page.
- Page 62 User Manual XTO2ie-XTO2ce Set ribbon Intermittent mode only Figure 80: Ribbon setting Set the code of the EIDOS ribbon used. The setting of the used ribbon code requires that some specific parameters of the printer are automatically set in the optimal way for the ribbon in use (e.g. Enhanced Mode, Accelerations, Jerk etc).
-
Page 63: Status Messages
User Manual XTO2ie-XTO2ce STATUS MESSAGES General information about status reports During operation, tests are continually carried out to determine whether a malfunction has occurred. If a malfunction is detected, the corresponding status report appears on the display. The list of messages, complete with their description, is shown in the document "RT578 - Error messages and troubleshooting". - Page 64 User Manual XTO2ie-XTO2ce Error messages Error messages must be acknowledged by the operator as the triggering event or fault endangers normal operation. The status report shown on the display is structured as follows: Figure 82: error message Alarm icon Press the key below the symbol to unblock the status message. Error number Error message Background colour...
-
Page 65: Preventive Maintenance
User Manual XTO2ie-XTO2ce Preventive Maintenance CLEANING INSTRUCTIONS WARNING! Dangerous situations may arise during maintenance and cleaning work. Accidents may occurs if the relevant safety instructions are not observed! ➔ Switch off the machine before cleaning or maintenance and pull out the mains power connecting line! ➔... -
Page 66: Cleaning The Print Head
User Manual XTO2ie-XTO2ce CLEANING THE PRINT HEAD ➔ Switch off and lock out the printer before performing this task! You are advised to clean daily the printing line of the thermal head located on the printing unit. Clean the fixed pin [P] located on the left side of the printing head. How to operate 1. -
Page 67: Cleaning The Printing Plate (Xto2Ie - Intermittent)
User Manual XTO2ie-XTO2ce CLEANING THE PRINTING PLATE (XTO2ie - intermittent) Clean with a cleaning tissue or with a paper tissue soaked in isopropyl alcohol. Advisable when the printer is in fixed position. How to operate 1. Switch off the printer and remove the roll of thermal ribbon. 2. -
Page 68: Cleaning Rolls And Ribbon Passages
User Manual XTO2ie-XTO2ce CLEANING ROLLS AND RIBBON PASSAGES Check the status of rubber coated roll [R]. Verify that the surface of the roll is smooth and even. Check every single roll turn without jamming and is not crooked. How to operate Use a jet of low-pressure air to clean the dust off the printing unit. -
Page 69: Cleaning The Carriage Sliding Guide
User Manual XTO2ie-XTO2ce CLEANING THE CARRIAGE SLIDING GUIDE How to operate It is advised to use BALLISTOLL oil for cleaning and lubrication. Move carriage manually for its entire path forwards/backwards three or four times and re-clean guides with clean cloth to dry any excess oil. Figure 90: cleaning the sliding guide WARNING! DO NOT use other lubricants or grease as they clog the bushes with the guides and... -
Page 70: Xto2Ie With Xls 20X Labeller
User Manual XTO2ie-XTO2ce XTO2ie with XLS 20x labeller Prerequisites for use and adjustment are the professional installation of the Novexx XLS 20x labeller and its correct assembly with the XTO2ie printer. Read carefully the assembly instructions in the technical manual of the XTO2ie printer. For any technical questions you may have that are not described in this manual, see: →... -
Page 71: Start Up And Operation
User Manual XTO2ie-XTO2ce Print start Print start RH version LH version the green arrows indicate the printing direction Figure 92: printing direction START UP AND OPERATION Connection WARNING! For the electrical connections and the correct power supply voltage of the labeller and XTO2ie, refer to the relative instruction manual. -
Page 72: Functionality Description And Synchronisms
User Manual XTO2ie-XTO2ce FUNCTIONALITY DESCRIPTION AND SYNCHRONISMS • XTO2ie prints when the paper is stopped. XLS 20x sends a digital print command pulse to XTO2ie printer on STA input. • • XTO2ie activates a digital output (FAP) during print time. The XTO2ie FAP output is connected to XLS 20x Inhibit input, so XLS 20x keep the paper stop during XTO2ie print time. -
Page 73: Change Of Label Roll And Label Ribbon
User Manual XTO2ie-XTO2ce CHANGE OF LABEL ROLL AND LABEL RIBBON → Refer to the Instruction manual of the labeller XLS 20x. REGULAR MAINTENANCE OF THE LABELLER Only some of the operations to be carried out for proper maintenance and cleaning are described. For more detailed information always refer to the manual of the XLS 20x labeller. -
Page 74: Ec Declaration Of Conformity
User Manual XTO2ie-XTO2ce Appendix 1 EC DECLARATION OF CONFORMITY Manufacturer: EIDOS Srl – via dell’Industria,11 - 10023 Chieri (TO) ITALY – www.eidos.eu Person authorised to compile the technical file: Paolo Bori – via dell’Industria, 11 – 10023 Chieri (TO) Declares regarding the following supply Generic Denomination and Function: Intermittent Thermal Transfer Overprinter (TTO) Commercial name: XTO “e”... -
Page 75: Ce Label
User Manual XTO2ie-XTO2ce Appendix 2 CE LABEL Attach the label here 1) System model 2) Mechanical unit 3) Electronic unit 4) Serial number 5) Production date CE Label position on Mechanical Unit CE Label CE Label Edition B - 01/2024 Appendix 2... -
Page 76: Zebra And Eidos Nicelabel Emulation File Management (.Prn, .Zpl)
User Manual XTO2ie-XTO2ce Appendix 3 ZEBRA and EIDOS NICELABEL EMULATION FILE MANAGEMENT (.prn, .zpl) It is possible to load all ZEBRA and EIDOS NICELABEL label files, with .ZPL, .zpl, .PRN, .prn extension, onto the printer. Following, an example of ZEBRA file. ^FT61,91^A0,40,40 ^FD809098987876543123^FS ^PQ1,0,1,Y^XZ... - Page 77 User Manual XTO2ie-XTO2ce Managing .prn files containing ZPL language with XTO The .prn files can be uploaded to the XTO printer from USB key or copied and stored in the printer's C: memory. How to operate: - Enabling the Zebra/Nicelabel Emulator At this point, from File Management you can also manage .prn files.
- Page 78 User Manual XTO2ie-XTO2ce Loading label in Zebra or NiceLabel formats - If the .prn file is a template containing text defined as variables (^FNn) to be filled with the ^FNnxxxxx command, it can be compiled locally by the operator with the SDK18 touchpanel. Edition B - 01/2024 Appendix 3...
- Page 79 User Manual XTO2ie-XTO2ce Management of .prn files with "Enable Page I/O" function on XTO If it is enabled, the emulator allows the "Enable pages from I/O" feature to be used for Zebra or NiceLabel format labels as well. How to operate: - Enabling the Zebra/Nicelabel Emulator - Enable the "Enable Page I/O"...
- Page 80 User Manual XTO2ie-XTO2ce Only in the case of loading Zebra/NiceLabel files, it is possible to change the "Width X" and "Length Y" parameters of the label from the "Label Parameters View" page. The change will take effect by pressing the save button at the top of the page. These parameters will be overridden by ^PW (Print Width) and ^LL (Label Length) commands that may be present in the layout, unless the "Ignore ZPLII Label dimension"...
- Page 81 Thank you for taking the time to read this manual we recommend you keep it for future reference.
- Page 82 Via dell’Industria, 11 Z.I. Fontaneto 10023 Chieri (TO) ITALY e-mail: eidos@eidos.eu web: www.eidos.eu...
Need help?
Do you have a question about the EIDOS XTO2ie and is the answer not in the manual?
Questions and answers