Table of Contents
Advertisement
Quick Links
Advertisement
Table of Contents

Related Manuals for Husky HUS-115IN


Summary of Contents for Husky HUS-115IN
- Page 1 Instruction manual • HUS-115IN To ensure safe operation, please read this instruction manual thoroughly before use. Please retain for future reference. Husky reserve the right due to possible changes to design to alter the instruction manual without notice.
- Page 2 Thank you for choosing this product. This user manual contains important information on safety and instructions intended to assist you in the operation and maintenance of your appliance. Please take the time to read this user manual before using your appliance and keep this book for future reference.
-
Page 3: Table Of Contents
CONTENTS 1 SAFETY INSTRUCTIONS ................4 1.1 General Safety Warnings ....................4 1.2 Installation warnings .......................8 1.3 During Usage........................8 2 DESCRIPTION OF THE APPLIANCE ............10 3 USING THE APPLIANCE ................10 3.1 Thermostat Setting .......................10 3.2 Temperature Settings Warnings ...................11 3.3 Accessories ........................11 3.3.1 Ice Tray (In some models) ..................11 4 FOOD STORAGE ................... -
Page 4: Safety Instructions
1 SAFETY INSTRUCTIONS 1.1 General Safety Warnings Read this user manual carefully. WARNING: Keep ventilation openings, in the appliance enclosure or in the built-in structure, clear of obstruction. WARNING: Do not use mechanical devices or other means to accelerate the defrosting process, other than those recommended by the manufacturer. - Page 5 due to damage of the cooler elements, move your ventilate the room where the appliance is located for a few minutes. While carrying and positioning the fridge, do not damage the cooler gas circuit. This appliance is intended to be used in household and domestic applications such as: –...
- Page 6 This appliance can be used by children aged from 8 years and above and persons with reduced physical, sensory or mental capabilities or lack of supervision or instruction concerning use of the appliance in a safe way and understand the hazards involved.
- Page 7 To avoid contamination of food, please respect the following instructions: Opening the door for long periods can cause compartments of the appliance. Clean regularly surfaces that can come in contact with food and accessible drainage systems refrigerator, so that it is not in contact with or drip onto other food.
-
Page 8: Installation Warnings
1.2 Installation warnings Clearance of at least 150 mm is required at the top of your appliance. Do not place Before using your fridge freezer for the first anything on top of your appliance. time, please pay attention to the following Do not place heavy items on the points: appliance. - Page 9 Do not touch frozen goods with wet reduces raw material consumption and hands. Do not eat ice-cream or ice cubes therefore decreases waste production. immediately after they are removed from Notes: the ice-making compartment. Please read the instruction manual Do not re-freeze thawed frozen food. This carefully before installing and using your may cause health issues such as food appliance.
-
Page 10: Description Of The Appliance
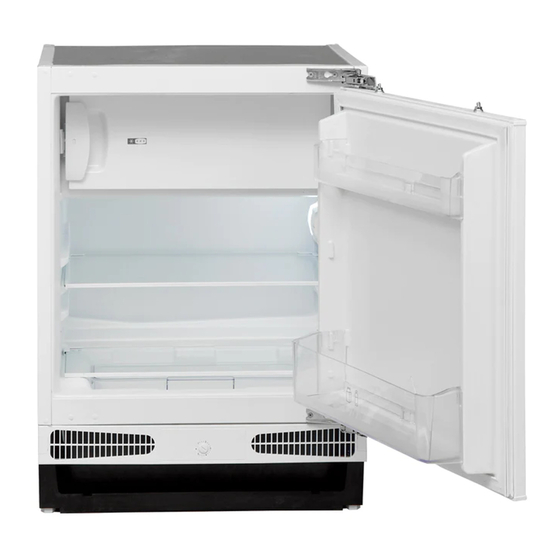
2 DESCRIPTION OF THE 3 USING THE APPLIANCE APPLIANCE “Door Open” Indicator; The "Door Open" indicator on the handle shows whether the door has closed properly or whether it remains open. If the indicator is red, the door is still open. If the indicator is white, the door is properly closed. -
Page 11: Temperature Settings Warnings
If device has SF position: Climate class and meaning: Turn the knob to SF to freeze fresh T (tropical): This refrigerating appliance food quickly. In this position, the freezer is intended to be used at ambient compartment will operate at lower temperatures ranging from 16 °C to 43 °C. -
Page 12: Food Storage
4 FOOD STORAGE Consume packaged foods before the Do not allow food to come into contact with 4.1 Refrigerator Compartment the temperature sensor, which is located in the refrigerator compartment, in order To reduce humidity and avoid the to keep the refrigerator compartment at consequent formation of frost, always optimum temperature. -
Page 13: Freezer Compartment
Do not purchase frozen food if the Maximum How and where to Food packaging shows signs of humidity storage time store and abnormal swelling. It is probable Bottled Until the that it has been stored at an unsuitable products On the designated e.g. - Page 14 The table below is a quick guide to show you the most efficient way to store the major food groups in your freezer compartment. Maximum storage time Preparation (months) Steak Wrap in foil 6 - 8 Lamb meat Wrap in foil 6 - 8 Veal roast Wrap in foil...
-
Page 15: Cleaning And Maintenance
Maximum storage time Vegetables and Fruits Preparation (months) Strawberry and Wash and hull 8 - 12 Blackberry Cooked fruits Add 10 % of sugar to the container Plum, cherry, sourberry Wash and hull the stems 8 - 12 Maximum storage time Thawing time at room Thawing time in oven (months) -
Page 16: Defrosting
5.1 Defrosting process. Remove all dislodged frost from the cabinet floor. It is not necessary to Defrosting the Refrigerator switch off the appliance for the removal Compartment of thin frost. For the removal of heavy ice deposits, disconnect the appliance from the mains supply, empty the contents into blankets or layers of paper to keep cool. -
Page 17: Replacing The Light Bulb
6 SHIPMENT AND to the mains supply and leave for 2 to 3 hours on setting number MAX before REPOSITIONING introducing the food back into the freezer. 5.2 Replacing the Light Bulb 6.1 Transportation and Changing Positioning Important note: Unplug the unit from the power supply before start the The original packaging and foam may be process. -
Page 18: Before Calling After-Sales Service
7 BEFORE CALLING AFTER- with the door joint are warm SALES SERVICE Especially during summer (warm seasons), the surfaces in contact with the door joint may become warmer during the operation your appliance, please check the following of the compressor, this is normal. before contacting the after-sales service. -
Page 19: Tips For Saving Energy
8 TIPS FOR SAVING ENERGY 1. Install the appliance in a cool, well- ventilated room, but not in direct sunlight and not near a heat source (such as a radiator or oven) otherwise an insulating plate should be used. 2. Allow warm food and drinks to cool before placing them inside the appliance. - Page 20 Changing The Door Swing Direction to Right Hand 1. Remove the top and bottom hinge screw caps. 2. Unscrew the top and bottom hinges, removing all of the screws. 3. Move the top hinge to the opposite bottom corner of the door, and rotate 180°. Move the bottom hinge to the opposite top corner of the door, and rotate 180°.
- Page 21 4. Screw the door back onto the appliance ensuring that it is screwed into the opposite side. 5. Insert the hinge screw caps into the opposite side of the appliance. EN - 21...
- Page 22 B- Changing The Freezer Door Swing Direction 1- Unscrew the screw fixing the freezer door hinge (Fig-1) and remove the freezer door (Fig-2) Figure 1 Figure 2 2- Unscrew the screw fixing the freezer 3- Screw the freezer door holder to the door holder and remove it.
- Page 23 The thermostat automatically regulates the temperature inside the cooler and freezer compartments. Refrigerator temperatures can be obtained by rotating the knob to higher numbers; 1 to 3, 1 to 5 or SF Thermostat settings: 1 – 2 : For short-term storage of food 3 –...
- Page 24 Replacement Lamp Unscrew the screws which are fixing the lamp cover and change lamp. EN - 24...
- Page 25 Replacement The Door Switch Stick a tape to protect the body Also flex the top-side of the switch and plastic. Flex it with the help of a tool then displace by pulling. like a slotted screwdriver. Put the switch connector cable in the housing. First place the top-side of the switch and then push the bottom side.
- Page 34 EN - 34...
- Page 35 EN - 35...
- Page 36 HUSKY REFRIGERATION Distributed by Arisit Pty LTD. Australia: 40-50 Mark Anthony Dr, Dandenong South VIC 3175, Australia. AUS Contact Number: 1300 762 219 New Zealand: 1A Howe Street, Freemans Bay, Auckland 1010, New Zealand. NZ Contact number: 09 306 10 20 Web: www.huskybrand.com.au...
Need help?
Do you have a question about the HUS-115IN and is the answer not in the manual?
Questions and answers