Table of Contents
Advertisement
Quick Links
□ IF-1330TCL □ IF-1336TCL □ IF-1340TCL
CONSUMER SAFETY INFORMATION
Read this manual before installing and operating this appliance
Failure to follow these instructions may result in electric shock, fire property,
or personal injury
Do not store or use gasoline or other flammable liquids in vicinity of this
appliance.
Electric Fireplace
Model No.:
□ IF-1350TCL□ IF-1360TCL
Advertisement
Table of Contents

Related Manuals for DecExpert IF-1336TCL


Summary of Contents for DecExpert IF-1336TCL
- Page 1 Electric Fireplace Model No.: □ IF-1330TCL □ IF-1336TCL □ IF-1340TCL □ IF-1350TCL□ IF-1360TCL CONSUMER SAFETY INFORMATION Read this manual before installing and operating this appliance Failure to follow these instructions may result in electric shock, fire property, or personal injury ...
-
Page 2: Important Safety Information
IMPORTANT SAFETY INFORMATION! WARNING Read all instructions before using this heater! This heater is hot when in use. To avoid burns, DO NOT let bare skin touch hot surfaces. If provided, use handles when moving this heater. Keep combustible materials, such as furniture, pillows, bedding, papers, clothes, and curtains at least 3 feet (0.9m) from the front of the heater, and keep them away from the sides and rear. - Page 3 ALWAYS mount to wall bracket before use. DO NOT set on the floor, or other surface, to use. NEVER use a wall mount bracket from another manufacturer. This product is not intended to be a primary heat source. It is for supplemental heat only. ...
-
Page 4: Parts & Hardware
Specification and Dimension PRODUCT DIMENSIONS Model Number IF-1330TCL 30” 17.0” 4.13” 26.2” 16.2” 9.1” 23.7” 76.2cm 43.2cm 10.5cm 66.5cm 41.2cm 23.2cm 60.2cm IF-1336TCL 36” 17.0” 4.13” 32.2” 16.2” 9.1” 29.7” 91.5cm 43.2cm 10.5cm 81.8cm 41.2cm 23.2cm 60.2cm IF-1340TCL 40” 17.0”... -
Page 5: Installation And Assembly
IF-1350TCL 50” 17.0” 4.13” 46.2” 16.2” 9.1” 43.7” 127.0cm 43.2cm 10.5cm 117.3cm 41.2cm 23.2cm 111.0cm IF-1360TCL 60” 17.0” 4.13” 56.2” 16.2” 9.1” 53.7” 152.4cm 43.2cm 10.5cm 142.7cm 41.2cm 23.2cm 136.4cm Installation and Assembly Your appliance is a wall-mounted, recessed and /or mantel installed appliance. Select a suitable location that is not susceptible to moisture and is away from drapes, furniture and high traffic areas. - Page 6 STEP A. Selection a dry wall to open a hole for fireplace box. Size of hole as below chat Figure (A) Framing Hole Size Model Number IF-1330TCL 26.77”(68.0cm) 16.54”(42.0cm) 32.77(83.2cm) 16.54”(42.0cm) IF-1336TCL IF-1340TCL 36.77”(93.4cm) 16.54”(42.0cm) IF-1350TCL 46.77”(118.8cm) 16.54”(42.0cm) 56.77”(144.2cm) 16.54”(42.0cm)
- Page 7 IF-1330TCL IF-1336TCL Figure (B ) IF-1340TCL IF-1350TCL...
- Page 8 IF-1360TCL STEP B. Fix the four wall anchors in each side of the fireplace box according to the dimensions Showed on the drawing. Figure (B)
- Page 9 STEP C. Take off the two screws in both sides of fireplace. Figure (C) STEP D. Have two person to take the glass panel out of the fireplace box. Place it to a soft and clean place. Figure (D) , taks two pcs of foam out of fireplace(E). (‘F) STEP E.
- Page 10 Wall Mounted Installation Due to the many different materials used on different walls, it is highly recommended that you consult your local builder before you install this appliance on the wall. A. Select a location that is not prone to moisture and is located at least 36”(914mm) away from combustible materials such as curtain drapes, furniture, bedding, paper, etc.
- Page 11 NOTE: It is strongly Recommended that the mounting bracket(d) be screwed into the wall studs where possible. If the wall studs cannot be used, ensure that the supplied plastic anchors are used to affix the bracket to the wall and the bracket is adequately secured. With the wall mounting bracket installed have two people lift the appliance up and insert the two hooks on the bracket into the two slots on the back of the appliance.Use original 4x8mm screws to fasten wall bracket.
- Page 12 Logset /Crystal Ember Installation (Note: Please make the installation according to the embers which you bought or selected.) A. Glass front must be removed and the appliance must be mounted in its final location before the logset/crystal embers are installed. B.
- Page 13 WARNING Read and understand this entire owner’s manual, including all safety information, before plugging in or using this product. Failure do to so could result in electric shock, fire, serious injury, or death. Power Plug the power cord into a 110-120V Volt 12 Amp grounded outlet (see IMPORTANT SAFETY INFORMATION on Pages 2 and 3).Make sure the outlet is in good condition and that the plug is not loose.NEVER exceed the maximum amperage for the circuit.
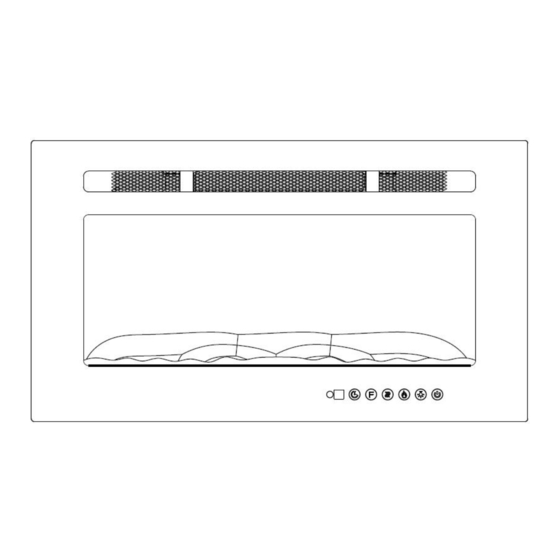
- Page 14 Touch panel/Remote control Operation BUTTON FUNCTION ACTION&INDICATION ON: Enables control panel functions and remote 1. Press once. Indicator light turns on. Power turns control.Turn on flame effect. on. All functions enabled. OFF: Disables control panel functions and remote 2. Press again. Indicator light turns off. Power POWER control.Turn off flame effect.
-
Page 15: Care And Maintenance
Step1, remove back cap’s screws. Step 2, take back cap out off remote, insert 2x AAA batteries. Last, fasten back cap again, then scew it. NOTE: Remote control battery used depends on the remote control type which selected above. NEVER dispose of batteries in fire. Failure to observe this precaution may result in an explosion. Dispose of batteries at your local hazardous material processing center. -
Page 16: Maintenance
Metal: Buff using a soft cloth, slightly dampened with a citrus oil-based product. DO NOT use brass polish or household cleaners as these products will damage the metal trim. Glass: Use a good quality glass cleaner and dry thoroughly with a paper towel or lint-free cloth. ... - Page 17 3. “Flame Rod” out of place due to rough transit/handing product. This issue can be corrected as simple as removing the glass, flipping the fireplace upside and down, removing a set of screws that are holding the bottom frame plate and placing the flame rod back into place.
Need help?
Do you have a question about the IF-1336TCL and is the answer not in the manual?
Questions and answers
HOW DO YOU TAKE FRONT GLASS OFF TO REMOVE PACKING AND PUT GLASS BEADS IN?