Table of Contents
Advertisement
Quick Links
52
We advise you to read this manual carefully, which contains all the instructions for maintaining the
appliance's aesthetic and functional qualities. For further information on the product: www.smeg.com
PRECAUTIONS
General safety instructions
Risk of personal injury
• ATTENTION: during use, the
appliance and its accessible
parts become very hot.
Children must be kept away
from the appliance.
• ATTENTION: during use, the
appliance and its accessible
parts become very hot. Never
touch the heating elements
during use.
• Protect your hands by wearing
oven gloves when moving food
inside the oven.
44 - PRECAUTIONS
44
44
47
48
57
48
48
48
49
49
49
49
49
50
50
50
51
51
52
53
53
53
• Never try to put out a fire or
flames with water: turn off the
appliance and smother the
flames with a fire blanket or
other appropriate cover.
• This appliance may be used by
children aged at least 8 and by
people of reduced physical,
sensory or mental capacity, or
lacking in experience in the use
of electrical appliances,
provided that they are
supervised or instructed by
adults who are responsible for
their safety.
54
54
54
60
61
63
63
63
66
67
70
70
70
71
72
72
73
75
76
76
76
914779561/D
Advertisement
Table of Contents

Related Manuals for Smeg SOP6302TX


Summary of Contents for Smeg SOP6302TX
-
Page 1: Table Of Contents
Positioning Using the accessories We advise you to read this manual carefully, which contains all the instructions for maintaining the appliance’s aesthetic and functional qualities. For further information on the product: www.smeg.com PRECAUTIONS General safety instructions • Never try to put out a fire or... - Page 2 • Children must not play with the THE VICINITY OF THIS appliance. APPLIANCE WHILST IT IS IN • Keep children under the age of USE. 8 at a safe distance unless they • DO NOT MODIFY THIS are constantly supervised. APPLIANCE.
- Page 3 removed must face downwards • If you wish to use greaseproof and towards the back of the paper, place it so that it will not oven cavity. interfere with the hot air circulation inside the oven cavity. • Do not use the open door to rest pans or trays on the internal glass pane.
-
Page 4: For This Appliance
CARAVAN. operation on the appliance, • The appliance must not be switch off the power supply. installed on a pedestal. • Disconnect the appliance after • Position the appliance into the the installation, through an cabinet cut-out with the help of accessible plug or switch in a second person. -
Page 5: Appliance Purpose
provided or recommended by inside the appliance. • Do not use the temperature the manufacturer. probe during the pyrolytic Temperature probe (if present) cycle. • Do not touch the rod or the tip Appliance purpose of the temperature probe after This appliance is intended for use. -
Page 6: Disposal
appliance. Do not remove the identification contained in a separate document plate for any reason. accompanying the product instructions. These data are present in the "Product Disposal information sheet" that can be downloaded This appliance conforms to the WEEE from the website at the page dedicated to the European directive (2012/19/EU) and product in question. -
Page 7: How To Read The User Manual
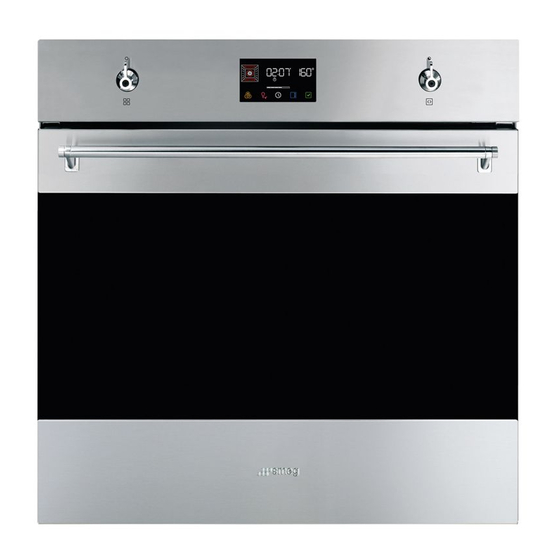
efficiency class "G". conventions: How to read the user manual Warning/Caution This user manual uses the following reading Information/Advice DESCRIPTION General Description 1 Control panel Frame shelf 2 Seal 3 Temperature probe socket (on some models only) 4 Light bulb 5 Door 6 Fan 50 - DESCRIPTION... -
Page 8: Control Panel
Control panel 1 Function knob Other parts This knob can be used to: Shelves • turn the appliance on and off; The appliance features shelves to position trays • select a function. and racks at different heights. The insertion heights are indicated from the bottom upwards. Turn the Function knob to the position 0 to immediately complete any cooking Cooling fan... -
Page 9: Accessories
• when the door is opened; Tray rack • when any function is selected, apart from the functions (depending on the models). When the door is open, it is not possible to turn off the interior lighting. To be placed over the top of the tray; for cooking foods which may drip. -
Page 10: Use
BBQ (teflon-coated barbecue grill pan) AIRFRY (oil-free frying grill) Double-use accessory: the striped side is Recommended accessory for air-frying recommended for grilling meat (fillets, previously breaded, precooked and/or frozen hamburgers...), while the smooth surface can be food (chips, potato or meat croquettes, small used for cooking vegetables, fruit, fish... -
Page 11: Digital Programmer
Digital programmer 5. Press the button to set the current time and go to the selection of minutes. 6. Turn the temperature knob to select the minutes of the current time. 7. Press the button to confirm. It may become necessary to change the current time, for example for daylight saving time. - Page 12 start flashing. 4. Check the cooking status of the food by turning on the internal light. 2 Turn the temperature knob to the right or to the left to select the wished temperature (for End of cooking example "200°C"). 5. To end cooking, turn the function knob to position 0 to exit the function.
- Page 13 To delete a timed cooking 5. Press the button to confirm end-of- 1. Press the button for a few seconds. cooking time. 2. Turn the temperature knob counter- 6. Press the button to start the function. clockwise until the cooking time is reset. The appliance waits for the set start time.
-
Page 14: Using The Temperature Probe (On Some Models Only)
THERMALLY-VENTILATED BASE 3. Press the button to confirm. This function is particularly suitable for cooking on a single shelf with low 4. At the end of the minute minder timer, an energy consumption. acoustic signal sounds and the indicator It is recommended for all types of food, light flashes on the display. - Page 15 that the food is perfectly cooked by monitoring Setting cooking parameters when using the the core temperature of the food. The core temperature probe temperature is measured by a sensor inside the Caution: during use, the accessible tip of the probe. parts become very hot.
- Page 16 6. Close the door. 2. Turn the temperature knob to set the cooking temperature (for example "190°C"). 3. Press the button to start the function. The appliance will begin preheating. At the end of preheating: 4. Open the appliance door. 5.
-
Page 17: Cooking Advice
• If the dessert collapses when it comes out of signal sounds and the display shows the oven, on the next occasion reduce the 1. Open the door. set temperature by about 10°C, selecting a 2. Remove the probe from the food and unplug longer cooking time if necessary. -
Page 18: Cooking Information Table
Cooking information table We recommend the use of the grill as a support surface for baking moulds/casseroles. In the absence of the baking tray grill, the grill can be used as a base for grilling with the deep baking tray placed on a shelf below to collect the juices. For multilevel baking, place two grills leaving one free shelf between them. - Page 19 Weight Temp. Time Food Function Shelf preh (kg) (°C) (minutes) FAN-ASSISTED Cream chicken thighs Breaded chicken cutlets 6 pcs FAN-ASSISTED 10 - 15 (thickness 1 cm) Add some white wine after 20 minutes, wet with stock from time to time during cooking. Add brandy after 20 minutes, wet occasionally during cooking.
-
Page 20: Multi-Level Cooking Instructions
Multi-level cooking instructions Food Function Shelf Ø 20 - 26 CIRCULAIRE 2 - 4 Cakes Ø 20 - 26 width 30 Mixed roasted vegetables / CIRCULAIRE 2 - 4 Roast potatoes width 30 width 30 CIRCULAIRE 2 - 4 Pizzas and focaccia width 30 CIRCULAIRE 1 - 3 or 1 - 4... - Page 21 1. After entering the special functions menu, 1. After entering the special functions menu, press the button until the press the button until the function is selected. function is selected. If the indoor temperature is higher than If the indoor temperature is higher than expected, the function is not activated expected, the function is not activated and every time the...
- Page 22 activation with the knob will not activate the 4. After entering the special functions menu, light. press the button until the • The internal fan remains turned off. function is selected. • Knob illumination and audible prompts remain disabled. After activating the Sabbath mode the settings cannot be altered.
-
Page 23: Secondary Functions
3. Close the door 1. After entering the special functions menu, 4. After entering the special functions menu, press the button until the press the button until the function is selected. function is selected. 2. Press the button to confirm. 5. -
Page 24: Settings
1. Press the button on the main menu. The 5. Press the button to set the current time and go to the selection of minutes. 6. Turn the temperature knob to select the minutes of the current time. 7. Press the button to confirm. - Page 25 2. Turn the temperature knob to activate the 1. After entering the setting menu, press the control lock function. button until the show room function is selected. 3. Press the button to go to the next 2. Turn the temperature knob to activate the setting or press the button to confirm.
- Page 26 1. After entering the setting menu, press the 2. Turn the temperature knob to the right or left to select the desired brightness, from value 1 button until the keep warm function is (low brightness) to value 5 (high brightness). selected.
-
Page 27: Cleaning And Maintenance
CLEANING AND MAINTENANCE Cleaning the appliance 2. Grasp the door on both sides with both hands, lift it forming an angle of around 30° and remove it. See General safety instructions. Cleaning the surfaces To keep the surfaces in good condition, they should be cleaned regularly after use. -
Page 28: Cleaning The Oven Cavity
4. Then remove the inner glass pane from the 7. Clean the external glass pane and the front profile. panes removed previously. 8. Use absorbent kitchen roll. In case of 5. Pull the intermediate glass unit downwards stubborn dirt, wash with a damp sponge from the door and then lift it upwards. -
Page 29: Special Cleaning Functions
Vapor Clean (on some models only) • The rack/tray support frames. In the event you are using specific See General safety instructions. cleaning products, we recommend running the oven at maximum temperature for 15-20 minutes in order The Vapor Clean function is an assisted to eliminate any residue. -
Page 30: Pyrolytic (On Some Models Only)
1. After entering the special functions menu, Vapor Clean End 1. Turn the function knob to 0 to exit from the press the button until the function. 2. Open the door and wipe away the less function is selected. stubborn dirt with a microfibre cloth. 3. - Page 31 • If present, remove the temperature probe. that the door is locked by a device that • Remove the rack/tray support frames. prevents the door from being opened. • Close the door. It is not possible to select any function Pyrolytic function setting once the door lock device has been activated.
-
Page 32: Extraordinary Maintenance
4. Slide out and remove the light bulb. the Pyrolytic function. It is not possible to select any function once the door lock device has been activated. It is always possible to switch the appliance off, by turning the function knob to the 0 position. -
Page 33: Installation
INSTALLATION Electrical connection Cable replacement Power voltage See General safety instructions. Danger of electrocution • Disconnect the mains power supply. General information Check the mains characteristics against the data 1. Unscrew the rear casing screws and remove indicated on the plate. the casing to access the terminal board. - Page 34 leaking in. Fastening bushings 1. Remove the bushing covers on the front of the appliance. 2. Mount the appliance into the recess. 3. Secure the appliance to the cabinet using screws. 4. Cover the bushings with the previously removed covers. Appliance overall dimensions (mm) 914779561/D INSTALLATION - 77...
- Page 35 Mounting into a column (mm) Make sure that the cabinet top/rear section has an opening approx. 35-40 mm deep. 78 - INSTALLATION 914779561/D...
- Page 36 Mounting under worktops (mm) If the appliance is to be built-in under a worktop, a wooden bar has to be installed order to use the seal that is glued to the back of the front panel to prevent water or other liquids leaking in. A min.
- Page 37 A min. 603 mm B 560 - 564 mm C 583 - 585 mm D 9 - 11 mm E min. 5 mm F 121 - 1105 mm G min. 560 mm H min. 594 mm co Cutout for power cord (min. 6 cm jb Electrical connection box wb Wooden bar (recommended) Mounting under worktops (mm) (pyrolytic...
- Page 38 When using a wooden separator, a wooden bar has to be installed under the worktop in order to use the seal that is glued to the back of the front panel to prevent water or other liquids leaking in. 914779561/D INSTALLATION - 81...
Need help?
Do you have a question about the SOP6302TX and is the answer not in the manual?
Questions and answers