Table of Contents
Advertisement
.
LIBERTY
User Manual
301-0005V & 301-0005VP PORTABLE OXYGEN CONCENTRATOR
Oxlife Liberty and Oxlife Liberty2
USER: Read this manual before operating the device and save this
manual for future reference.
HEALTH-CARE PROVIDER: This manual must be provided to the
end user.
®
2
PROUDLY DESIGNED,
ENGINEERED AND
ASSEMBLED IN THE U.S.A
.
Advertisement
Table of Contents

Subscribe to Our Youtube Channel
Related Manuals for O2 Concepts LIBERTY2


Summary of Contents for O2 Concepts LIBERTY2
- Page 1 ® LIBERTY User Manual 301-0005V & 301-0005VP PORTABLE OXYGEN CONCENTRATOR Oxlife Liberty and Oxlife Liberty2 USER: Read this manual before operating the device and save this manual for future reference. HEALTH-CARE PROVIDER: This manual must be provided to the end user.
- Page 2 Symbols Reference/Safety Information Icon Meaning Icon Meaning Caution represents the Warning represents the possibility of damage to possibility of harm to the the equipment operator or patient Not suitable for use No smoking while using in the presence of a or near device flammable anesthetic mixture...
-
Page 3: Device Symbols
Device Symbols Icon Meaning Icon Meaning Power button Cell connected Menu button GPS signal RDM connected Increase flow setting (Tech Support Only) Provider Information Decrease flow setting Battery charge status Alarm AC/DC battery Breath detection charging indicator Cell signal strength Device status Exit AC/DC power... -
Page 4: Specifications
Specifications Dimensions 10 in (25.4 cm) Device Dimensions 9 in (22.9 cm) 3.5 in (8.9 cm) Weights Device Weight 6.36 lbs. (2.88 kg) Battery 1.14 lbs. (0.52 kg) AC Charger 1.60 lbs. (0.72 kg) DC Charger 0.39 lbs. (0.17 kg) Modes of Operation Continuous Mode 301-0005V... - Page 5 Oxygen Purity 91% ± 4% (87 - 95%); Measured purity values are within ± 2% of actual values; There is no variation in purity within the operating altitude. This applies to the full range of environmental operating conditions. Operating 50°F (10°C) to 104°F (40°C) Temperature Operating Humidity 10% - 95% @ 82.4°F (28°C)
-
Page 6: Indications For Use
Contraindications Under certain circumstances, the use of non-prescribed oxygen therapy can be hazardous. This device should only be used when prescribed by a clinician. Not for use in the presence of aerosol sprays or flammable anesthetics. Additional monitoring may be required, as appropriate, for use by geriatric, pediatric, or any other patient unable to hear, see or interpret alarms or communicate discomfort. -
Page 7: Section 2: Safety Guidelines
Section 2: Safety Guidelines Device Safety Guidelines AVOID EXPOSURE TO OPEN FLAMES OR CREATION OF ANY SPARK NEAR YOUR OXLIFE LIBERTY. THIS INCLUDES SPARKS FROM STATIC ELECTRICITY CREATED BY ANY TYPE OF FRICTION. PROTECT ELECTRICAL POWER CORDS FROM SHARP EDGES TO AVOID ELECTRICAL SHOCK AND SERIOUS PHYSICAL INJURY. - Page 8 This device complies with Part 15 of the FCC Rules. Operation is subject to the following two conditions: (1) This device may not cause harmful interference, and (2) This device must accept any interference received, including interference that may cause undesired operation. Portable RF communications equipment (including peripherals such as antenna cables and external antennas) should be used no closer than 12 ®...
- Page 9 Patient Safety Guidelines DO NOT SMOKE WHILE USING THIS DEVICE. KEEP ALL MATCHES, LIT CIGARETTES, CANDLES, OR OTHER SOURCES OF IGNITION AT LEAST 10 FEET FROM THE DEVICE. THIS DEVICE PRODUCES ENRICHED OXYGEN GAS WHICH ACCELERATES COMBUSTION. PRESCRIBED MODE AND FLOW SETTINGS SHOULD ONLY BE ADJUSTED UNDER THE ADVICE OF A PHYSICIAN.
- Page 10 DO NOT leave the nasal cannula or mask on bed coverings or chair cushions. If the oxygen concentrator is turned on, but not in use, the oxygen will make the materials flammable. Turn the oxygen concentrator off when not in use to prevent oxygen enrichment.
-
Page 11: Battery And Power Supply Safety Guidelines
Battery and Power Supply Safety Guidelines Use of non-approved battery or power supply may cause serious damage to the device and will void the warranty. Store the battery in a cool dry place when not in use to enhance battery life. Remove the battery from the device if it will not be used for an extended period of time to enhance battery life. -
Page 12: Section 3: Product Description
Section 3: Product Description Device and Accessories The use of certain humidifiers and administration accessories not specified for use with this oxygen concentrator may impair performance. Your physician, healthcare provider or authorized dealer will recommend the proper accessories for your use. Your physician, healthcare provider or authorized dealer will recommend the proper cannula for your use. -
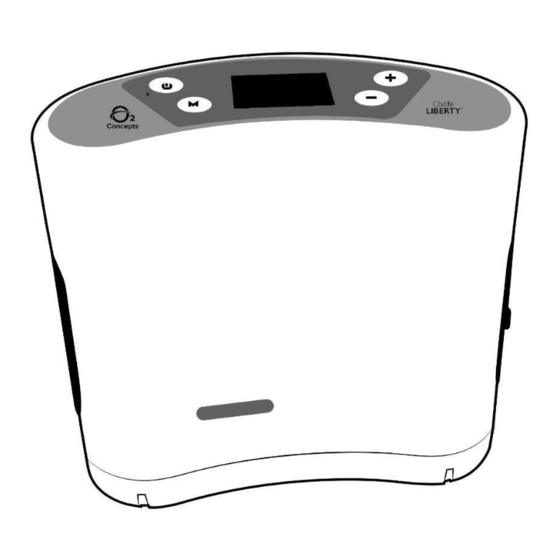
Page 13: Feature Identification
Feature Identification 1. Control Panel 6. Side Vents 2. LCD Display 7. Exhaust Ports 3. External Power Input 8. Device Serial Number 4. Rechargeable Battery 9. FAA Approval Statement 5. Oxygen Outlet Port... -
Page 14: Understanding The Control Panel
Understanding the Control Panel 10. Power Button 19. Alert/Alarm Indication 11. Mode Button 20. Breath Detection 21. Green Status Circle – 12. Battery Status/Battery Charging Indicator Open circle during warm-up. Filled 13. Cell Signal Strength circle indicates flow 14. Airplane Mode and purity are within 15. -
Page 15: Section 4: Operating Instructions
Section 4: Operating Instructions Before Operating Your authorized dealer or healthcare provider has demonstrated the proper ® operation of your Oxlife Liberty . This manual provides product information and operating instructions and should be saved for future reference to help you safely operate your device. -
Page 16: Locating Your Device
Locating Your Device ® Place the Oxlife Liberty in a well-ventilated area free of smoke, fumes, pollutants, and away from direct sunlight. Avoid high humidity environments. Ensure side vents and exhaust ports are not obstructed. Proper placement and positioning of the device is critical to the effectiveness of the oxygen therapy. -
Page 17: Device Settings
Device Settings Turn the device on by pressing the Power button. Press the Mode button to select Continuous or Pulse Mode. Press the Increase or Decrease buttons to select the desired flow rate. Turn the device off by pressing the Power button. When the device is powered on it will enter a five (5) minute warm-up period to reach desired performance. - Page 18 The patient is the intended operator. Consult your healthcare provider if you are feeling unwell, which may indicate too much or too little oxygen. These side effects are not immediate or life threatening. CONTINUOUS MODE In Continuous Mode the device will deliver a continuous flow of oxygen through the nasal cannula.
- Page 19 32.5 37.5 40.0 *Pulse Mode setting 10 available with the Liberty2 device. Pulse Mode No Breath Detection When the device has not detected a breath for 45 seconds, the screen will turn amber, sound a 3-beep sequence and the text “No Breath” will flash on the screen. If the device does not detect a breath after an additional 15 seconds, the device will beep once and switch to Continuous Mode.
-
Page 20: Installing And Removing The Battery
2.0* will degrade with Pulse Mode Settings Operating Time/Hours battery age, number of charge cycles and operating environment. 1.75 1.75 1.25 1.25 *Continuous Mode settings 1.75 and 2.0 and Pulse Mode setting 10 are available with the Oxlife Liberty2 device. -
Page 21: Battery Time Management
Battery Time Management ® The Oxlife Liberty is equipped with a rechargeable lithium-ion battery that is not user serviceable. The battery will degrade over time from standard use. The rate of such degradation is dependent upon the frequency of operation of the device under battery power as well as the frequency and length of associated battery charging cycles. -
Page 22: Ac Power Supply
AC Power Supply Use only the AC power supply (800-1083) provided with this device. Use of ® power cords not supplied by O Concepts may cause overheating or damage to the device and will void the warranty. The power supply is not water resistant. DO NOT place anything in the power supply port other than the supplied AC or DC power cords. - Page 23 Recommendation for Use Do not use electrical outlets controlled by a switch. When changing power sources, wait for the control panel to display the new power icon and the unit to beep before removing the original source. The detachable power supply cord to the power supply is the means of isolating the unit from the power supply main.
-
Page 24: Dc Power Cord
Switch to battery power to continue using your device. Use only the DC power cord (800-1079) provided with this device. Use of power cords not supplied by O2 Concepts may cause overheating or damage to the device and will void the warranty. -
Page 25: Recommendations For Use
Recommendations for Use ® When operating the Oxlife Liberty in your vehicle, ensure that the device is securely stowed and will not get damaged during transport. Ensure that side vents and exhaust ports are not blocked. The battery may not charge at any setting if the engine is not running. Use the DC outlet closest to the car battery. - Page 26 DC Power Cord User Information Guide Starting the device on DC power ALWAYS have the vehicle's engine running BEFORE ® plugging in your Oxlife Liberty Plug DC power cord into the device BEFORE plugging into the vehicle’s DC outlet. Plug DC power cord into the vehicle’s DC outlet. Remove the DC power cord from the vehicle’s DC outlet when the engine is not running.
- Page 27 DC Power Cord Troubleshooting Guide Event Solution • Reduce the device mode to the lowest setting on either Battery Not Charging Pulse or Continuous mode and wait for charging icon to appear. • Slowly increase settings to determine if charging can be achieved at prescribed setting.
-
Page 28: Carry Bag
Carry Bag ® The Oxlife Liberty carry bag provides protection and allows you to easily take your device with you for your daily activities. ® Always use your Oxlife Liberty in the supplied carry bag. Check that the adjustable shoulder strap is secure, and the battery access zipper is closed before each use. -
Page 29: Cannula Use
Cannula Use Your physician, healthcare provider or authorized dealer will recommend the proper cannula for your use. Ensure selected cannula is compliant to ISO 80601-2-69 Medical Electrical Equipment, particular requirement for basic safety and essential performance of oxygen concentrator equipment. Use of a cannula not specified for use with oxygen may impair the performance of your device. -
Page 30: Accessing The Menu Screen
Accessing the Menu Screen The provider screen shows information about the device’s status and run hours. To access the Menu screen: › Press the Mode (M) and Minus (-) buttons simultaneously. › Press the Plus (+) button or Minus (-) button to scroll through the screen options. - Page 31 Changing Device Language Device language is available in English, French, German, Italian and Spanish. To change device language: › Press the Mode (M) and Minus (-) buttons simultaneously to access the Menu screen. › Press the Plus (+) button to scroll to the language icon ( ›...
-
Page 32: Section 5: User Alerts And Alarms
Section 5: User Alerts and Alarms The functionality of the alarm system is verified automatically by the unit upon start up by the unit flashing three (3) visual display colors and audible indicators. There will be delays that are greater than ten (10) seconds inherent to specific alarms, and these delays are explained in detail for each alarm in the following tables. - Page 33 Alarm and Alert Screen Descriptions Alarms The LCD screen will be RED in Alarm Mode Low Purity Alarm When oxygen levels drop below 72% for 60 seconds, (technical) the screen will flash red, sound a 10-beep sequence repeated after 2.5 seconds of silence and the text “Low (high priority) Purity”...
- Page 34 Low External When the voltage from an external power source falls Power Alarm below 10 volts (as measured by the device internally), (technical) the screen will flash red at 2Hz, sound a 10-beep (high priority) sequence repeated after 2.5 seconds of silence and the text “Low External Power”...
- Page 35 Invalid Motor When the motor temperature is out of a valid range for Temperature Alarm 15 seconds, the screen will flash red at 2Hz, sound a (technical) 10-beep sequence repeated after 2.5 seconds of silence and the text “Invalid Motor Temperature” will flash on the (high priority) screen.
- Page 36 No Flow Alarm When the flow of oxygen is stopped for 45 seconds, the (technical) screen will flash red at 2Hz, sound a 10-beep sequence (high priority) repeated after 2.5 seconds of silence and the text “No Flow” will flash on the screen. The alarm will continue to sound until the power button is pressed momentarily to silence the audio;...
- Page 37 Alerts The LCD screen will be AMBER in Alert Mode When the device has not detected a breath for 45 No Breath Alert seconds, the screen will turn amber, sound a 3-beep (technical) sequence and the text “No Breath” will flash on the (low priority) screen.
- Page 38 Low Battery Alert When calculated battery run time reaches 6 minutes (technical) remaining, the screen will turn amber, sound one beep every 30 seconds and the text “ALERT Low Battery” will (low priority) flash on the screen. Pushing the Power button once momentarily silences the alert.
-
Page 39: Alarm System Test
Alarm System Test Use this test to verify that the alarm system is working properly. This test includes screen color, screen flashing sequence, and audible alarm sequence. Follow the steps in the procedure listed below. › Simultaneously press the Mode (M) button and Minus (-) button to enter the Menu screen. -
Page 40: Section 6: Maintenance And Cleaning
Section 6: Maintenance and Cleaning Maintenance Routine cleaning of the side vents, and the device care and cleaning, as described below, are the only routine maintenance by the user necessary ® for the operation of the Oxlife Liberty ® There is no routine maintenance or service to the Oxlife Liberty lithium-ion rechargeable batteries other than periodic replacement as described in the section on Battery Time Management, page 28. - Page 41 Device Care and Cleaning Side Vent Cleaning Routine cleaning of the side vents as described below and periodic cleaning of the exterior of the device is the only routine maintenance. ® To keep your Oxlife Liberty working properly, it is recommended you clean the side vents ®...
- Page 42 Device and Battery Cleaning ® Unplug your Oxlife Liberty and remove the battery before cleaning. Do not submerge your device or any accessories or allow water to enter the device. Clean the exterior of your device and/or battery using a soft cloth dampened with a mild detergent and water and wipe dry.
-
Page 43: Device Disposal
Carry Bag Cleaning Remove the device from the carry bag before cleaning. Follow these simple directions to clean the Carry Bag: The carry bag can be cleaned using a damp cloth or by washing in a washing machine alone, on a gentle cycle, using cold water and a mild detergent. - Page 44 Section 7: Traveling Before traveling, be sure to pack the following: › Accessory Bag › Carry Bag › AC Power Supply › DC Power Cord › Fully Charged Battery (and extra batteries if required) › User Manual Also, bring contact information for your healthcare provider, authorized dealer and/or physician.
-
Page 45: Entering And Exiting Airplane Mode
Entering and Exiting Airplane Mode The cellular connection must be deactivated prior to flight on any commercial aircraft. To enter and exit Airplane Mode, follow the steps listed in the procedure below. Simultaneously press the Mode (M) and Minus (-) buttons to enter the Menu screen.
Need help?
Do you have a question about the LIBERTY2 and is the answer not in the manual?
Questions and answers