Table of Contents

Related Manuals for Cincinnati CL-6 3000


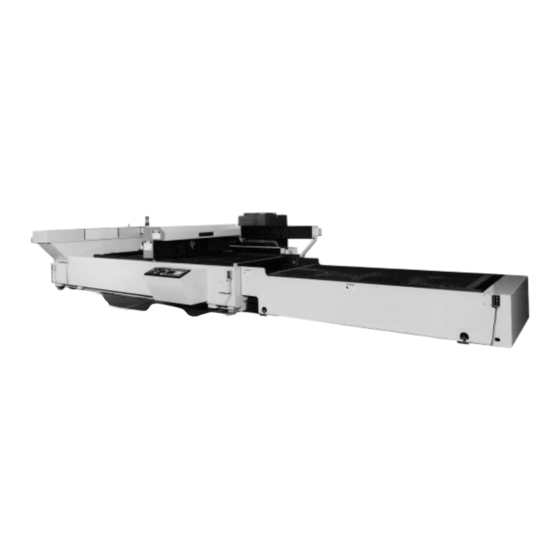
Summary of Contents for Cincinnati CL-6 3000
- Page 1 OPERATION, SAFETY AND MAINTENANCE MANUAL CL-6 3000 CNC LASER CENTER C I N C I N N A T I I N C O R P O R A T E D C I N C I N N A T I ,...
-
Page 2: Table Of Contents
CL-6 3000 CNC LASER CENTER CONTENTS INTRODUCTION SECTION 1 IDENTIFICATION SECTION 2 INSTALLATION LIFTING AND MOVING FOUNDATION ERECTION OF MACHINE CHILLER LEVELING ELECTRICAL CONNECTION SAFETY DEVICES SECTION 3 SAFETY SAFETY IS EVERYONE'S JOB EXPLANATION OF LASER RADIATION HAZARDS ASSOCIATED HAZARDS... - Page 3 FINAL ALIGNMENT CHECK 9-13 MIRROR COOLING 9-13 ALARM AND OPERATOR MESSAGES 9-14 PREVENTIVE MAINTENANCE 9-15 TROUBLESHOOTING 9-16 SECTION 10 SERVICE AND PARTS SERVICE 10-1 TECHNICAL TRAINING 10-1 ORDERING REPAIR PARTS 10-1 RETURNING PARTS FOR CREDIT 10-1 © COPYRIGHT 1998 CINCINNATI INCORPORATED...
- Page 4 Set up and programming Quality and type of material CINCINNATI machines are designed to be rugged and durable. However, improper adjustment or lack of maintenance can reduce the quality of parts produced on the machine. The quality of a laser-cut edge depends on the combination of a uniform...
-
Page 5: Identification
SECTION 1 IDENTIFICATION CL-6 3000 CNC LASER CENTER CONSTANT BEAM STAND (U-Axis) 8. X-AXIS GUIDE & BALLSCREW 13. MATERIAL CLAMPS HIGH VOLTAGE WARNING (Covered) 14. SCRAP / COOLANT COLLECTOR LASER WARNING LIGHT 9. X-AXIS BEAM TUBE 15. OPERATOR'S MANUAL GANTRY 10. - Page 6 ASSIST GAS PRESSURE SWITCH 8. ASSIST GAS CONNECTION ADJUSTMENT VALVE FOR COOLANT 9. GAS JET TIP (Nozzle) Z-AXIS DRIVE MOTOR 10. FOCUS ADJUSTING RING COUNTERBALANCE SPRING LATCH 11. 5.0” FOCAL LENGTH LENS HOLDER HINGED COVER 12. 7.5” FOCAL LENGTH LENS HOLDER LENS COOLING WATER LINES 13.
- Page 7 X-AXIS BALLSCREW (Covered) 6. FUME DUCT RAPID PIERCE SPARK SHIELD 7. X-AXIS SERVO MOTOR PALLET SCRAPERS 8. PALLET CHAIN DRIVE PALLET SCRAP TRAYS 9. PALLET DRIVE MOTORS (2) AUTO LUBE PUMP AND RESERVOIR FIGURE 1 - 3 – Main frame, resonator end...
-
Page 8: Installation
1.5” THICK by two lifting links with spacers (C. I. Part #920584 and #921838). The two lifting links (supplied by CINCINNATI INCORPORATED) are attached to the inside of the main frame with 1”-8 UNC SHCS bolts. See Figure 2-1. When lifting with chains, cables or straps, use the maximum length possible to reduce the side loading generated at the lift points. -
Page 9: Foundation
CINCINNATI INCORPORATED must be consulted. positioned as shown on the foundation plan draw- A certified foundation plan drawing is provided when ing. Consult CINCINNATI INCORPORATED if an the machine is ordered. This drawing will provide the alternative chiller location is required. The chiller... - Page 10 FIGURE 2-4 – Reference points for machine leveling FINAL LEVELING Final leveling should be done with a CINCINNATI INCORPORATED Service Representative present. The purpose of final leveling is to ensure that the gantry does not rotate about the X-axis as the gantry moves from end-to-end.
-
Page 11: Electrical Connection
The CL-6 3000 standard electrical input is 460 DO NOT START MACHINE UNTIL THOROUGHLY volt, 3 phase and 50/60 Hertz. The machine must... -
Page 12: Safety
The laser is an intense, highly directional beam of magnetic spectrum pertinent to our discussion. The light that, if directed, reflected or focused upon an area the CINCINNATI CL-6 3000 LASER operates in object, will be partially absorbed. This raises the tem- is located between 3x10... - Page 13 Gamma rays 3x10 X-rays 3x10 3x10 Ultraviolet 3x10 rays 3x10 Visible light (380-780 nanometers wavelength) 3x10 3x10 Lasers CINCINNATI CNC LASER Infrared 3x10 rays 3x10 3x10 3x10 Microwave 3x10 FM broadcast band Radio -frequency (RF) waves AM broadcast band 3x10...
- Page 14 CONTROL MEASURES most important and most often quoted. It pro- vides information on how to classify lasers for The CINCINNATI CNC Laser Center has been safety, laser safety calculations and measure- designed and manufactured using the highest ments and laser hazard control measures. A more engineering control measures practical, however, recent ANSI Standard B11.21-1997 pertains to...
-
Page 15: Explanation Of Laser Radiation
A second laser is part of the CL-6 3000 CNC Laser interact with light and other forms of energy. Center. This is a diode laser which produces a visi- ble red beam. -
Page 16: Hazards
SUPPLY CABINET. CONTACT WITH VOLTAGE tion, maintenance and service personnel while work- CARRYING CONDUCTORS IS NOT NECESSARY, ing at the CINCINNATI CNC Laser Center. The type AS ENERGY AT THIS POTENTIAL CAN JUMP TO and style of eye protection to use should be worked A CLOSE BODY AT GROUND POTENTIAL –... -
Page 17: Gas Storage
Workers assigned to handling pressurized cylinders The CL-6 3000 Laser Center has provisions for an should be properly trained and should work only exhaust system that draws air down from the cut- under competent supervision. - Page 18 Oxygen cylinders should not be stored within 20 Unless the cylinder valve has first been closed ft. (6 m) of cylinders containing flammable gases tightly, do not attempt to stop a leak between or near the location of other highly combustible cylinder and regulator by tightening union nut.
- Page 19 ery) gage by a steady buildup of pressure when sue. When spilled, they tend to spread. The demand is off, the cylinder valve should be vapors emitted by these liquids are also extreme- closed and the regulator removed for repairs. ly cold and can damage delicate tissues.
-
Page 20: Precautions
- a number of warning signs are attached to ted from the laser head. CINCINNATI Lasers. Warning signs are not intend- ed to be a substitute for reading and understanding this Safety Section and the machine Operation, AVOID EXPOSURE Safety and Maintenance Manuals. - Page 21 This sign is mounted on operators' side of gantry, DANGER main frame, U-axis and another sign is mounted on X-beam tube. INVISIBLE AND/OR VISIBLE LASER RADIATION WHEN OPEN. AVOID EYE OR SKIN EXPOSURE TO DIRECT OR SCATTERED RADIATION. DANGER 830135 POISONOUS FUMES MAY BE FORMED BY INVISIBLE AND / OR VISIBLE LASER CUTTING.
-
Page 22: Safety Guidelines
WARNING DANGER DO NOT CLIMB ON MATERIAL SUPPORT GRIDS OR MACHINE FRAME – THEY ARE NOT SAFE WALKING BEFORE ENTERING THIS AREA, SET OR WORKING THE "DRIVES" KEYSWITCH ON THE SURFACES OPERATOR CONTROL CONSOLE TO THE "LOCK / OFF" POSITION AND DO NOT REMOVE THIS SIGN FROM CNC LASER CENTER 920050 REMOVE THE KEY. -
Page 23: Safety Maintenance Check
Know your controls, be familiar with emergency PINCH POINT guarding properly installed. shutdown procedures. OPERATOR CONTROLS working O.K. Do not position any part of your body where it may OPERATING MODES functioning properly. be struck or crushed by machine movement. GANTRY and CUTTING HEAD positioning properly. -
Page 24: Specifications
SECTION 4 SPECIFICATIONS DIMENSIONS WIDTH LENGTH WEIGHT HEIGHT MODE COMPONENT SHIPPED INSTALLED SHIPPED INSTALLED MAIN 139 in. 147 in. 300 in. 350 in. 76 in. 18,000 lbs. 26,050 lb. 60 x 120 72 x 144 (3531 mm) (3734 mm) (7620 mm) (8890 mm) (1930 mm) (11814 kg) -
Page 25: Piping Connections
Maximum Hardness: 200 mg CaCO /liter The pre-mix laser gas must meet the following speci- fications: Maximum Cl Concentration: 50 mg/liter pH Range with additive: 6.5 to 8.0 5 ± 0.25% at 99.99% (or greater) purity Conductivity: < 1000 µ S /cm Chiller Temperature Set Point: 77°F (25°C) 40 ±... - Page 26 REGULATOR MANIFOLD TYPICAL APPROXIMATE SPECIFI- TYPE LABEL PURITY PRESSURE GAS USAGE CATION Gas in 4 to 80 PSI 0.36 SCFH CGA 580 LASER 99.99% 25 PSI Premix resonator) Grade 5 10 to 600 PSI 325 SCFH @ 100 PSI ASSIST Oxygen Variable Compatible...
-
Page 27: Capacities
3. Oxygen Assist Gas: High pressure oxygen is regulator. Flow rates and pressure require- the primary assist gas used for cutting most ments will be similar to those of oxygen or metals. Flow rates and operating pressures will nitrogen assist gases. be dependent on each specific application. -
Page 28: Ambient Temperature
AMBIENT TEMPERATURE ter as shown in Figure 4-2. This figure shows max- imum feedrates for CL-6 3000 Laser Centers using 105° F (40° C) maximum Look Ahead Control (LAC). LAC is a combination of 50° F (10° C) minimum several CNC control functions that significantly... - Page 29 FIGURE 4 - 2 – Feedrate limit for specified roundness tolerance of hole using Look Ahead Control...
-
Page 30: Setup And Use
(-X) of the first stop. LASER START-UP Set the focal point near the material surface. Run the MATERIALS REQUIRED program and then jog the Y-Stops, CINCINNATI Part No. 910251, (installed cutting head back (-X) so examine when shipped). 2.38 scribed line on the stop. - Page 31 If the scribed line is under 2.375", increase the f. If the error is .002" (.051mm) or less, this pro- parameter value by the distance adjustment (in cedure is complete. parameter units). If the parameter is negative, g. If error is more than .002", change parameter this will make it a smaller negative number.
- Page 32 O0300 (X-STOP); before the X = 0 stops can be set: G20; G90 N1 F - - - LASER SET UP, ELECTRICAL (by CINCINNATI N2 G89 - - - Service), specifically setting of X-Axis grid shift N3 G53 X-.06 Y5;...
-
Page 33: Machine Controls
SECTION 6 MACHINE CONTROLS FIGURE 6-1 – Machine Operator Panel PRELIMINARY EM-439 (N-01/98) (01/98) -
Page 34: Operator Control Station
FIGURE 6-2 – CRT / MDI panel OPERATOR CONTROL Action: Enables Laser Center CRM circuits. Indicator: Illuminates when drives are active. STATION Name: DRIVES-LOCK/OFF, RUN The Operator Control Station is made up of two pan- Device Type: Two position keyswitch els - the Machine Operator Panel (Figure 6-1) and Prerequisite: None. - Page 35 Name: LASER HV-ON Group: PALLETS Device Type: Pushbutton/indicator (green) Name: UPPER-IN Prerequisite: Laser mains must be ON, high voltage Device Type: Momentary pushbutton/indicator interlock circuits must be satisfied (amber) and laser status must be READY. Prerequisite: The CNC must be in the JOG mode. Action: Activates the laser high voltage power Manual...
- Page 36 Action: Depressing this pushbutton causes Name: DNC (direct numerical control) the lower pallet to move from the Device Type: Pushbutton/indicator (white) main frame toward the load frame. Prerequisite: CNC must be in the MEM mode. Motion stops if the pushbutton is Action: Depressing this pushbutton places released.
- Page 37 Name: OPTION STOP ed. That is, no changes can be made Device Type: Toggle pushbutton/indicator (white) to the programs and data in memory. With the keyswitch is the NO position, Prerequisite: CNC must be in either MEM or MDI mode. CNC programs and parameter/diag- nostic data can be edited and loaded.
- Page 38 Name: READY Group: Auxiliary Device Type: Indicator (white) Name: COOLANT PUMP Prerequisite: Not applicable. Device Type: Toggle pushbutton/indicator (white) Action: None. Prerequisite: None. Indicator: Illuminates when laser is in the Action: Depressing this pushbutton activates READY state. In the start-up the coolant pump.
- Page 39 effect on the feedrate in the rapid tra- mined by the multiplication pushbut- verse mode. Depressing this pushbut- tons) each time the Y- pushbutton is ton a second time disables the rapid depressed. traverse mode. Indicator: Illuminates flashing when the Y-axis Indicator: Illuminates when the CNC is in the completes its zero return positioning...
- Page 40 Action: Depressing this pushbutton puts the Action: With the keyswitch in the LOCK posi- CNC in incremental jog mode. In this tion, axis motion, pallet motion and mode, a fixed increment of axis the fume blower are disabled. The key motion takes place each time an axis can be removed in this position.
-
Page 41: Crt / Mdi Panel
CRT / MDI PANEL operator panel. See Figure 6-1. Depressing this pushbutton stops The CRT/MDI panel is shown in Figure 6-2 for refer- program execution and disables all ence. A complete description of the operation of this laser center functions except for the panel is given in Section III of the 16-L Operator’s fume blower. -
Page 42: U-Axis Remote Station
is used for manually opening the U-AXIS REMOTE STATION shutter for mode shots and beam The U-Axis Remote Station is a hand held control alignment. connected by a cable to the main frame. This control The SHUTTER FLASH pushbutton permits the functions described below to be manual- remains active for 2 seconds after ly operated when performing setup or maintenance. - Page 43 CYCLE STOP status is maintained Name: until the CYCLE START pushbutton Device Type: Momentary pushbutton (amber) RESET pushbutton Prerequisite: U-axis Remote Station must be depressed. enabled. Indicator: CYCLE STOP indicator on machine Action: When this pushbutton is depressed, operator panel illuminates when the the U-axis will move in the positive CYCLE STOP condition exists.
-
Page 44: Section 7 Operation
CAL state for about 5 minutes while the base FOLLOW THIS PROCEDURE CAN RESULT IN discharge is initiated and a laser power calibra- INTERNAL DAMAGE TO THE CHILLER. CINCINNATI tion is performed. INCORPORATED RECOMMENDS LEAVING THE CHILLER DISCONNECT ON AT ALL TIMES UNLESS 12. -
Page 45: Cutting Procedures
is OFF, turn the chiller disconnect ON, and wait 8 the FEEDHOLD pushbutton on either Remote hours before running the chiller. Then the SYSTEM Control Station. switch may be turned to “LOCAL” or “REMOTE” for 10. In an emergency situation, depress the EMER- normal operation. -
Page 46: Breakaway Cutting Head
3. Depress the ZERO RETURN pushbutton. 4. If the RAPID TRAVERSE indicator is illuminat- ed, turn it OFF before proceeding. Press -Y to 4. Depress and hold the X– and Y– pushbuttons jog the cutting head to within easy reach of the until both pushbuttons illuminate flashing. -
Page 47: Alignment Shot
Abandon the interrupted cut by completing and the following program must be run to set up it in DRY RUN and SINGLE BLOCK mode the power level, assist gas pressure and the shut- until M35, M37, M42 or M47 is command- ter flash system. -
Page 48: Lens Centering
LENS CENTERING 6. Apply a small amount of ink to the alignment tip by pressing an inkpad against the tip or by MATERIALS REQUIRED rubbing the tip with a felt marker pen. Place a length of masking tape over the orifice in the Masking tape nozzle tip. -
Page 49: Lens Focal Point Location
LENS FOCAL POINT LOCATION MATERIALS REQUIRED One sheet of 16 gauge (.060”) or thinner mild steel 24” by 36” (minimum), clamped in place on either pallet. One set of feeler gages with .004” to .020” gages in .001” increments. PURPOSE The location of the laser beam focal point is a crit- ical parameter which affects the quality and accu- racy of the cutting process. -
Page 50: Programmable Assist Gas Pressure
The nominal setting for the 5 inch lens is six (6) tering procedure with the new nozzle tip turns down for a standoff of 0.050”. The nomi- and cut another test part. nal setting for the 7.5 inch lens is seven (7) All edges are bad: The focal point is signifi- turns down for a standoff of 0.050”. -
Page 51: Rapid Pierce
The spatter control flaps when the G89 and G84 macro commands are used. on the Y-box prevent spatter from reaching the X- For programming details, see the CL-6 3000 MACRO axis covers and the operator control station. EXECUTOR MANUAL (EM-443). -
Page 52: Programmable Part Coolant (Optional)
Coolant on - Coolant is commanded to flow by pro- programming these power control modes are provid- gramming M08. Coolant will not be allowed to ed in the CL-6 3000 MACRO EXECUTOR MANUAL flow unless an assist gas is sensed at the nozzle. (EM-443). -
Page 53: Alignment Laser
CUTTING MAX. To program the CL-6 3000 Laser Center for a variety of applications, CINCINNATI INCORPORATED offers three different cutting modes - continuous wave, MIN. pulsed and dynamic power. -
Page 54: Programming
Local Coordinate System Setting Machine Coordinate System Selection PROGRAMMING Work Coordinate System 1 Selection Part programs for the CL-6 3000 Laser Center are Work Coordinate System 2 Selection generated using the standard G-Codes and M-Codes Work Coordinate System 3 Selection... - Page 55 M-CODE NAME DESCRIPTION M-CODE NAME DESCRIPTION Cut Mode This code will result in the following Timed Z-Axis Servo M38 maintains the Z-axis position Lock until a time period set by PMC timer actions: #9 (milliseconds) has elapsed. 1. Z-Axis (Nozzle) will travel down to top of material.
-
Page 56: Section 8 Options
SECTION 8 OPTIONS OPTICS The (optional) built-in coolant system is available when the (optional) contact head is used. The system Spare 5”: focal length lens. consists of the following elements: Spare 7.5”: focal length lens. Pump and tank assembly located between the main frame and the load frame. -
Page 57: Fume Blower
FUME BLOWER INSTALLATION / START-UP KITS A fume blower and motor are provided to draw Compressed Air Dryer/Filter: The dryer/filter fumes down through the fume plenum so that they option cleans compressed air so it can be used in can be vented away from the work area. A fume place of nitrogen to purge the beam delivery system blower is required unless there is a central fume and actuate the shutter mechanism. - Page 58 Lower Pallet Special Function: Commonly called Special Voltage Electrics: Provides an additional box cutting or square tube cutting. This allows cut- machine transformer as well as other functional ting of parts on the lower pallet that are up to 7” components to allow the machine to run on voltages high and 24”...
-
Page 59: Lubrication Requirements
FIGURE 9-2 – Lubrication system distribution block CAUTION USE OF GREASE NOT CONFORMING TO ABOVE SPECIFICATIONS COULD CAUSE PREMATURE BEARING FAILURE. CINCINNATI INCORPORATED recommends a grease conforming to the following specifications: Lithium base, MLGI#2 No graphite or MoS additives FIGURE 9-1 – Grease lubrication reservoir Kinematic Viscosity of 98 CST at 40°C... -
Page 60: Manual Lubrication
MANUAL LUBRICATION the U-axis cover. Each of the three linear bearings has its own grease fitting in the distribution block mounted to the U-axis carriage where the required ITEM LOCATION FREQUENCY LUBRICANT amount of grease can be added. See Figure 9-4. THREE FITTINGS ON U-AXIS U-AXIS... -
Page 61: Material Clamp Lubrication
BEAM BELLOW COMPOUNDS TURNBUCKLE Two compounds are used in the beam delivery sys- tem. One is a synthetic grease (CINCINNATI INCORPORATED Part #922230) intended to lubricate the bellow’s support surfaces, and the second is a vacuum grease (CINCINNATI INCORPORATED Part #922433) intended to create a particle trap in the X and Y-box. -
Page 62: Optics Handling And Cleaning
SCRAP REMOVAL CAUTION The scrap removal system is designed to remove FIRE HAZARD IS PRESENT IN THE PROCESS- scrap material from the cutting area after process- ING AREA THROUGH INTERACTION WITH THE ing. The system components are: scraper plates LASER BEAM AND MATERIALS PRESENT IN attached to the lower pallet, scrap trays mounted on THE WORK AREA. - Page 63 MATERIALS RECOMMENDED head assembly. See Figure 7-1, SECTION 7 - LENS FOCAL POINT LOCATION procedure. Acetone- reagent grade or certified ACS grade Slide the lens holder out of the cutting head Propanol - anhydrous grade or certified ACS grade assembly. Remove the locknut from the lens Surgical quality cotton balls holder using the tool provided.
-
Page 64: Beam Delivery Alignment
Steering Screws ish and for non-uniform color. If the optic Beam is not parallel or appears damaged, contact CINCINNATI centered on mirrors. INCORPORATED Service for further information. BEAM DELIVERY ALIGNMENT PURPOSE Near Field Far Field The beam delivery consists of the following compo-... -
Page 65: Tools Required
! ! ! DANGER ! ! ! FIGURE 9-9 – Alignment fixtures THIS ALIGNMENT PROCEDURE IS TO BE PER- FORMED ONLY BY CINCINNATI TRAINED SERVICE The heart of this procedure is the “card shot” which PERSONNEL. DO NOT ATTEMPT TO ALIGN THE is a special case of the “alignment shot”... -
Page 66: U-Axis Mirror Alignment (First Optic)
Note: The clearance between the mirror mount and U-AXIS MIRROR ALIGNMENT (First Optic) housing should be set to roughly .100” before If the laser internal optics have been adjusted or beginning the alignment process. Optic #1 is replaced, a complete system alignment is required. non-adjustable and does not require the The alignment must start with adjustment of the res- 0.100”... -
Page 67: U-Axis Phase Retarding Mirror (Second Optic)
7. Jog the U-axis to the U-far position. Take another card shot from this position and label the new card shot “U/U-far”. 8. Compare the two cross hair impressions. If the two card shots do not indicate the same beam position within ±1/64”... -
Page 68: X-Axis Beam Alignment (Fourth Optic)
FIGURE 9-14 – X-axis in near field 9. Repeat the two card shots and adjustments of Step 8 until the two cross hair impressions indi- cate the same beam position. 10. If the impressions are the same, but off-center more than ±1/64” (±0.4 mm), adjust the posi- tion of the third mirror using either the shim pack for vertical adjustment or the slide for hor- izontal adjustment. -
Page 69: Y-Axis Beam Alignment (Fifth & Sixth Optic)
near (closest to the resonator) and the X-far (farthest 13. If the impressions are the same but off-center from the resonator) positions of the gantry. X-near is more than ±1/64” (±0.4 mm), adjust the posi- at X = 0; X-far is 144”. tion of the moving X-mirror using either slide for vertical and horizontal adjustment. - Page 70 OPTIC #5 & OPTIC #6 COOLING LINES Y-AXIS SHOWN IN ACCESS COVERS Y-FAR POSITION FIGURE 9-16 – Access windows for the moving Y-mirror and pre-focusing lens 1. Position the Y-axis at the Y-near position and the X-axis at the X-far position. 2.
-
Page 71: Z-Axis Beam Alignment
14. Repeat Step 13 until both card shots are 4. Take the card shot, note the orientation of the centered. card and label it “Z-UP”. 15. Jog the gantry to the X-near position. Take card 5. Jog the Z-axis to the Z-down position. shots in the Y-near and Y-far positions. -
Page 72: Alarm And Operator Messages
1. Be sure the shutter is closed and the high volt- ALARM MESSAGE REMARKS age is OFF. 1015 Nozzle Interlocks One or more of the three inter- Tripped lock switches on the Z-axis noz- 2. Turn off the cooling flow by turning the two nee- zle are open. -
Page 73: Preventive Maintenance
ALARM MESSAGE REMARKS PREVENTIVE MAINTENANCE 2010 Z Axis Below This message is only for the DAILY (Each Shift): Surface Reference non-contact head and indicates the nozzle tip sensed a change in 1. Check focus lens and clean as required. the surface reference that was 1/4 inch below its last averaged position. -
Page 74: Troubleshooting
The following chart was developed to aid in troubleshooting problems with the machine. The chart contains the questions frequently asked by our customers. If major repairs are required or if the prob- lem has not been identified by using the chart, contact the Service Department at CINCINNATI INCORPORATED for assistance. - Page 75 PROBLEM POSSIBLE CAUSE REPAIR No power to machine. Verify line voltage. Control will not turn ON. Check condition of fuses. Power supply failure. Verify power supply voltage. Check condition of fuses. Alarm condition present. Check alarm status and correct any conditions present. Cannot start cycle.
-
Page 76: Section 10 Service And Parts
TECHNICAL TRAINING RETURNING PARTS FOR CREDIT CINCINNATI INCORPORATED offers a variety of Operator and Maintenance Training Programs to our 1. No item is to be returned without prior autho- customers to assist in obtaining maximum value rization. - Page 77 © C O P Y R I G H T 19 98 C I N C I N N ATI I N C O R P O R ATE D...
Need help?
Do you have a question about the CL-6 3000 and is the answer not in the manual?
Questions and answers