Table of Contents
Advertisement
Quick Links
Advertisement
Table of Contents

Related Manuals for HP 80000


Summary of Contents for HP 80000
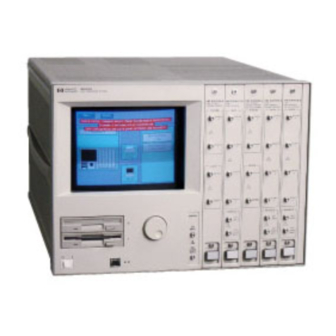
- Page 1 HP 80000 Data Generator System 1 GHz Data Generator User’s Guide...
- Page 2 HP 80000 Data Generator System User’s Guide 1 GHz Data Generator HP Part No. E2900-91012 October 1994 Printed in Germany Edition 3 El094...
- Page 4 Notice Safety Symbols Before turning on the instrument. Str. 130 you must connect the protective earth terminal of the instrument Instruction Manual symbol: Federal Republic of Germany instrument is marked with this of the (mains) power cord. The symbol when it is necessary for All Rights Reserved.
- Page 6 About thin edition travel expenses. warranties merchantability and fltnrss for a particular purpose. HP Part Numbrr Hewlett-Packard for warranty Exclusive Remedies Printed in Germany shipping rharges tr) Hewlett-Packard The remedies supplied are the Hewlett-Packard shall pay Buyer’s sole and exclusive...
- Page 7 P a c k a r d Stuttqart, 110,130 7 0 3 0 wird die Zulas8un9 mit 5 Nachtriiqen filr die nachfolqand aufgefirhrten 2. HP 16 500 A 1900 Garden of the Gods Road Colorado Colorado 10907, USA Hewlett-Packard H e w l e t t - P a c k a r d...
- Page 8 HP 80 000 / E2900A den Auflagen behdrde einer in den fur den der Bauartzulawing. 22.3 kV. 1030 Bob1 lnger...
- Page 9 About this book This book is a reference guide to operating and programming t,he HP 80000 1 GHz Data Generat.or System. Introducing the HP 80000 A short introduction t.o the User-interface, and the steps involved in using the 1 GHz Data Generator System.
- Page 10 SYSTEMCLOCK logical instrument. The SYSTEMCLOCK logical instrument corresponds to the Command Reference under the Top Level menu. HP 80000 Quick Reference A cross-reference table between the user-int,erface functions, listed by page, and their equivalent SCPI commands. Modules with 128kbit Memory A descript.ion of the differences bet wcen modules with...
-
Page 12: Table Of Contents
... . . System Operating Reference (Menu). from HP: ....Gen IGHz] Gen lGHz] Gen lGHz/128 2 - G to file: . - Page 13 ......HP-ID Address .....
- Page 14 2-15 2-15 2-15 Mode 2-15 Start ..2-15 Start/Stop ..2-16 Gate ..2-16 2-16 2-17 2-18 2-19 2-20 System State Controls . . 2-20 System Stat e:Stopped .
- Page 15 [ALL) Preamble Length: ..Cycle Lengt,h: ..3-10 Data Channel Groups . . . Repeat Ilnr) times 3-10 3-l 1 3-12 Periodic Pat t cm ..Random Pattcvn .
- Page 16 3 - 2 8 ... . 3 - 2 8 3 - 2 8 ... . . Termination Low-level ....High-level .
- Page 17 3-43 Clock SourceTriggcv Sourct~ ..External Module Input ..3-45 state ((GJ/~) ... . 3-46 ..3-45 Threshold (@?jKj) Slope (WlNeg)) .
- Page 18 Introduction to Programming the HP 80000 Int reduction ....Logical 1nWument.s ... . Groups ....
- Page 19 8. SYSTEMCLOCK Command Reference 8 - 7 ....8-12 ..8-14 ..8-17 .
- Page 20 HP-IB Error Messages ... 12-7 HP 80000 Fatal Errors ... 12-10 Fatal Error Message Display ..
- Page 21 Contents of Floating Point Error Messages 12-21 Contents of Hardware ReIat,ed Error Messages ....12-2 1 Index Contents-10...
- Page 22 Figures l-1. Top Lw~l Menu ... . . l-2. Typical Pagtt, Data Gtw lGIlz:Out,put.s . . 2-1. Top LweI pa@’ ....
- Page 23 Distribution ..3-43 3-44 3-31. Data Gt>n 1GIIz:Modulo Cloc*k pa@ ..4-1. PIIWSB3 Exam&>, Z-Hit Word ..5-1. HP 80000 St.at.us Model ..Contents-l 2...
- Page 24 Summary ....6-l. Operation St.atus Group - Bit Assignmtlnt . 6-2. Opwation St.atus Group - Bit Assignment . 10-l 10-l. HP 80000 Quick Hrfcrcncc ..Contents.1 3...
-
Page 26: Introducingthehp 80000
Clock Board fit.tcd, to enable it to bc used as an E29OOA Data Generator. 1Jp to three HP E29OlA Expansion Frames can be connect.ed to the Mainframe. slot cardcagcs in which any mix of the following modules... - Page 27 System arc: Modular Mainframe with fivct (lard slots. Facility t.o <‘onncc’t to an external keyboard or mousr. Introducing the HP 80000...
-
Page 28: Starting The System
2. Connect the EBROOA Mainframe t.o the power supply and swit,ch on the Line switch at the rear. 3. Insert an HP 80000 system-disk into one of the disk drives. 4. If you have a mouse and/or keyboard, you can plug them into the HP-I-III, socket on t,hc front of t.hc... - Page 29 HP-HIL mouse and/or keyboard t,o the Mainframe. The User-interface can be In use, the HP 80000 Data Generat,or System is driven by a series of screen menus from which desired selections or commands may be confirmed by t.ouching t.hc pict.orial clicking representation of a control but,t.on or by...
-
Page 30: Using The Touchscreen
1 . 0 0 o r r 1.00 to GND Figure 1-2. Typical Page, Data Gen 1GHz:Outputs Buttons are dark blue. Touch a but&m to activate it,. OH touch the act ivtl button again for numeric keypad scrolling Introducing the HP 80000... -
Page 31: Using A Mouse
OR click the active button again for numeric keypad entry Click a w@ key if you want to re-activate scrolling Using a keyboard cursor Press IReturn) t.o act.ivat.e a button. Active buttons are linht blue OR press (Return) on again numeric keypad entry scrolling Introducing the HP 80000... - Page 32 Set the channel deskews and delays on the Delay page. View and modify the data and delays on the Waveform page. Kefer to Chapter 3 for informat.ion about the pages in the Data Gen 1Gllz instrument. Refer to Chapter 11 for Introducing the HP 80000...
-
Page 34: System Operating Reference
System Operating Reference This chapter is an operating reference for the system located in tht> Mainframe. You uw them to st-lt up the system ctlock and touChsCreen, and t.o operat,e the disk-drives.. System Operating Reference 2-1... - Page 35 Top Level Top Level page Figure 2-1. Top Level page The Top Level page shows an overview of the system the system and any Expansion Frames. You must different Inst,rument-menus because you select the Instrument-menus from the ‘Ibp Level menu. Press IMenu) t,o see the Top Level menu.
- Page 36 Top Level want to move to the Systnm Clock page. Use the Syst.em Clock page to: Set up the System Ext,ernal Input (Threshold, Slope, Termination and Run Mode). Set up the Syst.em Clock Source (Source, Frequency, Reference). Refer t,o ‘System Clock page”. The 1GHz Dat.a Generat,or menu is only available if at least one module from the 1 GHz Data Generator family is installed.
- Page 37 System:Disk O/l pages l o a d T y p e SN102 SVS-CLOCK Figure 2-2. System:Disk 0 page Use t,hc Systcm:Disk O/l pages to list the files on Disk 0 or Disk 1 and file. Press the current file-operation button, ILoad) for example, to obtain a menu of the available operat,ions.
-
Page 38: Or Data Gen Lghz/128 Kbit
System:Disk O/l Load data from a file on disk. from file: Thr from file but.ton shows the name of the file from which data is to be loaded. Use the knob, or drag the mouse with the righthand key pressed, to choose a filename from the list of files displayed. -
Page 39: To File
System:Disk O/l Store data to a file on disk. to file: stored. U the knob, or drag the mouse with t,hc of files displayed. Tlb*is wL!I Press the buMon to obtain an alphanumeric keypad and Gen 1GHz) Or Data Gen lGHz/128 is st.orrd: (All). -
Page 40: File
System:Disk O/l Copy a file. file The file but,t.on shows thcl name of the file t,o be copied. key pressed, to choose a filename from the list of files displayed. Press the to but t.on to enter a filename for t.he copy of the file. -
Page 41: (Show)
System:Disk O/l Show thr contents of an aut,oload film. Make a copy of a complete disk. Pack files on disk t,o recover free space. Initializing a disk destroys any existing information on disk. -
Page 42: Printer Type
Handshake P r i n t n o d e : Figure 2-3. System:Peripherals page HP-IR address, c>onfigure the RS232C interface and set up the system print.er options. Press to view the System Menu. You can move directly to another System page or back to the Top Level page. -
Page 43: Print Mode
System:Peripherals Printer Note The printer must be connected to the RSZSC connect.or at the rear of the Mainframe. Printing via the HP-IF3 is not supported. Printer vpe: The but,t.on indicates the currently selected print.cr type. Press the but.t.on to change t,he printer. The supported... -
Page 44: Parity
System:Peripherals Parity: Press the buMon t.o select the parit.y:Odd, Even or None. Stopbits: Press the button t,o toggle between 1 or 2 st,op bits. Databits: Press t.he button to toggle between 7 or 8 data bits. You must have 8 data bits if you want to print in Graphics mode. -
Page 45: System:utilities Page
System:Utilities - - - - - Figure 2-4. System:Utilities page to customiztx Use the System:Ut.ilities page colors, adjust brightness and contrast, calibrat (1 the Press to view the System Menu. You can move directly to Press to print thtl page. Press D if you want to st.op the print. -
Page 46: Touch Calibration
System:Utilities Press to adjust, the screen contrast, in the range 0 - 100%. Use the knob to adjust the value, or drag the mouse with the right-key pressed or press (Contrast%) again to obtain a numeric keypad. Press to choose a Color number. The colors and their numbers are shown in a table. -
Page 47: System
C l o c k S o u r c e ! Figure 2-5. System Clock page You use the System Clock page to set up t.hc HP E2900A System External Input: Press to switch the External Input on or off. The button shows the current stat,us of the input. -
Page 48: Start
System Clock again to obtain a numeric keypad. The threshold limits depend on the current setting. (Termination:) Press to select between Positive and Negative slope System State depending on the current (FGGFiZZ]. system is running, the syst.em will be stopped. Press to toggle the ExWrnal Input Termination bet,ween Threshold range: External Input ranges... -
Page 49: Gate
System Clock Gate. A signal edge with the defined slope at the External Input starts the data sequence. The reverse edge stops t.he sequence. The next defined edge continues the sequence from where it was interrupt,ed. System Clock Source: Press to select. bet,ween the Internal clock source and t,hc External Clock input.. - Page 50 Clock System Press to toggle between Frequency or Period for emering the Imernal Clock timing. Press t,he paramet,er key beside this butt,on if you want to adjust the value. Use the knob to adjust, or drag the mouse wit.h the right-key pressed, or press the numeric button again to obtain a numeric keypad.
- Page 51 System Clock 10 MHz Reference: Press to toggle bet,ween Int,ernal and Ext,ernal 10 MHz reference for the internal syst,em clock. The External Reference Input is located at the rear of the Mainframe. Use an external 10 MHz reference if you need better accuracy than that offered by the int.ernal crySal reference.
- Page 52 Moving a module to a different slot. Replacing/Exchanging a module in a slot. You will need an oscilloscope with infinite persistance capability to perform the calibration. An HP 5412X series scope is recommended. Instructions and on-screen help are available throughout the procedure, but refer to the Guide for more detailed instructions.
-
Page 53: System State Controls
State Controls corner of all pagq above t,he System State : st.at.us lit-m. (running, paused, or stopped), and t.htl syst.clm Extclrnal Input.. System State:Stopped When the System State is Stopped all modules which have the System as their Triggtlr sour-ccl and “Dat.a Gcn 1GHz:Modulc Clock page”... - Page 54 State Controls If the Mainframe External Input is swit,ched off, press which have the System Trigger as their Trigger source can be comrolled in this way. In the Step menu: Figure 2-8. System State: Step menu Total no. of Steps: Indicates the current vect,or position.
- Page 55 State Controls Figure 2-9. Clock/Trigger Distribution System State:Running (Stop) source and rcsct s thclm 1.0 vMor 0. Thta syst clrn stat o changes to Stopped. (Break) Pauses all modules which have the System as their System State:Paused changes to Stopped.
- Page 56 Trigger source. The modules continue from where they were paused. The syst.em state changes to Running. System Operating Reference 2-23...
- Page 58 1 GHz Data Generator Operating Reference This chapter is an operating reference for the HP 80000 1 GHz Dat.a Generator Syst.em. If you have one or more 1 GHz Data Generat,or modules installed in your HP 80000 Gen lGHz/l28kBit) instrument appr’ars as an opt.ion in the Top Level Menu.
- Page 59 In the following steps only the 1GHz Data Generator is shown. Refer t.o Chapter 11 for the differences between the 1GHz Data Gcnerat.or and the lGHzll%kBit Data Generator. Data Gen lGHz:Channel Config G r o u p T y p e Figure 3- 1.
- Page 60 Data Gen 1GHz:Channel Conflg Press t,o view the Data Gen 1GHz menu. You can move back to the Top Level page. Press t,o print the screen, or a complete listing of all configured Groups. Press ICancel if you want to stop the print.
-
Page 61: Group Name [Bit,]
Data Gen 1GHz:Channel Press to redefine a Group of channels: If necessary, press the Name butt.on to choose t,hc Group name. Press (CXKFJ Assign new channels t.o the Group by pressing the red m buttons in the Output list. Only channels which are currently unassigned will have a red m knob, or dragging the mouse wit,h t.he right-key pressed, to see more outputs. - Page 62 Data Gen 1GHz:Channel Group Name [Bit] Press the Group Name [Bit] button, located next t.o the list. This is quicker than scrolling through the list, when you have a lot of Groups defined. D a t a G e n IGHr:Channel S y s t e m State1 S t o p p e d / G r o u p N a m e [Bltl o u t p u t...
- Page 63 Data Gen 1GHz:Data Listing Data Gen lGHz:Data Listing page D a t a t e n 1GHz:Data S y s t e m S t a t e : S t o p p e d Q Q Q Q Q Q Q Q Figure 3-3.
-
Page 64: Dat.a Button ([F]
Data Gen 1GHz:Data Listing Press to print t.he screen, or a complete listing of the data. Press (Cancel) if you want. to stop the print. (running or stopped). Refer t,o “System Stat.e Controls” in Group Name ((-1 (DATA)) Press the Group Name button above the Group data list, for example [STROBEI) in Figure 3-3, if you want to change swap the select.ed Group with any ot.her Group. - Page 65 Data Gen 1GHz:Dat.a Listing then moves to the next vector starting in the previous Group and then moves up Group. Press this button to act,ivat.e vert,ical scrolling of the Dat.a listing. IJse the knob to scroll, or drag t,he mouse wit.h the right-key pressed.
- Page 66 Data Gen 1GHz:Dat.a Listing Press to define the data sequence for a Group or all groups. S e t S e q u e n c e P a r a m e t e r s f o r G r o u p P’lllL Figure 3-4.
-
Page 67: Preamble Length
Data Listing Preamble Length: Press the numeric button to set the preamble length in vectors. Data in t,he preamble is out,put OTUY at the beginning of the sequence. Use the knob t,o adjust the value, or drag the mouse with the right-key pressed, or press the but,ton again to obtain a numeric keypad. - Page 68 Data Gen 1GEIz:Data Listing Press to obtain a menu of Editing functions. The following table summarizes the functions, which are explained in more detail after the table: Data Generator 1GHz:Data Listing Edit Functions with a constant data value. Periodic Pattern F i l l B c o n t i n u o u s b l o c k o f c h a n n e l s w i t h i n pattern.
-
Page 69: Fixed Pat.tern
Data Gen 1GHz:Dat.a Listing:m with a fixed pattern. The pattern is displayed and edit,ed in the same base as the Group, for example binary: Figure 3-7. Data Gen lGHz:Data Listing page: Edit:Fixed Pattern Group: Choose the Group you want to work with. -
Page 70: Periodic Pat T Cm
Data Gen 1GHz:Data Periodic Pattern Periodic Pattern to fill one or more channels within a Periodic Pattern Group wit,h a divided clock pattern. through Figure 3-8. Data Gen 1GHz:Data Listing page: Edit:Periodic Pattern Group: Choose the Group you want to work with. -
Page 71: Random Pattcvn
Data Gen 1GHz:Data Random Pattern Use CRandom Pattern) t.o fill a block of vectors wit.h PRBS is the shortest, PRBS which is longer than the number of vect,ors to be filled. The shortest PRBS is 2”-1 and the longest, is 2l”-1. The PRBS is phase-shifted between channels. -
Page 72: Count
Data Gen 1GHz:Data Counter Counter Use [Counter) to fill a block of vect.ors wit.h a fixed-step count,. Within each Group the current dat,a in the start can choose a positive or negative fixed-step. Figure 3-10. Data Gen 1GHz:Dat.a Listing page: Edit:Counter Group Range: Choose t,he Group range you want to work with. -
Page 73: Prws
Data Gen 1GHz:Data P B W S Use IPRWS) to fill a block of vect,ors in a Group with a Pseudo-Random-Word-Sequence, or PRBS wit.h Zero Substitution, or PRBS with fixed Marker Density. You cal choose the start vector, but the length of the block is For more information on the PRWS, Zero Substition and Mark Ratio capabilitites, refer to Chapt.er 4. - Page 74 Data Gen lGHz:Data Listing:m PRWS Polynomial Press to select, the PRBS polynomial to be used: Channel: Zero Sub: run in the chosen PRRS. Mark Ratio: Press to select a ratio of 1s to OS in the PRBS. Generator Operating Reference...
-
Page 75: Cut
Data Gen 1GHz:Data c u t Use Q to cut a block of data out of the pattern memory listing into an itWrna1 buffer. Note that data will be shifted upwards to close the gap, but the sequence definition is not, affected (Preamble/Cycle Length remain the same). -
Page 76: Paste
Data Gen 1GHz:Data Paste Paste Use IPaste) t,o paste a block of dat.a from the internal buffer into the pat,tern memory listing. You can use the Repeat Value to paste more than 1 copy of the buffer into the listing. Caution internal buffer, first use Insert. -
Page 77: Insert New
Data Gen 1GHz:Data Listing:m Insert New Use &‘GZXGNew) memory listing. Note the sequence definition (Preamble/Cycle lengths) is not affected. This means that data from your current list,ing may be shifted downwards into t,he pat,t.ern memory beyond the end of your sequence. Start at Vactorl Figure 3-15. - Page 78 Data Gen 1GHz:Delays Data Gen lGHz:Delays page S y s t e m S t a t e : S t o p p e d 0.000 0 . 0 0 0 STROBE 0 . 0 0 0 0 . 0 0 0 CLOCK 0 .
-
Page 79: Data Gen 1Ghz:delays Dart
Data Gen 1GHz:Delays Use t,hc these buttons to control the System State (running or stopped). Refer to “SysWm State Controls” ir Chapter 2. Press to toggle the display mode bet.ween display by channel and display by Groups of channels. The but.ton an example with t.hree channel Groups (called DATA, STROBE and CLOCK) displayed by Groups. -
Page 80: Name Button (M)
Data Gen 1GHz:Delays Groups/Channels Caution individual channel delays. You cannot. recover the individual delays afterwards. Press the numeric button in the ALL channels section if you want to delay all 1GHz Data Generat,or channels globally. In order to avoid accident.ally resetting all t,he channel delays, you cannot adjust the ALL channels delay using the knob. - Page 81 Data Gen 1GFIz:Delays Press t,o enter Deskew Mode. The numeric butt,ons move [Enter Deskew Mode) onto the Deskew parameters, as shown in Figure 3-18. Note when You can only enter Deskew Mode all the channel delays are 0 (zero). Use the ALL Channels Delay button to quickly set all delays t,o 0.
- Page 82 Data Gen 1GHz:Delays Press to exit Deskew Mode and ret,urn the numeric buttons t.o the Delay parameters. 3-25 1 GHz Data Generator Operating Reference...
- Page 83 Data Gen 1GEIz:Output Data Gen lGHz:Output page S y s t e m State5 S t o p p e d I L o u L e v e l Level S t a t e Termlnatlon STROBE O f f to GND CLOCK O f f...
- Page 84 Data Gen 1GHz:Output Press to view the Dat.a Gen 1GHz menu. You can move directly to any other page in the 1GHz Data Generator, or back to the Top Level page. Press to print the screen, or a complete listing. Press (Cancel) if you want to stop the print.
- Page 85 Data Gen 1GEIz:Output ALL Groups/Channels Caution Using t,he but.tons in the ALL line changes the set,ting for all the individual channels. You cannot, recover the original settings afterwards. all 1GHz Data C;enerat.or channels globally. In order to avoid accident,ally changing all t,he channel settings, you cannot, adjust the ALL levels using the knob.
- Page 86 Data lGHz:Output Low-level Press the numeric Low-level button to adjust the output Low-level. Use the knob to adjust the value, or drag the mouse with the right-key pressed, or press the button again t,o obtain a numeric keypad. If t,he Display mode is by Groups, the adjustment will be applied to all channels in the Group.
- Page 87 Data Gen 1GEIz:Data Format Data Gen 1GHz:Data Format page D a t a t e n F o r m a t S y s t e m S t a t e : S t o p p e d ; F o r m a t Preset Use the Data Format page to select.
- Page 88 Data Gen 1GEz:Data Format Press to view the Data Gen 1GHz menu. You can move directly to any other page in the IGHz Data Generator, or back t,o the Top Level page. Press to print the screen, or a complete listing. Press (Cancel) if you want, to stop the print,.
-
Page 89: Preset
Data Gen 1GHz:Data Format Groups/Channels Caution Using the bmtons in the ALL line changes the setting for all the individual channels. You cannot recover the original settings afterwards. Use the butt,ons in the ALL line if you want to adjust all 1 GHz Data Generator channels globally. -
Page 90: Data Gen 1Ghz:waveforms Page
Data Gen 1GEIz:Waveforms Data Gen 1GHz:Waveforms page S y s t e m Statel S t o p p e d memory in graphical format. If no waveforms arc displayed, press Waveform) display (See “Channel Name buttons at the left hand side to insert or remove channels from the display. -
Page 91: Time/Div
Data Gen 1GHz:Waveforms Press to print. t,he screen, or a complet,e listing. Make sure you print this screen in graphics mode. Press (c,,,,ll) if you want t,o stop the print. Use the these buttons to control the System State (running or stopped). Refer to “Syst.em Stat.e Controls” in Chapter 2. - Page 92 Data Press to set the Period value used for displaying t,he waveforms and calculating the timing values on the Waveforms page.. Normally the period of the Internal Syst.em Clock is used If the External System Clock (See “System Clock page” in Chapt,er 2) is selected, or one or more dat,a modules have Module Clock Source selected (See “Data Gen lGHz:Module Clock page”), you can choose to enter...
- Page 93 Data Gen 1GHz:Waveforms Press fjj) to edit. the pat,t,ern data for the Channel edit-position is indicated by a n-cursor. Figure 3-24. Data Gen 1GHz:Waveforms page Sattern edit Press to activate horizont,al scrolling of the rl-cursor. Use pressed, to move the cursor. Press the rising-edgcb n-cursor.
-
Page 94: Markers
Data Gen 1GHz:Waveforms Press the falling-edge key to set a low-level at the n-cursor. Not,e that the waveform display reflects the Data format and polarity settings. u you. HOW cursor Figure 3-25. Marker lock buttons Press the Marker buttons next to a Channel name button to lock a marker t,o that channel. - Page 95 Data Gen 1GEz:Waveforms Figure 3-26. Marker mode and activate buttons The numeric buttons at the bot.t.om of t,he screen the markers. In Figure 3-26 the red activates the red x-marker, the green 16.000) but,t.on activates the green o-marker. Marker mode: Use t.he red marker-mode but.ton to t ogglc t.he time display for t.he x-marker between elapsed time mode and The neighbouring t,ime butt on shows the...
-
Page 96: Channel Name
Data Gen 1GHz:Waveforms Update the module data-memory from the mainframe’s pattern memory. All data editing is carried out in pattern memory in the Mainframe. The module data-memory is not updated until you press this button. The button is red if t,here could be a difference between the data in pattern memory and the actual data in the modules. -
Page 97: Data Gcn 1Ghz:clock Output Page
Data Gen 1GHz:Clock Output Data Gen 1GHz:Clock Output page S y s t e m S t a t e : S t o p p e d D a t a t e n IGHz~CIock O u t p u t C l o c k O u t p u t A L L G r o u p s... -
Page 98: Clock Output Mode (S)I
Data Gen 1GHz:Clock Output ALL Groups Caution Using the butt.on in the ALL line changes t,he clock mode for all the clock channel Groups. You cannot recover the individual settings afterwards. Use the button in the ALL channels section if you want to set the clock mode for all 1GHz Dat,a Generator clock channels globally. -
Page 99: Dat.a Gen Lghz:module Clock Page
Data Gen 1GFlz:Module Clock Data Gen 1GHz:Module Clock page S y s t e m S t a t e : S t o p p e d G e n lGHz~~odule C l o c k C l o c k T r i g g e r I s o u r c e S o u r c e StateThreshold... -
Page 100: Clock Sourcetriggcv Sourct
Data Gen 1GHz:Module Clock ALL Groups Caution Using the but,t.ons in the ALL line changes the setting for all the Groups of data channels. You cannot, recover the original settings afterwards. Use the buttons in the ALL channels section if you want to adjust all IGl-Iz Data Generator data channels globally. - Page 101 Data Gen 1GHz:Module Clock You can choose from following combinations: Using Module Clock Source allows you to generate asynchronous data from different data modules. Using Module Trigger Source allows you to control different data modules independently. If you sclcct Module trigger source, you can configure the System State: Stopped ~ Data ten 1GHz:tlodule Clock...
-
Page 102: External Module Input
External Module input State ((GJ/@) Press t,o switch the External Module Input. on or off. The the External Input is on, it cont,rols the module Stat,e, depending on the current Run Mode. Threshold ((j)) Press if you want t.o adjust. t.he threshold-level of the the mouse with the right-key pressed, or press t-1 again to obtain a numeric keypad. -
Page 104: Ghz Data Generator Random Data Concedts
Introduction You can use the HP 80000 to generate various types of random data in different ways. To summarize: Hardware Generated PRWS 23 You can configure E2903A Data modules to produce Hardware generated Pselldo-Kandom-Word-S(~q~len(~~~s based on PROS ‘,?‘“-I. The data is out put during t.hc data can be generated by groups of 2, 4, 8 or 16 channels. -
Page 105: Variable-Length Random Data
Variable-length Random Data You can put, PRBS-based random data into any 1engt.h of part contiguous vectors in the Preamble Cycle of t,hc sequence. Use on the @ menu on the chosen t.o be the shortjest sequence that will fill the vector range chosen. -
Page 106: Bit Word Group
“phase-shifted” relative to the original PRBS sequence. ‘Ruble 4-l lists the channel phase-shifts implement,ed in the HP 80000 depending on the Channel Grouping used, and gives the equivalent, start-bit number for a 2”3-1 PRBS. - Page 107 Bit No PUBS “Phase-shift” Start Bit (223-1) Group: B i t 0 B i t 3 x 22’ Bit 2” B i t 0 Bit Z2’ ‘ 2 Bit 3 x %‘I ‘2 Bit %22 B i t 3 x 2” Bit 9 x 2’”...
-
Page 108: Generating A Complet,E 2'3-1 Prws
Figure 4-l shows an example of a 2 Bit PRWS generated on Channels 0 and 1 of a module. Each PRWS segment is a window int,o the continuously running hardware-generated PRBS. Not,e the “Phase-shift” of the PRBS on channel 1. Generating a Complete 223-1 PRWS The maximum PRWS segment-length of 131,072 bits is insufficient. -
Page 109: Fixed-1Engt.h Memory-Based Prws
Fixed-length Memory-based PRWS You can put a PRWS into the Preamble or Cycle part, of the data sequence. The data can then be edit.ed or manipulated like any other vect,or data. You can choose the PRBS polynomial used as a basis for the PRWS: The length of i.hc PRWS data is determined by the For Groups of 2, 4, 8 or 16 channels, l.hc PRHS... -
Page 110: Zero Substitution
Fixed-length Memory-based PRBS with Zero Substition or You can put a PRBS with either Zero Substition or Fixed Marker Density int,o Preamble or Cycle part of any channel’s data sequence. choose the PRBS polynomial from the following list,: Basis PRBS DR. -
Page 111: Example
The zero-run can bc increased in length up to 2”- 1. The bit. after the last substituted zero is always set to ’ 1’. Example Polynomial Length Longest Zero-run 2’ Max. Substituted Zeros: Marker Density You can set the marker dcnsit.y (Ratio of ‘1 ‘s 1.0 ‘O’s) in the PRBS sequence using Pat,tern @GiZZKJ on the IEdit menu on the Data Listing page. -
Page 112: Prbs Polynomial And Data Length
Variable-length Random Data You can put. random PRBS data of any length into the Preamble or Cycle part. of the dat.a sequence. Use from the (Edit) menu on the Data Listing (Random Pattern) page. The PRBS polynomial is chosen automatically, depending on the length of dat~a (vect.or range) to be filled. - Page 114 Introduction to Programming the HP 80000 Introduction This chapter is an introduction to the HP 80000 SCPI command set. and contains the following sections: Logical Instruments Groups IEEE 488.2 Common Command Summary Independent Command Summary SYSTEM Command Summary SYSTEMCLOCK Command Summary...
Need help?
Do you have a question about the 80000 and is the answer not in the manual?
Questions and answers