Table of Contents
Advertisement
Available languages
Available languages
Quick Links
USA office: Fontana
AUS office: Truganina
GBR office: Ipswich
If you're having difficulty, our friendly
customer team is always here to help.
FRA office: Saint Vigor d'Ymonville
USA:cs.us@costway.com
AUS:cs.au@costway.com
GBR:cs.uk@costway.com
FRA:cs.f r @costway.com
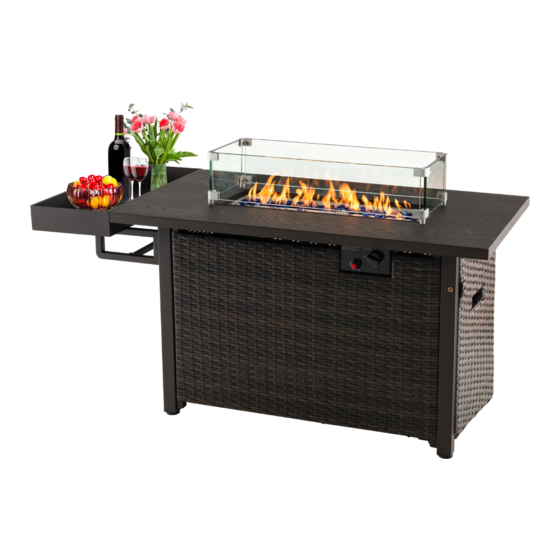
Gas Fire Pit Table
Table de Foyer à Gaz
NP11327
THIS INSTRUCTION BOOKLET CONTAINS IMPORTANT SAFETY INFORMATION. PLEASE READ AND KEEP FOR FUTURE REFERENCE.
Advertisement
Table of Contents

Subscribe to Our Youtube Channel
Related Manuals for Costway NP11327


Summary of Contents for Costway NP11327
- Page 1 GBR office: Ipswich FRA office: Saint Vigor d'Ymonville USA:cs.us@costway.com If you're having difficulty, our friendly AUS:cs.au@costway.com customer team is always here to help. GBR:cs.uk@costway.com THIS INSTRUCTION BOOKLET CONTAINS IMPORTANT SAFETY INFORMATION. PLEASE READ AND KEEP FOR FUTURE REFERENCE. FRA:cs.f r @costway.com...
-
Page 2: Before You Start
Before You Start Please read all instructions carefully. Retain instructions for future reference. Installer: Leave these instructions with consumer. Separate and count all parts and hardware. Consumer: Keep these instructions for further reference. Read through each step carefully and follow the proper order. We recommend that, where possible, all items are assembled near to the area in WARNING: For Outdoor Use Only. - Page 3 WHEN CONNECTING FOR USE: WARNING: ·Use only in compliance with applicable codes. Improper installation, adjustment, alteration, service or ·Read and follow manufacturer's instructions. maintenance can cause injury or property damage. Read the ·Consult manufacturer's instructions concerning the cylinder installation, operating, and maintenance instructions thoroughly connection provided with your appliance.
-
Page 4: Important Safety Information
IMPORTANT SAFETY INFORMATION 16. Before each use of this gas appliance, open the door and/or the LP (Liquid Propane) Tank Drawer and inspect the hose. If there is 1. The installation must conform with local codes or, in the absence evidence of excessive abrasion or wear or if the hose is damaged, of local codes, with the National Fuel Gas Code, ANSI Z223.1.NFPA the hose assembly must be replaced prior to the appliance being put... -
Page 5: Specifications
SPECIFICATIONS 5. The cylinder supply system must be arranged for vapor withdrawal. Rated Heat Input (Liquid Propane 50,000 BTU/hr 6. The cylinder used must include a collar to protect the cylinder & Natural Gas) valve. 7. This appliance shall be used only outdoors in a well-ventilated Propane Regulator Pressure 11 inches water column space and shall not be used in a building, garage or any other... - Page 6 M6 x 30 M5 x 25 Right front leg Right rear leg Left rear leg Left front leg Bolt Allen key Latch Bolt Front panel Back panel Left panel Support frame Connector Top Aluminum device Bottom Aluminum device Door Rolling base Connector rod Tabletop Long glass...
- Page 7 ASSEMBLY INSTRUCTIONS 4. Attach the Part I to the Part J with the Part EE and Part Q. Note: The Door need to be attached on the side near the circle. You NOTE: Tool Required for Assembly: Phillips screw driver (NOT may not able to find the Hole on the another side.
- Page 8 6. Attach the control board that is come with the table top on the small hole of the Part E with the Part Q gas valve propane hose Figure 6 7. Connect Q, S to J to form an integral part (FigureⅡ), which uses (AA) in C and D D(Figure Ⅲ).
- Page 9 7. Put the P around the burner, then remove the label from the box 9. Open the door, place the gas cylinder into the J, connect the (see Figure 7). regulator, screw the black handle clockwise to tighten, turn the black A gas fire pit requires 6.6 lbs rocks.
-
Page 10: Natural Gas Conversion
3. Replace the propane orifice with the natural gas orifice, screw the NATURAL GAS CONVERSION STOP STOP natural gas orifice with the bellows tightly, then connect and tighten the natural gas orifice with inlet tube (see Figure13). Natural gas Natural gas conversion must be performed only by natural gas orifice(4.18 mm diameter size). - Page 11 BATTERY 5. Stick and cover the conversion label onto the propane rating plate (see Figure 16). Make sure the control knob is in the "OFF" position. Unscrew the push button cap on the igniter module located on the control panel to access the battery compartment.
-
Page 12: Lighting Instructions
BATTERY To perform a leak test: 1. Make 2-3 oz. of leak solution by mixing one part liquid To prevent fire or explosion hazard when testing for a leak: dishwashing detergent and three parts water. Noted: make sure Always perform the leak test as described below before lighting this control knob is "OFF". -
Page 13: To Turn Off Gas
TO TURN OFF GAS Observe Flame Height When Lit: Flame should be a blue / yellow 1. Push in gas control knob slightly and turn to "OFF". WARNING: color between 1”-2” height (see Figure 23). For your safety, read and follow the Lighting Instructions in this manual and in the Rating Plate on the appliance. -
Page 14: Care And Maintenance
CARE AND MAINTENANCE To enjoy the outstanding performance from your fire pit, make sure you perform the following activities on a regular basis: 1. Use warm soapy water for cleaning. Never use flammable or corrosive cleaning agents. 2. While cleaning the fire pit, make sure to keep the area around the burner dry at all times. - Page 15 LORS DE LA CONNEXION POUR L’UTILISATION : AVERTISSEMENT: • Utiliser uniquement en conformité avec les codes applicables. • Lire et respecter les instructions du fabricant. Une installation, un ajustement, une modification, un entretien ou un entretien inadéquats peuvent causer des blessures ou des dommages •...
-
Page 16: Informations De Sécurité Importantes
INFORMATIONS DE SÉCURITÉ IMPORTANTES 16. Avant chaque utilisation de cet appareil à gaz, ouvrez la porte et/ou le tiroir du réservoir de propane liquide et inspectez le tuyau. En cas d'abrasion 1. L’installation doit être conforme aux codes locaux ou, en l’absence de ou d'usure excessive ou si le tuyau est endommagé, il doit être remplacé... -
Page 17: Spécifications
SPÉCIFICATIONS 5. Le système d'alimentation de la bouteille doit être conçu pour permettre le soutirage de la vapeur. Puissance calorifique nominale 50 000 BTU/h 6. La bouteille utilisée doit comporter un collier pour protéger le robinet de la (propane liquide et gaz naturel) bouteille. - Page 18 M6 x 30 M5 x 25 Jambe avant Jambe arrière Jambe arrière Jambe avant droite droite gauche gauche Boulon Clé Allen Loquet Boulon Panneau Dispositif supérieur Dispositif inférieur Panneau avant Panneau arrière Cadre de support Connecteur de gauche en aluminium en aluminium Tige de Porte...
- Page 19 Instructions d’Assemblage 4. Fixez la partie I à la partie J avec les parties EE et Q. Remarque : la porte doit être fixée sur le côté proche du cercle. Il se REMARQUE : Outil requis pour l’assemblage: tournevis cruciforme peut que vous ne trouviez pas le trou de l'autre côté.
- Page 20 6. Fixez le tableau de commande fourni avec le plateau de la table sur le petit trou de la partie E avec la partie Q Vanne de gaz Tuyau de propane Figure 6 7. Reliez Q, S à J pour former une partie intégrante (Figure Ⅱ), qui utilise (AA) en C et D (Figure Ⅲ).
- Page 21 7. Placez le P autour du brûleur, puis retirez l'étiquette de la boîte (voir 9. Ouvrez la porte, placez la bouteille de gaz dans le J, connectez le Figure 7). régulateur, vissez la poignée noire dans le sens des aiguilles d'une Un foyer à...
-
Page 22: Conversion Au Gaz Naturel
3. Remplacer l'orifice pour le propane par l'orifice pour le gaz naturel, CONVERSION AU GAZ NATUREL ARRÊT ARRÊT visser l'orifice pour le gaz naturel avec le soufflet, puis connecter et serrer l'orifice pour le gaz naturel avec le tube d’admission (voir La conversion au gaz naturel ne doit être effectuée que par un Figure 13). - Page 23 BATTERIE 5. Collez et recouvrez l'étiquette de conversion sur la plaque Assurez-vous que le bouton de commande est en position « OFF ». signalétique du propane (voir Figure 16). Dévissez le capuchon du bouton-poussoir du module d'allumage situé sur le panneau de commande pour accéder au compartiment des piles.
- Page 24 BATTERIE Pour effectuer un test d’étanchéité : 1. Préparez 2 à 3 oz de solution de fuite en mélangeant une partie Pour éviter tout risque d'incendie ou d'explosion lors d'un test d'étanchéité : de détergent à vaisselle liquide et trois parties d’eau. Remarque: Effectuez toujours le test d'étanchéité...
- Page 25 POUR COUPER LE GAZ Observez la hauteur de la flamme lorsqu’elle est allumée : La 1. Appuyez légèrement sur le bouton de contrôle des gaz et tournez flamme doit être de couleur bleue / jaune entre 1” et 2” de hauteur sur «...
-
Page 26: Soin Et Entretien
SOIN ET ENTRETIEN Pour profiter au maximum des performances de votre foyer, veillez à effectuer régulièrement les opérations suivantes : Return / Damage Claim Instructions 1. Utilisez de l'eau chaude savonneuse pour le nettoyage. N'utilisez jamais de produits de nettoyage inflammables ou corrosifs. DO NOT discard the box / original packaging.
Need help?
Do you have a question about the NP11327 and is the answer not in the manual?
Questions and answers