
Related Manuals for Squid Ink CoPilot 500 Oil


Summary of Contents for Squid Ink CoPilot 500 Oil
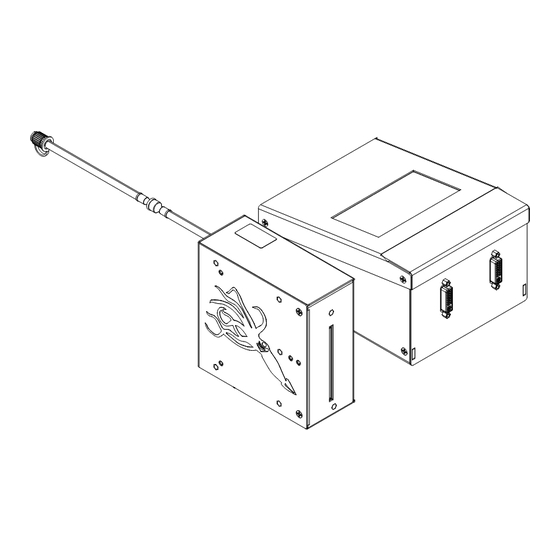
- Page 1 CoPilot 500 Oil CoPilot 500 High Speed CoPilot 500 Solvent Industrial Inkjet Printing System User Guide 1449 2005995 Rev J...
- Page 2 2005995 Rev J...
- Page 3 Printing System User Guide Revised 5/30/2019 P/N 2005995 Rev J Copyright and Trademarks Copyright ©2019 Squid Ink Manufacturing. All rights reserved. All trademarks and brand names are the property of their respective owners. Squid Ink Manufacturing 7041 Boone Avenue North...
- Page 4 2005995 Rev J...
-
Page 5: Table Of Contents
Contents Safety ......................8 Safety Notes ......................... 9 Introduction ..................... 10 General System Description ..................10 System Components ....................10 System Specifications ....................12 Software Specifications ....................13 Options ........................14 Installation and Setup ................15 General Recommendations ..................15 Printhead Overview ..................... - Page 6 Message Screen Remote Server ................57 Settings Screens ......................58 Line Speed ..........................59 Distance to Trigger ......................61 Print Direction........................62 Encoder ..........................63 Repeat Trigger ........................64 Counters ..........................66 Spit Function ........................67 USB Load ..........................69 Reset ..........................70 Ink Status ..........................71 Main Scanner ........................72 Printhead Temperature .......................72 Calibrate the Touchscreen ....................73 Remote Database Server ....................74...
- Page 7 CoPilot 500 System Updates ..............124 Applying Updates from USB ..................124 Warranty Statement ................126 Customer Support ................. 129 2005995 Rev J...
-
Page 8: Safety
• Use only Squid Ink Manufacturing ink or other Squid Ink Manufacturing approved fluids. • The Squid Ink CoPilot 500 printer utilizes an ink cartridge or ink bag system. Do not open or puncture the ink supply cartridge or bag in any way other than normal installation. -
Page 9: Safety Notes
Safety Notes Electrical Hazard-do not open cover. No user-serviceable parts inside. Ensure that unit is properly grounded. Inks, cleaners, and flush fluids may be harmful to the environment. Inks, cleaners, and flush fluids may be flammable. Use caution and keep away from flame. -
Page 10: Introduction
10 Introduction Introduction General System Description The CoPilot 500 printing system consists of a controller with integrated user interface and up to two CoPilot 500 printheads with cartridge or bag ink systems. The CoPilot printing system is designed to print superior quality high-resolution characters on a variety of porous surfaces. - Page 11 Introduction 11 Attention! If you have purchased an optional level of Orion™ that allows you to connect to multiple printers, you will find upon opening CoPilot shipping carton “DOWNLOAD INSTRUCTIONS” card. Do not throw this card away! It contains a serial number required for downloading the Orion™...
-
Page 12: System Specifications
Substrate Capabilities Porous or non-porous applications Ink Capabilities Oil-and solvent-based Ink System Ink system utilizes Squid Ink Manufacturing 500 ml cartridge or 500 ml bag ink systems. Low Ink Indicator Message alert on touchscreen Optional Low Ink Alarm Beacon Agency Certifications... -
Page 13: Software Specifications
Introduction 13 Software Specifications Time and Date Multiple formats including: 1,2,4, -digit year, 1,2-digit month, 3 letter month, custom month string, 1 letter day of month (Korean), 2-digit day of month, 1-digit day of week, 1,3 letter day of week, 2-digit week of year, 3 digit Julian year, 1 letter hour, (a-x), 2-digit hour 12 or 24, 2-digit minute, 2 digit second, 1,2 letter meridians (A/P, AM/PM), custom week string. -
Page 14: Options
14 Introduction Options Encoder For operation with variable speed conveyors. Barcode Laser Scanner Allows scan and print message retrieval. Starter Kit Includes ink, cleaner and flush, printhead wipes, hand cleaner, and latex gloves. Low Ink Alarm Beacon Alerts when ink levels become low. Stand Provides stable mount for printing system and printheads. -
Page 15: Installation And Setup
In cases where the conveyor is especially vibration-prone, the entire printing system can be mounted on an optional stand, which is available from Squid Ink for these applications. Maintenance Access When planning the installation, allow for easy access to the printheads so that priming and cleanup can be done conveniently. -
Page 16: Printhead Overview
16 Installation and Setup Printhead Overview Power & Communication Indicator LED Ink Line Fitting Hose Clamp 1674 Data Cable Ink Level Signal Wire (Cartridge Only) Purge Tube Nozzle (Capped) Plate Check Valve Photocell Mounting Bracket Holes 1675 2005995 Rev J... -
Page 17: Controller Overview
Installation and Setup 17 Controller Overview Touchscreen Display Photocell/Encoder Out to Second CoPilot System Photocell/Encoder In Label with Serial Number Power Network Switch 1659 Connection Port Fuse Power Cord Receptacle Data Cable Connection for Printhead 1 1660 Data Cable Connection for Printhead 2 2005995 Rev J... -
Page 18: Mounting
18 Installation and Setup Mounting Each installation is unique, and Squid Ink Manufacturing cannot anticipate customer requirements for attaching mounting brackets to the production line. Several mounting systems are available for the CoPilot 500 printing system. Follow the instructions for the specific mounting system ordered with your printer. -
Page 19: Controller
Mounting Screws Attention! Use only the supplied mounting screws to attach the CoPilot controller to the mounting brackets. Using mounting screws other than that supplied by Squid Ink Manufacturing can result in damage to the controller assembly. 2005995 Rev J... - Page 20 20 Installation and Setup 1493-1 1493 CoPilot 500 Main Components on Mounting Bracket 2005995 Rev J...
-
Page 21: Printhead Height Relative To Ink Reservoir Or Ink Pan
Installation and Setup 21 Printhead Height Relative to Ink Reservoir or Ink Pan The following Printhead-to-ink Bag or Reservoir height drawings are a starting point or guideline. The heights may need to be adjusted slightly if the following problems occur: •... - Page 22 22 Installation and Setup Oil Printheads Even with Ink Pan Top 1711 Printhead Enclosure Bottom Downshooter Mode Even with top of Ink Reservoir Printhead Enclosure Bottom 1694 Sideshooter Mode 1695 Ink Pan Top Printhead Enclosure Bottom Sideshooter Mode 2005995 Rev J...
- Page 23 Installation and Setup 23 Solvent Printheads Upright Mode Printhead Enclosure Bottom 2405 2” From Ink Reservoir Top 2406 2” From Ink Pan Top Printhead Enclosure Bottom Downshooter Mode 2407 Printhead Enclosure Bottom 2” From Ink Reservoir Top 2005995 Rev J...
- Page 24 24 Installation and Setup Solvent Printheads Downshooter Mode 2408 Printhead 2” From Enclosure Ink Pan Top Bottom Sideshooter Mode Printhead Enclosure Bottom 2” From top of Ink Reservoir 2404 2409 Printhead Enclosure Bottom 2” From Ink Pan Top 2005995 Rev J...
-
Page 25: Photocell
Installation and Setup 25 Photocell A photocell can be mounted directly to the CoPilot 500 printhead using the supplied mounting bracket and screws. The photocell should be mounted on the upstream side of the printhead so it will “see” the product first. Printhead Mounting Bracket Screws... -
Page 26: Distance From Substrate
Generally, the closer the printhead is to the surface to be printed (substrate), the better the print quality. Squid Ink recommends keeping the printed surface within 1/8” (3.2 mm) from the nozzle plate. While throw distances greater than 1/8” are possible, print quality may be affected. - Page 27 Installation and Setup 27 Printheads Bag Ink System CoPilot Controller Floor Stand Assembly 1747 Dual CoPilot 500s with Bag Ink System Mounted on Floor Stand 2005995 Rev J...
- Page 28 28 Installation and Setup CoPilot Controller Printhead Cartridge Ink System Floor Stand 1748 CoPilot 500 with Cartridge Ink System Mounted on Floor Stand 2005995 Rev J...
-
Page 29: Rotating Or Tilting The Printhead
Installation and Setup 29 Rotating or Tilting the Printhead The printhead can be mounted in a rotated or tilted orientation. This is useful when printing on an incline conveyor or vertical web. The printhead can be rotated 90 degrees in a counter-clockwise direction or 90 degrees in a clockwise direction when viewed from behind the printhead. -
Page 30: Cable Connections
30 Installation and Setup Cable Connections Connecting Photocell Trigger to Controller Connect the photocell signal cable to the “IN” connection on the back of the CoPilot controller. Connection “IN” Controller Back Panel Photocell 1046 Connecting an Optional Encoder to Controller Connect the optional encoder and photocell trigger to the RJ12 adapter cable. -
Page 31: Custom Triggering Device
Installation and Setup 31 Custom Triggering Device Some applications may require the use of a site-specific triggering device. Use the following Pin Assignments on the RJ12 CoPilot connector to install a custom triggering mechanism. Attention! Site-specific or unusual devices should only be connected by trained and qualified personnel. -
Page 32: Printhead Data Cable
32 Installation and Setup Printhead Data Cable Attention! Ensure that the controller power switch is turned OFF and the controller is disconnected from the power source when connecting a printhead. On the front of the CoPilot controller, there are data connections for two printheads. They are labeled “PRINTHEAD 1”... -
Page 33: Connecting A Second Printhead
Installation and Setup 33 Connecting a Second Printhead Attention! Ensure that the controller power switch is turned OFF and the controller is disconnected from the power source when connecting a second printhead. To connect a second printhead, connect the printhead data cable to PRINTHEAD 2 port on Controller and connect the other end to the designated printhead. -
Page 34: Connecting A Second Copilot Printing System
“IN” and “OUT” data connections. However, the number of printers chained through a single triggering device would be limited by the specific installation and use. Other Squid Ink printing systems can also be connected downstream from the controller. For example, there could be a CoPilot, AutoPilot, and an SQ-2 printing system all attached to a single triggering device. -
Page 35: Connecting An Optional Low Ink Warning Beacon
USB Port 1690 Since each installation is unique, Squid Ink cannot anticipate an ideal location for the low ink warning beacon. The beacon has a generic mounting bracket attached to it. Mount the warning beacon within 5 feet (1.5 meters) from the controller. -
Page 36: Connecting To A Desktop Pc
36 Installation and Setup Connecting to a Desktop PC To connect to a desktop PC, connect an Ethernet cable to the Ethernet port Desktop PC on the CoPilot controller and to the Ethernet port on the PC. Ethernet Cable 1664 Connecting to a Local Area Network The network connection is located on the controller. -
Page 37: Usb Port
Installation and Setup 37 USB Port There is a USB port located at the back of the CoPilot controller. The USB port can be used for a variety of USB supported devices such as a Wi-Fi adapter antenna, Low ink alarm light, scanner, or removable USB storage device. -
Page 38: Optional Four Port Usb Hub
38 Installation and Setup Optional Four Port USB Hub There is only a single USB port located on the CoPilot controller, however, the CoPilot is not limited to a single USB device. The optional four port USB hub (part number 2004242) can provide three points of entry for USB supported devices. -
Page 39: Power Supply
Installation and Setup 39 Power Supply There is a power cord receptacle located on the back of the CoPilot controller. Attach the supplied power cord into the power cord receptacle making sure the power switch is in the OFF position and plug the power cord into a properly wired and grounded electrical outlet. -
Page 40: Ink Supply
One ink system (cartridge or bag) can supply two printheads if they are mounted at the same height. Caution! Use only authorized ink and fluid cartridges from Squid Ink Manufacturing. Use of unauthorized fluids may damage the equipment, cause a safety hazard, and will void the warranty. - Page 41 Installation and Setup 41 Remove the foil seal from a new cartridge of ink. Install the ink cartridge by placing it in the ink system at a right angle and rotating 90° clockwise. The cartridge will thread down into the receptacle and seat into the ink reservoir. Ink will then fill the reservoir. Ink Cartridge Priming Bulb Cutout...
- Page 42 42 Installation and Setup The Ink Reservoir contains a short vent tube that allows air to flow into the ink reservoir during normal use. This tube is capped for shipping purposes, but the cap should be removed for normal operation. If the system is moved to a new location, be sure to cap the vent tube to prevent ink from escaping.
- Page 43 Installation and Setup 43 Reservoir Vent Tube Uncapped for Operation Printhead Purge Tube (Capped for Operation) Ink Cartridge Inline Check Valve Ink Reservoir Ink Line Fitting In Ink Line from Reservoir Printhead 1483 Low Ink Signal Wire Connect to Printhead Connecting Ink System to the Printhead 2005995 Rev J...
-
Page 44: Bag Ink System
44 Installation and Setup Bag Ink System To install a bag ink system, you will first have to attach the ink tray to the mounting surface. The following illustration shows an assembled bag ink system mounted on a typical print stand. -
Page 45: Handling Ink Bags
Installation and Setup 45 An ink line will need to be fabricated with female Luer fittings on each end to run from the ink tray to the back of the printhead using the supplied tubing and fittings. 1696 Handling Ink Bags Warning! Do not squeeze the bag like a sponge. - Page 46 46 Installation and Setup When the ink bag tray has been mounted at the correct height and the ink supply line has been connected to the printhead, connect the ink bag to the fitting in the ink tray. Ink Line to Ink Bag Printhead 0352...
-
Page 47: Operation
Scratches will result in diminished print quality. The printhead is NOT warrantied against scratches on the orifice plate. Squid Ink’s non-abrasive wipes are included in the CoPilot Startup Kit. They can be ordered as a separate item (part number 2007021). - Page 48 48 Operation After the vent tube on the printhead has been uncapped, place a paper towel or container under the vent tube open end to catch any ink. Hold a non-abrasive lint-free wipe in front of the printhead face against the nozzle plate (several wipes may be required). Gently but firmly press the priming bulb repeatedly until ink begins to exit the vent tube and leak from the nozzle face.
-
Page 49: Priming The Bag Ink System
Scratches will result in diminished print quality. The printhead is NOT warrantied against scratches on the orifice plate. Squid Ink’s non-abrasive wipes are included in the CoPilot Startup Kit or they can be ordered as a separate item (part number 2007021). - Page 50 50 Operation After the vent tube has been uncapped, place a paper towel or container under the vent tube open end to catch any ink. Hold a non-abrasive lint-free wipe in front of the printhead face. Several wipes may be required. Gently but firmly press down on the ink bag until ink begins to emit from the vent tube and the nozzle face.
- Page 51 Operation 51 After the printhead has been fully charged with ink, replace the cap on the vent tube. Replace Cap on Vent Tube 1480 The printer is now primed and ready to print. 2005995 Rev J...
-
Page 52: Power Up
52 Operation Power Up When all the components have been properly mounted and connected, you are ready to power up the CoPilot system and begin printing. Tip! Before powering up, double-check your installation. Make a quick inspection to ensure all the components have been securely mounted and all data and power cables are properly seated and connected. -
Page 53: Home Screen
Operation 53 When startup is complete, the Home screen is displayed on the touchscreen. 1498 Home Screen The Home Screen is displayed when power up is complete. The Home Screen will show: • A preview of the current message • The name of the current message •... - Page 54 54 Operation Message Message Function Buttons Preview Name Product Counter Zoom Button 1498 Status Current Time Connection Type Printing Wi-Fi or Intranet and Date Status There are five function buttons located along the left edge of the Home Screen. Stop/Start Printing Press the “Stop”...
-
Page 55: Zoom Function
Operation 55 Sleep Press the “Sleep” button to enter the printer into a sleep mode. Sleep is useful for long periods of idle time. This is a “Soft Shutdown”. Touch the screen to restart. Attention! If the Spit Function is turned on the printer will continue to spit ink while in the “Sleep”... -
Page 56: Message Screen
56 Operation Message Screen The “Message Screen” will display a list of available messages. To select a message for printing, touch and highlight the desired message and press the “APPLY” button. Use the up and down arrows or drag the scroll bar to scroll through the list of available messages. Reminder! Messages are created using the Orion™... -
Page 57: Message Screen Remote Server
Operation 57 Message Screen Remote Server If the printer is using a Remote Database Server to load messages for printing, the message ID must be entered. After entering the Message ID, select the “APPLY” button to load the desired message for printing. When the message is loaded, a green checkmark will briefly appear in the lower right corner of the screen. -
Page 58: Settings Screens
58 Operation Settings Screens The “Settings” screen contains buttons for configuring the printer. There are two pages of Settings screens. Use this button to switch between page one and page two. Settings Screen Page One (USB Inactive) Settings Screen Page One (USB Active) 2005995 Rev J... -
Page 59: Line Speed
Operation 59 Settings Screen Page Two Line Speed Use the “Line Speed” screen to set a static line speed for the printer. Line speed units are in Feet per Minute. When using an encoder, the line speed is ignored while the encoder is switched on, and does not need to be set. Previous Screen To set the line speed simply touch the Plus... - Page 60 60 Operation Line Speed Using an Encoder If you are going to use an encoder to dictate line speed, select the Encoder “ON” button and select the “APPLY” button. Encoder Timeout The Encoder timeout is the amount of time in seconds that the CoPilot Printer will wait for a signal after the encoder wheel stops spinning.
-
Page 61: Distance To Trigger
Operation 61 Distance to Trigger Distance to Trigger is the amount of distance between the trigger (photocell) and the jets on a printhead. In Inches (Deselected) Centimeters To change the print delay distance, simply touch the Plus or Minus button for the selected printhead to increase or decrease the print delay or move the slider bar in the plus or minus direction and select “APPLY”. -
Page 62: Print Direction
62 Operation Print Direction Print Direction is the direction of the production line relative to the position of the printer when viewed from behind the printhead. To set the Print Direction for the selected printhead (one or two), select the button that corresponds to the direction you want to print. -
Page 63: Encoder
Operation 63 Encoder Use the “ENCODER DIVIDER” screen to set the divider value for an optional encoder (if installed). Use the plus (+) or minus (-) buttons or the slider bar to increase or decrease the encoder divider value. Encoder Reset Button Selecting this button will reset the encoder divider to the default value of 13 (205 dpi). -
Page 64: Repeat Trigger
64 Operation Repeat Trigger This feature controls whether SquidConnect printing is active or inactive using SquidConnect Pin 6. Refer to the SquidConnect User Guide for more information. If the SquidConnect dongle is not installed, this option is unavailable. If SquidCheck is active, this option is unavailable. Repeat Trigger SquidConnect Inactive Repeat Trigger SquidConnect Dongle Active 2005995 Rev J... - Page 65 Operation 65 If unsure which option to use, select Screen. Repeat Trigger SquidConnect Screen Active 2005995 Rev J...
-
Page 66: Counters
66 Operation Counters Use the “COUNTERS” screen to set the current value of each printer counter in the current message. To access keyboards To change the counter value, select the Plus “ ” or Minus “ ” button to increase or decrease the counter. -
Page 67: Spit Function
Operation 67 Spit Function NOT USED WITH OIL-BASED INKS with the CoPilot 500. When turned on, the printhead will spit a small quantity of ink at pre- determined intervals. The spit function is useful when printing with fast drying solvent-based inks because it keeps the ink from drying and clogging in the ink nozzles. - Page 68 68 Operation Spit Quantity (Columns) The Spit Quantity defines the quantity of the spit mode by selecting the number of columns the printhead will spit each time. Spit Period (Seconds) The “Spit Period” in seconds is the time between spits. Spit Delay (Milliseconds) The “Spit Delay”...
-
Page 69: Usb Load
Operation 69 USB Load The “USB LOAD” screen provides functions for data management and printer updates. The USB button in the Settings Screen will be disabled if there is no USB present. The USB Load screen will automatically open any time a USB device is plugged in. -
Page 70: Reset
70 Operation Reset Use the “RESET” screen to reset the production counter to Zero and the ink Level to Full. Select the Reset Ink printhead to reset the ink supply to full. In the “RESET” Screen select Head 1 or Head 2. Select the Counter reset button to reset the production counter to zero. -
Page 71: Ink Status
Operation 71 Ink Status The “INK STATUS” button is used to select the type of ink system. The Bag ink system will monitor ink usage by the number of ink drops used. The cartridge ink system monitors ink usage using a float located in the ink reservoir. Drops are also counted when using a cartridge. -
Page 72: Main Scanner
72 Operation Main Scanner This button is available if barcode validation is available but the barcode scanner is not detected or connected. Printhead Temperature The Printhead Temperature button is used to display the current temperature for the printhead in Fahrenheit and Celsius. Printhead Temperature Fahrenheit Printhead Temperature Celsius 2005995 Rev J... -
Page 73: Calibrate The Touchscreen
Operation 73 Calibrate the Touchscreen This button is used to calibrate the touchscreen. The graphics on the touchscreen normally will not be out of sync with the corresponding functions, but if you are having problems selecting icons, recalibrating the touchscreen may help. -
Page 74: Remote Database Server
74 Operation Remote Database Server The remote database function allows the CoPilot controller to be connected to a remote database. See the Orion™ manual to learn how to set up database messages. Select the Database icon to open the “Remote Database” screen. Remote Mode Start/Stop Remote Server... - Page 75 Operation 75 Remote Server Tab In the “Remote Server” screen, use the search icon to locate the database server for messages you want to print. After selecting the Search icon, a list of connected servers is displayed. Select a server and select the “APPLY” icon. A green checkmark will briefly appear when the server connects.
- Page 76 76 Operation Multicast Tab The Multicast Address IP setting and UDP Port will match the communication settings for the DB server created using the Orion™ message creation software. Normally, the settings will be automatically populated with the default value and should not have to be changed.
-
Page 77: Set Date
Operation 77 Set Date Use the “SET DATE” function to set the current time residing in the printer. The date is displayed as shown in the above screens. To change the date, select the Plus “ ” or Minus “ ” button to increase or decrease the date. Select “APPLY” to set the date. 2005995 Rev J... -
Page 78: Set Time
78 Operation Set Time Use the “SET TIME” function to set the current time residing in the printer. The time is displayed in Hours, Minutes, and Seconds. To change the time value, select the Plus “ ” or Minus “ ” button to increase or decrease the time. Select “APPLY” to set the current time value. -
Page 79: Peak Encoder Speed
Operation 79 Peak Encoder Speed Select the “Peak Encoder” button to open a window that will display the top speed that the encoder has recorded. 1596 Reset Button Top Speed Peak Encoder Speed is used to determine what speed the printer requires to be able to print accurately. -
Page 80: Custom Keyboard
80 Operation Custom Keyboard Select to Open the “CUSTOM KEYBOARD” screen. If a custom keyboard has been created in Orion™ for use with User Data, use this screen to select the keyboard. Standard Keyboard Selected. When this icon is highlighted, the CoPilot will use the standard CoPilot keyboard. - Page 81 Custom Keyboard Selected. When this icon is highlighted, a custom keyboard associated with the user data for the specific message can be opened. Custom Keyboards are created in the Orion™ Message Creation software. Text 1 Prompt squid ink ‘ Shift 1669 Example of Custom Keyboard Created in Orion™...
-
Page 82: Language
82 Operation Language The Copilot Printing System supports seven languages. The “Language” icon can be found on “Settings Screen Two”. • U.S. English • German • Mandarin Chinese • Spanish • Korean • Japanese • Russian • Polish Select the Language icon from the Settings Screen Two to open the Language window. Select the desired language, then select “APPLY”. -
Page 83: Static Ip Address
Operation 83 Select the More button to open Language Screen Two. Language Screen Two The CoPilot controller will then change to the selected language. The controller may need to restart for the language change to take effect. Static IP Address A static IP address can be assigned to the CoPilot Controller. -
Page 84: User Data
Attention! A tablet or desktop computer cannot connect by Wi-Fi directly to the CoPilot printer. A Wi-Fi router that supports multicast must be used. Squid Ink sells and recommends using a Linksys Model EA4500. Other routers are currently not supported. -
Page 85: Wi-Fi
Operation 85 After the Wireless Adapter has been installed, power up the CoPilot Controller in the normal fashion. The Wireless settings are found on screen two of the Settings menu. Select this button from the Settings menu to open Settings screen page two. Note: The wireless router must support Wi-Fi Protected Access (WPA) Encryption. - Page 86 86 Operation Select the Wi-Fi scan button and the printer will find all the available wireless networks. Select the SSID box. A list of available wireless networks will display. Select a network from the list. If there is a security code for the desired network, use the onscreen keyboard to enter the password.
- Page 87 Operation 87 If you want to use the CoPilot USB port for another purpose, press the “Disconnect” Icon located in the lower right corner of the screen before removing the Wi-Fi USB Adapter. When you wish to resume Wi-Fi, insert the USB Wi-Fi adapter, and press “APPLY”. The SSID and password from the previous session will be used once you have established a Wi-Fi connection Note:...
- Page 88 Information about the currently used Wi-Fi adapter is displayed. If the following screen is displayed, the controller has determined that the adapter is incompatible and cannot be used. Squid Ink recommends the Edimax Wi-Fi adapter (part number 2003947) which can be ordered through the Customer Service Department.
-
Page 89: Temperature Warning Screens
Operation 89 Temperature Warning Screens The CoPilot 500 checks the printhead temperature every few minutes to detect if it is overheating. For CoPilot 500 Oil Systems, if a temperature over 130 F is detected for the interface, a full-screen warning is displayed. For CoPilot 500 Solvent Systems, if a temperature over 115 °F is detected, a warning is displayed indicating that the print... - Page 90 90 Operation If a temperature of over 140 F is detected, a critical warning screen is displayed, and printing is disabled. Tap the screen to dismiss the full-screen warning. The printheads must be allowed to cool. When the temperature drops below 130 ...
- Page 91 Operation 91 For CoPilot Solvent Ink Systems, the blue screen opens when the temperature falls below 65 °F. The blue screen is no longer displayed when the temperature is above 65 °F. Print quality may be affected when printing below 65 °F. Tap the screen to dismiss the full-screen warning.
-
Page 92: Copilot 500 Touchscreen Buttons
92 Operation CoPilot 500 Touchscreen Buttons Button Function Return to the Home Screen Stop Printing Start Printing Open the Message Files Screen Open the Settings Screen Places the CoPilot Printer in Sleep Mode Apply Current Settings and Values Return to Previous Screen Set Print Delay in the Tools Screen Select Print Direction in the Tools Screen Print Direction: Left to Right (Not Selected) - Page 93 Operation 93 Button Function Open Bluetooth Connect Screen Recalibrate the Touchscreen Remote Database Server Show/Change Current Time Show Change Current Date Encoder: Open the Encoder Dialog Box Spit Settings Open the Counters Dialog Box Set Line Speed Connect to USB: Only Enabled if USB Present Copy Messages from Printer to USB Copy Messages from USB to Printer Reset: Select to Reset Production Counter to Zero and Ink...
- Page 94 94 Operation Button Function Reset Ink Supply to Full User Data: Active if Current Message Contains User Data Open the “Ink Status” Settings Screen Ink Status: Count Drops Float Only Selected Ink Status: Count Drops Float Only Not Selected Ink Status: Count Drops Selected Ink Status: Count Drops Not Selected Ink Status: Combine Ink Bags Selected Ink Status: Combine Ink Bags Not Selected...
- Page 95 Operation 95 Button Function Custom Keyboard Unselected Static IP Address Language Toggle between Settings Page One and Page Two Printhead not Connected. This icon will display on the home screen only if no printheads are detected See 500 Printhead Temperature Barcode Validation 2005995 Rev J...
-
Page 96: Powering Off
96 Powering Off Powering Off Press the power switch to the OFF position to turn off the printer. 1050-2 Power Switch For a soft shutdown, select the “Sleep” mode. 2005995 Rev J... -
Page 97: Mounting Options
Mounting Options 97 Mounting Options Floor Stand 1504 1505 Typical Floor Stand Mounting System 2001132 2005995 Rev J... -
Page 98: Conveyor Mounting Bracket
98 Mounting Options Conveyor Mounting Bracket 2001148 2004920 2002059 1503 Conveyor Mounting Bracket Kit (2005940) 2005995 Rev J... -
Page 99: Single Printhead Conveyor Mounting
Mounting Options 99 Single Printhead Conveyor Mounting Single Printhead Conveyor Mounting Assembly (2004943) 2005995 Rev J... -
Page 100: Maintenance
External Cleaning The outside surfaces of the CoPilot 500 printing system can be wiped clean with a clean cloth and flushed with Squid Ink approved cleaning fluid. Gently wipe the components clean. Never immerse the components in water or cleaning fluids. -
Page 101: Flushing The Printhead
Attention! Use only non-abrasive lint-free wipes (part number 2007021) and appropriate Squid Ink Manufacturing fluids to clean the nozzle face or flush the printhead. Pour some of the flush fluid that is compatible with your ink into a clean cup or other clean container that is accessible by the end of the syringe. - Page 102 102 Maintenance Being cautious not to splatter ink, disconnect the ink supply line from the printhead. Before proceeding, cap the ink supply line. Printhead Ink Supply Line Cap Ink 1500 Ink Supply Supply Fitting on Line Printhead Rotate the printhead 90 degrees so that the nozzle face is pointing downward into a waste container and connect the flush line with filter to the ink supply fitting on the printhead.
- Page 103 Maintenance 103 Disconnect the syringe from the flush tube. Withdraw the syringe’s plunger thereby filling the syringe with air. Once again, attach syringe to the flush line to push air through the printhead. Gently force out the fluid that is in the ink line and print engine by expelling the air from the syringe.
-
Page 104: Parts List
104 Parts List Parts List CoPilot 500 Replaceable Parts Main Components Part Number Description 2005900 Printhead Oil Based 2001065 Cartridge Ink System Porous 2001159 Bag Ink System Porous 2003957 Touch Panel Controller 2004187 Power Supply Cord for Controller 2001079 CoPilot 500 Starter Kit, Oil Based, Cartridge 2002023 CoPilot 500 Starter Kit, Oil Based, Bag 1602018... -
Page 105: Copilot Solvent Replaceable Parts Main Components
Parts List 105 CoPilot Solvent Replaceable Parts Main Components Part Number Description 2005901 Printhead Solvent-Based 2001066 Cartridge Ink System Non-Porous 2001160 Bag Ink System Non-Porous 2005990 Touchpanel Controller 2004187 Power Supply Cord for Controller 2001080 CoPilot 500 Starter Kit, Solvent-Based, Cartridge 2002024 CoPilot 500 Starter Kit, Solvent-Based, Bag 1602018... -
Page 106: Mounting Hardware
106 Parts List Mounting Hardware Mounting Bracket Assembly 2004920 2005995 Rev J... - Page 107 Parts List 107 Floor Stand Mounting Assembly One Arm 2001132 (Two Arm 2004921) 2005995 Rev J...
- Page 108 108 Parts List Conveyor Bracket Mounting Assembly 2002059 2005995 Rev J...
- Page 109 Parts List 109 One Printhead Conveyor Mounting Assembly 2004943 2005995 Rev J...
- Page 110 110 Parts List 2004918 Printhead Mounting Assembly 2005995 Rev J...
- Page 111 Parts List 111 Item Component No. Description 2003616 Bracket-Downshooter Joint 2003617 Bracket-Downshooter PH Mount 2003630 Screw-8-32X5/16, FHP, Zinc Plate Steel 2003635 Screw-SHC, M6X30, SS 2006063 T-Nut Slider 10mm M6 2006103 Screw-SHC, M6X20, SS Printhead Downshooter Mounting Bracket Kit (2003629) 2005995 Rev J...
- Page 112 112 Parts List Item Component No. Description 2003618 Bracket, Tube Joint Connector, ¾” Diameter 2006035 Screw-SCH, M6 X 16, SS 2006063 T-Nut, Slider 10mm MS 2006103 Screw-SHC, M6X20, SS Printhead Rotation Bracket Kit (2003636) 2005995 Rev J...
-
Page 113: Ink Systems
Parts List 113 Ink Systems 2001065 Cartridge Ink System Assembly, Porous 2005995 Rev J... - Page 114 114 Parts List 2165 2001065 Cartridge Ink System, Porous 2005995 Rev J...
- Page 115 Parts List 115 2001066 Cartridge Ink System, Non-Porous 2005995 Rev J...
- Page 116 116 Parts List 2166 2001066 Cartridge Ink System, Non-Porous 2005995 Rev J...
- Page 117 Parts List 117 2001159 Bag Ink System, Porous 2005995 Rev J...
- Page 118 118 Parts List Component No. Item Description 2002013 Pan Ink System 2003015 Cover Ink System 2003017 Tray Ink System 2006007 Nut Hex 8-32 Keps SS 2006020 Washer Flat #8 SST 2006021 Fitting QConn Fem W/E 2006022 Fitting–Fem Luer to ⅛” Barb 2006023 Luer Lock Ring 2006056...
-
Page 119: Printheads
Parts List 119 Printheads 1673 Component No. Item Description 2005920 Check Valve Asy 2005905 Fab, Printhead Cover 2003271 Screw, #6-32x1/4, FH Undercut, SS 2005908 Fab. Inside Guard, CoPilot 500 1440010 PCB Asy-Printhead, CoPilot 500 2005999 Print Engine, Oil Based, CoPilot 500 2005917 Gasket, Printhead Seal, CoPilot 500 2005904... - Page 120 120 Component Dimensions 1673 Component No. Item Description 2005921 Check Valve Asy 2005905 Fab, Printhead Cover 2003271 Screw, #6-32 x 1/4, FH Undercut, SS 2005908 Fab. Inside Guard, CoPilot 500 1440010 PCB Asy-Printhead, CoPilot 500 2005998 Print Engine, Solvent Based, CoPilot 500 2005916 Gasket, Printhead Seal, CoPilot 500 2005904...
-
Page 121: Component Dimensions
Component Dimensions 121 Component Dimensions CoPilot 500/High Speed/Solvent Printhead 6-32 THRU (4X, BOTH SIDES) 5.00 3.25 3.66 2.50 1.14 8-32 THRU 1.10 (2X) 2.24 1.35 3.25 1742 2005995 Rev J... -
Page 122: Copilot Controller
122 Component Dimensions CoPilot Controller All dimensions are shown in inches. 2.217 2.543 3.840 5.418 .850 3.802 2.980 MOUNTING HOLES M6X1 (2X) 2.439 2.620 2.770 1672 7.125 Controller 2005995 Rev J... - Page 123 System Updates 123 Exploded View 2003909 2003271 (4) 1603532 2006065 (4) 1603530 2001430 (4) 1603529 2003972 2003920 1603576 2003923 2003974 2003907 2003916 (4) 2003271 (2) 1912 2005995 Rev J...
-
Page 124: Copilot 500 System Updates
124 System Updates CoPilot 500 System Updates Occasionally software and firmware updates will become available from Squid Ink Manufacturing. Software and Printer System Firmware can be updated from a desktop computer using Orion™. Periodically check to see if updates are available. - Page 125 In the unlikely event that there is a problem, remove the USB device containing the update, power the printer off and on, and then retry installing the update. If the problem persists, call Squid Ink Manufacturing Technical Support. 2005995 Rev J...
-
Page 126: Warranty Statement
Printheads are warranted for 6 months from the date of shipment from Squid Ink. Use of inks, flush fluids, and cleaning fluids that are not obtained from Squid Ink, or which do not meet Squid Ink’s manufacturing specifications and have written approval of Squid Ink void the warranty on printheads. - Page 127 For warranty questions that take place more than 45 days from the original invoice, Squid Ink requires the end-user or Squid Ink distributor to return the component to Squid Ink for repair. Upon receipt of the returned component, Squid Ink will evaluate it and repair as necessary.
- Page 128 128 Warranty Statement Warranty Eligibility The warranty provided by Squid Ink Manufacturing, Inc. is only to the original buyer. Limited Warranty THE ABOVE WARRANTY IS EXCLUSIVE AND IN LIEU OF ALL OTHER WARRANTIES, WHETHER EXPRESSED OR IMPLIED, INCLUDING THE IMPLIED WARRANTIES OF FITNESS FOR A PARTICULAR PURPOSE, MERCHANTABILITY AND NON- INFRINGEMENT.
-
Page 129: Customer Support
Squid Ink reseller or Squid Ink Technical Service at one of the following telephone numbers. Toll-Free Phone 800-877-5658 Phone 763-795-8856 763-795-8867 E-mail info@squidink.com www.squidink.com Thank you for your purchase of Squid Ink products. We are pleased to be a part of your marking and coding needs. 2005995 Rev J... - Page 130 2005995 Rev J...
- Page 131 2005995 Rev J...
- Page 132 2005995 Rev J...
Need help?
Do you have a question about the CoPilot 500 Oil and is the answer not in the manual?
Questions and answers