Subscribe to Our Youtube Channel
Summary of Contents for Rosco SAFE -T-SCOPE STSM351
- Page 1 SAFE -T-SCOPE ® B A C K U P C A M E R A S Y S T E M S STSM351 7" 2 CHANNEL AHD MONITOR INSTALLATION/ USER MANUAL...
-
Page 2: Table Of Contents
• The driver is always responsible for the safe operation of the vehicle at all times. Rosco camera systems do not replace the need for a skilled, alert, professional driver, observing appropriately, and using safe driving practices. -
Page 3: Component List And Description
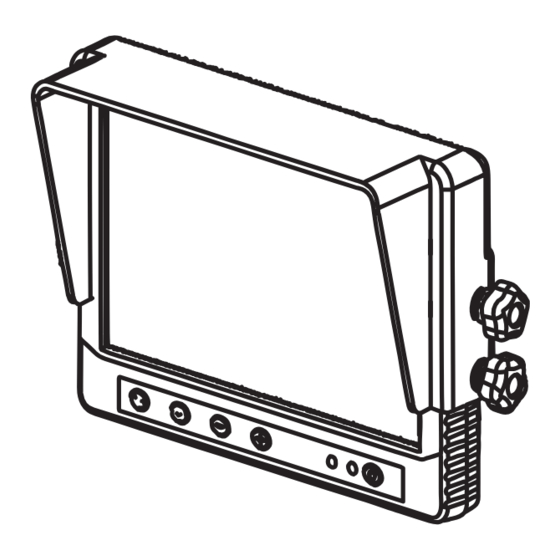
COMPONENT LIST AND DESCRIPTION PART NO. DESCRIPTION 7'' AHD LCD 2 Channel Monitor STSM351MO STSM351PHAR SAFE-T-SCOPE, 7" LCD MONITOR KIT, AHD, 4PIN/ 2 INPUT Monitor Sun Shield BAS4515 Washer, use only with Thumb Screw & WAS2221 U-Bracket, not needed when sun shield is used STSDF1000 Duck-foot Mount (Mounting Option-... -
Page 4: Monitor Installation
Safe-T-Scope ® 7" AHD LCD 2 CHANNEL MONITOR KIT MONITOR INSTALLATION Find a mounting location inside the vehicle cabin that is convenient to the driver, and complies with federal regulations (e.g. center of the dashboard, above the windshield on the ceiling, near the rear view mirror etc). - Page 5 STSM351 MONITOR INSTALLATION DIFFERENT CONFIGURATIONS OF MONITOR INSTALLATION • Mounting Option 1: Duck Foot Mount Monitor along with optional sun- Monitor with the Duck Foot Mount fig. 2 fig. 1 shade kit & Duck Foot Mount • Mounting Option 2: U Bracket Mount Monitor with U Bracket Mount Monitor along with optional sun- fig.
-
Page 6: Power Harness Installation
Safe-T-Scope ® 7" AHD LCD 2 CHANNEL MONITOR KIT POWER HARNESS INSTALLATION • Once the monitor is mounted, if necessary, drill a hole on the monitor mounting surface near the monitor in which to pass through the monitor pigtail. The hole should be no larger than 1" in diameter. -
Page 7: Wiring Diagram
STSM351 STSM351 Wiring Diagram MONITOR SUN U-BRACKET SHIELD (Mounting Options 2 of 2) DUCK-FOOT 7" AHD MOUNT MONITOR (Mounting Options 1 of 2) CAMERA 2 CAMERA 1 POWER HARNESS BLADE FUSE 2A FILTER BOX GREEN: TRIGGER 1 RED: +12/24 V DC WHITE: TRIGGER 2 ACC POWER BLACK: GROUND... -
Page 8: Monitor Functions And Operations
Safe-T-Scope ® 7" AHD LCD 2 CHANNEL MONITOR KIT MONITOR FUNCTIONS AND OPERATIONS NOTE: The monitor buttons do not function while the vehicle is in reverse. It is recommended that the buttons are ONLY used in park/neutral. POWER ON/OFF Turns the LCD on or off. The monitor, however, is always fully on and functional when receiving power, whether or not the power button is used. -
Page 9: Monitor Settings And Menus
STSM351 MONITOR SETTINGS AND MENU NOTE: Press MENU button to enter the menu and press the MENU button to change pages. The menu cannot be accessed when any trigger is activated. Volume can still be adjusted with +/- if triggers are activated. The menu is closed after 10 sec without any operation. - Page 10 Safe-T-Scope 7" AHD LCD 2 CHANNEL MONITOR KIT ® MONITOR SETTINGS AND MENU NOTE: Press MENU button to enter the menu and press the MENU button to change pages. The menu cannot be accessed when any trigger is activated. Volume can still be adjusted with +/- if triggers are activated.
- Page 11 STSM351 MONITOR SETTINGS AND MENU NOTE: Press MENU button to enter the menu and press MENU button again to change pages. The menu cannot be accessed when any trigger is activated. Volume can still be adjusted with +/- if triggers are activated. The menu is closed after 10 sec. without any operation.
-
Page 12: Appendix
These cameras can be installed at the rear of the vehicle, left/right side of the vehicle or any other location according to user's wish. An example of camera installation is given here using the STSC201 Rosco Backup Camera. INSTALL MOUNTING BRACKET •... - Page 13 (AVAILABLE FOR PURCHASE SEPARATELY OR WITH STSK8165 KIT) RED: +12V ACC WHITE: CONNECT TO VEHICLE TURN SIGNAL CIRCUIT (USER CHOICE) GREEN: CONNECT TO VEHICLE REVRSE CIRCUIT BLACK: VEHICLE GROUND ROSCO, INC DRAWN 90-21 144TH PL. 7/21/2021 Jordan.Edwards JAMAICA NY 11435 CHECKED (718)526-2601...
- Page 14 The Safe-T-Scope 7" 2 Channel AHD Monitor is compatible with most vehicle infotainment systems as long as the vehicle provides RCA connectivity. Using the proper Rosco adapter harnesses, video can be sent to the Rosco monitor and vehicle infotainment system..
- Page 15 STSM351 APPENDIX STSM351 Technical specification PARAMETER VALUE Operating Voltage Range 9V~36V DC Max Current Draw =< 1000mA Screen Size 7" Diagonal Screen Ratio 16:9 Accepted Video Input Format AHD 1080p, AHD 720p, NTSC Speaker Operating Temperature Range -20°C to + 65°C (-4°F to +149°F) Screen Brightness ≥500cd/m^2 LCD Resolution...
- Page 16 A CENTURY OF AUTOMOTIVE VISION SAFETY 90-21 144th Place, Jamaica, New York 11435 TEL (800) 227-2095 • FAX (718) 297-0323 techsupport@roscovision.com www.roscomirrors.com www.roscovision.com Lit P/N: MNLSTSM351 Lit. Revision: 1.0 Lit. Revision Date: 10/13/2021...


Need help?
Do you have a question about the SAFE -T-SCOPE STSM351 and is the answer not in the manual?
Questions and answers