Akaso EK7000 PRO User Manual
Hide thumbs
Also See for EK7000 PRO:
- User manual (134 pages) ,
- User manual (134 pages) ,
- User manual (232 pages)
Table of Contents
Advertisement
Quick Links
Advertisement
Table of Contents

Related Manuals for Akaso EK7000 PRO


Summary of Contents for Akaso EK7000 PRO
- Page 1 EK7000 PRO A C T I O N C A M E R A USER MANUAL V35AX...
-
Page 2: Table Of Contents
Your EK7000 Pro ------------------------------------------------------------------------------- 02 Getting Started--------------------------------------------------------------------------------- 04 Overview of Modes--------------------------------------------------------------------------- 06 Customizing Your EK7000 Pro------------------------------------------------------------ 09 Connecting to the AKASO GO App------------------------------------------------------ 15 Transferring Your Content ---------------------------------------------------------------- 16 Playing Back Your Content ---------------------------------------------------------------- 17 Deleting Your Content ---------------------------------------------------------------------- 19... -
Page 3: What's In The Box
What's in the Box EK7000 Pro Waterproof Battery Charger Battery USB Cable Housing x 1 Remote Control Remote Control Binden Clip 1 Clip 2 Strap x 1 Buckle Mount J-Hook Mount E Mount C Mount D Mount F Mount A Mount... -
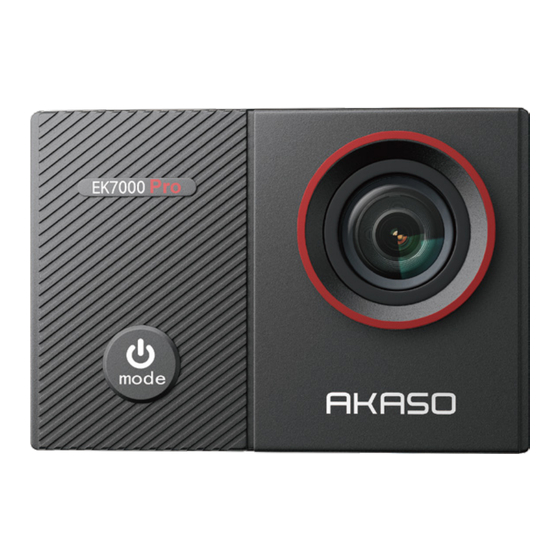
Page 4: Your Ek7000 Pro
Your EK7000 Pro Shutter / OK Button Wifi Indicator Power / Mode/Exit Button Microphone Memory Card Slot USB / External Mic Port Micro HDMI Port Lens... - Page 5 Touch Screen Speaker Working Indicator Down / Wifi Button Charging Indicator Battery Cover Up Button Note: The camera does not record sound when it is in the waterproof case.
-
Page 6: Getting Started
Getting Started Welcome to your new EK7000 Pro. To capture video and photos, you will need a memory card (sold separately). Memory Cards Use brand name memory cards that meet these requirements: • Class 10 or UHS-I rating • Capacity up to 128GB (FAT32) Note: 1. - Page 7 Switching Modes To switch mode: On the preview screen, press the Power button to switch modes. To exit mode: Press the Mode button to exit the current mode. Turing Wifi on or off To turn on: On the preview screen, press and hold the Wifi button to turn on Wifi. You can also tap the Wifi...
-
Page 8: Overview Of Modes
Overview of Modes The camera boasts 6 modes: Video, Photo, Burst Photo, Time Lapse Video, Time Lapse Photo, and Wifi. On the preview screen, tap the mode icon at the bottom to access the mode menu screen. On this screen, tap the desired mode to enter the selected mode. 00:00:00 | 06:02:04 Mode Burst Photo... - Page 9 Photo Mode 0000 | 3206 On the preview screen, press the Mode button once to switch to Photo Mode. In this mode, press Shutter button to take a photo at the preset photo resolution. Photo Burst Photo Mode 0000 | 3206 On the preview screen, press the Mode button twice to switch to Burst Photo Mode.
- Page 10 Wifi Mode SSID: When Wifi is turned on, the camera AKASO-EK7000Pro-****** will enter Wifi mode and display the PWD: 1234567890 Wifi information. Please connect your Waiting for Wifi Connection... camera to the AKASO GO app as soon as possible.
-
Page 11: Customizing Your Ek7000 Pro
Customizing Your EK7000 Pro Video & Photo Settings On the preview screen, press the Down button or tap the Tool icon in the bottom right corner to access the camera's settings screen. From there, you're free to configure the video & photo and system settings. - Page 12 like riding, skating, and handheld use. 3. Loop Recording Off/1min./3min./5min. (Default setting: Off) This option allows you to set the video length before recording loop videos. For instance, if you set "Loop Recording" to "3min", the camera will save video files every 3 minutes.
- Page 13 immediate impact on your image, guaranteeing that you never miss a moment. Rest assured that should you switch modes, the camera seamlessly reverts back to utilizing the complete scene for precise exposure calculation. 7. Photo Resolution 20MP/16MP/14MP/12MP/8MP/5MP/4MP (Default setting: 20MP) This camera is capable of capturing 20MP photos, with higher resolution offering greater clarity and detail due to the increased number of pixels.
- Page 14 System Settings 1.Special Effect Normal/B&W/Sepia/Negative/Warm/Cold/Red/Green/Blue (Default setting: Normal) Choose an ideal special effect for your photos or videos to enhance their appeal. 2. Angle Super Wide/Wide/Medium/Narrow (Default setting: Super Wide) The angle refers to how much of the scene can be captured through the camera lens.
- Page 15 7. Date & Time YY/MM/DD, MM/DD/YY, DD/MM/YY (Default setting: MM/DD/YY) You can set your camera’s date and time manually or sync it with your phone through the AKASO Go app. 8. Sounds Shutter: Off/On Beep: Off/On Volume: off/0/1/2/3 Boot-up: Off/On (Default setting: on) You can turn the shutter, beep, and boot-up sounds on or off, or adjust the...
- Page 16 13. Reset No/Yes (Default setting: No) This option resets all settings to their default values. 14. Version Brand: AKASO Model: EK7000 Pro Version: XXXXXXVX You can check the model, version and updated time of your EK7000 Pro.
-
Page 17: Connecting To The Akaso Go App
1. Turn on the camera, press and hold the Wifi button to turn on Wifi. The camera will enter Wifi mode and display the Wifi information in 3 seconds. 2. Enter your phone’s Wifi settings page, find the Wifi named “EK7000 Pro” in the list and tap on it, then enter the password 1234567890 for connection. -
Page 18: Transferring Your Content
files to your computer or delete selected files using File Explorer. Downloading Your Content to A Smartphone 1. Open the AKASO GO app, then connect it to the camera. 2. Tap the Album icon in the bottom left corner to view all the photos and videos captured by the camera. -
Page 19: Playing Back Your Content
TV. With this method, playback resolution depends on the resolution of the device and its ability to play back that resolution. Viewing Your Videos or Photos on the EK7000 Pro 1 Turn on your camera. - Page 20 00:00:00 | 06:02:04 Video 1080/60 4K/30...
-
Page 21: Deleting Your Content
Deleting Your Content Deleting Your Videos or Photos on the EK7000 Pro 1. Enter Playback mode. 2. Tap video or photo icon to access your video or photo files. 3. Tap the Forward or Backward icon to select the file you want to delete. -
Page 22: Reformatting Your Memory Card
Reformatting Your Memory Card To keep your memory card in good condition, reformat it on a regular basis. Reformatting erases all of your content, so be sure to offload your photos and videos first. 1. Turn on the camera. 2. Press the Down button or tap the Settings icon in the bottom right corner to enter the Settings screen. -
Page 23: Maintaining Your Camera
Maintaining Your Camera Follow these guidelines to get the best performance from your camera: 1. For best audio performance, shake the camera or blow on the mic to remove debris from the microphone holes. 2. To clean the lens, wipe it with a soft, lint-free cloth. Do not insert foreign objects around the lens. -
Page 24: Maximizing Battery Life
Maximizing Battery Life A message appears on the touch display if the battery drops below 10%. If the battery reaches 0% while recording, the camera saves the file and powers off.To maximize battery life, follow these guidelines when possible: 1. Turn off the Wifi connection. 2. -
Page 25: Battery Storage And Handling
Battery Storage and Handling The camera contains sensitive components, including the battery. Avoid exposing your camera to very cold or very hot temperatures. Low or high temperature conditions may temporarily shorten the battery life or cause the camera to temporarily stop working properly. Avoid dramatic changes in temperature or humidity when using the camera, as condensation may form on or within the camera. -
Page 26: Remote
Remote When the camera is turned on, it will be automatically connected to the remote within a certain distance. You can control the camera to take photos or record videos using the remote. Photo Button Video Button Splashproof only, not waterproof Video To record video, first make sure the camera is in Video mode. - Page 27 Burst Photo To capture burst photos, first verify the camera is in Burst Photo mode, then press the Photo button. The camera will emit a shutter sound indicating the completion of the shot. Time Lapse To capture time lapse photos or videos, first verify the camera is in Time Lapse mode, then press the Photo or Video button.
- Page 28 (3) Lift the PCB board and slide out the battery, as shown in the picture. Note: Do NOT rotate the PCB board to avoid reversing the camera and video button functions. (4) Install the new battery, keeping the “+” pole facing up. (5) Install all 4 screws back onto the PCB board.
-
Page 29: Mounting Your Camera
Mounting Your Camera Attach your camera to helmets, gear and equipment. -
Page 31: Contact Us
Contact Us (888) 466-9222 (US) cs@akasotech.com www.akasotech.com For any inquiries about AKASO products, please feel free to contact us. We will respond within 24 hours.
Need help?
Do you have a question about the EK7000 PRO and is the answer not in the manual?
Questions and answers