Table of Contents
Advertisement
Quick Links
Advertisement
Table of Contents

Related Manuals for Western Digital My Book WDBACW0030H


Summary of Contents for Western Digital My Book WDBACW0030H
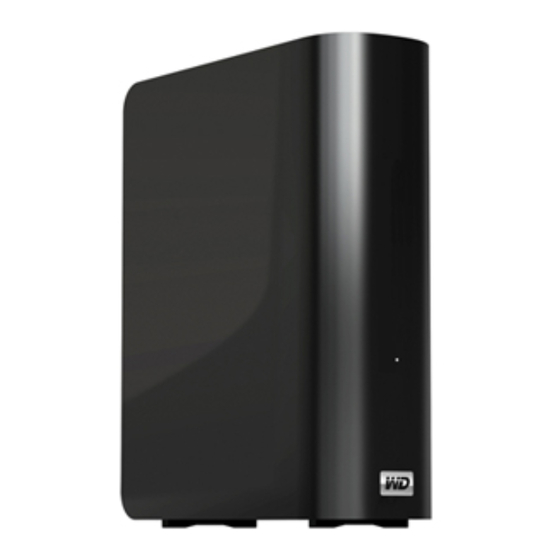
- Page 1 ® My Book Essential ™ User Manual My Book Essential User Manual...
-
Page 2: Wd Service And Support
WD Service and Support Should you encounter any problem, please give us an opportunity to address it before returning this product. Most technical support questions can be answered through our knowledge base or e-mail support service at support.wdc.com. If the answer is not available or if you prefer, ®... -
Page 3: Table Of Contents
Table of Contents WD Service and Support ........... ii Accessing Online Support . - Page 4 Locking and Unlocking the Drive ......27 Password Protecting the Drive ..........27 Unlocking the Drive .
- Page 5 Unlocking the Drive ............52 Unlocking the Drive with the WD SmartWare Software .
-
Page 6: About Your Wd Drive
About Your WD Drive Welcome to your My Book storage solution for all the chapters of your digital life. Our latest edition features visual, easy-to-use, automatic, continuous backup software and drive lock security protection. WD's best-selling My Book Essential USB external hard drive features WD SmartWare software that backs up your data automatically and continuously, shows your backup as it happens, and brings back lost files effortlessly. -
Page 7: Kit Contents
reduces power during idle times, and a power-saving feature turns the drive on and off with your computer. Planet friendly—We designed a small box from recycled materials to minimize waste. We encourage you to recycle it. Ready to plug-and-play with Windows Computers—NTFS-formatted for compatibility with all updated Windows operating systems. -
Page 8: Operating System Compatibility
Operating System Compatibility Your My Book Essential drive and the WD SmartWare software are compatible with the following operating systems: ® Windows • Windows XP ® • Windows Vista • Windows 7 Compatibility can vary, depending on hardware configuration and operating system. For highest performance and reliability, always install the latest updates and service pack (SP). -
Page 9: Power/Activity Led
Power Button USB 3.0 Figure 3. Back of the My Book Essential Drive Power/Activity LED The power/activity LED shows the drive’s power state and activity as follows: LED Appearance On steady Fast flashing, approximately 3 times per second Slow flashing, approximately every 2.5 seconds Power Button Use the power button to safely power down the drive and avoid data loss or damage to the drive. -
Page 10: Kensington Security Slot
WD products are precision instruments and must be handled with care during unpacking and installation. Drives may be damaged by rough handling, shock, or vibration. Always observe the following precautions when unpacking and installing your external storage product: • Do not drop or jolt the drive. -
Page 11: Connecting The Drive And Getting Started
Connecting the Drive and Getting Started This chapter provides instructions for connecting the drive to your computer and installing WD SmartWare software. It includes the following topics: Connecting the Drive Getting Started with the WD SmartWare Software Getting Started Without the WD SmartWare Software Connecting the Drive To connect the My Book drive to your Windows computer: Depending on your region, if required, change the power adapter as follows:... - Page 12 Note: If you have reformatted the drive for use on a Mac computer, skip the rest of this procedure and see “Connecting the Drive and Getting Started” on page 43 instead. 4. If a Found New Hardware screen appears, click Cancel to close it. The WD SmartWare software that is on the drive installs the proper driver for your My Book drive.
-
Page 13: Getting Started With The Wd Smartware Software
8. Continue to “Getting Started with the WD SmartWare Software” in the next section. If you do not want to install the WD SmartWare software, go to “Getting Started Without the WD SmartWare Software” on page 15 instead. 9. For Windows Vista or Windows 7, two or three screens might appear, depending on whether the AutoRun (AutoPlay) function is enabled or disabled: IF AutoRun (AutoPlay) is . - Page 14 4. After the software installation completes: IF you clicked . . . at step 1, THEN the WD SmartWare software displays . . . Install WD SmartWare Install Drive Settings Retrieve a backup Note: The initial Backup and Drive Settings screens only appear one time—the first time you install the WD SmartWare software on your computer.
- Page 15 MY BOOK ESSENTIAL USER MANUAL Figure 6. Initial Backup Screen WD SmartWare Initial Drive Settings Screen Drive Management Initial Drive Settings Screen Figure 7. Initial Drive Settings Screens CONNECTING THE DRIVE AND GETTING STARTED – 10...
- Page 16 6. After password protecting or registering your drive, click Continue to close the WD SmartWare initial Drive Settings screen and display the WD SmartWare Home screen (Figure 8). This completes the getting started procedure after selecting Install WD SmartWare and skipping the backup. 7.
-
Page 17: Wd Smartware Overview
Figure 9. Drive Management Home Screen WD SmartWare Overview The WD SmartWare software is an easy-to-use tool that gives you the power to: • Secure your drive—In drive settings, create a password to protect your drive from unauthorized access or data theft. •... -
Page 18: Wd Smartware Home Screen
WD SmartWare Home Screen The WD SmartWare Home screen provides four tab-selected options: • Home—Provides a Content Gauge with the capacity of each hard drive in or connected to your computer (see Figure 8 on page 11) • Backup—Manages existing backups or creates new backups of your important data, including movies, music, documents, e-mail, and photos (see Figure 10 on page 17) •... -
Page 19: Drive Management Home Screen
In the Content Gauge for your My Book drive, the Additional Files category includes all of the files shown in the used space portion of your drive properties. This space is not available for backups. Note: The small number of files that are shown in the Additional Files category when you first install the WD SmartWare software—before performing your first backup—represents the system and hidden files that your computer’s operating system put there when you installed the drive. -
Page 20: Getting Started Without The Wd Smartware Software
Getting Started Without the WD SmartWare Software If you do not install the WD SmartWare software, you can still use your My Book as an external hard drive. In this case, however, you will not be able to: • Protect your data with automatic continuous backups (see “Backing Up Your Computer Files”... -
Page 21: Backing Up Your Computer Files
• Content Gauges for your computer’s hard drives, so you can see the number of files and the storage size for each content category • A Detailed View content box that you can use to select specific categories of files... - Page 22 Figure 10. Backup Screen In the Content Gauges for your computer’s hard drives, the categories of files that would be included in the backup if you click Start Backup are shown where a: • Light blue background in the Content Gauge for your computer’s hard drive represents the original files that are available for backup •...
-
Page 23: Backing It All Up
Note that: • The System category, shown against a dark gray background, includes all of your operating system files that are not available for backup. Files that are not backed up include system files, program files, applications, working files like .tmp and .log files, and any files that are stored in a Temp folder. -
Page 24: Advanced Backup Capabilities
The best long-term solution would be to relegate the drive to long- term archive storage and: a. Click the Home tab to display the Home screen. b. Click the WDStore link in the WD Online box to view the Western Digital Online Store website. -
Page 25: Changing The Backup Software Settings
2. In the backup files content box: • Select the check boxes for the categories of files that you want to include in the backup • Clear the check boxes for the categories of files that you want to exclude from the backup 3. - Page 26 Figure 12. Software Settings Screen Specifying the Number of Backup Versions. The WD SmartWare software can keep up to 25 older versions of each file. If you overwrite or delete a file by mistake, or want to see the file a couple of versions ago, the WD SmartWare software has a copy for you. You always have the most-recent specified number of versions of each file available for retrieves, and you can choose to keep from 1 to 25 versions.
- Page 27 Pausing Backups Until Your Computer is Idle. A large backup can take a lot of time, and can consume a lot of your system processing resources. The WD SmartWare software works in the background using minimal computer resources while you are working on your computer.
-
Page 28: Retrieving Backed Up Files
Retrieving Backed Up Files This chapter includes the following topics: About Retrieving Files Retrieving Files Retrieving Folders Retrieving an Earlier Version of a File or Deleted Files Retrieving All Your Files About Retrieving Files The WD SmartWare software makes it easy for you to retrieve files that have been backed up on your My Book drive and copy them to either: •... - Page 29 MY BOOK ESSENTIAL USER MANUAL Figure 13. Retrieve Screen Figure 14. Select a Destination for Retrieved Files Screen RETRIEVING BACKED UP FILES – 24...
- Page 30 Figure 15. Select Content to Retrieve Screen 4. On the Select content to retrieve... screen, select Retrieve Some Files to display the retrieve files selection box (see Figure 16 on page 26). 5. Navigate through the folder structure to find the files you want. Also, you can use the search box by typing the name (or partial name) of the file or folder: •...
-
Page 31: Retrieving Folders
Figure 16. Retrieve Files Selection Box 7. During the retrieve: • The Retrieve screen displays a progress bar and a message indicating the amount of data that has been copied to the specified retrieve location. • A Cancel Retrieving button is available for stopping the retrieve. 8. -
Page 32: Locking And Unlocking The Drive
Locking and Unlocking the Drive This chapter includes the following topics: Password Protecting the Drive Unlocking the Drive Changing Your Password Turning Off the Drive Lock Feature Password Protecting the Drive You should password protect your drive if you are worried that someone else will gain access to your drive and you do not want them to see your files on the drive. -
Page 33: Unlocking The Drive
3. On the Drive Settings screen, click Security to display the Set Security dialog: 4. Type your password in the Choose a password box. 5. Retype your password in the Verify password box. 6. Type a hint to help remind yourself of your password in the Password hint box. 7. -
Page 34: Unlocking The Drive With The Wd Smartware Software
Unlocking the Drive with the WD SmartWare Software Whenever you shut down and restart your computer, or disconnect and reconnect the drive to your computer, the WD SmartWare software displays a Drive is locked message in place of the Content Gauge for your My Book drive: To unlock your drive using the WD SmartWare software: As prompted, click the My Book image above the Drive is locked message to display the WD SmartWare drive unlock screen:... -
Page 35: Changing Your Password
• Clicking Start > My Computer and double-clicking the WD Unlocker virtual CD icon under Devices with Removable Storage 2. Type your password in the Password box and click Unlock to unlock your drive. 3. At the Your drive is now unlocked prompt, click Exit to close the WD SmartWare Drive Unlock utility screen. -
Page 36: Turning Off The Drive Lock Feature
Turning Off the Drive Lock Feature To remove password protection from your drive: Click Security on either the WD SmartWare Drive Settings screen or the drive management Drive Settings screen (Figure 17 on page 27) to display the Your Drive is Secure dialog: 2. -
Page 37: Managing And Customizing Your Drive
Managing and Customizing Your Drive This chapter includes the following topics: Using the WD SmartWare Icon Opening the WD SmartWare Software Checking Drive Status Monitoring Icon Alerts Safely Disconnecting the Drive Customizing Your Software Settings Customizing Your Drive Settings Uninstalling the WD SmartWare Software Restoring the WD SmartWare Software and Disk Image Using the WD SmartWare Icon After you have installed the WD SmartWare software, the WD SmartWare icon displays in... -
Page 38: Monitoring Icon Alerts
Monitoring Icon Alerts The WD SmartWare icon in the taskbar flashes to indicate drive status: IF the WD SmartWare icon flashes . . . Green and white, Red and white, Safely Disconnecting the Drive CAUTION! To prevent data loss, close all active windows and applications before shutting down or removing the drive. -
Page 39: Customizing Your Software Settings
Customizing Your Software Settings The WD SmartWare software makes it easy for you to quickly customize its own software settings for the best possible performance with your drive by: • Specifying the number of backup versions that you want to keep for each file •... -
Page 40: Setting The Preferences Option
Setting the Preferences Option When enabled, each time you reconnect your My Book drive to your computer, the Preferences option checks for software updates. This ensures that you are always using the most-recent software version. To enable or disable the Preferences option: On either the Software Settings screen (Figure 12 on page 21) or the drive management Drive Settings screen (Figure 17 on page 27), click Preferences to display the Set Preferences dialog:... - Page 41 To customize your drive settings for the best possible performance, on either the WD SmartWare Drive Settings screen or the drive management Drive Settings screen (see Figure 17 on page 27): IF you want to . . . Use a password to keep others from accessing the files on your drive, Change your password,...
-
Page 42: Registering The Drive
Registering the Drive The WD SmartWare software uses your computer’s Internet connection to register your drive. To register your drive to receive free technical support during the warranty period and be kept up-to-date on the latest WD products: Make sure that your computer is connected to the Internet. 2. -
Page 43: Erasing The Drive
2. In the Turn off Drive box, select the inactivity time interval at which you want to turn off the drive. 3. Click Set Timer to save and implement your sleep timer selection. Erasing the Drive CAUTION! Erasing your drive permanently deletes all of the data on your drive. Always make sure that you no longer need any of the data on your drive before erasing the drive. - Page 44 Using your computer’s file management utility to open the WD Unlock virtual CD and double-clicking the Unlock.exe file Clicking Start > My Computer, opening the WD Unlock virtual CD listing under Devices with Removable Storage, and double-clicking the Unlock.exe file 2. Make five attempts to unlock the drive by: a.
-
Page 45: Enabling The Backup And Retrieve Functions
After the drive erase operation completes, go to Base Answer ID #5419 for information about downloading and restoring the WD SmartWare software and disk image on your My Book drive. Note: Erasing your drive also removes your password. If you still want to use a password to protect your drive, you will need to re-create it after restoring the WD SmartWare software and disk image. -
Page 46: Uninstalling On Windows Vista Or Windows 7
Uninstalling on Windows Vista or Windows 7 Click Start > Control Panel. 2. Double-click Programs and Features. 3. Click WD SmartWare or the WD SmartWare icon and click Uninstall/Change at the top of the screen. 4. Click Yes at the Do you wish to proceed... prompt. Restoring the WD SmartWare Software and Disk Image In addition to deleting all of the data on your My Book drive, erasing or reformatting the drive also removes the WD SmartWare software and all of the support files, utilities,... -
Page 47: Checking Drive Health
Checking Drive Health The files on your My Book drive are important to you. The WD SmartWare software has several built-in diagnostic tools to help make sure that your drive is performing well. Run the following tests if you are concerned that your drive is not operating properly: Diagnostic Tool Description Quick S.M.A.R.T. -
Page 48: Using The Drive With A Mac
Using the Drive with a Mac The My Book drive is preformatted as a single NTFS partition for compatibility with all updated Windows operating systems. To use the drive with Mac OS X Leopard or Snow Leopard operating systems, and to use Time Machine, if you want, you must first: •... -
Page 49: Enhancing Performance With Wd +Turbo
If you do want to use the Time Machine backup software, click Use as Backup Disk. The My Book icon now displays as: Your My Book drive is now ready to use as an external storage device. You can enhance its performance by installing the following software that is on the drive: •... - Page 50 To install WD +TURBO: Double-click the My Book icon and then double-click the Extras folder on the screen that displays: 2. Double-click the WD +TURBO Installer icon: 3. Click Install on the WD +TURBO Driver Installer screen: 4. Read the license agreement and click Accept to continue. 5.
-
Page 51: Installing The Wd Smartware Software
Mac computer: Your My Book drive is now ready to use as an enhanced-performance external storage device. Installing the WD SmartWare Software To install the WD SmartWare software:... - Page 52 2. The WD SmartWare Software Installer screen displays: 3. Click Continue to Install and the installer utility detects that the WD SmartWare software is not installed: 4. Click Install WD SmartWare to begin the installation. 5. Read the license agreement and click Accept to continue. 6.
-
Page 53: The Wd Smartware Home Screen
Figure 18. WD SmartWare Home Screen The WD SmartWare Home Screen On the Home screen, you can change the drive being categorized by using the drop- down selection box under the name of your computer. If you select a different drive, the WD SmartWare software identifies the categories of files on that drive. -
Page 54: Using The Wd Smartware Icon
Note that: • The System category, shown against a dark gray background, includes all of your operating system files that are not available for backup. Files that are not backed up include system files, program files, applications, working files, and any files that are stored in a Temp folder. -
Page 55: Checking Drive Status
• Double-clicking WD SmartWare in the Applications list: Checking Drive Status Use the WD SmartWare icon to determine whether the drive is locked (encrypted), how full the drive is, the drive’s serial number, and the temperature condition of the drive: Click the WD SmartWare icon to display a list of drives and select the My Book drive: 2. -
Page 56: Safely Dismounting The Drive
c. At the Your drive is now unlocked prompt, click Exit to close the WD SmartWare Drive Unlock utility screen. d. Repeat step 1 to see the drive status. Safely Dismounting the Drive You can safely dismount the drive using either the: •... -
Page 57: Using The My Book Icon
Using the My Book Icon To safely dismount the drive using the My Book icon: Right- or control-click the My Book icon on the desktop and click Eject “MY BOOK” where “MY BOOK” is the name you assigned to the volume when you reformatted the drive for use on a Mac computer: You might hear the drive power down. - Page 58 Automatically. Whenever the WD SmartWare drive unlock screen appears: To unlock your drive: Type your password in the Password box. 2. Click Unlock to unlock your drive and enable the WD SmartWare software. Manually. If your computer goes into sleep mode, an unlock screen might not display when you reactivate it.
-
Page 59: Unlocking The Drive Without The Wd Smartware Software
Unlocking the Drive Without the WD SmartWare Software Whenever you connect your password-protected drive to a computer that does not have the WD SmartWare software installed, you can use the WD SmartWare Drive Unlock utility to unlock the drive there. The WD SmartWare software provides the Drive Unlock utility on a “virtual”... -
Page 60: Uninstalling The Wd Smartware Software
Uninstalling the WD SmartWare Software Important: You can easily uninstall the software. However, you will need to restart the backup job manually after reinstalling the software as uninstalling deletes all existing backup job configurations. (See “Backing Up Your Computer Files” on page 16.) To uninstall the WD SmartWare software: Double-click the My Book icon on the desktop or WD SmartWare in the Applications list and double-click the Extras folder on the screen that displays:... -
Page 61: Troubleshooting
Troubleshooting This chapter includes the following topics: Installing, Partitioning, and Formatting the Drive Frequently Asked Questions If you have problems installing or using this product, refer to this troubleshooting section or visit our support website at more help. Installing, Partitioning, and Formatting the Drive How to Install, partition, and format the drive in Windows XP and Vista Install, partition, and format the drive to Mac OS X 10.4.11 and 10.5+... - Page 62 A: If your system has a USB 3.0 or USB 2.0 PCI adapter card, be sure that its drivers are installed before connecting your WD USB 3.0 external storage product. The drive is not recognized correctly unless USB 3.0 or USB 2.0 root hub and host controller drivers are installed.
-
Page 63: Installing The Ses Driver
Installing the SES Driver This appendix includes the following topics: Installing on Windows XP Computers Installing on Windows Vista Computers Installing on Windows 7 Computers If you decide to not install the WD SmartWare software, you must have an SES driver installed on computers running Windows to keep the hardware popup wizard from displaying every time you connect your My Book drive to your computer. - Page 64 MY BOOK ESSENTIAL USER MANUAL 4. Select Install the software automatically and click Next: 5. When the installation completes, click Finish: INSTALLING THE SES DRIVER – 59...
-
Page 65: Installing The Driver Manually
Installing the Driver Manually If your computer is not connected to the Internet, install the driver manually: On the Found New Hardware Wizard screen, select No, not this time to inhibit a connection attempt to Windows Update: 2. Click Next to continue. 3. -
Page 66: Installing On Windows Vista Computers
d. Click Next: 5. When the installation completes, click Finish: Installing on Windows Vista Computers After you physically connect the drive as shown in Figure 4 on page 6, the Found New Hardware screen displays. Note: If Autoplay is enabled, two additional screens might appear at the same time as the Found New Hardware screen. -
Page 67: Installing The Driver Automatically
Installing the Driver Automatically To install the SES driver automatically, your computer must be connected to the Internet: Verify that your computer is connected to the Internet. 2. On the Found New Hardware wizard screen, click Locate and install driver software: 3. -
Page 68: Installing The Driver Manually
Installing the Driver Manually If your computer is not connected to the Internet, install the driver manually: On the Found New Hardware wizard screen, click Locate and install driver software: 2. On the Found New Hardware - WD SES Device wizard screen, click Don’t search online: 3. - Page 69 4. Browse to Computer and: a. Double-click the My Book drive. b. Double-click the Extras folder. c. Select WD SES Device Driver. d. Click Next: 5. When the installation completes, click Close: MY BOOK ESSENTIAL USER MANUAL INSTALLING THE SES DRIVER – 64...
-
Page 70: Installing On Windows 7 Computers
Installing on Windows 7 Computers After you physically connect the drive as shown in Figure 4 on page 6, use the Windows 7 Computer Management utility to install the SES driver: Open All Programs and click Computer > Manage: 2. Under Computer Management (Local), click Device Manager > Unknown Device and right-click Update driver software: MY BOOK ESSENTIAL USER MANUAL... - Page 71 MY BOOK ESSENTIAL USER MANUAL 3. Click Browse my computer for driver software: 4. Browse to Computer, double-click the My Book drive, double-click the Extras folder, and select WD SES Device Driver: 5. Click Next to continue. 6. When the installation completes, click Close: INSTALLING THE SES DRIVER –...
-
Page 72: Compliance And Warranty Information
Directives of the European Union, including the EMC Directive (2004/108/EC) and the Low Voltage Directive (2006/95/EC). A “Declaration of Conformity” in accordance with the applicable directives has been made and is on file at Western Digital Europe. GS Mark (Germany only) Machine noise - regulation 3. -
Page 73: Kcc Notice (Republic Of Korea Only)
KCC Notice (Republic of Korea only) Class B Device 1 Please note that this device has been approved for non-business purposes and may be used in any environment, including residential areas. Environmental Compliance (China) (Pb) Kensington 6-32x6.35mm M3x5mm+5W (PCA)* (PCB) Warranty Information Obtaining Service WD values your business and always attempts to provide you the very best of service. -
Page 74: Limited Warranty
Modification of or tampering with the Software, including but not limited to any Open Source Software, is solely at your own risk. Western Digital is not responsible for any such modification or tampering. Western Digital will not support any product in which you have or have attempted to modify the Software supplied by Western Digital. -
Page 75: Index
Index Accessories, optional 2 Alerts, flashing icon 33 Backup about backing up files 16 files content box 19 procedure 18 Box contents 2 CAUTION about erasing the drive 38 about lost passwords 27 about preventing data loss when dis- connecting 33 about your unlocked drive 28 China RoHS 68 Compatibility with operating systems 3... - Page 76 Operating systems 3 Other file category, defined 13 Password protecting your drive 27 CAUTION about lost passwords 27 Physical description 3 Pictures file category, defined 13 Power button 4 Precautions for handling the drive 5 Preferences options, setting 35 Preferences software setting 34 Product features 1 Product registration 5 Quick Diagnostic Self-test 42...
- Page 77 WD. WD reserves the right to change specifications at any time without notice. Western Digital, WD, the WD logo, My Book, and My Passport are registered trademarks and My Passport Essential, WD SmartWare, and Data Lifeguard are trademarks of Western Digital Technologies, Inc. Other marks may be mentioned herein that belong to other companies.
Need help?
Do you have a question about the My Book WDBACW0030H and is the answer not in the manual?
Questions and answers