Table of Contents
Advertisement
Quick Links
Advertisement
Table of Contents

Related Manuals for Western Digital My Book WDBAAF0010HBK


Summary of Contents for Western Digital My Book WDBAAF0010HBK
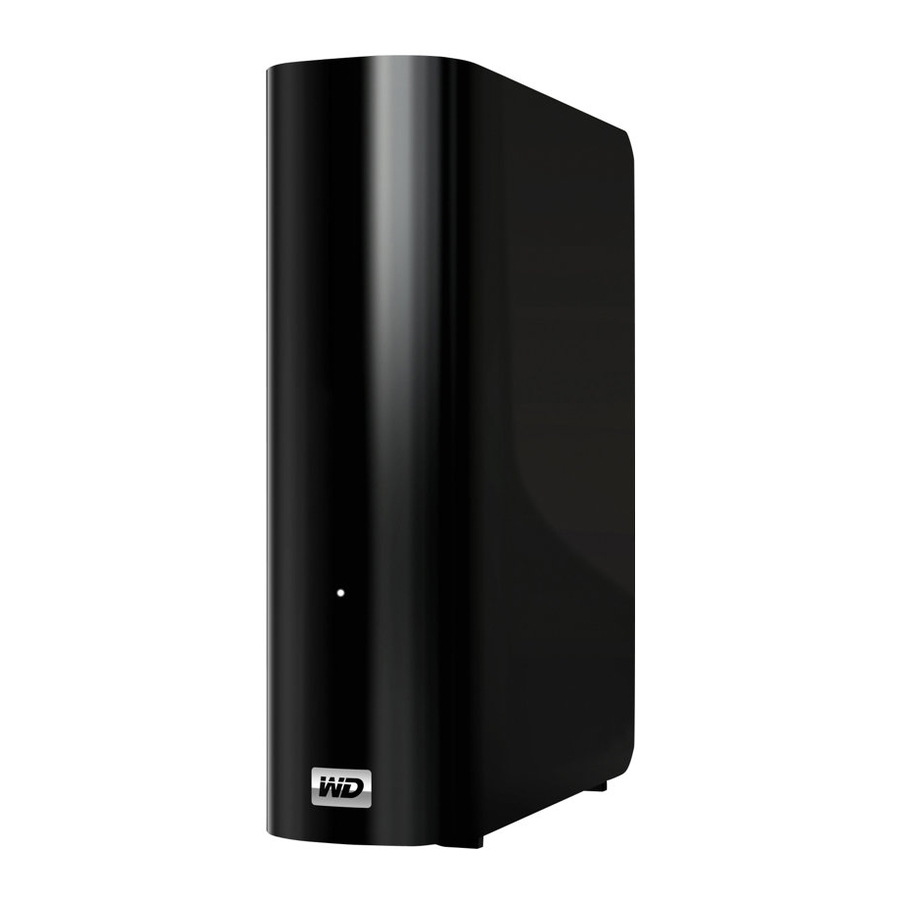
- Page 1 My Book ® Essential ™ User Manual...
-
Page 2: Wd Service And Support
WD Service and Support Should you encounter any problem, please give us an opportunity to address it before returning this product. Most technical support questions can be answered through our knowledge base or e-mail support service at support.wdc.com. If the answer is not available or if you prefer, please contact WD at the best telephone number shown below. -
Page 3: Table Of Contents
Table of Contents WD Service and Support ........ii Accessing Online Support . - Page 4 Retrieving Files Directly from the Drive........26 Locking and Unlocking Your Drive .
- Page 5 Troubleshooting ......... . . 52 Installing, Partitioning, and Formatting the Drive .
-
Page 6: About Your Wd Drive
About Your WD Drive Welcome to your My Book™ Essential™ external hard drive, an elegant, high-capacity storage solution for all the chapters of your digital life. Our latest edition features visual, easy-to-use, automatic, continuous backup software and drive lock security protection. -
Page 7: Kit Contents
Planet friendly - We designed a small box from recycled materials to minimize waste. We encourage you to recycle it. Ready to plug-and-play with Windows PCs - Formatted NTFS for compatibility with all Windows operating systems. Support for multiple devices - One installation of the software supports up to three WD devices (My Book and/or My Passport drives) shipped with WD SmartWare software. -
Page 8: Compatibility
Compatibility ® Windows ® • Windows XP ® • Windows Vista • Windows 7 Note: Compatibility may vary depending on your computer’s hardware configuration and operating system. For highest performance and reliability, install the latest updates and service pack (SP). For Windows, go to the Start menu and select Windows Update. -
Page 9: Led Indicators
Power Button USB Port Figure 2. Back of My Book Essential Drive LED Indicators Power/Activity LED. The power/activity LED is on the center of the front panel of the drive. It indicates the drive’s power state and activity. The LED indicator functions as shown in the table below. -
Page 10: Power Button
Drives may be damaged by rough handling, shock, or vibration. Be aware of the following precautions when unpacking and installing your external storage product: • Do not drop or jolt the device. • Do not move the device during activity. -
Page 11: Connecting The Drive And Getting Started
Connecting the Drive and Getting Started This chapter includes the following topics: Connecting the Drive Installing the Drive Getting Started With WD SmartWare Software WD SmartWare Overview WD SmartWare Home Screen Viewing the Info/Online Help Topics Connecting the Drive Connect your My Book drive as shown below. Figure 3. -
Page 12: Installing The Drive
Open My Computer. b. Double-click the WD SmartWare virtual CD, which is listed under Devices with Removable Storage. Note: WD SmartWare software is provided in the form of a virtual CD (VCD) drive on your My Book drive. The VCD displays on your desktop and behaves just like a physical CD. -
Page 13: Installing On Windows Vista/Windows 7
The Welcome to WD SmartWare screen displays. If a Flash Player is installed on your computer, the screen is animated: 3. Continue with “Getting Started With WD SmartWare Software” on page 10. Installing on Windows Vista/Windows 7 After you physically connect the drive as shown in Figure 3 on page 6, two or three screens may pop up, depending on your computer setup. - Page 14 b. In the AutoPlay screen, click Run WDSmartWare.exe. Figure 6. AutoPlay Screen The Welcome to WD SmartWare screen displays. If a Flash Player is installed on your computer, the screen is animated. c. Continue to “Getting Started With WD SmartWare Software” on page 10. 2.
-
Page 15: Getting Started With Wd Smartware Software
The WD SmartWare virtual CD drive is listed under Devices with Removable Storage. b. Double-click the WD SmartWare virtual CD. Note: WD SmartWare software is provided in the form of a virtual CD (VCD) drive on your My Book Drive. The VCD displays on your desktop and behaves just like a physical CD. - Page 16 MY BOOK ESSENTIAL USER MANUAL Figure 7. Initial Backup Screen Figure 8. Initial Drive Settings Screen CONNECTING THE DRIVE AND GETTING STARTED – 11...
-
Page 17: Wd Smartware Overview
Figure 9. Home Screen WD SmartWare Overview WD SmartWare software is an easy-to-use tool that gives you the power to: • Secure your drive—In drive settings, create a password to protect your encrypted drive from unauthorized access or data theft. •... -
Page 18: Viewing The Info/Online Help Topics
• Retrieve screen—Brings back valuable data that has been lost or overwritten (see Figure 13 on page 23) • Settings screen—Manages security, diagnostics, power settings, and backup parameters (see Figure 11 on page 19) On the Home screen, you can modify the primary drive being categorized with the drop- down selection box under the name of your computer. -
Page 19: Backing Up Your Computer Files
Additionally, the Backup screen (see Figure 10 on page 15) provides: • Content Gauges for your computer’s disk drives, so you can see the number of files and the storage size for each content category • A Refresh View button for refreshing the Content Gauges •... - Page 20 Figure 10. Backup Screen In the Content Gauges for your computer’s disk drives, the categories of files that would be included in the backup if you click Run Backup are shown: • Light blue background in the Content Gauge for your computer’s hard drive represents the original files that are available for backup.
-
Page 21: Backing It All Up
For a complete list of all included file extensions, search for Answer ID 3644 in the WD Knowledge Base at http://support.wdc.com. Note that: • The System category, shown against a dark gray background, includes all of your operating system files that are not available for backup. Files that are not backed up include system files, program files, applications, and working files like .tmp and .log files. -
Page 22: Advanced Backup Capabilities
The best long-term solution would be to relegate the drive to long- term archive storage and: a. Click the Home tab to display the Home screen. b. Click the WDStore link in the WD Online box to view the Western Digital Online Store website. -
Page 23: Selecting Specific Content To Back Up
Selecting Specific Content to Back Up To back up some of your computer files: On the Backup screen (see Figure 10 on page 15), select Detailed View to open the backup files content box: 2. In the backup files content box: •... -
Page 24: Changing The Backup Software Settings
Changing the Backup Software Settings To optimize your backup, you can: • Specify the number of backup versions to keep for each file • Pause backups until your computer is idle In order to configure these backup options: Click the Settings tab to display the Settings screen (see Figure 11). Figure 11. - Page 25 Figure 12. Software Settings Screen Specifying the Number of Backup Versions. The WD SmartWare software enables you to keep up to 25 older versions of each file. If you overwrite or delete a file by accident, or want to see the file a couple of versions ago, The WD SmartWare software has a copy for you.
- Page 26 2. Specify the number of file versions that you want to keep (from 1 to 25) in the Enter the number of backup versions to keep for each file box. 3. Click Apply to save and implement the new number of backup versions. Pausing Backups Until Your Computer is Idle.
-
Page 27: Retrieving Backed Up Files
Retrieving Backed Up Files This chapter includes the following topics: About Retrieving Files Retrieving a File/Folder Retrieving a Folder Retrieving an Earlier Version of a File or Deleted Files Retrieving All of Your Content Retrieving Files Directly from the Drive About Retrieving Files The WD SmartWare software makes it easy for you to retrieve files that have been backed up on your My Book drive and either:... - Page 28 MY BOOK ESSENTIAL USER MANUAL Figure 13. Retrieve Screen Figure 14. Select a Destination for Retrieved Files Screen RETRIEVING BACKED UP FILES – 23...
- Page 29 MY BOOK ESSENTIAL USER MANUAL Figure 15. Select Content to Retrieve Screen 4. On the Select content to retrieve... screen, select Retrieve Some Files to display the retrieve files selection box (see Figure 16). Figure 16. Retrieve Files Selection Box RETRIEVING BACKED UP FILES –...
-
Page 30: Retrieving A Folder
5. Navigate through the folder structure to find the content of interest. Also, you can use the search box by typing the name (or partial name) of the file or folder you are looking for: • Click the appropriate file category button to list the files by category: Pictures Music Movies... -
Page 31: Retrieving All Of Your Content
Retrieving All of Your Content On the Select content to retrieve... screen (see Figure 15 on page 24), choose the Retrieve all Files option, which will retrieve content across all categories and copy them to either their original locations or the Retrieve Contents folder. Retrieving Files Directly from the Drive Using the WD SmartWare Retrieve feature is the best way to find backed up files and copy them to your computer’s hard drive. -
Page 32: Locking And Unlocking Your Drive
Locking and Unlocking Your Drive This chapter includes the following topics: Password Protecting Your Drive Unlocking Your Drive Turning Off the Drive Lock Feature Changing Your Password Password Protecting Your Drive You should password protect your drive if you are worried that someone else will gain access to your drive and you do not want them to be able to access your content on the drive. - Page 33 MY BOOK ESSENTIAL USER MANUAL Figure 17. Drive Settings Screen 3. Click Security to display the Set Security dialog: 4. Type your password in the Choose a password box. 5. Retype your password in the Verify password box. 6. Type a hint to help remind yourself of your password in the Password hint box. 7.
-
Page 34: Unlocking Your Drive
9. Click Save Security Settings to save your password and enable password protection for your drive. CAUTION! After creating a password, the drive remains unlocked for as long as you continue your current work session. Then, the WD SmartWare software: •... -
Page 35: Unlocking Your Drive Without The Wd Smartware Software
CD and double-clicking the Unlock.exe file • Clicking Start > My Computer and double-clicking the WD SmartWare icon under Devices with Removable Storage 2. Type your password in the Password box. If you provided a password hint when you created your password, click the Password hint pointer to see the hint. -
Page 36: Turning Off The Drive Lock Feature
Turning Off the Drive Lock Feature Important: After you have created a password, the drive can only be unlocked by a user logged on to the computer with administrative privileges. This is not usually possible on computers at hotels, libraries, or Internet kiosks. If you will need to use the drive on such computers, remove password protection to turn off the drive lock feature first. -
Page 37: Managing And Customizing Your Drive
Managing and Customizing Your Drive This chapter includes the following topics: Launching WD SmartWare Software Checking Status and Temperature Monitoring Icon Alerts Disconnecting the Drive Safely Customizing Your Software Settings Customizing Your Drive Settings Updating Your Software Uninstalling the WD SmartWare Software After you have installed the WD SmartWare software (see “Getting Started With WD SmartWare Software”... -
Page 38: Checking Status And Temperature
The WD SmartWare Home screen displays: Checking Status and Temperature Mouse over the WD SmartWare icon drive temperature, and to determine whether the drive is currently locked: Monitoring Icon Alerts • If the WD SmartWare icon may be locked or is in a format that the WD SmartWare software does not understand (non-Windows format in a Windows environment). -
Page 39: Disconnecting The Drive Safely
Disconnecting the Drive CAUTION! To prevent data loss, close all active windows and applications before shutting down or removing the drive. Using the System Tray Right-click the WD SmartWare icon remove My Book Essential USB HDD: You may hear the drive power down as the Power LED flashes. 2. -
Page 40: Specifying A Different Retrieve Folder
To customize your WD SmartWare software settings for the best possible performance with your drive, on the Software Settings screen (see Figure 12 on page 20): IF you want to . . . Change the number of backup versions to keep for each file, Enable anytime backups or inhibit them until your computer is idle, Specify a path to a different retrieve... -
Page 41: Setting The Preferences Options
Setting the Preferences Options When enabled, each time you reconnect your My Book drive to your computer, the Preferences options: • Display the WD SmartWare Home screen. This is the default configuration of the WD SmartWare software, and it is recommended when you routinely perform a number of backups or retrieves each day. -
Page 42: Registering Your Drive
To customize your drive settings for the best possible performance with the WD SmartWare software, on the Drive Settings screen (see Figure 17 on page 28): IF you want to . . . Use a password to keep others from accessing the files on your drive, Change your password, Remove password protection from... -
Page 43: Setting The Drive Sleep Timer
4. Type your last name in the Last name box. 5. Type your e-mail address in the E-mail address box. 6. Select your language in the Preferred language box. 7. Select or clear the Yes, I want to receive communication... check box to specify whether or not you want to receive e-mail notifications about software updates, product enhancements, and price discount opportunities. -
Page 44: Updating Your Software
Clicking the Update Software button on the WD SmartWare Home screen checks for an updated version of your WD SmartWare software. Then, if an update is available, your Internet connection opens the Downloads page of the Western Digital Service & Support website. -
Page 45: Windows Vista Or Windows 7
Windows Vista or Windows 7 Click Start > Control Panel. 2. Double-click Programs and Features. 3. Click WD SmartWare or the WD SmartWare icon and click Uninstall/Change at the top of the screen. 4. Click Yes at the Do you wish to proceed... prompt. MY BOOK ESSENTIAL USER MANUAL MANAGING AND CUSTOMIZING YOUR DRIVE –... -
Page 46: Checking Drive Health
Checking Drive Health The data files on your My Book drive are important to you. The WD SmartWare software has several built-in diagnostic tools to help make sure that your drive is performing well. Run one of the following tests if you are concerned that your drive is not operating properly: Diagnostic Tool Quick S.M.A.R.T. - Page 47 2. Click the button for the test that you want to run: • Quick SMART Status • Quick Drive Test • Complete Drive Test MY BOOK ESSENTIAL USER MANUAL CHECKING DRIVE HEALTH – 42...
-
Page 48: Using The Drive With A Mac
Using the Drive with a Mac This chapter includes the following topics: Reformatting the Drive Installing on a Mac OS X Tiger/Leopard/Snow Leopard Enhancing Performance with WD +TURBO Managing the Drive on a Mac The My Book Essential drive that you purchased is preformatted as a single NTFS partition for compatibility with all updated Windows operating systems. -
Page 49: Enhancing Performance With Wd +Turbo
Note: WD SmartWare software is fully compatible with Apple's Time Machine software. When using Time Machine, WD SmartWare software can still be used for password protecting the drive, registering the drive, and running diagnostics. 3. The Welcome to WD SmartWare screen displays. If a Flash Player is installed on your computer, the screen is animated. - Page 50 MY BOOK ESSENTIAL USER MANUAL 3. Double-click the WD +TURBO Installer icon. 4. On the WD +TURBO Driver Installer screen, click Install. 5. To accept the license agreement, click Accept. 6. A message informs you that installing the drivers requires you to restart your computer to make them active.
-
Page 51: Managing The Drive On A Mac
When installation is complete, the computer restarts. Note: The My Book icon Managing the Drive on a Mac Actions After you have installed the WD SmartWare Software, the WD SmartWare icon displays in the bar at the top right of the screen. Clicking the icon enables you to perform the following actions: •... - Page 52 MY BOOK ESSENTIAL USER MANUAL • In Finder, double-click WD SmartWare in the Applications list: The WD SmartWare Home tab displays. USING THE DRIVE WITH A MAC – 47...
-
Page 53: Dismounting The Virtual Cd From A Mac
Dismounting the Virtual CD from a Mac To be sure all data has been written to the drive before you physically disconnect it, dismount the Virtual CD as well as the drive or volume. Note: There are other reasons you may want to dismount a VCD. For example, if you have more than one My Book drive with the same software connected to your Mac, multiple My Book VCD icons display on your desktop. -
Page 54: Displaying The Status, Serial Number, And Temperature On A Mac
Using the My Book Icon. Right-click the My Book icon Volume.” (“New Volume” will be the name you assigned to the volume.) You may hear the drive power down as the Power LED flashes 2. Wait for the drive icon to be removed from the desktop before disconnecting the drive from the system. -
Page 55: Quickly Unlocking The Drive Using The Virtual Cd
Quickly Unlocking the Drive Using the Virtual CD You may need to unlock the drive manually in cases such as the following: • You uninstall the software and disconnect the drive while the drive is locked. • You move your drive to another system, and need to unlock it without installing the software. - Page 56 MY BOOK ESSENTIAL USER MANUAL 3. Double-click the WD Uninstaller icon. A Western Digital pop-up screen appears: 4. Click Remove. USING THE DRIVE WITH A MAC – 51...
-
Page 57: Troubleshooting
If your system has a USB 2.0 PCI adapter card, be sure that its drivers are installed before connecting your WD USB 2.0 external storage product. The drive is not recognized correctly unless USB 2.0 root hub and host controller drivers are installed. Contact the adapter card manufacturer for installation procedures. - Page 58 Why won't my computer boot when I connect my USB drive to the computer before booting? Depending on your system configuration, your computer may attempt to boot from your WD portable USB drive. Refer to your system’s motherboard BIOS setting documentation to disable this feature or visit support.wdc.com and see Knowledge Base answer ID 1201.
-
Page 59: Appendix
Directives of the European Union, including the EMC Directive (2004/108/EC) and the Low Voltage Directive (2006/95/EC). A “Declaration of Conformity” in accordance with the applicable directives has been made and is on file at Western Digital Europe. GS Mark (Germany only) Machine noise - regulation 3. -
Page 60: Kcc Notice (Republic Of Korea Only)
KCC Notice (Republic of Korea only) 기종별 B급 기기 이 기기는 가정용으로 전자파적합충족을 한 기기 (가정용 정보통신기기) 로서 주거지역에서는 물론 모든 지역에서 사용할 수 있습니다. Class B Device 1 Please note that this device has been approved for non-business purposes and may be used in any environment, including residential areas. Environmental Compliance (China) (Pb) Kensington... -
Page 61: Limited Warranty
MY BOOK ESSENTIAL USER MANUAL Limited Warranty WD warrants that the Product, in the course of its normal use, will for the term defined below, be free from defects in material and workmanship and will conform to WD’s specification therefor. The term of your limited warranty depends on the country in which your Product was purchased. -
Page 62: Index
Index AC power adapters 6 Accessories, optional 2 Alerts, flashing icon 33 Backup about backing up files 14 files content box 18 procedure 16 screen 15 Box contents 2 Capacity gauge 4 CAUTION about erasing the drive 38 about lost passwords 27 about preventing data loss when dis- connecting 34 about your unlocked drive 29... - Page 63 NTFS format 3 Operating system requirements 3 Other file category, defined 13 Overheating 33 Password protecting your drive 27 CAUTION about lost passwords 27 Physical description 3 Pictures file category, defined 13 Power adapters 6 Power button 5 Powering up 53 Precautions for handling the drive 5 Preferences options, setting 36 Preferences software setting 35...
- Page 64 Windows Vista/Windows 7 installing drive on 8 Windows XP installing drive on 7 MY BOOK ESSENTIAL USER MANUAL INDEX – 59...
- Page 65 WD. WD reserves the right to change specifications at any time without notice. Western Digital, WD, the WD logo, and My Book are registered trademarks; and My Book Essential, WD SmartWare, and Data Lifeguard are trademarks of Western Digital Technologies, Inc. Other marks may be mentioned herein that belong to other companies.
Need help?
Do you have a question about the My Book WDBAAF0010HBK and is the answer not in the manual?
Questions and answers
what is this used for? Found after hubby died, not sure what to do with it
The purpose of the Western Digital WDBAAF0010HBK, also known as the My Book Essential 1 TB USB 2.0 Desktop External Hard Drive, is to provide external data storage. It is used to store files, perform backups, and transfer data between computers.
This answer is automatically generated
my WD my book was install around 2017 and used until about 5-6 years ago. I am now using an HP desktop with Winmdows10 OS. Will My Disk okperate with my computer? Is the software needed to run the drive available on the disk I have? I have on my computer two files that are identified as WD My Disks - might these be still usable or should I acquire updated WD software?
Yes, the Western Digital My Book WDBAAF0010HBK will operate with an HP desktop running Windows 10, as it is formatted NTFS for compatibility with all Windows operating systems. The necessary WD SmartWare software is included on the drive.
This answer is automatically generated