Table of Contents
Advertisement
Available languages
Available languages
ES319157AAA
ES319157AAA
KOMFORTABLER
UND SAUBERES LEBEN MIT HAUSTIEREN
Wir danken Ihnen für den Kauf von Merax-Produkten. Bitte lesen Sie die Gebrauchsanweisung
sorgfältig durch, bevor Sie die Produkte zum ersten Mal benutzen.
Da es sich bei diesem Produkt um ein innovatives elektronisches Produkt handelt, können bei der
Verwendung Probleme auftreten, wenden Sie sich bitte zunächst an den Verkäufer.
Vielen Dank, dass Sie sich für ein Merax-Produkt entschieden haben. Bitte lesen Sie die Gebrauch-
sanweisung sorgfältig durch, bevor Sie es zum ersten Mal benutzen.
Da es sich bei diesem Produkt um ein innovatives elektronisches Produkt handelt, wenden Sie sich
bitte zunächst an den Verkäufer, da bei der Benutzung Probleme auftreten können.
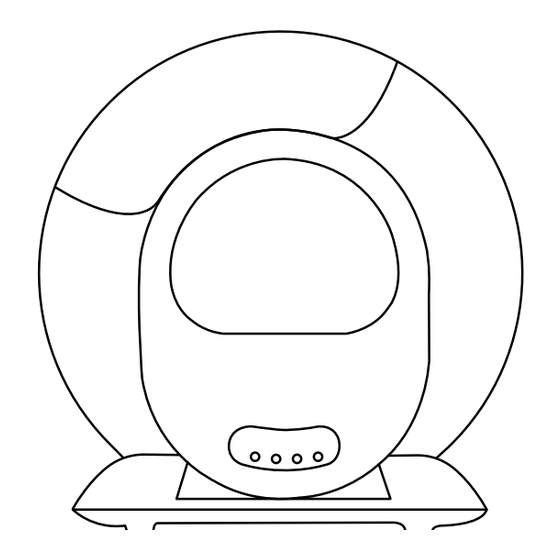
Intelligente Katzenstreu BoX
Benutzerhandbuch
Bitte lesen Sie die Gebrauchsanweisung vor dem ersten Gebrauch sorgfältig durch.
Dieses Produkt entspricht den geltenden Anforderungen der Richtlinie 2014/30/EU.
Advertisement
Chapters
Table of Contents

Related Manuals for TUYA Smart Cat Litter BoX


Summary of Contents for TUYA Smart Cat Litter BoX
- Page 1 Vielen Dank, dass Sie sich für ein Merax-Produkt entschieden haben. Bitte lesen Sie die Gebrauch- sanweisung sorgfältig durch, bevor Sie es zum ersten Mal benutzen. Da es sich bei diesem Produkt um ein innovatives elektronisches Produkt handelt, wenden Sie sich bitte zunächst an den Verkäufer, da bei der Benutzung Probleme auftreten können.
- Page 2 FÜR DIE ERSTE NUTZUNG Vorsichtsmaßnahmen: 1. bitte installieren und verwenden Sie dieses Gerät streng nach den Anweisungen. 1、 Bitte stellen Sie die Maschine auf einen festen und ebenen Untergrund. 2. bitte verwenden Sie es in einem Innenraum, setzen Sie es nicht in direktes Sonnenlicht und 2、...
- Page 3 1.3 Zubehör (in der Aufbewahrungsbox für Streu): ⅠHINWEISE FÜR DEN ERSTEN GEBRAUCH Adapter*1 Handbuch*1 1.1 Auspacken: Müllsack (45*50mm)*1(Rolle) Drehen Sie den Karton um, um das Klebeband von der Unterseite abzuschneiden, dann drehen Sie den Karton wieder um, um ihn vertikal nach oben zu ziehen. 1.2 Aufstellen: Stellen Sie das Gerät auf den flachen Boden und vergewissern Sie sich, dass alle vier Füße des Geräts den Boden berühren.
- Page 4 1.5 Verwendung: 1.4 Einstreusand einfüllen: Stellen Sie sicher, dass die Höhe der Einstreu zwischen der MAX- und der MIN-Linie liegt. 1.5.1 Schalten Sie das Gerät mit dem Adapter ein und warten Sie, bis das Gerät sich selbst überprüft hat. Es wird automatisch in den Zustand der Abtastung nach dem Selbsttest (Die Sandmenge kann je nach den tatsächlichen Gegebenheiten angepasst werden).
- Page 5 Gerät in das AUTO Verteilernetz eingetreten ist und wartet. Für 2s drücken Methode 2: Sie können die "tuya" App Methode 1: Sie können das obige Symbol mit Ihrem Mobiltelefon scannen herunterladen herunterladen und installie- 2.2.3 Öffnen Sie Ihre ren, indem Sie sie im App Store suchen.
- Page 6 2.2.6 Geben Sie nach der 2.2.4 Fahren Sie mit "Weiter" Verbindung die APP ein. fort, nachdem Scannen des Geräts. Hinweis: 2.2.5 Fahren Sie nach Eingabe Wenn die Netzwerkkonfiguration fehlschlägt oder eine Timeout-Meldung angezeigt des WiFi-Codes mit "Weiter" fort wird, prüfen Sie die folgenden und warten Sie auf die Verbind- Möglichkeiten: Ob WiFi, Bluetooth und Standortwechsel gleichzeitig aktiviert sind.
- Page 7 Ⅲ BETRIEBSANLEITUNG 3.1 Auto: Hinweis: Klicken Sie auf die Schaltfläche "➀" auf dem Produktbedienfeld oder auf "AUTO" in der App. ①Nach dem Einschalten des Geräts und dem Abschluss des Selbsttests wird der induktive Lassen Sie das " "-Symbol aufleuchten. Reinigungsmodus automatisch eingeschaltet. Wenn Sie diesen Modus aus anderen Gründen AUTO ausschalten, können Sie die induktive Reinigungsfunktion durch erneutes Klicken auf die Schaltfläche "➀"...
- Page 8 3.2 Reinigen: Klicken Sie auf die Schaltfläche "➁", oder klicken Sie auf das Symbol "Jetzt bereinigen" in Hinweis: der App, wird das Produkt sofort eine Bereinigung durchführen. ①Während des Löschvorgangs sind alle Tasten gesperrt. Wenn Sie andere Funktionen ausführen müssen, warten Sie bitte, bis der Reinigungsvorgang abgeschlossen ist. ②Verlängern Sie die Wartezeit für die Reinigung in der Telefon-App, wenn die Katze Durchfall hat, damit das Katzenstreu genügend Zeit hat, zu verklumpen und die Verschmutzung des Balleimers durch weichen Kot zu reduzieren.
- Page 9 3.3 Fügen Sie Katzenstreu hinzu: Methode 1: Im "Auto"-Modus, wenn die hinzugefügte Katzenstreu mehr als 1 kg beträgt, blinkt die Anzeige "Auto" MAX-Linie blinken. Nach 30 Minuten wird die Katzenstreu automatisch geglättet und das und das Gewicht wird automatisch kalibriert. Wenn Sie denken, dass 30 Minuten Wenn Sie der Die Menge des Katzenstreus sollte Meinung sind, dass 30 Minuten zu lange sind, drücken Sie bitte 2 oder mehr Sekunden lang die Max-Linie nicht überschreiten...
- Page 10 3.4 Ersetzen Sie die Einstreu: ①Ersetzen Sie den Müllsack durch einen leeren (um zu vermeiden, dass der ursprüngliche (um zu vermeiden, dass der ursprüngliche Sack bereits mit Streu gefüllt ist); ②Vergewissern Sie sich, dass der Restsand nahe der MIN-Linie liegt (um ein Überlaufen zu FULL vermeiden, wenn AUTO...
- Page 11 3.5 Geruch entfernen: 3.6 Ersetzen Sie den Müllsack: Methode 1 : Wenn die Anzeige "Voll" aufleuchtet, müssen Sie den Müllbeutel austauschen. Klicken Sie auf die Schaltfläche "➂", oder klicken Sie in der App auf "Geruch entfernen", um die Geruchsreinigungsfunktion für etwa 30 Minuten zu starten. Methode 2 Stellen Sie die regelmäßige Arbeit in Ihrer Telefon-App ein.
- Page 12 Hinweis: Die "Voll"-Anzeige ist nur ein Referenzwert. Wenn Sie verschiedene Arten von Katzenstreu verwenden, wird die Beurteilung der "Voll"-Anzeige durch die Dichte und die Fließfähigkeit FULL beeinflusst. In der APP können Sie die Verzögerung der "Voll"-Eingabeaufforderung entsprech- AUTO end Ihrer eigenen Verwendung einstellen. 0 ist der Standardwert (es ist noch ein wenig Platz im Beutel für den Müll), und der maximale Wert kann auf 15 eingestellt werden.
- Page 13 3.7 Waschbehälter: 3.8 Sperren Sie die Tastatur: ①Bitte schalten Sie die Maschine zuerst aus! Sie können die Kindersicherungsfunktion aktivieren oder deaktivieren, indem Sie die ②Öffnen Sie die Schnalle des Trommelfachs, heben Sie den Behälter an. Tasten "➁" + "➂" für mehr als 2 Sekunden gleichzeitig oder über die Option " ③Trocknen Sie den Behälter, bevor Sie ihn wieder in den Sockel laden! Kindersicherung"...
- Page 14 3.9 Infrarotsensor schließen oder öffnen: 33.10 Zeitablauf: Wenn die Katzentoilette in einem Käfig oder einem engen Raum platziert wird, klicken Sie bitte 3.10.1 Schlafmodus auf die Schaltfläche "4" Infrarot-Sensor-Option direkt oder in der APP zu aktivieren oder deaktiv- Wenn die Katzentoilette im Schlafzimmer steht, können Sie in der App "Nicht stören" ieren Sie den Eimer Infrarot-Sensor, um zu verhindern, dass die Maschine immer falsch zu einstellen.
- Page 15 IV METHODE DER FEHLERSELBSTPRÜFUNG 3.10 Zeitplan: 3.10.2 Regelmäßiger Reinigungsmodus Stellen Sie in der App "Clean Timing" ein, dass das Gerät regelmäßig gereinigt wird. 4.1 Klicken Sie innerhalb von 2 Minuten nach dem Wiedereinschalten des Geräts mehr als 3.10.3 Timing Netzgeruch 5 Mal kontinuierlich auf die Taste "➂", um das Gerät in den Erkennungsmodus zu Stellen Sie das Gerät in der App "Deodo Timing"...
- Page 16 V FAQ F: Welche Art von Katzenstreusand sollte ich verwenden? F:Warum sind die Gewichtsangaben nur etwa halb so groß wie die meiner Katzen? A: Bitte prüfen Sie, ob die Katze aus Neugier mit nur zwei Füßen in die Maschine Neugierde. Oder A: Gemischter Sand und Tofusand werden bevorzugt;...
- Page 17 VI PRODUKTLISTE VII EINFÜHRUNG DES BEDIENFELDS Kategorie Funktion Operation Status Auffordernder Ton Klicken Sie auf die Sofort mit der Reinigung beginnen ein Ring Reinigen Sie Schaltfläche "➁" Abfallbehälter Drücken Sie die Taste Beginn des Austauschs von Katzenstreu Langer Ring für 1" Einstreu austauschen "➃"...
- Page 18 Ⅷ SCHALTPLAN IX PARAMETER UND SPEZIFIKATIONEN Gewicht Menschlicher Hall-Sensoren Körper Sensoren Sensoren WiFi-Modul Hauptsteuerplatine EingangDC 12V 1.5A Anzeige und Bedienfeld Ionen-Generator DC 12V 2W Produktname Produktmodell Größe der gesamten Maschine Intelligente Katzentoilette MSP-01 480(W)×520(D)×505(H)mm Lüfter Nennspannung Nennleistung Empfohlener Haustiertyp DC12V ≤18W Katze Motor...
- Page 19 Das Vorhandensein dieses Zeichens auf dem Produkt bedeutet, dass die Entsorgung des Geräts der Richtlinie 2012/19/EU vom 4. Juli 2012 über Elektro- und Elektronik-Altgeräte (WEEE) unterliegt. Alle in Elektro- oder Elektronikgeräten enthaltenen gefährlichen Stoffe können beim Recyclingprozess potenzielle Auswirkungen auf Umwelt und Gesundheit haben.
- Page 20 As this product is an innovative electronic product, you may encounter problems during use, please contact the seller at first. ES310396AAA ES310396AAA Smart Cat Litter BoX User Manual MORE COMFORTABLE AND CLEAN LIFE WITH PETS Thank you for purchasing Merax products, please read the instructions carefully before using them for the first time.
-
Page 21: Table Of Contents
FOR THE FIRST USE Cautions: 1、 Please place the machine on a firm and flat ground. 2、 Please add litter no higher than MAX line after placing the 1.Please install and use this device strictly according to the instructions. machine well. 2.Please use it in an indoor environment, do not place it in direct sunlight, and keep it away 3、... -
Page 22: Ⅰinstructions For The First Use
1.3 Accessories(in litter storage box): ⅠINSTRUCTIONS FOR THE FIRST USE Adapter*1 Manual*1 1.1 Unpacking: Garbage bag(45*50mm)*1(roll) Turn over the carton to cut the tape from the bottom, then turn over back the carton to pull up the carton vertically. 1.2 Placement: Place the machine on the flat ground and make sure all four feet of the product are in contact with the ground.Items with a height of more than 5CM shall not be placed within 30CM in front of the product, so as... - Page 23 1.4 Add litter sand: 1.5 Use: Make sure the leveled litter height is between the MAX line and the 1.5.1 Power on with adapter and wait the machine to self-check for about MIN line.(The amount of sand can be adjusted according to the actualsituation.) 3-8 minutes.It will automatically enter the state of sensing after self-check, no need to change its program.
-
Page 24: Ⅱapp
2.1 Overseas users network waiting FULL AUTO Method 1: You can scan the above Method 2:You can download "tuya" App icon with your mobile phone and install it by search it in the App store. 2.2 Networking: 2.2.3 Open your phone App to add equipment or scan 2.2.1 Confirm that the phone is... - Page 25 2.2.6 Enter APP after connecting. 2.2.4 Continue “Next” after scanning the machine. 2.2.5 Continue “Next" after Notice: inputting WiFi code and wait If the network configuration fails or a timeout message is displayed, check the following to connect. possibilities: ①Whether WiFi, Bluetooth, and Location switch are enabled at the same time. ②Whether the WiFi is in 2.4G band and whether the phone is connected to 2.4G band WiFi network.(The product cannot recognize the 5G band network.) ③Whether the WiFi indicator on the panel is flashing during network configuration.
-
Page 26: Ⅲ Operating Instructions
Ⅲ OPERATING INSTRUCTIONS 3.1 Auto: Notice: Click the button "①" on the product panel, or click the "AUTO"on the app. ①After the product is powered on and the self-check reset is completed, the inductive cleaning Make the " "icon light up. mode will be automatically turned on. - Page 27 3.2 Clean: Click the button "➁", or click the "Clean " Now icon on the app, the product will perform a clean up immediately. Notice: ①During the clearing process, all keys are suspended. If you need to perform other functions, please wait until the clearing process is complete.
- Page 28 3.3 Add cat litter: Method 1: In “Auto” mode, when the adding cat litter is more than 1kg, the "Auto" will flash. After 30 minutes, the cat litter will be automatically smoothed and MAX Line the weight will be automatically calibrated. If you think 30 minutes is too long to wait, please long press the “...
- Page 29 3.4 Replace litter: ①Replace the garbage bag with an empty one (to avoid that the original one is already full of litters); ②Make sure the rest sand is close to MIN line (to avoid the overflow when the bin rotates); FULL ➂Long press button "➃"...
- Page 30 3.5 Remove Odor: 3.6 Replace garbage bag: Method 1 : When indicator “Full” lights up, you need to replace the garbage bag. Click the button "➂", or click "Remove Odor" in the app to start the odor cleaning function for about 30 minutes. Method 2 Set regular work on your phone App.
- Page 31 Notice: ①The “ Full” prompt is only a reference value.When using different types of cat litter, its violume, FULL density and fluidity will affect the judgement of “Full” prompt. In the APP, you can aqjust the AUTO delay of “Full” prompt according to your own use.The default value is 0(there is still a little space in bag for garbage), and the maximum value can be adjusted to 15.
- Page 32 3.7 Wash bin: 3.8 Lock the keyboard: ①Please power off the machine first! You can activate or deactivate the child lock function by pressing buttons "➁" ②Open the buckle of the barrel compartment, lift the bin. + "➂" for more than 2 seconds at the same time, or by using the "Child Lock" ③Dry the bin before loading it back to the base! option on the app.
- Page 33 3.9 Close or open infrared sensor: 3.10 Timing: When cat litter box is placed in a cage or a narrow space, please click the button"4" infrared 3.10.1 sleep mode sensor option directly or in the APP to turn on or off the bucket infrared sensor for preventing When cat litter box is placed in the bedroom, you can set in the App "Do not the machine from always judging wrongly.
-
Page 34: Ⅳ Fault Self-Check Method
IV FAULT SELF-CHECK METHOD 3.10 Timing: 3.10.2 Regular clean-up mode Set the machine to clean regularly in the App “Clean Timing” . 4.1 Within 2 minutes of re-powering the product, click the button "➂" 3.10.3 Timing net flavour more than 5 times continuously, the product can enter the detection mode. Set the machine to remove odor regularly in the App “Deodo Timing”... - Page 35 V FAQ Q:Why is the weight data only about half of that of my cats? Q: What kind of cat litter sand should I use? A: Please check whether the cat enters the machine with only two feet inside due to A:Mixed sand and tofu sand are preferred;...
-
Page 36: Ⅵ Product Lis
VI PRODUCT LIST VII INTRODUCTION OF CONTROL PANEL Category Function Operation Status Prompt tone Start cleaning immediately one ring Clean Click the button "②" Press the button Start replacing cat litter Long ring for 1" Replace litter "④" for 2 seconds Start Auto cleaning one ring Waste bin... -
Page 37: Ⅷ Circuit Diagram
WiFi Module Main Control Board Input DC 12V 1.5A Display And Control Panel Ion Generator Product Name Product Model Whole Machine Size DC 12V 2W Smart Cat Litter Box MSP-01 480(W)×520(D)×505(H)mm Rated Voltage Rated Power Suggested Pet Type DC12V ≤18W Motor... - Page 38 The presence of this logo on the product means that the disposal of the device is governed by directive 2012/19/EU dated July 4, 2012 on waste electrical and electronic equipment(WEEE). Any hazardous substance contained in electrical or electronic equipment can have a potential impact on the environment and health during its recycling.
- Page 39 Merci d'avoir acheté un produit Merax et de lire attentivement les instructions avant de l'utiliser pour la première fois. Ce produit étant un produit électronique innovant, veuillez contacter le vendeur en premier lieu car vous pourriez rencontrer des problèmes lors de l'utilisation. ES310396AAA ES310396AAA Litière pour chat intelligente BoX...
-
Page 40: Pour La Première Utilisation
POUR LA PREMIÈRE UTILISATION Précautions : 1. installez et utilisez cet appareil en suivant scrupuleusement les instructions. 1、 Veuillez placer la machine sur un sol ferme et plat. 2. utilisez-le dans un environnement intérieur, ne le placez pas à la lumière directe du soleil et 2、... -
Page 41: Ⅰinstructions Pour La Première Utilisation
1.3 Accessoires ⅠINSTRUCTIONS POUR LA PREMIÈRE UTILISATION (dans la boîte de rangement de la litière) : 1.1 Déballage : Adaptateur*1 Manuel*1 Retourner le carton pour couper le ruban adhésif du bas, puis retourner le carton pour Sac poubelle (45*50mm)*1 (rouleau) le tirer verticalement. - Page 42 1.5 Utilisation 1.4 Ajouter le sable de la litière : Assurez-vous que la hauteur de la litière nivelée se situe entre la ligne MAX 1.5.1 Mettez l'appareil sous tension à l'aide de l'adaptateur et attendez qu'il effectue un auto-contrôle pendant 3 à 8 minutes. et la ligne MIN.(La quantité...
-
Page 43: Ⅱapp
2 secondes Méthode 1 : Vous pouvez scanner l'icône Méthode 2 : Vous pouvez télécharger ci-dessus avec votre téléphone portable. l'application "tuya" et l'installer en la 2.2.3 Ouvrez l'application recherchant dans l'App Store. de votre téléphone pour ajouter un équipement ou 2.2 Mise en réseau :... - Page 44 2.2.6 Entrer dans APP après la 2.2.4 Continuer "Next" après connexion. avoir scanné la machine. Remarque : 2.2.5 Continuer "Next" après Si la configuration du réseau échoue ou si un message de dépassement de délai avoir entré le code WiFi et s'affiche, vérifiez les possibilités suivantes attendre la connexion.
- Page 45 Ⅲ MODE D'EMPLOI Avis : 3.1 Auto: ①Après la mise sous tension de l'appareil et la réinitialisation de l'autocontrôle, le mode de Cliquez sur le bouton "➀" sur le panneau du produit, ou cliquez sur "AUTO" dans l'application. nettoyage par induction est automatiquement activé. est automatiquement activé. Si vous L'icône "...
- Page 46 3.2 Nettoyer : Cliquez sur le bouton "➁", ou cliquez sur l'icône "Nettoyer" maintenant sur l'application, le Avis : produit effectuera un nettoyage immédiatement. ①Durant le processus d'effacement, toutes les touches sont suspendues. Si vous devez exécuter d'autres fonctions, veuillez attendre la fin du processus de nettoyage. ②Prolongez le temps d'attente pour le nettoyage dans l'application téléphone lorsque le chat a la diarrhée, afin de permettre à...
- Page 47 3.3 Ajouter de la litière pour chats : Méthode 1 : En mode "Auto", lorsque la quantité de litière ajoutée est supérieure à 1 kg, le symbole "Auto" clignote.clignote. Au bout de 30 minutes, la litière est automatiquement lissée et le poids est Ligne MAX automatiquement calibré.
- Page 48 3.4 Remplacer la litière : ①Remplacer le sac à ordures par un sac vide (pour éviter que le sac d'origine ne soit déjà plein de déchets) ; ①Remplacer le sac à ordures par un sac d'origine soit déjà rempli de litières) ; ②S'assurer que le sable de repos est proche de la ligne MIN (pour éviter le débordement FULL lorsque la...
- Page 49 3.5 Éliminer les odeurs: 3.6 Remplacer le sac à ordures : Méthode 1 : Lorsque l'indicateur "Full" s'allume, vous devez remplacer le sac à ordures. Cliquez sur le bouton "➂", ou cliquez sur "Remove Odor" dans l'application pour démarrer la fonction de nettoyage des odeurs pendant environ 30 minutes. Méthode 2 Réglez le travail régulier sur l'application de votre téléphone.
- Page 50 Avis : ①L'indication "Plein" n'est qu'une valeur de référence.Lors de l'utilisation de différents types de litière pour chats, leur violume, Lors de l'utilisation de différents types de litière pour chats, FULL son volume, sa densité et sa fluidité affecteront l'évaluation de l'invite "Plein". Dans l'APP, vous AUTO pouvez régler le délai de l'invite "Plein"...
- Page 51 3.7 Bac de lavage : 3.8 Verrouiller le clavier : ①Veuillez d'abord éteindre la machine ! Vous pouvez activer ou désactiver la fonction de verrouillage des enfants en ②Ouvrir la boucle du compartiment du tonneau, soulever le bac. appuyant sur les boutons "➁" + "➂" pendant plus de 2 secondes en même temps, ③Sécher le bac avant de le remettre dans la base ! ou en utilisant l'option "Verrouillage enfant"...
- Page 52 3.9 Fermez ou ouvrez le capteur infrarouge : 3.10 Délais : Lorsque le bac à litière pour chat est placé dans une cage ou un espace étroit, veuillez cliquer sur 3.10.1 Mode sommeil le bouton "4" option capteur infrarouge directement ou dans l'APP pour activer ou désactiver le Lorsque la litière du chat est placée dans la chambre à...
-
Page 53: Ⅳ Méthode D'autocontrôle Des Défauts
IV MÉTHODE D'AUTOCONTRÔLE DES DÉFAUTS 3.10 Calendrier : 3.10.2 Mode de nettoyage régulier Réglez l'appareil pour qu'il se nettoie régulièrement dans l'application "Timing de nettoyage". 4.1 Dans les 2 minutes qui suivent la remise sous tension du produit, cliquez sur 3.10.3 Timing net flavour le bouton "➂"... - Page 54 V FAQ Q : Quel type de sable pour litière de chat dois-je utiliser ? Q:Pourquoi le poids indiqué ne correspond-il qu'à la moitié de celui de mes chats ? R : Veuillez vérifier si le chat n'entre pas dans la machine avec seulement deux pieds à l'intérieur R : Le sable mixte et le sable de tofu sont préférables ;...
-
Page 55: Ⅵ Liste Des Produits
LISTE DES PRODUITS VI VII INTRODUCTION DU PANNEAU DE CONTRÔLE Catégorie Fonction Fonctionnement Statut Tonalité de l'invitation Cliquez sur le Commencez à nettoyer immédiatement un anneau Nettoyer bouton "➁". Poubelle Appuyez sur le bouton Commencer à remplacer la litière pour chats Anneau long pour 1 "... -
Page 56: Ⅸ Paramètres Et Spécifications
Ⅷ SCHÉMA DE CIRCUIT IX PARAMÈTRES ET SPÉCIFICATIONS Capteurs Capteurs Capteurs pour à effet Hall de poids le corps humain Module WiFi Carte de contrôle principale Entrée DC 12V 1.5A Panneau d'affichage et de contrôle Générateur d'ions Nom du produit Modèle de produit Taille de l'ensemble de la machine DC 12V 2W... - Page 57 La présence de ce logo sur le produit signifie que la mise au rebut de l'appareil est encadrée par la directive 2012/19/EU datée du 4 juillet 2012 relative aux déchets d’ équipements électriques et électroniques (DEEE). Toute substance dangereuse contenue dans un équipement électrique ou électronique peut avoir un impact potentiel sur l'environnement et la sante au cours de son recyclage.
Need help?
Do you have a question about the Smart Cat Litter BoX and is the answer not in the manual?
Questions and answers
How do I disassemble to clean the bin
To disassemble the TUYA Smart Cat Litter Box for cleaning:
1. Unlock the top panel by turning the lock at the back of the barrel bin.
2. Slide down to remove the panel, paying attention to align positions B and C.
3. Take out the barrel bin for cleaning.
4. Clean the upper position of the barrel as shown in the diagram (not provided here).
Make sure to reassemble by aligning and loading back into positions B, C, D, and E correctly.
This answer is automatically generated
Working status indicates "Cat entering" with no cat around. How do I change working status back to normal?
To change the TUYA Smart Cat Litter Box from "Cat entering" back to normal, wait until the cat exits. After the cat leaves and 3 minutes have passed, the device will automatically start the cleaning process and return to normal status.
This answer is automatically generated
Box smells terrible.dont know how to fixing don't have a manual could you send one.
To fix the odor issue with the TUYA Smart Cat Litter Box:
1. Use the built-in odor elimination function. After each cleaning, the device automatically eliminates odors for 30 minutes.
2. When the "Full" indicator lights up, replace the trash bag and press the button or use the app to start odor removal for about 30 minutes.
3. You can also schedule regular odor cleaning through the app.
4. For better odor control, consider adding a motion or vibration sensor to start the ionizer or a fan when the cat enters or leaves the box.
This answer is automatically generated
Gravity anti pinch trigger what do I do
To check if the gravity anti-pinch trigger is working on the TUYA Smart Cat Litter Box, place a 1 kg weight on the device. If the "Full" indicator flashes, the gravity sensor is functioning correctly.
This answer is automatically generated
Worked great for a few weeks then powered off and won’t power back on.
If the TUYA Smart Cat Litter Box does not power back on after working for a few weeks, consider the following possible reasons and solutions:
1. Power Cord Issues: Ensure the power cord is properly plugged in and not damaged.
2. Power Adapter: Use the original power adapter to avoid damage or safety hazards.
3. Restart the Device: If the product does not work properly due to unknown conditions, restart the power.
4. Fault Self-Check: Perform a self-check by following the diagnostic method in the manual.
5. Customer Service: If the issue persists, contact customer service for further assistance.
This answer is automatically generated
I don’t know what all the lights mean that are blinking
The blinking WiFi light in the middle indicates that the device is trying to connect to the network.
This answer is automatically generated
Replacement plastic bags
The provided context does not specify the exact replacement plastic bags for the TUYA Smart Cat Litter Box. However, it mentions that after clearing the litter, users should replace the garbage bag with an empty one. It also describes a method to avoid overflow when replacing the bag, but no specific bag type or brand is mentioned.
This answer is automatically generated
What is flow set adjustment on the app
The TUYA Smart Cat Litter Box app allows users to adjust the "litter surface calibration" parameter to manage the flow of cat litter. This adjustment helps alleviate issues such as litter getting stuck inside the filter, particularly for low-density or oversized litter types. The parameter can be set to a value of 6 to improve filtration and flow.
This answer is automatically generated
Why does the box keep going into an abnormal posistion
The TUYA Smart Cat Litter Box may keep going into an abnormal position if it is placed in a narrow space or if there is an infrared interference source in front of it. This can affect the product's self-check, causing it to take about 8 minutes to complete. If the space is unsuitable for the infrared sensor to work, the infrared detection function will be disabled, and the weight detection system will take over to determine if a cat enters.
This answer is automatically generated
We have set up the new litter box and it's not working. Is there a phone number to call about this issue?
If your TUYA Smart Cat Litter Box is not working and is not supported in Home Assistant, you can try the following:
1. Check Device Recognition: Ensure the device is correctly recognized in Home Assistant. If it says "not supported," it may require additional integration or updates.
2. Verify Installation Setup: Confirm that your Home Assistant OS and Tuya integration are up to date. The provided diagnostics indicate Home Assistant OS 13.0, which should support Tuya devices.
3. Troubleshoot Common Errors:
- If the motor failure or fault indicator is on, check if the garbage bag is full or if there is foreign matter stuck in the barrel rotation.
- If the self-check takes more than 15 minutes, ensure the barrel compartment is properly installed.
- If litter is leaking, verify the position of the garbage box.
4. Check Placement and Litter Type:
- Ensure the litter box is on a flat surface.
- Use recommended sand types like mixed sand and tofu sand for better detection.
5. Reconnect to Tuya App:
- Ensure your phone is connected to a 2.4GHz WiFi network.
- Enable Bluetooth and location services.
- Re-add the device in the Tuya app.
6. Request Home Assistant Support:
- If Home Assistant does not support the device, consider requesting support on the Home Assistant Community forums.
If issues persist, refer to the device manual for further troubleshooting.
This answer is automatically generated