Table of Contents
Advertisement
Quick Links
Advertisement
Table of Contents

Related Manuals for TUYA SPF-1010-TY


Summary of Contents for TUYA SPF-1010-TY
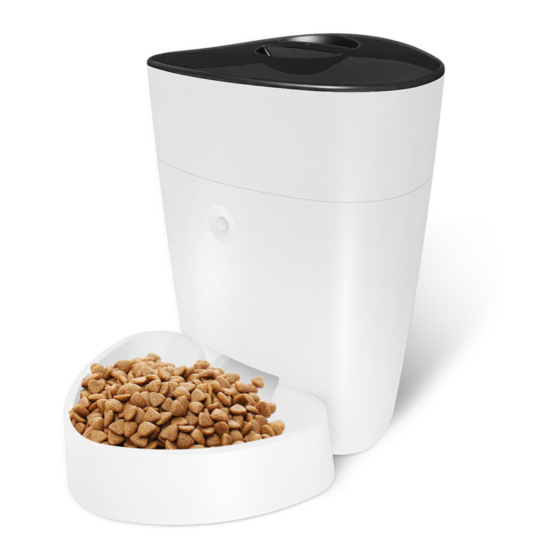
- Page 1 SPF-1010-TY Smart Pet Feeder Quick Start Guide...
- Page 3 Preface Quick start by the following steps: Remove the cover and scan the QR Code with your smartphone or • search 'Smartlife' APP from App store to download. Make sure the Wi-Fi indicator is rapidly blinking. If not, please reset it. •...
-
Page 4: Safety Notice
Safety Notice WARNING: Failure to follow these safety notices could result in fire, electric shock, other injuries, or damage to the Smart Pet Feeder and other property. Read all the safety notices below before using the Smart Pet Feeder. • Avoid high humidity or extreme temperatures. • Avoid long exposure to direct sunlight or strong ultraviolet light. -
Page 5: Technical Specifications
Technical Specifications Hopper Capacity • 4 L Auto Feeding Time • 1-20 meals per day • DC power cord Power • Backup batteries: 3 x D cell Dimension • 240 x 340 x 300 mm N. W. • 1.3 kg Color • White... - Page 6 This guide will provide you with an overview of the product and help you get through the initial setup. Features: • Wi-Fi Remote control -Tuya APP smartphone programmable. • Automatic & manual feeding • Accurate feeding -Schedule up to 20 feeds per day •...
- Page 7 In the box • Pet Feeder x 1 • Power Adapter x 1 • Quick Guide x 1 Please check the condition and the accessories of pet feeder after you open the box. APP Download: 1. Remove the cover and scan the QR Code with your smartphone. 2.
-
Page 8: Get To Know Your Device
Get to know your device Cover Button & indicator (Open the cover) Food outlet Bowl... -
Page 9: Battery Box
Power switch Power jack Battery box Battery box 3 x D-size batteries. Please pay attention to the polarity. Please note that the battery charging is for backup purpose only. If you wish to control the pet feeder remotely, power supply is needed. Power switch —... - Page 10 OK Button Power indicator Wi-Fi indicator OK Button: • Tap once to feed once in 1 portion • Reset the network configuration Hold the 'OK' button for 5 seconds until the power indicator flashes once to reset. The device will enter the EZ pair mode at the first reset. If resetting the device again in the EZ pair mode, it will change to AP pair mode.
-
Page 11: Get Started
Get started To get started, you will need: • Connect your phone to the 2.4Ghz Wi-Fi network. • A mobile phone with a mobile APP installed. Then follow the steps below: 1. Power on the Smart Pet Feeder. 2. Make sure the Wi-Fi indicator is rapidly blinking. If not, please reset 4.1 Add devices 1. - Page 12 5. Enter your home Wi-Fi account and password (Only support 2.4Ghz Wi-Fi), then tap "Next" button. 6. Place the router, mobile phone, and Pet Feeder as close as possible. Confi rm the indicator on your device is rapidly blink, then tap "Next" to wait for connection.
-
Page 13: App Overview
4.2 App Overview: Home management Add Device Location Voice Control Information Room Management Device List Home: 1.Device list You can check the added device, tap one to enter control board 2. Location information Information about your local weather conditions, outdoor temperature, PM 3.Home management Add or delete home and manage home names, rooms, locations, and... -
Page 14: Control Board
Device settings Total portion Manually feed Automatic feed Feeding records Add schedule for automatic feed Control board: Select the target Pet Feeder in device list then enter the control board • Automatic feed Tap to edit the schedule for the automatic feed. Schedule supports up to 20 items. - Page 15 1. Confi gure the network in AP mode. 1. Reset the device in EZ pair mode, it will switch to AP pair mode. The indicator on your device will blink slowly. 2. Then switch the network configuration mode to AP mode at the upper right corner of the APP when you add the device.
- Page 16 4. After the device has been added, you can use 4. After the device has been added, you can use to rename the to rename the device. (If failed, please refer to FAQ2 to troubleshoot) 2. Wi-Fi confi guration of the device failed - Confi rm the entered router password is correct.
- Page 17 - If you have already upgrate the iOS system to 14, you need to enable the "Local network" of the App. - If it still does not work, it is recommended to change the router and try again. 3. Device offline - Confirm whether the Pet Feeder is powered on.
Need help?
Do you have a question about the SPF-1010-TY and is the answer not in the manual?
Questions and answers