Table of Contents
Advertisement
Available languages
Available languages
Quick Links
Advertisement
Table of Contents

Related Manuals for Rollei Sportsline Fun


Summary of Contents for Rollei Sportsline Fun
- Page 1 Sportsline ANLEITUNG AUF DEUTSCH MANUAL IN ENGLISH www.rollei.de...
-
Page 2: Table Of Contents
Inhalt Vor dem ersten Gebrauch . . . . . . . . . 4 Symbole auf dem Bildschirm . . . . . . . 16 Zeichenerklärung . - Page 3 Content Before the First Use . . . . . . . . . . . . . 28 Function Menu . . . . . . . . . . . . . . . . . 41 Explanation of Symbols .
-
Page 4: Vor Dem Ersten Gebrauch
Vor dem ersten Gebrauch Bitte lesen Sie vor dem ersten Gebrauch die Bedienungsanleitung und die Sicherheitshinweise aufmerksam durch . Bewahren Sie die Bedienungsanleitung zusammen mit dem Gerät für den späteren Gebrauch auf . Soll ten andere Personen dieses Gerät nutzen, so stellen Sie ihnen diese Anleitung zur Verfügung .Wenn Sie das Gerät verkaufen, gehört diese Anleitung zum Gerät und muss mit- geliefert werden . -
Page 5: Sicherheitshinweise
Sicherheitshinweise – Schließen Sie das Produkt nur an das Stromnetz an, wenn die Eingangs- oder Versorgungs- spannung mit den Angaben auf dem Typenschild des Produkts übereinstimmt . – Verwenden Sie nur das mit dem Produkt gelieferte Kabel . – Stecken Sie keine Gegenstände in das Gerät . –... - Page 6 Sicherheitshinweise – Setzen Sie das Gerät nicht übermäßiger Hitze durch andere Wärmequellen aus . – Verwenden Sie das Gerät nicht in der Nähe von brennbaren Gasen oder Flüssigkeiten, da dies zu einer Explosion führen kann . – Das Produkt darf nicht mit einem externen Tirner oder einem separaten Fernbedienungs- system betrieben werden .
- Page 7 Sicherheitshinweise – Wenn das Produkt oder das Zubehör beschädigt ist, muss es durch den Hersteller, seinen Kundendienst oder eine ähnlich qualifizierte Person ersetzt oder repariert werden, um Gefahren zu vermeiden . – Das Produkt darf nicht geöffnet werden und Reparaturen dürfen nur von einem Fachmann durchgeführt werden .
-
Page 8: Warnhinweise Für Akkus
Warnhinweise für Akkus – Laden Sie den Akku vollständig auf und ziehen Sie dann das Kabel ab . – Wenn Sie das Produkt längere Zeit nicht benutzt haben, laden Sie den Akku auf, bevor Sie es wieder benutzen . – Um die Lebensdauer des Akkus zu verlängern, sollten Sie den Akku mindestens alle drei Monate aufladen . - Page 9 Warnhinweise für Akkus – Laden Sie den Akku immer über das System auf . Wird der Akku durch einen falschen Typ ersetzt, besteht Explosionsgefahr . – Halten Sie den Akku von Kindern und Tieren fern . – Akkus können explodieren, wenn sie einem offenen Feuer ausgesetzt werden . Werfen Sie Akkus niemals in ein Feuer .
-
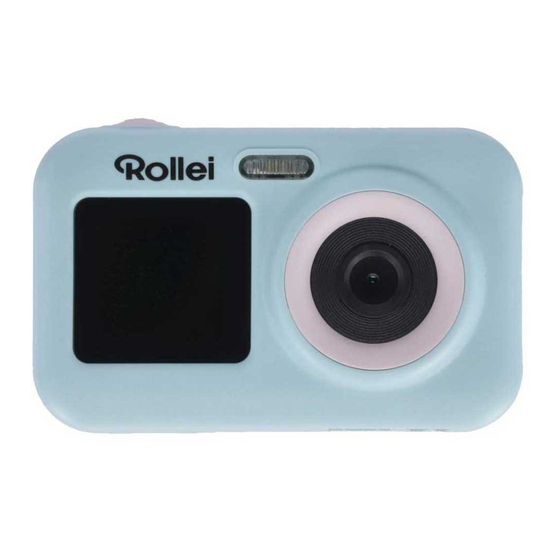
Page 10: Aufbau Der Kamera
Aufbau der Kamera 2,4-Zoll-LCD-Display Einstellungs-Taste Lautsprecher Wiedergabe-Taste Anzeige Objektiv Mikrofon 1,3-Zoll-LCD-Frontdisplay Display-Wechsel-Taste Auslöse-Taste Ein-/Aus-Taste Blitz Aufwärts-Taste Handschlaufen-Loch OK-Taste ReEinstellungs-Taste Löschen-Taste Speicherkarten-Slot Zurück-Taste USB-Anschluss Abwärts-Taste DEUTSCH... - Page 11 Aufbau der Kamera 16 17...
-
Page 12: Aufladen Der Kamera
Aufladen der Kamera – Schieben Sie die Abdeckung nach oben . – Schließen Sie das Ladekabel an den USB-Anschluss an . Einlegen einer Speicherkarte in die Kamera – Schieben Sie die Abdeckung nach oben . – Setzen Sie die Speicherkarte in das Kartenfach ein . DEUTSCH... -
Page 13: Verwenden Der Kamera
Verwenden der Kamera – Drücken Sie die Ein-/Aus-Taste 2 Sekunden lang, um die Kamera einzuschalten . – Schalten Sie die Kamera ein, um in die Modusauswahl zu gelangen, wählen Sie mit der Aufwärts- und Abwärts-Taste den Modus, rufen Sie mit der OK-Taste den ausgewählten Modus auf und drücken Sie auf die Auslöse-Taste, um Fotos und Videos aufzunehmen . -
Page 14: Auswahl Des Kameramodus
Auswahl des Kameramodus Drücken Sie kurz die Ein-/Aus-Taste , um zur Modusauswahl zurückzukehren . Video Foto Wiedergabe Lustige Fotorahmen Einstellungen Die Kamera enthält eine Viel- zahl von lustigen Fotorahmen, drücken Sie auf die OK-Taste, um zum nächsten Rahmen zu wechseln und die Zurück- Taste, um zur vorherigen Aus- wahl zurückzukehren . -
Page 15: Rückseite Der Kamera
Tasten auf der Rückseite der Kamera Display-Wechsel-Taste OK-Taste Zurück-Taste Abwärts-Taste Wiedergabe-Taste Ein-/Aus-Taste Aufwärts-Taste Löschen-Taste Einstellungs-Taste... -
Page 16: Symbole Auf Dem Bildschirm
Symbole auf dem Bildschirm Foto / Video Batterie-Ladestand DEUTSCH... -
Page 17: Menü-Funktion
Funktions-Menü Auslöse-Taste Fotomodus: Klicken Sie auf die Einstel- lungs-Taste, um die Fotoein- stellungen aufzurufen . Videomodus: Klicken Sie auf die Einstel- lungs-Taste, um die Video- einstellungen aufzurufen . -
Page 18: Pfeil-Tasten
Pfeil-Tasten Abbildung rechts: Vorherige Abbildung unten: Nächste DEUTSCH... -
Page 19: Blitzlicht-Funktion
Blitzlicht-Funktion Blitzlicht-Modus Umschalt-Taste Blitz aus Blitz automatisch Blitz ein Blitz immer ein... -
Page 20: Ausschalten Der Kamera
Ausschalten der Kamera Drücken Sie die Ein-/Aus-Taste für 2 Sekunden, um die Kamera auszuschalten . DEUTSCH... -
Page 21: Kamera-Taste Beschreibung
Kamera-Taste Beschreibung Auslöse-Taste: Kurz drücken, um Fotos und Videos aufzunehmen . Ein-/Aus-Taste: Zum Ein- und Ausschalten 2 Sekunden lang gedrückt halten . Kurz drücken, um zur Modusauswahloberfläche zurückzukehren . Display-Wechsel-Taste: Kurz drücken, um zwischen vorderem und hinterem Display zu wechseln . Aufwärts-Taste/Blitzeinstellungs-Taste: Kurz drücken, um das Menü... -
Page 22: Foto-Menü-Einstellungen
Foto-Menü-Einstellungen Drücken Sie diese drei Tasten zur Bedienung und Steuerung, und drücken Sie dann OK zur Einstellung . Fotoauflösung: 44MP 7680 x 5760 42MP 7488 x 5616 36MP 6944 x 5280 24MP 5600 x 4200 20 MP 5120 x 3840 16MP 4608 x 3456 12MP 4000 x 3000 10MP 3680 x 2760... -
Page 23: Video-Menü-Einstellungen
Video-Menü-Einstellungen Drücken Sie diese drei Tasten zur Bedienung und Steuerung, und drücken Sie dann OK zur Einstellung . Videoauflösung: 1920 x 1080P | 1280 x 720P | 640 x 480P Loop-Aufnahme: Aus, 1 Min ., 3 Min ., 5 Min ., 10 Min . Zeiteinstellung: Datum und Uhrzeit einstellen . -
Page 24: Häufige Probleme
Häufige Probleme 1. Kann die Kamera nicht eingeschaltet werden? Es kann sein, dass die Kamera keinen Strom hat, bitte laden Sie die Kamera auf . 2. Welche Art von Ladegerät sollte ich für die Kamera verwenden? Sie können die Kamera mit einem 5,0 V / 2,0 A-Adapter aufladen, Sie können aber auch den USB-Anschluss des Computers zum Aufladen verwenden . -
Page 25: Technische Daten
Technische Daten Display Rückdisplay: LCD 2,4“ | Frontdisplay: LCD 1,3“ Sensor OV5647 Chip SPCA1627A-HL091 Aufnahmewinkel 60° Foto-Auflösung 44 MP*, 42 MP*, 36 MP*, 24 MP*, 20 MP*, 16 MP*, 12 MP*, 10 MP*, 8 MP*, 5 MP Video-Auflösung Full-HD (1920 x 1080) 30 fps, HD (1280 x 720) 30 fps, VGA (640 x 480) 30 fps Foto-Format Video-Format... -
Page 26: Entsorgung
Technische Daten Stromversorgung Lithium-Polymer-Akku (3,7 V, 650 mAh / 2,4 Wh), Eingang 5,0 V 2,0 A Anschluss USB-C-Anschluss, microSD-Speicherkarten-Slot, 1/4-Zoll-Anschluss Betriebstemperatur -10 – 50 °C Maße | Gewicht 9,3 x 6 x 3,2 cm | 80 g Technische Details sind ohne Vorankündigung änderbar . Druckfehler und Irrtümer vorbehalten . *Interpoliert . Entsorgung Entsorgen Sie die Verpackung sortenrein. -
Page 27: Konformitätserklärung
Ihrem Händler, oder wenden Sie sich an Rückgabe- und Sammelstellen in Ihrer Gemeinde . *gekennzeichnet mit: Cd = Cadmium, Hg = Quecksilber, Pb = Blei Konformitätserklärung Hiermit erklärt die Rollei GmbH & Co . KG, dass dieses Gerät „Rollei Sportsline Fun“ den folgenden Richtlinien entspricht: 2011/65/EU RoHs-Richtlinie 2014/30/EU EMV-Richtlinie Der vollständige Text der EU-Konformitätserklärung ist unter der folgenden Internetadresse... -
Page 28: Before The First Use
Before the First Use Please read the operating instructions and the safety instructions carefully before using the device for the first time . Keep the operating instructions together with the device for future use . If you pass on the device to a third party, this manual is part of the device and must be supplied with the device . -
Page 29: Safety Instructions
Safety Instructions – Connect the product to the mains only if the input or supply voltage matches the specifica- tions on the product‘s rating label . – Use only the cable supplied with the product . – Do not insert any objects into the product . –... - Page 30 Safety Instructions – Keep the device and accessories away from open flames, hot surfaces and easily flamma- ble materials . – Do not expose the device to excessive heat from other heat sources . – Do not use the device near flammable gases or liquids as this may cause an explosion . –...
- Page 31 Safety Instructions – Do not use the product if it is visibly damaged or the cable is defective . – If the product or accessories are damaged, they must be replaced or repaired by the manufacturer, its customer service or a similarly qualified person in order to avoid danger . –...
-
Page 32: Battery Warnings
Battery Warnings – Fully charge the battery and then disconnect the cable . – If you have not used the product for a long time, charge the battery before using it again . – To prolong the life of the battery, charge the battery at least every three months . –... - Page 33 Battery Warnings – Rechargeable batteries can explode if exposed to an open fire . Never throw rechargeable batteries into a fire . – Dispose of used batteries according to local regulations . – Before disposing of the device, remove the battery and dispose of it separately . –...
-
Page 34: Camera Structure
Camera Structure 2 .4-inch LCD display Settings button Speaker Playback button Indicator Lens Microphone 1 .3-inch LCD front display Display switch button Shutter button Power button Flash Up button Lanyard hole OK button ReSettings button Delete button Memory card slot Back button USB connection Down button... - Page 35 Camera Structure 16 17...
-
Page 36: Charging The Camera
Charging the Camera – Slide the cover upwards . – Connect the charging cable to the USB connection . Inserting a Memory Card in the Camera – Slide the cover upwards . – Insert the memory card into the card slot . ENGLISH... -
Page 37: Using The Camera
Using the Camera – Long press the power button for 2 seconds to turn on the camera . – Turn on the camera to enter mode selec- tion, up and down button to select mode, OK button to enter the selected mode, and click on the shutter button to take photos and videos . -
Page 38: Camera Mode Selection
Camera Mode Selection Short press the power button to return to mode selection interface . Video Poto Playback Funny photo frame Settings The camera contains a variety of funny photo frames, click the OK button to switch to the next frame and the back button to return to the previous selection . -
Page 39: Buttons At The Back Of The Camera
Buttons at the Back of the Camera Display switch button OK button Back button Down button Playback button Power button Up button Delete button Settings button... -
Page 40: Icons On The Screen
Icons on the Screen Photo / Video Battery charge level ENGLISH... -
Page 41: Function Menu
Function Menu Shutter button Photo mode: Click on the settings button to enter the photo settings . Video mode: Click on the settings button to enter the video settings . -
Page 42: Arrow Buttons
Arrow Buttons Figure right: Previous Figure below: Next ENGLISH... -
Page 43: Flash Function
Flash Function Flash mode Toggle button Flash off Flash automatic Flash on Flash always on... -
Page 44: Turning Off The Camera
Turning Off the Camera Short press the power button for 2 seconds to turn the camera off . ENGLISH... -
Page 45: Camera Button Description
Camera Button Description Camera shutter button: Short press to take photos and videos . Power button: Press and hold for 2 seconds to turn on and off . Short press to return to mode selection interface . Display switching button: Short press to switch between front and rear display . Up button/flash adjustment button: Short press to flip up the menu or adjust the flash . -
Page 46: Photo Menu Settings
Photo Menu Settings Go through these three buttons to operate and control, and then press OK to set . Photo resolution: 44MP 7680 x 5760 42MP 7488 x 5616 36MP 6944 x 5280 24MP 5600 x 4200 20 MP 5120 x 3840 16MP 4608 x 3456 12MP 4000 x 3000 10MP 3680 x 2760... -
Page 47: Video Menu Settings
Video Menu Settings Go through these three buttons to operate and control, and then press OK to set . Video resolution: 1920 x 1080P | 1280 x 720P | 640 x 480P Loop recording: Off, 1 min, 3 min, 5 min, 10 min . Time setting: Set date, time . -
Page 48: Common Problems
Common Problems 1. Can not turn on the camera? It may be that the camera has no power, please charge the camera . 2. What kind of charger should I use for the camera? Support the use of 5 .0 V / 2 .0 A adapter charging, you can also use the computer USB port for charging . -
Page 49: Technical Data
Technical Data Display Rear display: LCD 2 .4“ | Front display: LCD 1 .3“ Sensor OV5647 Chip SPCA1627A-HL091 Shooting angle 60° Photo resolution 44 MP*, 42 MP*, 36 MP*, 24 MP*, 20 MP*, 16 MP*, 12 MP*, 10 MP*, 8 MP*, 5 MP Video resolution Full HD (1920 x 1080) 30 fps, HD (1280 x 720) 30 fps, VGA (640 x 480) 30 fps... -
Page 50: Disposal
Technical Data Connection USB-C connection, microSD memory card slot, 1/4-inch connection Operating tempera- -10 – 50 °C ture: Dimensions | Weight 9 .3 x 6 x 3 .2 cm | 80 g Technical details are subject to change without notice . Misprints and errors excepted . *Interpolated . Disposal Dispose of the packaging according to its type. -
Page 51: Declaration Of Conformity
. *marked with: Cd = Cadmium, Hg = Mercury, Pb = Lead . Declaration of Conformity Hereby, Rollei GmbH & Co . KG declares that this device ”Rollei Sportsline Fun“ complies with the following directives: 2011/65/EU RoHs Directive... - Page 52 Rollei GmbH & Co. KG In de Tarpen 42 D-22848 Norderstedt Service Hotline: +49 40 270750277 /rollei.foto.de @rollei_de Item Nos.: White: 40452 Green: 40453 www.rollei.de...
Need help?
Do you have a question about the Sportsline Fun and is the answer not in the manual?
Questions and answers