Table of Contents
Advertisement
Quick Links
Tritex
EVA
®
Installation & Service Instructions
Rev. A | PN84148
| 10/15/23
Class 1, Division 2, Groups A, B, C, D
Hazardous Environment Rating
Intelligent Linear Valve Actuator
This document does not contain any export-controlled technical data.
Information furnished by Exlar Corporation is believed to be accurate and reliable. However, no responsibility is assumed by Exlar Corporation for
its use. Exlar reserves the right to change the design and operation of the equipment described herein and any associated motion products that
may appear in this document. Information in this document pertaining to equipment not furnished by Exlar should be confirmed by that equipment
manufacturer. Exlar assumes no responsibility for changes to information by other manufacturers or errors in that information or the description of that
information. Information in this document is subject to change without notice.
Advertisement
Table of Contents

Related Manuals for Curtiss-Wright Tritex EVA080


Summary of Contents for Curtiss-Wright Tritex EVA080
- Page 1 Tritex ® Installation & Service Instructions Rev. A | PN84148 | 10/15/23 Class 1, Division 2, Groups A, B, C, D Hazardous Environment Rating Intelligent Linear Valve Actuator This document does not contain any export-controlled technical data. Information furnished by Exlar Corporation is believed to be accurate and reliable. However, no responsibility is assumed by Exlar Corporation for its use.
-
Page 2: Table Of Contents
4.7.2. Seal Maintenance ..........................40 4.8. TRANSPORTATION & STORAGE INSTRUCTIONS ................41 4.9. PRODUCT RETURNS ..........................41 4.10. CERTIFICATIONS & COMPLIANCE ....................41 2 | Tritex EVA Actuator Installation & Maintenance Instructions Curtiss-Wright | Rev A | PN84148 | 10/15/23... -
Page 3: Introduction
This manual is for use with Tritex EVA080 actuators only. Installation and service instructions for other Tritex actuators can be found at www.Exlar.com. -
Page 4: Health & Safety Considerations
Before installing the actuator ensure that it is suitable for the intended application. Consult with Curtiss-Wright, Exlar if there are questions prior to installation. -
Page 5: Product Information
3. PRODUCT INFORMATION The Tritex EVA actuator includes the patented and proven Exlar inverted roller screw with integrated brushless motor plus electronics to provide a complete valve actuator solution, all housed in an environmentally sealed enclosure with hazardous area certification. 3.1. -
Page 6: Product Specifications
Weight 17.2 lbs. (7.8 kg) Standards Approvals cCSAus Class 1, Division 2, Group A, B, C, D, T5 Product standards ISO 22153, RoHS 6 | Tritex EVA Actuator Installation & Maintenance Instructions Curtiss-Wright | Rev A | PN84148 | 10/15/23... -
Page 7: Label & Ordering Information
3.3. LABEL & ORDERING INFORMATION A product label is attached to each actuator under the conduit entry points. Figure 1 - Typical Label Specifications Ordering Info Sample Product Number: EVA080-100-01-B-AA-H-R-XXXX (EVA) AAA HIJK Actuator Series & Frame Size Options Stroke Length Communication Position Sensing Screw Lead... -
Page 8: Installation
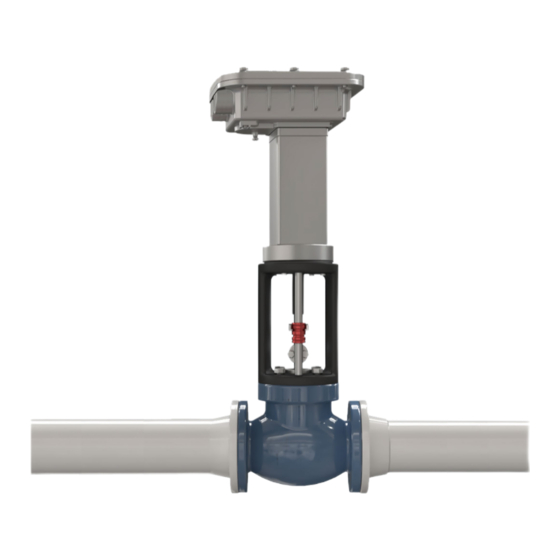
The Tritex EVA actuator is a complete motion system that combines a linear actuator, servo motor, and servo drive. The electrical to mechanical power conversion and control device are contained in the actuator. 4.1. PRODUCT DIMENSIONS Tritex EVA080 ° 0 8 | Tritex EVA Actuator Installation & Maintenance Instructions Curtiss-Wright | Rev A | PN84148 | 10/15/23... -
Page 9: Mechanical Installation
The Tritex EVA080 can be mounted in any orientation without consideration of performance, but typically the actuator is mounted vertically, rod end down. -
Page 10: Electrical Installation
DC power supply. If a power supply is used either a regulated or non-regulated supply can be used, if the above ranges are always maintained. Regulated power supplies typically have built in protections such as over current or overvoltage and are recommended. 10 | Tritex EVA Actuator Installation & Maintenance Instructions Curtiss-Wright | Rev A | PN84148 | 10/15/23... -
Page 11: Grid Power Supply
4.3.2.1. Grid Power Supply The maximum current required from the power supply is dependent on three factors: supply voltage, thrust required to operate the valve and the operating speed. Speed limit is a setup parameter within the actuator. The charts below show the maximum (peak) power supply current draw for various force and speed combinations for 12 Vdc and 24 Vdc supplies. -
Page 12: Battery And Charging Supply Systems
Ripple Voltage from battery charging system is a factor that needs to be considered. The maximum peak ripple voltage allowed is 36 Vdc peak. Any instantaneous voltage above 38 Vdc will cause the Tritex EVA080 to fault out on High Voltage Fault. - Page 13 12 Vdc ISO 22153 Move, 3 inch stroke, extend and retract, 10% of stroke @ 100% thrust, 90% of stroke @ 30% thrust, 8.3 in/s² accelera�on. Average Input Current vs Thrust. 1000 1100 1200 1300 1400 1500 Rated Output Thrust (lbf) 0.1 in/s at 12 Vdc 0.2 in/s at 12 Vdc 0.3 in/s at 12 Vdc...
-
Page 14: Conecting To Terminals
RS485 - RS485 + RS485+* Input 1 RS485-* M8 RS485 RS485 + RS485 - RS485 Common Figure 6 - Tritex EVA080 Wiring Overview 14 | Tritex EVA Actuator Installation & Maintenance Instructions Curtiss-Wright | Rev A | PN84148 | 10/15/23... -
Page 15: Ground Connections
Description Location Terminal # DC Power - DC Power + Screw Terminal 4-20 mA OUT - 4-20 mA OUT + 4-20 mA IN - 4-20 mA IN + RS485- RS485+ Output 2 Output 1 Input 3 Input 2 Input 1 4.3.3.1. -
Page 16: Power Supply Wiring & Fusing
Figure 9 - Power supply wiring example WARNING! All installations should provide a method of removing the power source during an emergency shutdown condition. 16 | Tritex EVA Actuator Installation & Maintenance Instructions Curtiss-Wright | Rev A | PN84148 | 10/15/23... -
Page 17: Control Wiring
4.3.3.3. Control Wiring The I/O on the Tritex EVA080 includes one 4-20 mA input, one 4-20 mA output, three digital inputs, and two digital outputs. All I/O circuits are isolated from each other as well as all other actuator I/O, ground, and commons. Analog and digital input / output connections use tool-free terminal blocks, which can be easily manipulated by hand. -
Page 18: Analog Output Connections (4-20 Ma)
PLC Output or Other Signal Loads Output Load Output 1 Figure 12 - Examples of digital IO field wiring 18 | Tritex EVA Actuator Installation & Maintenance Instructions Curtiss-Wright | Rev A | PN84148 | 10/15/23 Input 3 PLC Input or Other... -
Page 19: Digital Input Specifications
4.3.3.3.4. Digital Input Specifications 4.3.3.3.5. Digital Output Specifications Description Specification Description Specification Input Voltage 0-30 Vdc Operating Voltage Range 0-30 Vdc On State Voltage Range 8-30 Vdc On State Maximum Continuous 100 mA Off State Voltage Range 0-7 Vdc Current On State Current On state voltage drop @ 50 mA 0.5 V typical... -
Page 20: Pc Communication (Connecting To The Actuator)
PC communication ports and the actuator. This can be a USB to Modbus RTU (RS485) converter, such as the Exlar CBL-T2USB485-M8-006 (6 ft length) or CBL-T2USB485-M8-015 (15 ft length) any other standard Modbus RTU converter. 20 | Tritex EVA Actuator Installation & Maintenance Instructions Curtiss-Wright | Rev A | PN84148 | 10/15/23... -
Page 21: Cbl-T2Usb485-M8-Xxx Communication Cable
DISCONNECT WHEN CIRCUIT IS LIVE Exlar offers a USB to Modus RTU (RS485) converter with an M8 connector ready to connect to the Tritex EVA080 port. Model # CBL-T2USB485-M8-xxx. This converter is not isolated and is not recommended for permanent installation. -
Page 22: Position Tracking On Power Loss
22 | Tritex EVA Actuator Installation & Maintenance Instructions Curtiss-Wright | Rev A | PN84148 | 10/15/23... -
Page 23: Expert Pc Tool Quick Start
4.6. EXPERT PC TOOL QUICK START 4.6.1. Quick Start Guide – Generic Lite The following guide provides a concise step-by-step procedure to setup a typical control valve using the Generic Lite application profile and does not describe all the features the Expert software is capable of. For a complete explanation of functions see the Exlar Software Manual. - Page 24 If not; ensure the correct COM port is selected. ii. Or check the USB to Modbus RTU (RS485) adapter is functioning correctly. 24 | Tritex EVA Actuator Installation & Maintenance Instructions Curtiss-Wright | Rev A | PN84148 | 10/15/23...
- Page 25 NOTE: For issues with connecting to the actuator ensure the drive is installed for the Modbus RTU (RS485) to USB adapter. 3. Step Three – Setup a. Click the upload from drive button found on the menu bard. This will read the parameters stored in the actuator to the Expert PC tool.
- Page 26 (power loss, signal loss, etc). Typically, the “0” position is the Valve Closed position. NOTE: The FAULT MOVE has priority on all operating modes. 26 | Tritex EVA Actuator Installation & Maintenance Instructions Curtiss-Wright | Rev A | PN84148 | 10/15/23...
- Page 27 NOTE: The FAULT MOVE requires the actuator to be homed before a FAULT MOVE can be executed. e. Select the “Limits” page in the System Panel under “Setup” Limits are used to define limit of the maximum value of each parameter. Adjusting limits can be used to protect the actuator or attached equipment.
- Page 28 Normal Limt Motion Limit Velocity Velocity Hard Stop Seating Current Foldback Current Running Current Current Seating Time Figure 15 - Valve Seating Routing 28 | Tritex EVA Actuator Installation & Maintenance Instructions Curtiss-Wright | Rev A | PN84148 | 10/15/23...
- Page 29 Absolute Position Limits – Defines the distance or % of analog position range where the valve seating routine is enabled. Enable min (-) is used for valve close and Enable max (+) is used for valve open. ii. Velocity – Defines the speed of the seating routine. This parameter allows for a slower valve seat to protect the valve.
- Page 30 Output Current vs Output Thrust 1000 1100 1200 1300 1400 1500 Output Thrust (lbf) While Moving Holding Figure 18 - Output Current vs Output Force 30 | Tritex EVA Actuator Installation & Maintenance Instructions Curtiss-Wright | Rev A | PN84148 | 10/15/23...
- Page 31 4. Step 4a – Digital I/O Step 4 is broken into 4a and 4b. 4a is for actuators primarily controlled by digital inputs, 4b is for actuators primarily controlled by 4-20 mA. a. Select the “Digital I/O” page in the System Panel under “I/O”. Input Assignments –...
- Page 32 For a detailed explanation see the Expert Software Manual. NOTE: Analog output is typically to monitor valve position or monitor actuator output force (continuous current). 32 | Tritex EVA Actuator Installation & Maintenance Instructions Curtiss-Wright | Rev A | PN84148 | 10/15/23...
- Page 33 Select the “Move” tab in the System Panel under “Motion Setup”. This page defines the home, jog, and actuator positions. b. Home – The Tritex EVA080 intelligent valve actuator is a servo-based solution that requires homing before regular operation.
- Page 34 NOTE: By default, the Input Function Control page is found on the right side the Expert Software interface. If closed; it can be re-opened by View > Page > Input Function Control. NOTE: Motion will occur during the homing operation. 34 | Tritex EVA Actuator Installation & Maintenance Instructions Curtiss-Wright | Rev A | PN84148 | 10/15/23...
- Page 35 c. Move – Define the commanded positions and move behavior of the valve actuator. Move only applies to actuators configured for the Digital Input operating mode. The “Move” drop-down menu defines what move is being setup. Position / Distance – The value defines the position of the move. The actuator can be configured for up to 4 pre- defined position moves.
- Page 36 Modbus Source – Used to simulate analog position command through the Expert software. NOTE: Modbus Source is only used when the Analog Input Channel is set to Modbus Control. 36 | Tritex EVA Actuator Installation & Maintenance Instructions Curtiss-Wright | Rev A | PN84148 | 10/15/23...
- Page 37 7. Step 7 - Download & Save To save the changes made in the actuator configuration process the Expert software parameters must be written to the actuator. a. Click the down arrow button above the system menu or under the Drive drop-down menu, click “Write Parameters to Drive”.
- Page 38 Bus Current – Displays the input current from the power supply. This can be used to read the load from supply power. viii. Bus Voltage – Displays the input voltage from the power supply. 38 | Tritex EVA Actuator Installation & Maintenance Instructions Curtiss-Wright | Rev A | PN84148 | 10/15/23...
- Page 39 9. Step 9 - Diagnostics The Expert software is a powerful software tool that can be used to monitor the actuator diagnostics. a. Diagnostics – Used to view the detail status of the actuator internal functions. b. Status Log – Used to view last 10 fault history and actuator run time. Power- Up –...
-
Page 40: Product Maintenance
4.7. PRODUCT MAINTENANCE In most applications the Tritex EVA080 is a maintenance free actuator. 4.7.1. Lubrication Renewal Procedure 1. Remove the four bolts connecting the faceplate from the front of the actuator. 2. Remove the roller screw by turning it counterclockwise and threading it out of the cylinder. To remove the screw, it may be necessary to hold the roller screw cylinder to keep it from turning. -
Page 41: Seal Maintenance
Roller Screw M6x25 SHCS Stainless Steel; Torque 108 in-lbs (12.2 Nm) Figure 16 - Lubrication Renewal Procedure Reference 4.7.2. Seal Maintenance Exlar recommends that the faceplate assembly containing the main rod seal and bushing assembly be replaced during the re-lubricating procedure. To have this service performed for you, contact the Exlar Returns Department to send your unit in for service. -
Page 42: Product Returns
The sealed electrical compartment and stem seal will protect the actuator components in accordance with NEMA 4X and IP66 environments. Curtiss-Wright, Exlar cannot accept responsibility for damage to the actuator once installed on-site. Each Tritex EVA has been fully tested at the factory and will provide years of trouble-free operation as long as the cover is properly re-installed after wiring and cable entry points are properly sealed. -
Page 43: Certifications & Compliance
4.10. CERTIFICATIONS & COMPLIANCE Certificate of Compliance Certificate: Master Contract: 163694 70060591 Project: 80163757 Date Issued: 2023-11-17 Issued To: Exlar Corporation 18400 West 77th St Chanhassen, Minnesota, 55317 United States Attention: Robert Schulz The products listed below are eligible to bear the CSA Mark shown Issued by: Steven Simkevitz Steven Simkevitz... - Page 44 Products shall be marked with the markings specified by the particular product standard. DQD 507 Rev. 2019-04-30 © 2018 CSA Group. All rights reserved. Page 2 44 | Tritex EVA Actuator Installation & Maintenance Instructions Curtiss-Wright | Rev A | PN84148 | 10/15/23...
- Page 45 Certificate: 70060591 Master Contract: 163694 Project: 80163757 Date Issued: 2023-11-17 Products certified for Canada shall have all Caution and Warning markings in both English and French. • Additional bilingual markings not covered by the product standard(s) may be required by the Authorities Having Jurisdiction.
- Page 46 Products certified under Class C322802 have been certified under CSA’s ISO/IEC 17065 accreditation with the Standards Council of Canada (SCC). www.scc.ca DQD 507 Rev. 2019-04-30 © 2018 CSA Group. All rights reserved. Page 4 46 | Tritex EVA Actuator Installation & Maintenance Instructions Curtiss-Wright | Rev A | PN84148 | 10/15/23...
- Page 47 Supplement to Certificate of Compliance Certificate: 70060591 Master Contract: 163694 The products listed, including the latest revision described below, are eligible to be marked in accordance with the referenced Certificate. Product Certification History Project Date Description 80163757 2023-11-17 Project to update report 70060591 to evaluate: i) Changes to the ELT090 model with Class I, Division 1, Groups C and D construction consisting of model name change (ELT090 to EXA090), update to latest edition CSA C22.2 No.
- Page 48 Phone: 855-620-6200 (US & Canada) Phone: 952-500-6200 Email: CHA_info@curtisswright.com Website: www.exlar.com © 2023 Curtiss-Wright Exlar Automation 48 | Tritex EVA Actuator Installation & Maintenance Instructions 18400 W 77th St, Chanhassen, MN 55317 | www.exlar.com Curtiss-Wright | Rev A | PN84148 | 10/15/23...
Need help?
Do you have a question about the Tritex EVA080 and is the answer not in the manual?
Questions and answers