Advertisement
Available languages
Available languages
Quick Links
IB51416222
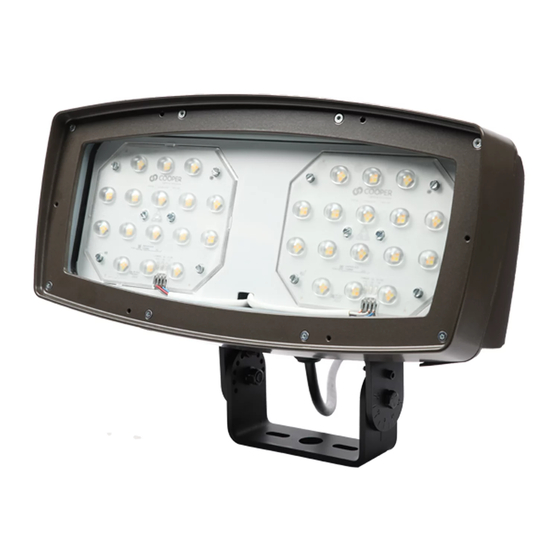
Installation Instructions – Night Harrier/NHR
Instructions d'installation – Night Harrier/NHR
Instrucciones de instalación – Night Harrier/NHR
IMPORTANT: Read carefully before installing product. Retain for future reference. Failure to comply with these
instructions may result in death, serious bodily injury and property damage.
Risk of Fire, Electrical Shock, Cuts or other Casualty Hazards- Installation and maintenance of this
product must be performed by a qualified electrician. This product must be installed in accordance
with the applicable installation code by a person familiar with the construction and operation of the
product and hazards involved.
Risk of Fire and Electric Shock- Make certain power is OFF before starting installation or attempting
any maintenance. Disconnect power at fuse or circuit breaker.
Risk of Fire- Refer to product label for specific minimum supply conductor requirements.
Risk of Burn- Disconnect power and allow fixture to cool before handling or servicing.
Risk of Personal Injury- Fixture may become damaged and/or unstable if not installed properly.
DISCLAIMER OF LIABILITY: Cooper Lighting Solutions assumes no liability for damages or losses of any kind
that may arise from the improper, careless, or negligent installation, handling or use of this product.
NOTICE: Green ground wire provided in proper location. Do not relocate.
ATTENTION Receiving Department: Note actual fixture description of any shortage or noticeable damage on
delivery receipt. File claim for common carrier (LTL) directly with carrier. Claims for concealed damage must be
filed within 15 days of delivery. All damaged material, complete with original packing must be retained.
Safety: This fixture must be wired in accordance with the National Electrical Code and applicable local codes and
ordinances. Proper grounding is required to insure personal safety. Carefully observe grounding procedure under
installation section.
APPLICATIONS: This lighting fixture is designed for outdoor lighting applications, and should not be used in area
of limited ventilation or inside high ambient temperature enclosures. It must be stored in a dry location prior to
installation. Do not expose lighting fixture to rain, dust or other environmental conditions prior to installation
and insertion of photo control or shorting cap (if so equipped). Best results will be obtained if installed and
maintained according to the following instructions.
WARNING
WARNING
Brand Logo
reversed out of
black
INS #
INS #
Advertisement

Related Manuals for Cooper Lighting Night Harrier/NHR


Summary of Contents for Cooper Lighting Night Harrier/NHR
- Page 1 Risk of Personal Injury- Fixture may become damaged and/or unstable if not installed properly. DISCLAIMER OF LIABILITY: Cooper Lighting Solutions assumes no liability for damages or losses of any kind that may arise from the improper, careless, or negligent installation, handling or use of this product.
-
Page 2: Installation
Installation Instructions – Night Harrier/NHR INSTALLATION Tools Required Ratchet, 3/8" socket, 3/8" square nut driver, 9/16" wrench, Torx T-15 driver and #2 Philips screwdriver. Trunnion Mounting (Figure 1.) Mount luminaire to surface using the 2-7/8” center-to- center hole pattern provided on the trunnion bracket. - Page 3 Installation Instructions – Night Harrier/NHR Adjusting color and power (Figure 4.) ote: Disconnect power before making any adjustment to the CCT and power settings. (+) Line Black Using a Torx T-15 screwdriver, remove the access panel cover. White (-) Common...
- Page 4 Installation Instructions – Night Harrier/NHR Wire Guard (Figure 5.) Tools Required Torx T-20 driver Align wire guard on top of lens frame matching the six existing holes. (Figure 5.) Tighten (6) 8-32 screws to the face of the fixture. Visor (Figure 6.)
- Page 5 Risques de blessures – Le luminaire peut être endommagé et/ou instable s’il n’est pas installé correctement. EXONÉRATION DE RESPONSABILITÉ : Cooper Lighting Solutions n’assume aucune responsabilité pour les dommages ou pertes de quelque nature que ce soit pouvant découler d’une installation, d’une manipulation ou d’une utilisation inappropriée, imprudente ou négligente de ce produit.
-
Page 6: Outils Requis
Instructions d'installation - Night Harrier/NHR INSTALLATION Outils requis Cliquet, douille de 9,53 mm (3/8 po), tournevis à douille carrée de 9,53 (3/8 po), clé de 14,3 mm (9/16 po), visseuse Torx T-15 et tournevis cruciforme no 2. Montage du pivot (Figure 1). Montez le luminaire sur la surface en utilisant le modèle de trou de centre à... - Page 7 Instructions d'installation - Night Harrier/NHR Positionnez le luminaire selon la direction désirée puis serrez les trois (3) vis de serrage à un couple de 9,5 Nm (7 pi-lb). Ligne électrique (+) Noir Serrez les écrous de blocage à un couple de 9,5 Nm (7 pi-lb).
- Page 8 Instructions d'installation - Night Harrier/NHR Protecteur de fil métallique (Figure 5). Outils requis Visseuse Torx T-20 Alignez le protecteur de fil métallique situé sur le cadre de la lentille et correspondant aux six trous existants. (Figure 5). Serrez les (6) vis 8-32 sur la face du luminaire.
- Page 9 Riesgo de lesiones físicas: la luminaria puede dañarse o convertirse en un objeto inestable si no se lo instala correctamente. EXENCIÓN DE RESPONSABILIDAD: Cooper Lighting Solutions no asume ninguna responsabilidad por daños o pérdidas de ningún tipo que puedan surgir de la instalación, el manejo o el uso incorrectos, descuidados o negligentes de este producto.
-
Page 10: Instalación
Instrucciones de instalación: Night Harrier/NHR INSTALACIÓN Herramientas necesarias Trinquete de 3/8 in, toma de corriente de 3/8 in (0,95 cm), llave para tuercas cuadradas, llave de 9/16 in (1,42 cm), destornillador Torx T-15 y destornillador Philips n.º 2. Montaje en soporte giratorio (Figura 1) Monte la luminaria en la superficie, usando el patrón de orificios de 2-7/8 in (7 ,30 cm) de centro a centro incluido... - Page 11 Instrucciones de instalación: Night Harrier/NHR Ajuste las tuercas de bloqueo a 7 ft-lb (9,49 N m). Consulte el diagrama de cableado para ver la conexión Línea (+) Negro de la alimentación. (Figura 3) Blanco Luminaria Neutro (-) Ajuste del color y la potencia (Figura 4) Desconecte la alimentación antes de hacer cualquier...
- Page 12 Instrucciones de instalación: Night Harrier/NHR Protector de cables (Figura 5) Herramientas necesarias Destornillador Torx T-20 Alinee el protector de cables en la parte superior del marco de la lente para que coincida con los seis orificios existentes. (Figura 5) Ajuste los (6) tornillos de 8-32 a la parte frontal de la luminaria.
- Page 13 Garantías y Limitación de Responsabilidad Visite www.cooperlighting.com/global/resources/legal para conocer nuestros términos y condiciones. Cooper Lighting Solutions 1121 Highway 74 South Peachtree City, GA 30269 P: 770-486-4800 Cooper Lighting Solutions is a www.cooperlighting.com registered trademark. All trademarks are property Canada Sales of their respective owners.
Need help?
Do you have a question about the Night Harrier/NHR and is the answer not in the manual?
Questions and answers