Advertisement
Quick Links
S
T
-E Q
TAT
RAK
T
C
S
RAFFI
LOUD
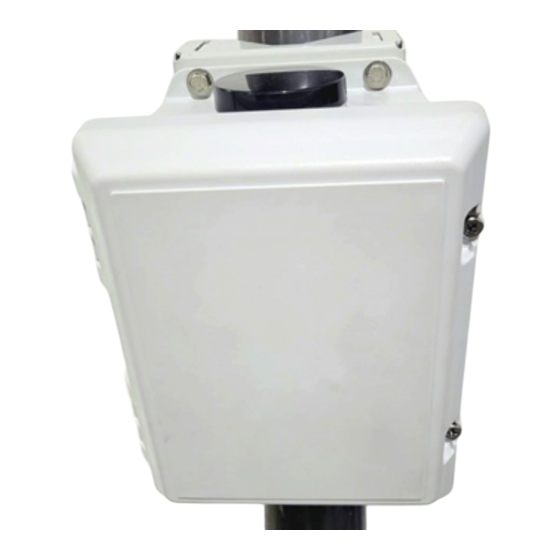
The StatTrak-E by All Traffic Solutions is a discreet, wireless traffic data collection device that provides
law enforcement authorities and traffic engineers with detailed statistics and reports on vehicle counts and
speeds by class of vehicle (small, medium, and large). StatTrak-E captures traffic data simultaneously for
the same or opposite directions.For roadside installations, StatTrak-E captures traffic data simultaneously
for up to two lanes of traffic, moving in the same or opposite directions, and for median installations
captures up to four lanes bidirectionally. For TraffiCloud subscribers, data uploads automatically to the
cloud.
Initial StatTrak-E setup
Once you receive your StatTrak-E, you'll need to perform the following initial setup:
Step 1: Charging the StatTrak-E on the next page
Step 2: Signing in to TraffiCloud for the first time on page 3
Step 3: Choosing a Site for your StatTrak-E on page 3
Step 4: Mounting a solar panel on page 6
Step 5: Installing the mounting brackets on page 7
Step 6: Mounting and aiming the StatTrak-E on page 8
Step 7: Connecting a solar panel to the StatTrak-E on page 10
Step 8: Powering on the StatTrak-E on page 11
Step 9: Setting up the StatTrak-E mobile app on page 11
Step 10: Confirming your installation on page 14
After deployment, please see:
Replacing StatTrak-E batteries on page 15
Check the package contents
Upon receiving your new StatTrak-E, check to ensure that you have all of the items ordered. If you notice any damaged or missing
items, contact All Traffic Solutions Technical Customer Support immediately. Here's a summary of what's typically included with
your StatTrak-E. Also check your packing slip for precise details of your order.
The StatTrak-E can accommodate up to two 12.8V, 11.5Ah rechargeable lithium batteries
and includes a smart battery charger, two adapters, and keys for the ON/OFF switch. If you
purchased a solar panel, only one battery is included.
A main pole bracket, three stainless steel banding straps, and a custom security bit. See
Step 5: Installing the mounting brackets on
Six 3/4-in. long x 1/4-in. diameter (7.6-cm x 2.5 cm) -20 size bolts, with 7/16-in. (11 mm)
nuts and washers.
An angle bracket, two bolts with washers, a Torx T-30 security bit with 1/4-in. (6 mm) shank,
and two pole adapters for roadside use with Telespar-type poles.
ATS | Chantilly, VA | USA | Tel: 1-866-366-6602 | Email:
Copyright © 2024 | StatTrak-E Quick Start Guide, TraffiCloud Subscriber Edition , ver. 1.01 | 4800268 | All rights reserved.
S
G
UICK
TART
UIDE
E
UBSCRIBER
DITION
What's included
page 7.
,
sales@alltrafficsolutions.com
What you'll need
A sheltered workspace and
electrical power supply.
A nut driver and power
screwdriver or drill.
Two wrenches or nut drivers with
7/16-in. (11 mm) sockets.
An Android mobile device and the
StatTrak-E app (not required for
basic roadside setup).
| Web:
www.alltrafficsolutions.com
Advertisement

Related Manuals for All Traffic Solutions StatTrak-E

Summary of Contents for All Traffic Solutions StatTrak-E
- Page 1 Check the package contents Upon receiving your new StatTrak-E, check to ensure that you have all of the items ordered. If you notice any damaged or missing items, contact All Traffic Solutions Technical Customer Support immediately. Here's a summary of what's typically included with your StatTrak-E.
- Page 2 StatTrak-E is fully charged and ready for use. Do not remove the StatTrak-E battery (or batteries) for charging. The device is shipped with the power turned off. Do not turn it on during charging. You'll only need to turn it on to test during pole mounting. See Step 6: Mounting and aiming the StatTrak-E on...
- Page 3 Creating a Site in TraffiCloud To generate reports you'll need to create at least one Site for each StatTrak-E and then assign your device to it. Sites are the key to generating traffic reports, because TraffiCloud organizes traffic data for reports by Site. You can perform these steps before (recommended) or after you install a device at a physical location.
- Page 4 You can also copy and paste an address from your address book. ATS | Chantilly, VA | USA | Tel: 1-866-366-6602 | Email: sales@alltrafficsolutions.com | Web: www.alltrafficsolutions.com Copyright © 2024 | StatTrak-E Quick Start Guide, TraffiCloud Subscriber Edition , ver. 1.01 | 4800268 | All rights reserved.
- Page 5 Click Show Hidden to show all Sites, including active and hidden Sites. Repeat these steps for multiple Sites If you'll be using a StatTrak-E at multiple Sites, you can repeat the above steps for those Sites or add them later. ATS | Chantilly, VA | USA | Tel: 1-866-366-6602 | Email: sales@alltrafficsolutions.com...
- Page 6 Step 4: Mounting a solar panel Page 6 All Traffic Solutions Selecting a physical location for the StatTrak-E The site you select for the StatTrak-E will vary with your requirements, however you should generally adhere to the following guidelines: Guideline What to do...
- Page 7 Place the StatTrak-E face down on a workbench or other smooth, flat surface. Place the pole bracket back to back with the StatTrak-E, aligning the top end of the bracket with the top back side of the StatTrak-E. The top end of the bracket has the threaded bolt fittings for attaching the angle bracket, as shown.
- Page 8 The green LED on the base of the StatTrak-E flashes when it detects a vehicle. Installing the StatTrak-E on a pole Place the StatTrak-E on your selected pole at the planned horizontal angle to the traffic and a height between 5 ft. 6 in. and 8 ft. »...
- Page 9 Lane width 13 ft. (3.6 m) ATS | Chantilly, VA | USA | Tel: 1-866-366-6602 | Email: sales@alltrafficsolutions.com | Web: www.alltrafficsolutions.com Copyright © 2024 | StatTrak-E Quick Start Guide, TraffiCloud Subscriber Edition , ver. 1.01 | 4800268 | All rights reserved.
- Page 10 Twist to tighten the waterproof IP68 electrical cable connector onto the port, as shown. ATS | Chantilly, VA | USA | Tel: 1-866-366-6602 | Email: sales@alltrafficsolutions.com | Web: www.alltrafficsolutions.com Copyright © 2024 | StatTrak-E Quick Start Guide, TraffiCloud Subscriber Edition , ver. 1.01 | 4800268 | All rights reserved.
- Page 11 MOBILE APP Once the StatTrak-E is installed at your monitoring site, use this section to test and configure it using the StatTrak-E mobile app. Using the app is NOT required for roadside installations, but provides useful information such as real time...
- Page 12 View the default radar settings. For most median installations, the default radar settings are all you need, in which case you » can leave them as is. However, in some special traffic scenarios such as if the road in front of the StatTrak-E is curved, it may be necessary to decrease the signal level.
- Page 13 The range is from one percent to 100 percent. The default setting is 60 percent. ATS | Chantilly, VA | USA | Tel: 1-866-366-6602 | Email: sales@alltrafficsolutions.com | Web: www.alltrafficsolutions.com Copyright © 2024 | StatTrak-E Quick Start Guide, TraffiCloud Subscriber Edition , ver. 1.01 | 4800268 | All rights reserved.
- Page 14 First, make sure the device is powered on. See Step 8: Powering on the StatTrak-E on page 11. Check the green LED at the base of the StatTrak-E. The LED flashes 30 seconds after you turn on the device and whenever it » detects a passing vehicle.
- Page 15 Step 8: Powering on the StatTrak-E on page 11. ATS | Chantilly, VA | USA | Tel: 1-866-366-6602 | Email: sales@alltrafficsolutions.com | Web: www.alltrafficsolutions.com Copyright © 2024 | StatTrak-E Quick Start Guide, TraffiCloud Subscriber Edition , ver. 1.01 | 4800268 | All rights reserved.
- Page 16 LEDs on the StatTrak-E circuit boards light up when the device starts receiving power from the new battery or batteries. This is normal, even when the power switch is turned off.
Need help?
Do you have a question about the StatTrak-E and is the answer not in the manual?
Questions and answers