Table of Contents
Advertisement
Quick Links
WARNING
Failure to follow all instructions and safety precautions in this
manual, in the vehicle and body manufacturers' manuals and
on the safety decals attached to the vehicle, body and this
product could result in serious injury or death to operators,
service technicians or bystanders and/or damage to property.
AWT07MLEDT HD
DO NOT operate the vehicle or install this product before you
READ and UNDERSTAND the vehicle Operation Manual, this
Monitor
manual and other applicable manufacturers' manuals, and all
safety decals. This product must be installed by certified
technicians/installers familiar with the vehicles on which they
will be making the installation.
USER MANUAL
ISSUED OCTOBER 2018
© 2018 3rd Eye
3E-AWT07MLEDT-UM-1018
Advertisement
Table of Contents

Related Manuals for 3rd Eye AWT07MLEDT


Summary of Contents for 3rd Eye AWT07MLEDT
- Page 1 This product must be installed by certified technicians/installers familiar with the vehicles on which they will be making the installation. USER MANUAL ISSUED OCTOBER 2018 © 2018 3rd Eye 3E-AWT07MLEDT-UM-1018...
-
Page 2: Table Of Contents
Information ....................................12 Vehicle Installation Vehicle Installation Vehicle Installation ....................................27 Specifications Specifications Specifications ....................................29 Mounting Mounting Mounting ....................................31 Cable Connections Cable Connections Cable Connections ....................................33 ..................................34 Index Issued October 2018 Copyright 2018, 3rd Eye Table of Contents Printed in U.S.A. - Page 3 This device complies with Part 15 of the FCC Rules. Operation is subject to the following two conditions: 1. This device may not cause harmful interference and, 2. This device must accept any interference received, including interference that may cause undesired operation Issued October 2018 Copyright 2018, 3rd Eye Printed in U.S.A.
- Page 4 PRODUCT DOCUMENTATION UPDATES Thank you for purchasing our product. Please read this User Manual before using the product. All product documentation is subject to change without notice. Please go to to get the most current documentation for your 3rd Eye www.3rdeyecam.com products.
- Page 5 USER MANUAL AWT07MLEDT AWT07MLEDT HD MONITOR 7" Q TFT LCD MONITOR (LED BACKLIGHTED) USER MANUAL ISSUED OCTOBER 2018 3E-AWT07MLEDT-UM-1018 Issued October 2018 Copyright 2018, 3rd Eye Printed in U.S.A.
-
Page 6: Features
This heavy duty 4 port monitor is designed to withstand shock and vibrations of up to 10G, repel water intrusion, salt and handle extreme temperatures. Split, Tri and Quad screen viewing is available on this 7" screen. The AWT07MLEDT is a rugged, robust monitor protected by die cast aluminum housing with the highest military specs suitable for the toughest known environments. -
Page 7: Package Contents
USER MANUAL AWT07MLEDT PACKAGE CONTENTS ITEM 1. 7” LCD Monitor 2. Sun-Hood 3. Mounting Bracket 4. Accessories 5. Control Cable 6. User Manual Issued October 2018 Copyright 2018, 3rd Eye Package Contents Printed in U.S.A. -
Page 8: Tft Installation
Referred to the identification sticker for further installation. STEP 4 Install the monitor on to the bracket. Issued October 2018 Copyright 2018, 3rd Eye TFT Installation Printed in U.S.A. -
Page 9: Signal Cable Description
Connection for any Audio signal (such as DVD, VCD, Game) 9. CAM OUT (Green Color RCA Jack) Video loop out (for recording, second monitor or other device Issued October 2018 Copyright 2018, 3rd Eye Signal Cable Description Printed in U.S.A. - Page 10 1. Cam Out: Composite video loop out signal to recorder, monitor or other device. 2. Live Video/Audio Out: On screen video/audio signal loop out to recorder, monitor or other device. Issued October 2018 Copyright 2018, 3rd Eye Signal Cable Description Printed in U.S.A.
-
Page 11: Control Cable Description
DO NOT connect the red wire (power wire) of this product directly to the battery. Connect the red wire of this product to the ACC of the ignition key switch. Failure to do so may result in permanent damage of the product. Issued October 2018 Copyright 2018, 3rd Eye Control Cable Description Printed in U.S.A. - Page 12 REMARK ON SCREEN VIEW ACC POWER BLACK WHITE SW Control Active Power Level Connect to CAM C BLUE Reverse Control Active Power Level Connect to Reverse Light Issued October 2018 Copyright 2018, 3rd Eye Control Cable Description Printed in U.S.A.
- Page 13 2. With car power is on, the monitor power is off, when making a reverse / right / left turn, the monitor will display default screen. 3. You may push the “JUMP” button under event trigger when Priority is OFF. Issued October 2018 Copyright 2018, 3rd Eye Control Cable Description Printed in U.S.A.
-
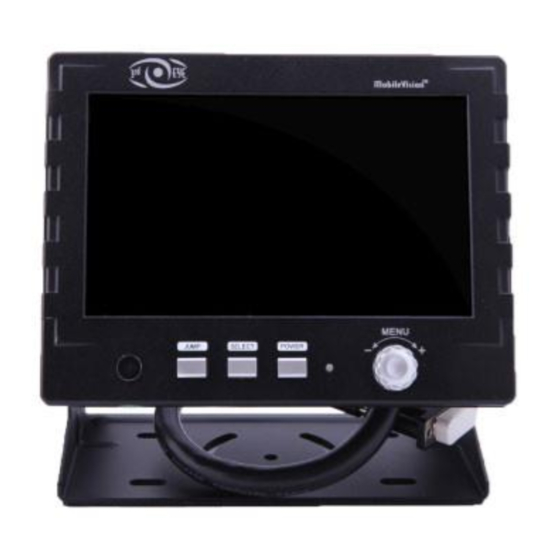
Page 14: Front Panel Control
Enter Function: Press the encoder switch to act as “Enter” function under the OSD menu. Volume Value: Exit the OSD menu, user can turn this switch left or right to adjust the volume value. Issued October 2018 Copyright 2018, 3rd Eye Front Panel Control Printed in U.S.A. -
Page 15: Osd Menu
Turn the MENU button left or right to adjust your setting value. 3. Press the MENU button once back to submenu and then press menu button again in order to return to OSD menu. Enter to Main Menu: Issued October 2018 Copyright 2018, 3rd Eye Front Panel Control Printed in U.S.A. -
Page 16: Screen Menu
Provide adjustment for the lightness and colorfulness level of TFT display. Setting value from 0 ~ 100. Default value is 45. (Only in NTSC system is available.) Issued October 2018 Copyright 2018, 3rd Eye Front Panel Control Printed in U.S.A. - Page 17 Provide adjustment for the edge contrast the TFT LCD. (acutance) level of TFT display. Setting value from 0 ~ 100. Default value is 100. Return Return to OSD menu selection screen. Issued October 2018 Copyright 2018, 3rd Eye Front Panel Control Printed in U.S.A.
-
Page 18: Display
Default value is OFF. NOTE: Users must turn on LCD in order to run unlock process. All function buttons are still working during OSD Menu lock up period. Issued October 2018 Copyright 2018, 3rd Eye Front Panel Control Printed in U.S.A. - Page 19 > Reverse 3. JUMP mode: CAM R 4. OSD Lock mode: ON Default value is “ON”. NOTE When you choose “OFF” mode, OSD Lock function is enabled. Issued October 2018 Copyright 2018, 3rd Eye Front Panel Control Printed in U.S.A.
- Page 20 4:3 (default), select gauge. LCD profile ratio 16:9 to display in 16:9 size. Return Return to OSD menu selection screen. Issued October 2018 Copyright 2018, 3rd Eye Front Panel Control Printed in U.S.A.
- Page 21 SEQ Time Setup Select Cam A/B/C/R switching time setting value from 02~100 Default value is “02” Return to OSD menu selection screen. Return Issued October 2018 Copyright 2018, 3rd Eye Front Panel Control Printed in U.S.A.
- Page 22 Select “ON” to activate the mirror function for different cameras or “OFF” for a normal image. Default values are following below setting. CAM A “OFF” CAM B “OFF” CAM C “OFF” CAM R “ON” Issued October 2018 Copyright 2018, 3rd Eye Front Panel Control Printed in U.S.A.
- Page 23 Screen of touch panel shows only single picture on direction turn. The screen will show only left side view on left turn and only right side view on right turn. Default value is SINGLE. Issued October 2018 Copyright 2018, 3rd Eye Front Panel Control Printed in U.S.A.
- Page 24 R+B: Screen will display dual image for both Cam R and Cam B. R/AB Screen will display triple image from Cam R, Cam A, and Cam B. Issued October 2018 Copyright 2018, 3rd Eye Front Panel Control Printed in U.S.A.
- Page 25 USER MANUAL AWT07MLEDT FRONT PANEL CONTROL (CONTINUED) R+AB Screen will display triple image from Cam R, Cam A, Cam B. Default value is R. Issued October 2018 Copyright 2018, 3rd Eye Front Panel Control Printed in U.S.A.
- Page 26 CAM A+C Obtain image from camera A+C in dual picture while pressing the JUMP button and press again to return the default screen. Issued October 2018 Copyright 2018, 3rd Eye Front Panel Control Printed in U.S.A.
- Page 27 Default value is QUAD. SEQ Time Step Select Cam A/B/C/R switching time setting value from 02~100 Default value is “02” Return Return to OSD menu selection screen. Issued October 2018 Copyright 2018, 3rd Eye Front Panel Control Printed in U.S.A.
- Page 28 FRONT PANEL CONTROL (CONTINUED) Information Recall This menu setup contains Recall & Exit functions. Recall factory default. Exit Exit OSD menu. Note Firmware version will be displayed on last column. Issued October 2018 Copyright 2018, 3rd Eye Front Panel Control Printed in U.S.A.
-
Page 29: Vehicle Installation
4. Switch to Rear view with SELECT button, the screen always display on 16:9 While rear viewing, the screen always display on 4:3 to correct size percentage Issued October 2018 Copyright 2018, 3rd Eye Vehicle Installation Printed in U.S.A. - Page 30 USER MANUAL AWT07MLEDT VEHICLE INSTALLATION (CONTINUED) Issued October 2018 Copyright 2018, 3rd Eye Vehicle Installation Printed in U.S.A.
-
Page 31: Specifications
Contrast ratio 300:1* Brightness 450 cd/m2 * AV Video In Connector Input Signal 1Vpp Impedance 75 Ohms AV Audio In Connector Input video signal level 1Vpp Impedance 1K Ohms Issued October 2018 Copyright 2018, 3rd Eye Specifications Printed in U.S.A. - Page 32 Environmental Operation temperature -10°C~70°C Storage temperature -30°C~80°C Humidity 20%-80% *The brightness and contrast ratio specifications are from panel specification. Design and Specifications are subject to change without notice. A1.6 Issued October 2018 Copyright 2018, 3rd Eye Specifications Printed in U.S.A.
-
Page 33: Mounting
USER MANUAL AWT07MLEDT MOUNTING Attachment 1: Dimension Chart Issued October 2018 Copyright 2018, 3rd Eye Mounting Printed in U.S.A. - Page 34 USER MANUAL AWT07MLEDT MOUNTING (CONTINUED) Attachment 2: Installation Chart Issued October 2018 Copyright 2018, 3rd Eye Mounting Printed in U.S.A.
-
Page 35: Cable Connections
NOTE: The Cable should be stored in a dry place and please try to avoid the water and humidity, otherwise, it may cause problem of the product itself or even more dangerous. Issued October 2018 Copyright 2018, 3rd Eye Cable Connections Printed in U.S.A. -
Page 36: Index
OSD menu switches mounting package contents screen menu signal cable description audio functions specifications Issued October 2018 Copyright 2018, 3rd Eye Index Printed in U.S.A. - Page 37 WARRANTY DISCLAIMER 4.1 This warranty shall become null, void, and not apply if Client fails to notify 3rd Eye in writing of such defects prior to the expiration of the Warranty Period, if the defect is not reproducible, or if the defect is caused by (a) customer damage, negligence, misuse, tampering, accident, fire, variation or interruption of electricity;...
- Page 38 Customer Care: 866-804-2984 3rd Eye 22130 Merchants W ay STE 100 Katy, TX 77449...
Need help?
Do you have a question about the AWT07MLEDT and is the answer not in the manual?
Questions and answers