Chapters
Table of Contents

Related Manuals for Dr.Fodisch MGA 12


Summary of Contents for Dr.Fodisch MGA 12
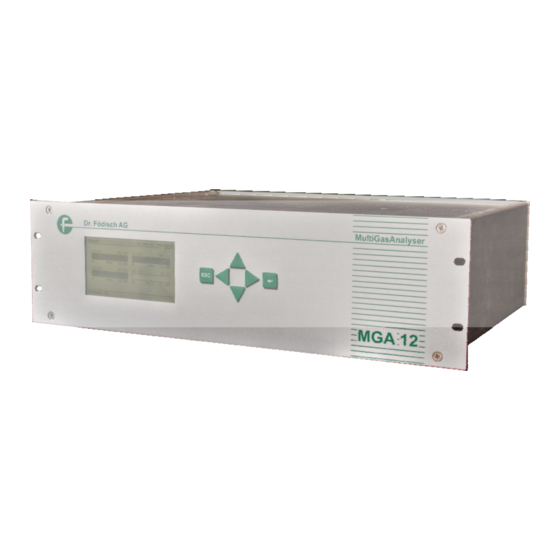
- Page 1 MultiGasAnalyser MGA 12 Operation manual Dr. Födisch Umweltmesstechnik AG telephone: +49-34205-755-0 Zwenkauer Strasse 159 fax: +49-34205-755-40 D - 04420 Markranstädt e-mail: info@foedisch.de internet: www.foedisch.de...
- Page 2 Dr. Födisch Umweltmesstechnik AG in written way. Violations oblige for compensation of losses. All rights for the case of registration of patent, utility patent or design patent are reserved. Page 2 of 78 Operation manual MGA 12 Version 1.3...
-
Page 3: Table Of Contents
Zero point calibration ....................30 5.4.2.2 Reference point calibration ..................31 Operation and handling Display of the analyser ....................32 6.1.1 Status line ........................32 Version 1.3 Operation manual MGA 12 Page 3 of 78... - Page 4 Adjust | Automatic calibration | Setup | Reference purging times ......58 6.3.3.1.7 Adjust | Automatic calibration | Setup | REF interval ..........59 6.3.3.1.8 Adjust | Automatic calibration | AUTOZERO now ........... 59 Page 4 of 78 Operation manual MGA 12 Version 1.3...
- Page 5 Technical data 10.1 General remarks ......................73 10.2 Plug assignment ......................74 10.3 Menu ........................75 Spare parts and consumables Index Version 1.3 Operation manual MGA 12 Page 5 of 78...
- Page 6 Fig.4.3: Internal gas flow sheet MGA 12, one bench ..........21 Fig. 4.4: Internal gas flow sheet MGA 12, two benches separate gas way ....21 Fig. 4.5: Plug connectors back side ................22 ...
- Page 7 Table 9.1: Messages maintenance ................69 Table 9.2: Messages maintenance request ..............71 Table 9.3: Messages failure ...................72 Table 10.1: Technical data ......................74 Version 1.3 Operation manual MGA 12 Page 7 of 78...
-
Page 8: General Remarks
The used signal words have the following meaning: WARNING Danger of death, severe injuries and / or substantial damages to property, if necessary precautions are not taken or ignored. WARNING Danger by electric current. Version 1.3 Operation manual MGA 12 Page 8 of 78... -
Page 9: Intended Use
such automation technology equipment or are authorised to energise, ground and tag circuits and devices/systems in accordance with established safety practices. Version 1.3 Operation manual MGA 12 Page 9 of 78... -
Page 10: Warranty Information
Please retain the packaging material if it is necessary to return the device. 1.7.1 Scope of supply The MultiGasAnalyser MGA 12 consists as standard of the following components: 1 Analyser MGA 12 1 operation manual ... -
Page 11: Safety Advices
caught on the pipes is avoided. The MGA 12 as whole as well as the single components are only allowed to be operated in the original state. If elements have to be exchanged the manufacturer’s original parts shall be used. -
Page 12: Structure And Function
3 Structure and function Structure and function Structure of analyser The MultiGasAnalyser MGA 12 is a 19“-rack with a fixed front plate and removable cover. The case contains the cuvette, the emitter and receiver unit, the power supply and the signal processing. -
Page 13: Fig. 3.3: Mga 12 Inside View One Optical Bench, Paramagnetic Oxygen Sensor And
Dr. Födisch Umweltmesstechnik 3 Structure and function Fig. 3.3: MGA 12 inside view one optical bench, paramagnetic oxygen sensor and massflowmeter Fig. 3.4: MGA 12 inside view two optical benches, EC cells (O ) and massflowmeters Version 1.3 Operation manual MGA 12... -
Page 14: Back Side
MGA 12 inside view with one optical bench, EC cell (O ) and pressure switch 3.1.1 Back side At the back side of MGA 12 plug connectors are arranged for the feeding, the electric signals as well as the gas entry and exit. Fig. 3.6: MGA 12 back side Fig. -
Page 15: Dimensions
The optic bench for the measurement of the infrared-active components consists primarily of an infrared source, a measuring cell and a detector. 3.2.1 Measuring principle In MGA 12 2 measuring principles are used, being independent from each other and selectively working: Infrared absorption and ... -
Page 16: Fig. 3.9: Working Principle Of The Infrared Channel
In order to get a better focusing of the optical path a parabolic reflector is used. The cuvettes consist of aluminium tubes with a high gloss finished surface. Page 16 of 78 Operation manual MGA 12 Version 1.3... -
Page 17: Fig. 3.11: Optical Bench - Gas Path
Then it gets to the IR detectors with narrow band filters. These are arranged in a thermostate where the temperature for the filters and the detectors is kept constantly. A multi-pyro-detector is used as radiation receiver. Version 1.3 Operation manual MGA 12 Page 17 of 78... -
Page 18: Fig. 3.12: Paramagnetic Oxygen Sensor
1 Mirror 3 Magnet (4x) concentration in the measuring 2 Diamagnetic glass 4 Paramagnetic oxygen bar-bell molecules gas. Fig. 3.13: Paramagnetic measuring method Page 18 of 78 Operation manual MGA 12 Version 1.3... -
Page 19: Assembly
Umweltmesstechnik 4 Assembly Assembly Installation instructions The gas analyser MGA 12 is designed as 19"-device. It can be inserted and screwed into a suitable 19"-frame with slide bars. ADVICE A place of installation being free of shocks should be chosen. -
Page 20: Gas Conditioning
In order to avoid the pollution of the parts passed by the measuring gas, the measuring gas has to be conditioned in a sufficient way. Generally the following items are placed in front of the MGA 12 a gas sampling probe with filter, ... -
Page 21: Gas Connections And Internal Gas Flow Sheet
Internal gas flow sheet MGA 12, one bench Pressure measurement optical bench -measurement (EC) Gas exit path 1 Gas exit path 2 Fig. 4.4: Internal gas flow sheet MGA 12, two benches separate gas way Version 1.3 Operation manual MGA 12 Page 21 of 78... -
Page 22: Electrical Connection
Plug connectors back side Fig. 4.6: Plug connectors back side two separate gas paths The plug connectors of the MGA 12 are on the back side of the device Fig. 4.5. The plugs or sockets are marked in the following way: Type... -
Page 23: X10 Power Supply
Digital contact measuring range channel 5 a Normally open contact Digital contact measuring range channel 5 b Normally open contact Table 4.1: Plugs –X20 Analogue outputs | Digital outputs (measuring ranges) Version 1.3 Operation manual MGA 12 Page 23 of 78... -
Page 24: X21 Digital Outputs (Status, Limit Values, Valves)
AUTOREF in progress Normally open contact Probe back flushing Normally open contact (optional) Probe back flushing Normally open contact (optional) Table 4.2: Plugs –X21 Digital outputs (status, limit values, valves) Page 24 of 78 Operation manual MGA 12 Version 1.3... -
Page 25: X22 Digital Inputs
External AUTOZERO or external AUTOREF calibration can only be initiated if there is no F-Failure status and the measuring mode is active otherwise the message “Error during external AUTOCAL” occurs. Version 1.3 Operation manual MGA 12 Page 25 of 78... -
Page 26: X30 Rs 232
Parity None int. connected with Pin 8 No echo mode int. connected with Pin 7 Table 4.4: Plugs –X30 RS 232 4.4.6 –X31 The Sub-D socket –X31 is not used. Page 26 of 78 Operation manual MGA 12 Version 1.3... -
Page 27: Set-Up
WARNING If the gas, which is to be measured, contains humidity a gas cooler has to be integrated in the gas conditioning. Danger of destroying the optical bench! Version 1.3 Operation manual MGA 12 Page 27 of 78... -
Page 28: Execution Of Set-Up
Status: M M-heating up used The M-starting up – phase lasts ca. 30 minutes. Then the MGA 12 will do an automatic calibration if automatic calibration is activated (see: 6.3.3.1.1 Adjust | Automatic calibration | Setup page 53)! ADVICE ... -
Page 29: Calibration
Calibration 5.4.1 General remarks During the calibration of the MGA 12 it is required to observe the dependence on humidity of the infrared measuring principle! That means that the used zero gas, the measuring gas and the calibration respectively reference gases have to be provided with exactly the same dew point. -
Page 30: Automatic Calibration
During the operation an automatic calibration can be set manually (see: 6.3.3.1.8 page 59). The MGA 12 can also do an automatic calibration cyclically that means in adjustable regular periods (see: 6.3.3.1.1 Adjust | Automatic calibration | Setup page 53). -
Page 31: Reference Point Calibration
60) or automatically (see 6.3.3.1 Adjust | Automatic calibration page 53). ADVICE During adjustment calibration gas must be provided at the analyser entry (see: Fig. 4.2: Gas conditioning page 20)! Version 1.3 Operation manual MGA 12 Page 31 of 78... -
Page 32: Operation And Handling
Umweltmesstechnik 6 Operation and handling Operation and handling Display of the analyser The MGA 12 shows all information being necessary for operating the measuring device on a graphic display: Fig. 6.1: Display (example, depending on ordered configuration) If the MGA 12 has more than 4 measuring components the other components can be displayed by pressing . -
Page 33: Measuring Mode
In the input mode parameters can be seen and changed as well as the device can be checked, calibrated, maintained and messages can be viewed. The input mode is displayed via pressing the -key out of the measuring mode. Version 1.3 Operation manual MGA 12 Page 33 of 78... -
Page 34: Operation
Umweltmesstechnik 6 Operation and handling Operation 6.2.1 Keys The operation of the MGA 12 is done via keyboard. The keys are arranged on the front plate in the following way: Fig. 6.3: Keyboard The keys have the following meaning: Escape: menu one level up Enter: confirm input, select menu Left: navigation in menu &... -
Page 35: Parameter Input
6.2.3 Parameter input The MGA 12 has an operation and parameterisation level for input of the specific parameters and for calibration of the device. You get there by entering the valid password: Main menu: select sub menu Main Menu... -
Page 36: Main Menu
Umweltmesstechnik 6 Operation and handling Main menu After pressing the -key you get into the main menu of the MGA 12. Here the following information can be seen: The Main menu allows the selection, the change and Main Menu the display of the device parameter or diagnosis Setup values. -
Page 37: Setup | Integration
The units are converted internally under standard conditions. (0 °C and 1.013 mbar). Conversion factor ppm mg/m³ Conversion factor mg/m³ ppm Component 0.72 1.39 1.25 0.80 1.34 0.75 Version 1.3 Operation manual MGA 12 Page 37 of 78... -
Page 38: Setup | Outputs | Output Range
The measuring range 2 is the physical measuring range of the optical bench. The measuring range 1 can take the following values: 0.1 x measuring range 2 < measuring range 1 measuring range 2 Page 38 of 78 Operation manual MGA 12 Version 1.3... -
Page 39: Setup | Outputs | Range Change-Over
Determine the limit values of the components Output limit values Select the channel Channel 1 Channel 2 Select a channel with Channel 3 Channel 4 Quit the menu with Status: OK Version 1.3 Operation manual MGA 12 Page 39 of 78... -
Page 40: Setup | Outputs | H3Po4 Metering
Duration back flushing pulse in s Valid entries are 0 s to 60 s. 0 <= X <= 60 Set a value with 00001 Quit the menu with Status: OK Page 40 of 78 Operation manual MGA 12 Version 1.3... -
Page 41: Setup | Outputs | Analogue Outputs
MAINTENANCE has started output of a constant free adjustable value between Status: OK 3.6 mA and 20.0 mA Select a function with Quit the menu with Version 1.3 Operation manual MGA 12 Page 41 of 78... -
Page 42: Setup | Outputs | Analogue Outputs | Output During Error
In this sub menu contact type and trigger signal can Digital inputs be freely adjusted for each digital input. Contact type Trigger signal Select a sub menu with Quit the menu with Status: OK Page 42 of 78 Operation manual MGA 12 Version 1.3... -
Page 43: Setup | Digital Inputs | Contact Type
(R) for trigger signal maintenance request with 1:sampling probe 5:ext.maint. 2:sampling line 6:ext.flow 3:gas cooler 7:fan Accept settings with 4:ext. hum. mon. 8:cond.tank Status: OK Quit the menu without saving Version 1.3 Operation manual MGA 12 Page 43 of 78... -
Page 44: Setup | Clock
Quit the menu with 00012 Status: OK Example: Setting minutes Minute Enter minutes Set a value with 0.0 <= X <= 59.0 Quit the menu with 00013 Status: OK Page 44 of 78 Operation manual MGA 12 Version 1.3... -
Page 45: Setup | Clock | Set Date
Quit the menu with 00008 Status: OK Example: Setting day (day) Enter day Set a value with 1.0 <= X <= 31.0 Quit the menu with 00001 Status: OK Version 1.3 Operation manual MGA 12 Page 45 of 78... -
Page 46: Setup | Password
Status: OK ADVICE The standard password is 00111. 6.3.1.6 Setup | Manual maintenance Switch MGA 12 into status maintenance (with the Manual maintenance SET parameter) or OFF (with the RESET parameter) that means the status contact maintenance is set Reset (see: Point 4.4.3 Page 24) -
Page 47: Diagnosis | Raw Values
Absorption pos. 5: 95.25 Absorption pos. 6: 9.355 Status: OK 6.3.2.3 Diagnosis | Message archive In this menu point all messages of the MGA 12 are Message archive listed in a chronological way. The actual message is heating bench 09/11/02 14:09:32- heating bench 09/11/02 14:07:59+ displayed first. -
Page 48: Diagnosis | Deviation Values | Zero Deviations
When the zero point monitoring is activated the cycle Cycle count Deviation limit starts again with 0. Reset deviation values Confirm with Quit the menu with Status: OK Page 48 of 78 Operation manual MGA 12 Version 1.3... -
Page 49: Diagnosis | Check Outputs
0.0 <= X <= 20.0 Quit the menu with +1.0000 E+01 Status: OK Example: Enter current value for channel 1 Check channel 1 Input was accepted! Confirmed. Status: OK Version 1.3 Operation manual MGA 12 Page 49 of 78... -
Page 50: Diagnosis | Check Outputs | Digital Outputs
Digital contact valve reference gas Reference gas Digital contact humidity monitor Pump off Digital contact H metering Metering of H Digital contact AUTOZERO in Automatically zero point progress calibration in progress Page 50 of 78 Operation manual MGA 12 Version 1.3... -
Page 51: Diagnosis | Check Outputs | Mr Outputs
Digital contact measuring range channel 4 measuring range channel 4 Digital contact measuring range channel 5 measuring range channel 5 Not assigned Not assigned Not assigned Not assigned Not assigned Not assigned Not assigned Version 1.3 Operation manual MGA 12 Page 51 of 78... -
Page 52: Diagnosis | Export Message Archive
–X30. Show graph bench A/D values Show graph bench V++ values (see: Point 4.4.5 Page 26) Message archive Deviation values Check outputs Export message archive Export parameter file Status: OK Page 52 of 78 Operation manual MGA 12 Version 1.3... -
Page 53: Adjust
Configure automatic calibration Setup ZERO purging gas Select a sub menu with ZERO purging times ZERO interval Quit the menu with Zero criterions REF purging times REF interval Status: OK Version 1.3 Operation manual MGA 12 Page 53 of 78... -
Page 54: Adjust | Automatic Calibration | Setup | Zero Purging Gas
During this purging time with zero gas analyser status is maintenance and the digital output 10 “zero valve” is set. 00360 Set a value with Quit the menu with Status: OK Page 54 of 78 Operation manual MGA 12 Version 1.3... -
Page 55: Adjust | Automatic Calibration | Setup | Zero Interval
Status: OK ADVICE A zero point that is triggered by a zero point criterion is an additional zero point and does not influence the cycle of the automatically zero point. Version 1.3 Operation manual MGA 12 Page 55 of 78... - Page 56 Instead the analyser is set to status error until the next automatically zero point correction. If 0.0 K is entered this function is disabled. Set a value with Quit the menu with Page 56 of 78 Operation manual MGA 12 Version 1.3...
- Page 57 Instead the analyser is set to status maintenance request until the next automatically zero point correction. If 0.0 Vol% is entered this function is disabled. Set a value with Quit the menu with Version 1.3 Operation manual MGA 12 Page 57 of 78...
-
Page 58: Adjust | Automatic Calibration | Setup | Reference Purging Times
During this purging time with reference gas analyser status is maintenance and the digital output 11 00600 “reference gas valve” is set. Set a value with Status: OK Quit the menu with Page 58 of 78 Operation manual MGA 12 Version 1.3... -
Page 59: Adjust | Automatic Calibration | Setup | Ref Interval
Quit the menu with Status: OK 6.3.3.1.8 Adjust | Automatic calibration | AUTOZERO now The automatic calibration of the MGA 12 is 1.00 l/min AUTOZERO immediately done! If probe back flushing is activated the message “probe back flushing” will occur. -
Page 60: Adjust | Automatic Calibration | Autoref Now
The drift compensation is activated after the 3 automatically zero point correction. 6.3.3.1.9 Adjust | Automatic calibration | AUTOREF now The automatic calibration of the MGA 12 is 1.00 l/min AUTOREF immediately done! Wait until calibration is finished or abort with AUTOREF in progress. -
Page 61: Adjust | Manual Calibration | Ir Channels
Status: OK Execute manual reference for the infrared channels: Manual reference Reference gas values Select a sub menu with Set reference Calibration factors Quit the menu with Status: OK Version 1.3 Operation manual MGA 12 Page 61 of 78... - Page 62 Select channel for manual reference gas calibration: Set reference Channel 1 Select a channel with Channel 2 Channel 3 Quit the menu with Status: M M-REF in progress Page 62 of 78 Operation manual MGA 12 Version 1.3...
- Page 63 Measuring value x calibration factor[%] = adjusted measuring value +1.0000 E+02 The standard calibration factor is 100 %. Set a value with Status: OK Quit the menu with Version 1.3 Operation manual MGA 12 Page 63 of 78...
-
Page 64: Adjust | Manual Calibration | Ec Channel
Manual zero O2 Reference gas value O2 Select a sub menu with Set reference O2 Quit the menu with Status: OK Page 64 of 78 Operation manual MGA 12 Version 1.3... - Page 65 Quit the menu with Status: M M-REF in progress ADVICE For manual span point calibration ambient air with 20.95 Vol% O has to be provided at the analyser entry! Version 1.3 Operation manual MGA 12 Page 65 of 78...
-
Page 66: Humidity Monitor
In the menu point Info the device number as well as the software version can be seen: Info Quit the menu with Device ID: 12001 SW version: 1.4 Powered by: FreeRTOS V4.1.2 Bench ID: X028_90002 Bench version: 190 Powered by: FreeRTOS V5.0.3 Status: OK Page 66 of 78 Operation manual MGA 12 Version 1.3... -
Page 67: Shut Down
Umweltmesstechnik 7 Shut down Shut down In order to shut down the MGA 12 the following steps have to be executed: 1. Separate the measuring gas path from the gas sampling – Attention: Depending on plant over-pressure can occur! 2. Purge at least 30 minutes (respectively until the measuring components show ambient air) with purging gas or zero gas. -
Page 68: Maintenance
Moreover the maintenance works are basis for warranty claims. 8.1.1 Maintenance works The analysis system MGA 12 works almost free of maintenance, it should only be checked by professional staff in regular periods. Therefore a working gas conditioning (gas cooler, filter, condensate pump etc.) is necessary. -
Page 69: Error Messages And Error Elimination
9 Error messages and error elimination Error messages and error elimination For monitoring, signalisation of error states and for error search the MGA 12 provides status signals. These are shown on the display and supplied as potential-free contact at the status contacts. -
Page 70: Maintenance Request
Maintenance request external sampling line measuring gas pipe Check digital input 02 Check gas cooler Maintenance request external gas gas cooler cooler Check digital input 03 Page 70 of 78 Operation manual MGA 12 Version 1.3... -
Page 71: Failure
Temperature sensor bench 1 has a bench 1 temp. sensor failure Call service Restart device Temperature sensor bench 2 has a bench 2 temp. sensor failure Call service Version 1.3 Operation manual MGA 12 Page 71 of 78... -
Page 72: Table 9.3: Messages Failure
Check ext. fan of system Error external fan Check digital input 07 Check condensate tank condensate tank Error condensate tank Check digital input 08 Table 9.3: Messages failure Page 72 of 78 Operation manual MGA 12 Version 1.3... -
Page 73: Technical Data
Max. 16 potential-free contacts (24 VDC 0,4 A) Burden Max. 500 Ω Digital inputs Max. 8 optocoupler entries Display 5" black/white LC-Display (240*128 Pixel) Keyboard 6 bottoms Keypad (with arrow keys) Version 1.3 Operation manual MGA 12 Page 73 of 78... -
Page 74: Plug Assignment
Ambient humidity Max. 90 % (not condensing) Table 10.1: Technical data 10.2 Plug assignment Fig. 10.1: MGA 12 back side Fig. 10.2: MGA 12 back side with two separate gas paths Page 74 of 78 Operation manual MGA 12 Version 1.3... -
Page 75: Menu
Dr. Födisch Umweltmesstechnik 10 Technical data 10.3 Menu Fig. 10.3: Menu (standard) Version 1.3 Operation manual MGA 12 Page 75 of 78... -
Page 76: Spare Parts And Consumables
11 Spare parts and consumables Spare parts and consumables For the purchase of spare parts and consumables please contact the Dr. Födisch Umweltmesstechnik AG respectively your responsible regional representative office. Page 76 of 78 Operation manual MGA 12 Version 1.3... -
Page 77: Index
36, 46, 53 G password 35, 46 place of installation gas conditioning plug assignment gas connections plug connectors gas cooler 19, 29 power supply gas flow sheet pressure reducer gas sampling probe Version 1.3 Operation manual MGA 12 Page 77 of 78... - Page 78 –X22 span value calibration –X30 spare parts –X31 status 24, 32 Status Z status line zero gas provision structure zero point calibration 61, 64 sub menu supply voltage Page 78 of 78 Operation manual MGA 12 Version 1.3...
- Page 79 Flow Measuring Device FMD 09 Operation manual Dr. Födisch Umweltmesstechnik AG Telephone: +49-34205-755-0 Zwenkauer Strasse 159 Fax: +49-34205-755-40 D - 04420 Markranstädt E-Mail: info@foedisch.de Internet: www.foedisch.de...
- Page 80 Dr. Födisch Umweltmesstechnik Dr. Födisch Umweltmesstechnik AG Zwenkauer Strasse 159 D - 04420 Markranstädt Telephone: +49-34205-755-0 Fax: +49-34205-755-40 E-Mail: info@foedisch.de Internet: www.foedisch.de Date of operation manual: 26.09.2018 File path: N:\FMD\FMD09\Betriebsanleitung\en\en.Operation manual FMD09 1.0j.doc © Dr. Födisch Umweltmesstechnik AG 2009 - 2019 This operation manual is not subject to the service of change.
- Page 81 Dr. Födisch Umweltmesstechnik Content General remarks General advices ......................6 Advices for handling the manual ................6 Warning advices ......................6 Approved use ......................7 Qualified personnel ....................7 ...
- Page 82 Dr. Födisch Umweltmesstechnik 6.4.1.5 Settings | languages ....................32 6.4.1.6 Settings | password ....................32 6.4.2 Analogue inputs ...................... 33 Analogue inputs | Measuring range p-transmitter ..........33 6.4.2.1 6.4.2.2 Analogue inputs | Flue gas density ................. 33 ...
- Page 83 Dr. Födisch Umweltmesstechnik Figures Fig. 3.1: View FMD 09 ....................11 Fig. 3.2: Control and display unit FMD 09 ..............12 Fig. 4.1: Entry and exit section ..................14 Fig. 4.2: Weld-in port ....................15 Fig. 4.3: Installation instruction step 1 –...
-
Page 84: General Remarks
Dr. Födisch Umweltmesstechnik 1 General remarks General remarks General advices The product described by this manual has left the factory in a safety-related proper and checked state. In order to keep this state and to achieve a perfect and safe product operation it is only allowed to be used in the way described by the manufacturer. -
Page 85: Approved Use
Dr. Födisch Umweltmesstechnik 1 General remarks WARNING Danger by hot surface ATTENTION Means that an event or state which is not desired can occur, if the corresponding advice is not observed. HINT Is an important information about the product itself, its handling or that chapter of manual where special attention shall be paid to. -
Page 86: Warranty Information
Dr. Födisch Umweltmesstechnik 1 General remarks or have been trained as operators in the use of automation technology equipment and are acquainted with the contents of these instructions which refer to operation or have been appropriately trained as commissioning and/or maintenance personnel for ... -
Page 87: Scope Of Delivery
Dr. Födisch Umweltmesstechnik 1 General remarks 1.7.1 Scope of delivery The flow measuring device FMD 09 consists in standard version of the following components: 1 probe with weather protection case 1 weld-in flange 1 operation manual 1 magnetic screw driver ... -
Page 88: Safety Advices
Dr. Födisch Umweltmesstechnik 2 Safety advices Safety advices Generally WARNING Operate the measuring device FMD 09 only in perfect state and under strict observance of the safety hints! The flow measuring device FMD 09 is only allowed to be connected to the supply voltage ... -
Page 89: Structure And Function
Dr. Födisch Umweltmesstechnik 3 Structure and function Structure and function Structure The flow measuring device FMD 09 consists of: 1 in-situ probe 1 weld-in flange 3.1.1 Probe The probe of the FMD 09 consists of a probe rod with a probe head. The probe rod is a dynamic pressure probe. - Page 90 Dr. Födisch Umweltmesstechnik 3 Structure and function The control and display unit is 160 mm integrated weather protection case. All measuring values, status information and Dr. Födisch FMD 09 parameters are shown on the Limit value high-quality display. By means On Off of the keyboard the display can configured...
-
Page 91: Measuring Principle
Dr. Födisch Umweltmesstechnik 3 Structure and function 3.2.1 Measuring principle The differential pressure via a dynamic pressure probe is a degree for the velocity of the exhaust gas. The flow of the exhaust gas can be determined in relation to the cross- section of the exhaust gas channel at the measuring point. -
Page 92: Installation
Dr. Födisch Umweltmesstechnik 4 Installation Installation Selection of measuring point The place of installation of the probe has to meet the requirements of local valid guidelines (e.g. EN 13284-1, in Germany: VDI 2066 page 1). In case of doubts it is recommended to let have determined the measuring point by a responsible measuring institute (in Germany according to §§... -
Page 93: Assembly Of The Weld-In Flange
Dr. Födisch Umweltmesstechnik 4 Installation Assembly of the weld-in flange The weld-in flange of the FMD 09 is installed according to Fig. 4.2: Weld-in port. installation position of the probe is horizontal or vertical from top. ATTENTION Risk of measuring failures through diagonal installation position! At mounting in diagonal channel the device must be mounted upright so that the connections of the pressure transmitter are aligned vertically. -
Page 94: Assembly Of The Probe
Dr. Födisch Umweltmesstechnik 4 Installation Assembly of the probe The probe is assembled into the flange according to Fig. 4.3 and Fig. 4.4 and fixed with the supplied screws and nuts. Thereby the right flow direction of the measuring gas has to be observed: the side marked with has to be flown against by the flue gas! Fig. - Page 95 Dr. Födisch Umweltmesstechnik 4 Installation Fig. 4.4: Installation instruction step 2 – insert probe ATTENTION All holes of the probe need to be inserted into the gas flow. Even if only one hole cannot enter the gas flow (and is stuck in the flange instead), considerable measuring errors will result.
-
Page 96: Electric Connection
Dr. Födisch Umweltmesstechnik 4 Installation Electric connection The electric connections of the FMD 09 are in the weather protection case. The heating (D) is supplied with voltage via the terminal box (C) (see Fig. 3.1: View FMD 09 page 11) here. - Page 97 Dr. Födisch Umweltmesstechnik 4 Installation Terminal strip lower Terminal strip top Fig. 4.7: Terminal strip: feeding 24 VDC, status signals and analogue outputs The operating voltage 24 VDC is connected to terminal strip 1 and 2. Additionally it is possible to connect the cable shield respectively a potential compensation to terminal strip HINT For connecting another operating voltage (110 VAC or 230 VAC) the optional ...
-
Page 98: Operational Voltage (230 / 110 Vac)
Dr. Födisch Umweltmesstechnik 4 Installation 4.4.2 Operational voltage (230 / 110 VAC) The terminals are designed as plug terminals. For connecting the cable no special tool is required. Fig. 4.8: Electric connection 230/110 VAC Terminal strip lower Terminal strip top Fig. -
Page 99: Status Signals
Dr. Födisch Umweltmesstechnik 4 Installation 4.4.3 Status signals The status signals are configured as potential-free contacts. The following signals are provided at the FMD 09: Signals Contact position Error see 11 Error messages and error normally closed, in case of failure opened elimination page 49 ... -
Page 100: Analogue Inputs
Dr. Födisch Umweltmesstechnik 4 Installation 4.4.5 Analogue inputs The analogue inputs of the FMD 09 are occupied in the following way: Analog input 2-Wire- 4 ... 20 mA Transmitter used as: Analog input 2 Signal output Analog input 2 24 VDC Signal output Analog input 1 Analog input 1... -
Page 101: Set Up
Dr. Födisch Umweltmesstechnik 5 Set up Set up 1. Switch on pre-fuse 2. Adjust the zero point of the differential pressure transmitter (see point 8.2 ) 3. Open lock valves 4. Check measuring values shown for plausibility 5. Adjust measuring ranges, if necessary Version 1.0j Operation manual FMD 09 Page 23 of 54... -
Page 102: Operation And Handling
Dr. Födisch Umweltmesstechnik 6 Operation and handling Operation and handling Display The FMD 09 shows in a Point-Matrix Display (128 x 64 Pixel) at the control unit (B) all information necessary for operating the measuring device: Present measuring value (text and graphic mode) ... -
Page 103: Text Mode
Dr. Födisch Umweltmesstechnik 6 Operation and handling 6.1.2 Text mode Limit value On Off Limit value 1 & 2 Integration on/off Integration time Tm³ Status: Maint/ pres. meas. value Failure channel 1 pres. meas. value pres. meas. value T[°C]: 125 pabs[mbar]: 3 channel 2 channel 3... -
Page 104: Enter Numbers
Dr. Födisch Umweltmesstechnik 6 Operation and handling 6.2.2 Enter numbers Entering numbers , e.g. password: Password Set the cursor with at the respective digit Enter new password Chose the digit with and adjust the desired value 0 0 0 0 0 with ... -
Page 105: Main Menu
Dr. Födisch Umweltmesstechnik 6 Operation and handling Main menu The main menu allows the selection and change of the device parameters. The parameters are divided into 6 sub menus: Settings Analogue inputs Adjustment Manual maintenance Calibration parameters ... -
Page 106: Settings | Integration
Dr. Födisch Umweltmesstechnik 6 Operation and handling 6.4.1.1 Settings | Integration By means of item integration on/off the smoothing of Setup the measuring values can be switched on or off. By means of item integration time the time interval for Integration on/off integration is selectable. -
Page 107: Settings | Output Ranges
Dr. Födisch Umweltmesstechnik 6 Operation and handling For all 3 analogue outputs the following options are mA-Output 1 available: Velocity: in [m/s] Abs.Pressure [mbar] Velocity [m/s] Flow measured: in [m³/h] Flow measured [Tm³/h] Flow standardized: in [m³/h] Flow normal. - Page 108 Dr. Födisch Umweltmesstechnik 6 Operation and handling HINT 1 Tm³/h = 1.000 m³/h, 1.000 Tm³/h = 1.000.000 m³/h Example input Flow standardized and dry in [m³/h]: Range Flow normal. The span value of the measuring range can be selected in the range of 10 ...
-
Page 109: Settings | Limit Values
Dr. Födisch Umweltmesstechnik 6 Operation and handling 6.4.1.4 Settings | Limit values The limit values determine, from which measuring value Limit values onwards the limit value shall be fallen below (-> limit value 1) respectively exceeded (-> limit value 2). The Limit 1 violation of a limit value is shown on the display (text and Limit 2... -
Page 110: Settings | Languages
Dr. Födisch Umweltmesstechnik 6 Operation and handling 6.4.1.5 Settings | languages Under item language the menu and display language is Language chosen. The following languages are selectable: English English German German 6.4.1.6 Settings | password Under item password it is possible to change the pre- Password adjusted password in order to protect it against... -
Page 111: Analogue Inputs
Dr. Födisch Umweltmesstechnik 6 Operation and handling 6.4.2 Analogue inputs In the menu item Analogue inputs the evaluation of the differential pressure measured and the temperature is configured: Measuring range p-Transmitter Flue gas density Flue gas pressure Cross-Section ... - Page 112 Dr. Födisch Umweltmesstechnik 6 Operation and handling Example input Vol% O2 Vol% O2 (Hint: the measuring values are not standardized with regard to the oxygen content of the media to be Enter value [%] measured!) + 2 , 1 0 0 0 E + 0 1 ...
-
Page 113: Analogue Inputs | Flue Gas Pressure
Dr. Födisch Umweltmesstechnik 6 Operation and handling 6.4.2.3 Analogue inputs | Flue gas pressure In this item it will be selected, if an absolute pressure Flue Gas Pressure transmitter is used. Standard: pressure transmitter available Abs.press.transm. The dark selection bar shows which option has been Abs.press. -
Page 114: Analogue Inputs | Exhaust Gas Temperature
Dr. Födisch Umweltmesstechnik 6 Operation and handling 6.4.2.5 Analogue inputs | Exhaust gas temperature Under this item it can be adjusted if a temperature Temperature measurement with Pt100 is used. Standard: Pt100 used Pt100 used Temperature as value The possible display range of the Pt100 measurement is –30°C up to 600°C ( depending on probe design). -
Page 115: Adjustment
Dr. Födisch Umweltmesstechnik 6 Operation and handling 6.4.3 Adjustment Under item Adjust the analogue and digital outputs can be checked: Check outputs 6.4.3.1 Adjust | Check outputs The digital and analogue outputs can be checked Adjust here. Check Outputs ... - Page 116 Dr. Födisch Umweltmesstechnik 6 Operation and handling Under this item the Analogue output can be checked. Analog output The adjusted current value is provided in mA at the analogue output (see 4.4 Electric connection page 18). Set 0 - 20 mA In order to provide the adjusted current value set the Cursor at ...
-
Page 117: Manual Maintenance
Dr. Födisch Umweltmesstechnik 6 Operation and handling 6.4.4 Manual maintenance Under item manual maintenance the status maintenance can be adjusted manually: Check outputs 6.4.4.1 Manual maintenance Switch on/off display manual maintenance Manual maintenance HINT Display of status maintenance: ... -
Page 118: Calibration Parameter
Dr. Födisch Umweltmesstechnik 6 Operation and handling 6.4.5 Calibration parameter Under item Calibration parameter it is possible to enter manually parameters resulting from a reference measurement: enter calibration parameters A and D Selection of parameters to be adjusted Cal. Parameter Parameter A Parameter D ... -
Page 119: Error
Dr. Födisch Umweltmesstechnik 6 Operation and handling 6.4.6 Error Under item Error the last 15 errors can be regarded and deleted: View error list Clear error list 6.4.6.1 Error | View error list All recorded errors of the FMD 09 are saved in the error Error list list. -
Page 120: Info
Dr. Födisch Umweltmesstechnik 6 Operation and handling 6.4.7 Info Under item Info all device and software versions can be regarded: Serial number FMD 09 Software versions Info Dev.: FMD09 Dev.No.: 09007 Main.Ver. : 2.07 I/O Ver. : 1.13 ... -
Page 121: Shut Down
Dr. Födisch Umweltmesstechnik 7 Shut down Shut down Close lock valves Switch off pre-fuse WARNING Danger of burn! Parts of the probe can be heated up extremely by the measuring gas! Wear protective gloves! Disassembly The probe will be de-installed according to Fig. 7.1: Disassembly. Thereby the lock valves have to be closed first and then the power supply must be interrupted. -
Page 122: Disposal
Dr. Födisch Umweltmesstechnik 7 Shut down Disposal HINT The disposal of the FMD 09 has to be done according to locally valid environmental protection regulations. In case of disposal the FMD 09 has to be treated as hazardous waste. Page 44 of 54 Operation manual FMD 09 Version 1.0j... -
Page 123: Device Calibration
Dr. Födisch Umweltmesstechnik 8 Device calibration Device calibration General remarks As highly sensitive measuring device the FMD 09 is subject to slight variations of the used elements and materials. Therefore the FMD 09 has to be calibrated for the zero point before the first commissioning as well as after cleaning and reconstructing works at the probe. -
Page 124: Velocity And Flow Calibration
Dr. Födisch Umweltmesstechnik 9 Velocity and flow calibration Velocity and flow calibration General remarks Due to different, technological conditions at the concerning measuring places the detection of the measuring values is subject to most various influences. Variable influencing factors are e.g. channel cross-section, gas velocity, temperature and probe length. -
Page 125: Execution Of Calibration
Dr. Födisch Umweltmesstechnik 9 Velocity and flow calibration Execution of calibration In order to execute the reference measurements the following steps are recommended: check the zero point of the p-Transmitter (see 8 Device calibration Page 45). Execute reference measurement (in Germany it is done by an approved measuring institute ... -
Page 126: Maintenance
Dr. Födisch Umweltmesstechnik 10 Maintenance Maintenance 10.1 Maintenance HINT Warranty claims can only be granted if maintenance works have been done in accordance with the instructions. The maintenance works aim at: Preserving the measuring exactness of FMD 09, Granting the operating safety, ... -
Page 127: Error Messages And Error Elimination
Dr. Födisch Umweltmesstechnik 11 Error messages and error elimination Error messages and error elimination HINT If failures or errors occur, which cannot be eliminated by the measures described hereinafter, contact the Dr. Födisch Umweltmesstechnik AG (see cover inside). The FMD 09 supplies status signals for monitoring, signalling error states and error search. - Page 128 Dr. Födisch Umweltmesstechnik 11 Error messages and error elimination Message Meaning Measures mA-Input1 Failure at analogue input 1, Check wiring current signal < 4 mA or current signal Check current signal > 20 mA mA-Input2 Failure at analogue input 2, ...
-
Page 129: Error
Dr. Födisch Umweltmesstechnik 12 Technical data Technical data Feeding 230 / 110 VAC, 50 - 60 Hz, 24 VDC, 5W Degree of protection Feeding for antifreeze heating ( optional ) 230V AC, 500W Ready for operation after 5 to 15 minutes Probe Dimensions (W x H x D) ca. -
Page 130: Menu Guide
Dr. Födisch Umweltmesstechnik 13 Menu guide Menu guide Fig. 13.1: Menu guide FMD 09 Page 52 of 54 Operation manual FMD 09 Version 1.0j... -
Page 131: Spare Parts And Consumables
Dr. Födisch Umweltmesstechnik 14 Spare parts and consumables Spare parts and consumables In order to purchase spare parts and consumables please contact Dr. Födisch Umweltmesstechnik AG (see cover inside). Version 1.0j Operation manual FMD 09 Page 53 of 54... -
Page 132: Index
Dr. Födisch Umweltmesstechnik 15 Index Index A I A 40 Info 42 Absolute pressure 11, 21, 29, 30 Installation 16; Assembly 16 act. Time 41 Integration 28; Integration time 28; On/Off 28 Analogue input 27, 33 Integration time 28 Analogue output 21, 28, 38 Assembly 16 L ... - Page 133 Particle Flow Meter PFM 02 Operation manual Dr. Födisch Umweltmesstechnik AG Telephone: +49-34205-755-0 Zwenkauer Strasse 159 Fax: +49-34205-755-40 D - 04420 Markranstädt e-mail: info@foedisch.de Internet: www.foedisch.de...
- Page 134 Dr. Födisch Umweltmesstechnik Dr. Födisch Umweltmesstechnik AG Zwenkauer Strasse 159 D - 04420 Markranstädt Telephone: +49-34205-755-0 Fax: +49-34205-755-40 e-mail: info@foedisch.de Internet: www.foedisch.de Date of operation manual: 26.10.2016 File path: N:\PFM\PFM02\Bedienungsanleitung\en\en.pfm02 3.0e.doc © Dr. Födisch Umweltmesstechnik AG 2002 - 2016 This operation manual is not subject to the service of change. Distribution and duplication of the operation manual and all related documents as well as use and communication of its content are forbidden unless it has not been permitted explicitly in written way by Dr.
- Page 135 Dr. Födisch Umweltmesstechnik Content General remarks General advices ......................6 Advices for handling the manual ................6 Warning advices ......................7 Approved use ......................7 Qualified personnel ....................8 ...
- Page 136 Dr. Födisch Umweltmesstechnik 6.4.1.5 Setup | Digital contacts ................... 27 6.4.1.5.1 Setup | Digital contacts | Output mode ..............27 6.4.1.5.2 Setup | Digital contacts | Contact type ..............27 6.4.1.5.3 Setup | Digital contacts | Limit values ..............28 ...
- Page 137 Dr. Födisch Umweltmesstechnik Figures Fig. 3.1: Side view PFM 02..................11 Fig. 3.2: Probe profiles ....................12 Fig. 3.3: Control and display unit PFM 02 ..............12 Fig. 3.4: Measuring principle ..................13 Fig. 4.1: Entry and exit section ..................14 ...
-
Page 138: General Remarks
Dr. Födisch Umweltmesstechnik 1 General remarks General remarks General advices The product described by this manual has left the factory in a safety-related proper and checked state. In order to keep this state and to achieve a perfect and safe product opera- tion it is only allowed to be used in the way described by the manufacturer. -
Page 139: Warning Advices
Dr. Födisch Umweltmesstechnik 1 General remarks Warning advices Safety hints and warnings serve the avoidance of dangers for life and health of users or staff respectively damages to property. In the manual they are marked by here defined signal words. Moreover they are marked by symbols at the place of their appearance. The used signal words mean in this manual and on the product itself the following: WARNING means, that death, heavy injuries and / or substantial damages to property can... -
Page 140: Qualified Personnel
Dr. Födisch Umweltmesstechnik 1 General remarks WARNING Danger of injury by electric current! This device is operated by electricity. Following removal of the housing or guard, or after opening the system cabinet, certain parts of the device/system are accessible which may carry dangerous voltages. Therefore only suitably qualified personnel shall work on this device. -
Page 141: Advices For Delivery
Dr. Födisch Umweltmesstechnik 1 General remarks Advices for delivery The respective scope of delivery according to the valid contract is listed on the shipping documents accompanying the delivery. When opening the packaging, please check that the delivery is complete and undamaged. Please keep the packaging material in order to return the device, if necessary. -
Page 142: Safety Advices
Dr. Födisch Umweltmesstechnik 2 Safety advices Safety advices WARNING Risk of injury due to non-observance of safety advices! Operate the measuring device PFM 02 only in perfect state and under strict observance of the safety hints! Before the PFM 02 is allowed to be used, the complete manual must have been read and understood. -
Page 143: Structure And Function
Dr. Födisch Umweltmesstechnik 3 Structure and function Structure and function Structure The dust measuring device PFM 02 consists of: 1 in-situ-probe 1 weld-in sleeve 3.1.1 Probe The probe PFM 02 consists of a probe rod and a probe head. The probe rod is assembled in a sleeve and an insulator which insulates it electrically from the case. - Page 144 Dr. Födisch Umweltmesstechnik 3 Structure and function Circular profile Rectangular profile Wing profile Probe rod Insulator Probe rod Insulator Probe rod Insulator Fig. 3.2: Probe profiles The control and display 160 mm unit is integrated in the probe head. All measuring values, status information Dr.
-
Page 145: Function
Dr. Födisch Umweltmesstechnik 3 Structure and function Function The filter controller PFM 02 is a highly sensitive system for continuous, triboelectric in-situ filter monitoring. The qualitative monitoring of the exhaust gas is done hereby. The meas- uring gas is measured triboelectrically in the exhaust gas flow by means of the probe rod (see 3.2.1 Measuring principle Page 13). -
Page 146: Installation
Dr. Födisch Umweltmesstechnik 4 Installation Installation Selection of the measuring point WARNING Risk of measuring failures. The point of installation of the weld-in sleeve must be grounded Therefore the weld-in sleeve has to be integrated into the local potential equalisation! The place of installation of the probe has to meet the requirements of local valid guide- lines (e.g. -
Page 147: Installation Of The Weld-In Sleeve
Dr. Födisch Umweltmesstechnik 4 Installation Installation of the weld-in sleeve The weld-in sleeve of the PFM 02 is installed according to Fig. 4.2. The installation posi- tion of the probe is horizontal or vertical from top. weld-in sleeve (1“-sleeve to DIN 2986, material: high-grade steel 1.4301) Welding angle 2°...5°... -
Page 148: Electric Connection
Dr. Födisch Umweltmesstechnik 4 Installation probe head (3. insert probe) 4. Probe here bolting on! probe rod (2. align probe rod) weld-in sleeve (1“-sleeve to DIN 2986, material: high-grade steel 1.4301) cable entry exhaust gas wastegas flue / chimney Fig. 4.4: Installation rule Electric connection The electric connections of the PFM 02 are inside the probe head. -
Page 149: Operational Voltage (24 Vdc)
Dr. Födisch Umweltmesstechnik 4 Installation 4.4.1 Operational voltage (24 VDC) The terminals are plug-in terminals. For connecting the cable no special tool is required. Fig. 4.6: Electric connection 24 VDC PFM 02 (sum status with limit values) PFM 02 (single status without limit values) External power supply 24 VDC External power supply... -
Page 150: Operational Voltage (230/110 Vac)
Dr. Födisch Umweltmesstechnik 4 Installation The operating voltage 24 VDC is connected to terminals 1 and 2. It is additionally possible to connect the cable shield respectively a potential compensation to terminal PE. HINT In order to connect it to another operating voltage (110 VAC or 230 VAC) the optional power supply unit shall be used. -
Page 151: Status Signals
Dr. Födisch Umweltmesstechnik 4 Installation HINT The terminals 1 and 2 (24 VDC feeding) are not occupied at the 230/110 VAC type. 4.4.3 Status signals The status signals are made as potential-free contacts. They can be supplied either as single status signals or as sum status signals with limit values. The change-over between single and sum status signals is done in the menu under item 6.4.1.5.1 Setup | Digital contacts | Output mode Page 27. -
Page 152: Set Up
Dr. Födisch Umweltmesstechnik 5 Set up Set up 1. Switch on pre-fuse 2. Check measuring values shown for plausibility 3. Adjust measuring ranges respectively amplification, if necessary 4. Calibrate the device probe calibration (see 8 Device calibration page 36) 5. -
Page 153: Operation And Handling
Dr. Födisch Umweltmesstechnik 6 Operation and handling Operation and handling Display The PFM 02 shows in a Point-Matrix Display (128 x 64 Pixel) all information necessary for operating the measuring device: Present measuring value (text and graphic mode) Line diagram (ongoing display only in graphic mode) ... -
Page 154: Text Mode
Dr. Födisch Umweltmesstechnik 6 Operation and handling 6.1.2 Text mode Limit value On Off m³ Gain Fig. 6.2: Display in text mode In the text mode the momentary value of the dust content in the exhaust gas is shown as numerical value. -
Page 155: Enter Parameters
Dr. Födisch Umweltmesstechnik 6 Operation and handling Enter parameters The PFM 02 has a control respectively parametry level for entering specific parameters and for calibrating the device. You can get there by entering the valid device password: press Enter valid password ->... -
Page 156: Setup | Gain
Dr. Födisch Umweltmesstechnik 6 Operation and handling 6.4.1 Setup Under menu item Setup device-specific parameters can be configured: Gain Integration on/off & integration time Output mode Output ranges Digital contacts Language Password 6.4.1.1 Setup | Gain In this menu the gain of PFM 02’s electronic is adjusta- ble. -
Page 157: Setup | Output Mode
Dr. Födisch Umweltmesstechnik 6 Operation and handling The time interval for the integration time can be cho- Integration time sen out of 6 predefined values: 0,5 – 1 – 2 – 5 – 10 – 30 seconds 30 sec The chosen value for integration time is shown in the 0,5 sec upper part of the display (text and graphic mode). - Page 158 Dr. Födisch Umweltmesstechnik 6 Operation and handling Example input diagram in [%]: Range % The span value of the diagram range is freely se- lectable range 10 % ... 100 % End value 10 ... 1000 mg/m³. (10 – 100%) ...
-
Page 159: Setup | Digital Contacts
Dr. Födisch Umweltmesstechnik 6 Operation and handling 6.4.1.5 Setup | Digital contacts Digital contacts Output mode defines the kind of output of the status signals. Output mode Contact type determines the switch direction of the digital outputs for both limit values. Contact type Limit values The limit values fix from which measuring value on-... -
Page 160: Setup | Digital Contacts | Limit Values
Dr. Födisch Umweltmesstechnik 6 Operation and handling Output 1 Example Contact type Output 2 Standard: Normally closed N.C. N.O. 6.4.1.5.3 Setup | Digital contacts | Limit values Limit values The limit values determine from which measuring val- ue onwards the limit value shall be exceeded. -
Page 161: Setup | Language
Dr. Födisch Umweltmesstechnik 6 Operation and handling Example: Enter Limit 2 in [mg/m³] Limit 2 mg/m³ Standard: 50 mg/m³ Limit 2 mg/m³ 0 0 0 5 0 < > 6.4.1.6 Setup | Language Under item language the menu and display language is Language chosen. -
Page 162: Adjust
Dr. Födisch Umweltmesstechnik 6 Operation and handling 6.4.2 Adjust The triboelectric sensor as well as the analogue input and output can be adjusted respec- tively checked in the menu item Adjust: Adjust Sensor Check outputs 6.4.2.1 Adjust | Adjust sensor It starts the internal device calibration where the elec- Adjust sensor tronic is adjusted manually at the zero point. - Page 163 Dr. Födisch Umweltmesstechnik 6 Operation and handling Example: Digital output Failure Check Failure OPEN CLOSED By means of this item the analogue output can be Analog output checked. The current value adjusted in mA is provided at the analogue output (see 4.4 Electric connection Set 0 - 20 mA Page 16).
-
Page 164: Calibration Parameter
Dr. Födisch Umweltmesstechnik 6 Operation and handling 6.4.3 Calibration parameter In the menu item calibration parameter the exhaust gas to be measured can be as- signed to a media already known. Moreover it is possible to enter manually parameters resulting from gravimetric reference measurements. ... -
Page 165: Calibration Parameter | Target Value
Dr. Födisch Umweltmesstechnik 6 Operation and handling 6.4.3.2 Calibration parameter | Target value Entering a target value allows a simple adjustment of the dust content displayed in mg/m³ to the dust content existing in the measuring gas stream. For that purpose a known aver- age value of dust content is entered. -
Page 166: Error
Dr. Födisch Umweltmesstechnik 6 Operation and handling 6.4.4 Error In the menu item error the last 15 errors can be regarded and deleted: View error list Clear error list 6.4.4.1 Error | View error list View error list All recorded errors of PFM 02 are saved in the error list. -
Page 167: Shut Down
Dr. Födisch Umweltmesstechnik 7 Shut down Shut down WARNING Danger of burn! The probe rod can be heated up extremely by the measuring gas! Don’t touch the probe rod. Wear protective gloves during works at the probe. switch off pre-fuse Disassembly The probe is de-installed according to Fig. -
Page 168: Device Calibration
Dr. Födisch Umweltmesstechnik 8 Device calibration Device calibration General remarks As highly sensitive measuring device the PFM 02 is subject to slight variations of the used elements and materials. Therefore the PFM 02 has to be calibrated for the zero point be- fore the first putting into operation as well as after cleaning and reconstructing works at the probe. - Page 169 Dr. Födisch Umweltmesstechnik 8 Device calibration Probe head Cable entry Zero tube Earth ground Fig. 8.1: PFM 02 in the zero tube 1. Install PFM 02 in a zero tube 2. Switch on PFM 02 3. Start device calibration (see 6.4.2.1 Adjust | Adjust sensor Page 30) 4.
-
Page 170: Dust Calibration
Dr. Födisch Umweltmesstechnik 9 Dust calibration Dust calibration Generally Due to different, technological conditions at the concerning measuring places the detec- tion of the measuring values is subject to most various influences. Variable influencing factors are e.g. sort of dust, gas velocity and temperature. The dusts to be measured vary i.e. -
Page 171: Execution Of The Calibration
Dr. Födisch Umweltmesstechnik 9 Dust calibration Execution of the calibration 9.3.1 Generally advices The basis of the triboelectric dust measurement is the measurement of the charge intensi- ty of the dust particles. Apart from diverse physical effects the intensity is defined by the plant itself, e.g. -
Page 172: Dust In
Dr. Födisch Umweltmesstechnik 9 Dust calibration 1 0 Determine parameter A and D out of the correlation. Enter parameter A and D into PFM 02 (see 6.4.3 Calibration parameter Page 32). 9.3.3 Dust in % In order to execute the gravimetric calibration the following steps are recommended: ... -
Page 173: Maintenance
Dr. Födisch Umweltmesstechnik 10 Maintenance Maintenance 10.1 Maintenance HINT Warranty claims can only be granted if maintenance works have been done in accordance with the instructions. The maintenance works aim at: Preserving the measuring exactness of PFM 02, Granting the operating safety, ... -
Page 174: Error Messages And Error Elimination
Dr. Födisch Umweltmesstechnik 11 Error messages and error elimination Error messages and error elimination HINT If failures or errors occur, which cannot be eliminated by the measures de- scribed hereinafter, contact the Dr. Födisch Umweltmesstechnik AG (see cover inside). The PFM 02 supplies status signals for monitoring, signalling error states and error search. -
Page 175: Maintenance/Failure
Dr. Födisch Umweltmesstechnik 11 Error messages and error elimination 11.2 Maintenance/Failure The operating state Maintenance/Failure occurs under the following points: Message Meaning Measures 0 : 0 – act. is the present time of PFM 02 (is set none Time back to 0 : 0 when it is switched on) –... -
Page 176: Technical Data
Dr. Födisch Umweltmesstechnik 12 Technical data Technical data Feeding 230 / 110 VAC, 50 – 60 Hz, 24 VDC, 3 VA Degree of protection Ready for operation After 5 to 15 minutes Probe Dimension (W x H x D) 160 x 130 x 480 mm Immersion depth 300 mm (standard ->... -
Page 177: Menu Guide
Dr. Födisch Umweltmesstechnik 13 Menu guide Menu guide Fig. 13.1: Menu guide PFM 02 Version 3.0e Operation manual PFM 02 Page 45 of 47... -
Page 178: Spare Parts & Consumables
Dr. Födisch Umweltmesstechnik 14 Spare parts & consumables Spare parts & consumables In order to purchase spare parts and consumables please contact Dr. Födisch Umwelt- messtechnik AG (see cover inside). Page 46 of 47 Operation manual PFM 02 Version 3.0e... -
Page 179: Index
Dr. Födisch Umweltmesstechnik 15 Index Index Keys 23 A L A 33 act. Time 35 Language 30 Adjust 21, 24, 31, 38 Limit 1 29, 31 Amplification 25 Limit 2 28, 29, 30, 31 Analog output 32 Limit Value 28 ATTENTION 7, 11, 12, 16, 31 limit values 20, 21, 28, 29 C ...
Need help?
Do you have a question about the MGA 12 and is the answer not in the manual?
Questions and answers