Baby Jogger City Mini 2 - Pushchair Manual
- User manual ,
- Assembly instructions manual (147 pages) ,
- Instructions for use manual (53 pages)
Advertisement
- 1 FEATURES
- 2 FRAME
- 3 FRONT WHEEL
- 4 SWIVEL FEATURE
- 5 REAR WHEELS
- 6 BRAKE
- 7 CANOPY
- 8 ADJUSTING SAFETY HARNESS
- 9 USING SAFETY HARNESS
- 10 RECLINE THE SEAT
- 11 LEG SUPPORT
- 12 FOLDING
- 13 BASKET REMOVAL
- 14 REMOVING THE SEAT PAD
- 15 CARE AND MAINTENANCE
- 16 Limited Lifetime Warranty
- 17 IMPORTANT SAFETY INSTRUCTIONS
- 18 Documents / Resources
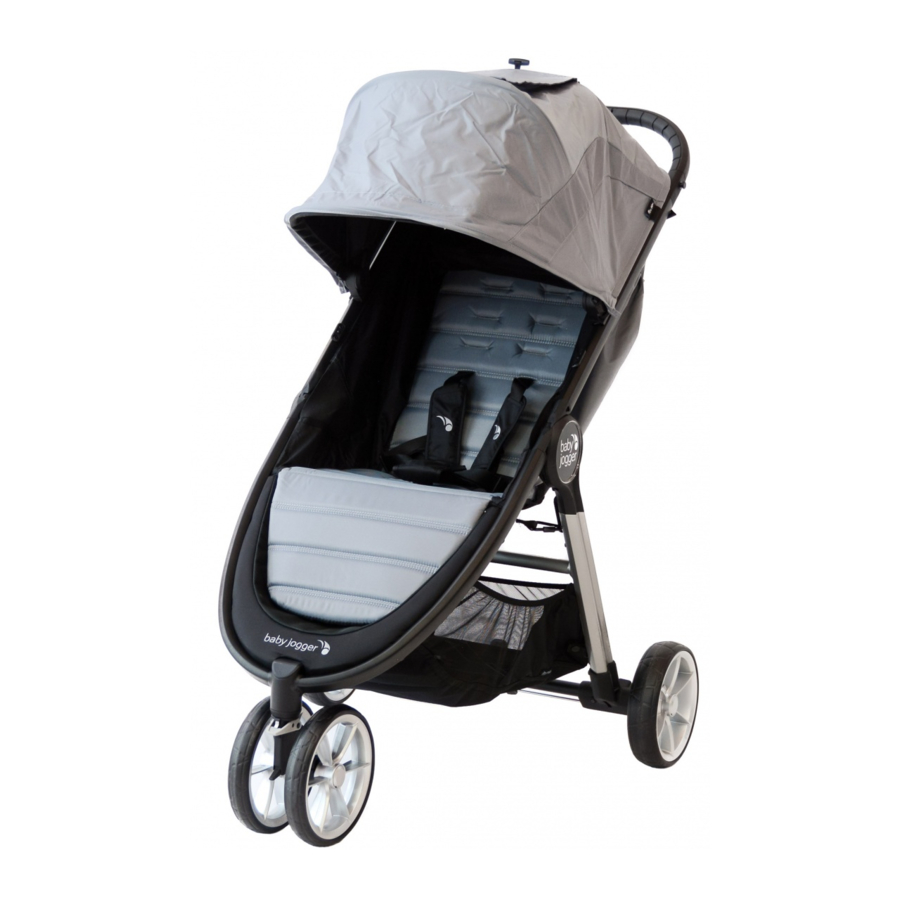
FEATURES

- Handlebar
- Canopy
- Auto-Lock
- Harness Pads
- Harness Buckle
- Crotch Strap Pad
- Fold Strap
- Rear Wheel
- Rear Wheel Release Button
- Parking Brake
- Leg Support
- Footwell
- Storage Basket
- Front Wheels
- Swivel/Lock
- Front Wheel Release Button
- Seat Recline Strap
FRAME
- Unpack the pushchair frame from the box and set the wheels aside. Unlock the pushchair by pulling the auto-lock lever.

- Unfold the pushchair by pulling the handlebar away from the frame. Then lift the handlebar away from the seat. The pushchair will lock into place and you will hear a click.

- Place the pushchair in the upright position.


Ensure that all the locking devices are engaged before use.
FRONT WHEEL
- Installation
- Lay pushchair on its back so the handlebar is resting on the floor.
- Attach the front wheel by sliding it into the front wheel mount until it clicks. Gently pull on the front wheel to make sure it is properly attached.

- Removal
- While pressing the front wheel release button, gently slide the front wheel out of the front wheel mount.

- While pressing the front wheel release button, gently slide the front wheel out of the front wheel mount.


SWIVEL FEATURE
- Push the swivel lock button down to lock the front wheel to a fixed position.

- Press the swivel lock button up to allow the front wheel assembly to swivel.


When loading and unloading child, lock the front wheel in a fixed position. Although the front wheel of your pushchair locks, it is not intended for jogging or exercise purposes.
REAR WHEELS
- Installation
- Align the rear wheel axle with the wheel mount on the pushchair frame and insert it into the wheel mount until it locks into place. You will hear a click.

- Gently pull on the rear wheel to make sure it is properly attached.

- Align the rear wheel axle with the wheel mount on the pushchair frame and insert it into the wheel mount until it locks into place. You will hear a click.
- Removal
- While pressing down on the wheel release button, gently slide the rear wheel out of the wheel mount.

- While pressing down on the wheel release button, gently slide the rear wheel out of the wheel mount.


BRAKE
- To lock the brakes: push the brake lever down to engage the brakes.

- To release the brakes: lift the brake lever up.


Lock the brakes before loading and unloading your child and whenever the pushchair is not moving.
CANOPY
- Attach the canopy to the frame by sliding the canopy onto one of two mounting brackets. To remove, slide canopy off of mounts.
NOTE: When using a City Go i-Size/ Graco or Britax car seat, the canopy must be in the top position. For all other carseats, canopy must be removed.


- Snap the two snaps to the pushchair frame.

- Zip the back of the seat to the canopy top. Attach the 2 fastening strips on the side of the canopy.

- Pull forward to open canopy and push backwards to close canopy.

- There are two canopy windows, a top one and back one. To use them, roll the shade up towards the top and secure with the elastic and button.


ADJUSTING SAFETY HARNESS
- From the back of the seat, undo the fastening strip and open the pocket to locate the plastic square stopper. Turn stopper and pass through the openings in the PE board and seat fabric.

- Reinsert stopper at seat opening closest to child's shoulders. Pass back through seat fabric and PE board. Tug on strap to ensure stopper is locked. Repeat on both sides.


Avoid serious injury from falling or sliding out. Always properly adjust and fasten safety harness.
Always use the crotch strap in combination with the shoulder straps and waist belt.
- Slide the harness pads up to access plastic guide on strap.

- Hold the plastic guide and pull strap to tighten or loosen.


USING SAFETY HARNESS
- Insert side strap buckle into harness buckle on both sides.

- Insert connected harness and side strap buckles into the sides of the crotch buckle.

- Press button on crotch buckle to release.


RECLINE THE SEAT
- Pinch the clamp behind the seat, and slide it down to desired recline.

- Pull seat down on both sides to match the clamp position. Reverse steps to return to the upright position.


When making adjustments to the pushchair seat, make sure child's head, arms, and legs are clear of moving seat parts and pushchair frame.
- For extra ventilation, roll up the seat back flap and secure with elastic and button.


LEG SUPPORT
- To use the leg support, lift the front of the seat pad.


- Rotate the support arm out and lower the seat pad. Lock the support arm.


- To lower leg support, reverse the steps.


FOLDING
- Remove your child from the seat.
- Disengage front wheel swivel locks.
- Remove all attachments and all items from basket.
To prevent injury, remove Child Tray or Belly Bar accessory when folding or unfolding the stroller.

- Insert finger into loop and pull up, then
- Pull up on the "Pull to Fold" folding handle and let the frame collapse.
- Make sure the auto-lock lever clicks into place.


BASKET REMOVAL
- From the front of the pushchair, unsnap the 2 snaps and pull the straps out of foot well.

- Lift basket off the hook.

- From the back, lift the top of basket off the tab on both sides of frame.

- Remove the strap from the C clamp on both sides of frame.


REMOVING THE SEAT PAD
- Flip the pushchair over to expose the seat bottom.

- Unfasten the 2 fastening strips and pull then out of the pushchair frame.

- Unfasten the fastening strip and pull them out of the sides of the pushchair frame.

- Unscrew the right carabiner hook and pull strap out from the seat pad.

- Unfasten the 2 fastening strips and pull then out of the pushchair frame.
- Flip the seat back over on its wheels. Pull seat fabric up and off of buttons.

- Starting from the bottom, slide the seat pad out from the stroller frame on both sides.

- From the top, slide the seat pad out of the frame on both sides.

- Remove seat fabric.


Reverse the steps to reattach the seat pad to the frame.
CARE AND MAINTENANCE
To preserve the longevity of your pushchair, it is important to perform simple, regular maintenance. From time to time, make sure that the joints and folding areas are still in good condition. If you hear any squeaking or feel tension, you can take your pushchair to a local bike shop for added lubrication. All repairs should only be carried out by an authorized dealer.
WASHING
Seat Fabric
- You can hand wash your pushchair's seat in cold water with a mild detergent.
- Be sure to remove the metal frame and PE boards from the seat before washing.
- Do not use solvents, caustic or abrasive cleaning materials.
- To minimize shrinkage, simply reattach the seat to the frame to dry.
- Do not press, iron, dry clean, tumble dry or wring the fabric.
- If the seat covers need to be replaced, only use parts from a Baby Jogger Authorized Dealer. They are the only ones that are guaranteed to have been safety tested and designed to fit this seat.
Plastic/Metal Parts
- Wipe clean using a mild soap and warm water.
- You must not remove, dismantle or alter any part of the seat folding mechanism or brakes.
Wheel Care
- The wheels can be cleaned using a damp cloth. They will need to be dried completely with a soft towel or cloth.
STORING
- Sunshine can fade seat fabric and dry out tires, so storing your pushchair indoors will prolong its good looks.
- DO NOT store outside.
- Ensure that the pushchair is dry before storing for prolonged periods.
- Always store the pushchair in a dry environment.
- Store the pushchair in a safe place when not in use (i.e. where children cannot play with it).
- DO NOT place heavy objects on top of the pushchair.
- DO NOT store the pushchair near a direct heat source such as a radiator or fire.
Limited Lifetime Warranty
If your pushchair was purchased outside of the United States, please contact the distributor in the country nearest you. Their contact information can be found on our website at http://www.babyjogger.com/retailers/#international
NOTE: When contacting Baby Jogger distributor regarding your pushchair, please have your pushchair' s serial number ready. It can be located just below the hub on the outside of rear leg.

IMPORTANT SAFETY INSTRUCTIONS

Read carefully and keep for future reference.
Your child's safety may be affected if you do not follow these instructions.
- Never leave the child unattended.
- Always use the restraint system.
- This product is not suitable for running or skating
- Ensure that all the locking devices are engaged before use.
- To avoid injury, ensure that the child is kept away when unfolding and folding this product.
- To prevent injury, remove Child Tray or Belly Bar accessory when folding or unfolding the stroller.
- Do not let the child play with this product.
ADDITIONAL SAFETY INFORMATION
- This pushchair seats one passenger. NEVER allow more than one child at a time on this pushchair.
- The seat unit is suitable for one child from birth up to 22 kg.
![]()
- Total weight load recommended for this pushchair is 28 kg. 22 kg in the seat, 1 kg in the seat back pocket, and 4.5 kg in the basket. Excessive weight may cause a hazardous unstable condition to exist.
- For car seats used in conjunction with a chassis, this vehicle does not replace a cot or a bed. Should your child need to sleep, then it should be placed in a suitable pram body, cot or bed.
- Any load attached to the handle and/or on the back of the backrest and/or on the sides of the vehicle will affect the stability of the vehicle.
- For new born babies we recommend always to use the most reclined seat position.
- Lock the brakes before loading and unloading your child and whenever the pushchair is not moving.
- Ensure that the brake is properly engaged by moving the pushchair slightly back and forth.
- Pushchair is not meant to be used for transporting children up or down stairs or escalators. Damage resulting to pushchair will not be covered under warranty.
- Accessories which are not approved by Baby Jogger shall not be used.
- Watch out for cars - never assume that a driver can see you and your child.
- The passenger shall remain seated (no standing in the pushchair).
- Use only replacement parts supplied or approved by Baby Jogger.

babyjogger.com

Documents / ResourcesDownload manual
Here you can download full pdf version of manual, it may contain additional safety instructions, warranty information, FCC rules, etc.
Advertisement


Need help?
Do you have a question about the City Mini 2 and is the answer not in the manual?
Questions and answers