Table of Contents
Advertisement
Quick Links
Advertisement
Chapters
Table of Contents

Subscribe to Our Youtube Channel
Related Manuals for Power Acoustik PD-710B


Summary of Contents for Power Acoustik PD-710B
- Page 1 User Manual of Product 1: Power Acoustik PD-710B Single-DIN Multimedia Source with Detachable 7-Inch Oversize LCD Touchscreen including Bluetooth 2.0 User Manual of Product 2: Metra 99-6000 Single DIN Installation Kit for 1974-2003 Chrysler, Dodge, Eagle, Jeep, and Plymouth Vehicles...
- Page 2 PD-710/ PD-710T In-Dash 7 ” Monitor Touch Screen DVD/CD/MP3/MP4 AM/FM Radio Built-in TV tuner Owner’s Manual Take the time to read through this owner’s manual. Familiarity with installation and operation procedures will help you obtain the best Performance from your new DVD-receiver.
-
Page 3: Operation Precautions
WARNING! To promote safety, certain functions are disabled unless the parking brake is on. The Unit is designed to detect parked status and must be connected to the power supply side of the parking brake switch. Improper connection or use of his connection may violate applicable law and may result in serious injury or damage. -
Page 4: Table Of Contents
CONTENTS WARNING! ......................... 2 OPERATION PRECAUTIONS ..................2 Accessories ........................ 4 INSTALLATION / UN-INSTALLATION ................ 5 WIRING CONNECTIONS ................... 6 Front pane ........................8 REMOTE CONTROL ....................10 REMOVE BATTERY ....................12 MAIN MENU ......................13 ◆ RADIO PLAYER ....................13 ◆... -
Page 5: Accessories
Accessories Package contains the following accessories for installation and operation of the unit. (1) Washer, Spring 1 each Washer, M5 Nut (2) Mounting Strap (3) Bolt (4) Screw4*6 (5) Mounting Collar (6) Release Key (7) Screw 5*20 Power cable Speaker cable Remote Control Warranty card User Manual... -
Page 6: Installation / Un-Installation
INSTALLATION / UN-INSTALLATION Note Before starting installation of the unit, make sure the wiring is connected properly. Use only the parts provided with the unit to ensure proper installation. The use of unauthorized parts may cause malfunction. Install the unit where it does not get in the driver’s way and will not injure the passenger in case there is a sudden stop, like an emergency stop. -
Page 7: Wiring Connections
WIRING CONNECTIONS NOTE: Never connect cable to the system while it is connected to the battery power. Whenever the unit is disconnected from the battery, the preset memory will be erased and the unit will go back to its factory defaults. Note: To watch video the parking wire should be connected to break signal. - Page 8 Note: Only use groundless loudspeakers. Use only loudspeakers of minimal 40Watt, using fewer watts may result in damaging your loudspeakers at higher volumes. Use 4~8 Ω (Ohm impedance) loudspeakers only; using higher or lesser impedance may damage the unit. Do not use 3-cable loudspeakers and do not connect the loudspeakers minus to the car body (GND). The is using a BTL circuit and each loudspeaker must be connected with insulated cables according the unit diagram.
-
Page 9: Front Pane
Front pane Inner panel 1. IR Sensor IR Remote control signal receiving window. Max distance is 6-8 meters, 45 angels. 2 VOL- button Press to decrease volume level. - Page 10 3 VOL+ button Press to increase volume level. 4. POWER/MUTE Button Press it to turn on the unit, press it again to turn the unit off. Short press it to MUTE the volume output, press it again to resume volume when the power is 5.
-
Page 11: Remote Control
REMOTE CONTROL 1: MODE 2: POWER 3: BAND/RANDOM 4: ENTER 5: UP/DOWN/LEFT/RIGHT 6: EJECT 7: STEREO/MONO 8: P.SCN/RPT 9: BACKWARD/SEEK- FAST BACKWARD 10: LOUD 11: OSD 12: PBC/STOP 13: Digit numbers 14: Play/Pause 15: MUTE 16: MENU 17: SUBTITLE 18: SETUP 19: ANGLE 20: INT 21: VOLUME PLUS... - Page 12 / seek- buttons In DVD mode, Press button to skip to the previous track. Press and hold button for two seconds to activate fast reverse (REW) search in a track. In RADIO mode, press button to start searching automatic, press and hold for two seconds to start manual searching.
-
Page 13: Remove Battery
26. AUDIO/GOTO button In DVD mode press it to select the audio language. In VCD mode, press it to select the sound track in the sequence of MONO L =>MONO R =>STEREO. Go to: in DVD mode,press and hold for 2 seconds to show TIME SEARCH menu, select number and confirm to go to certain position directly. -
Page 14: Main Menu
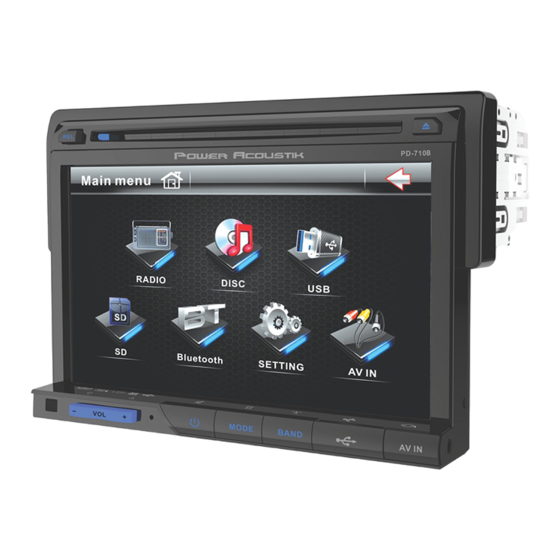
MAIN MENU The best way to discover the program is to explore each screen in detail, and to find out how to move from one to another. Read this chapter for a guided tour. Unit starts by displaying the Main menu. This is the root of the screen hierarchy, and you can simply access all features by tapping on the touch screen buttons. -
Page 15: Dvd Player
◆ DVD PLAYER To start DVD Player, tap on DVD button from main menu screen. TOUCH SCREEN MENU You will not see any buttons while DVD is played. Buttons will appear when you tap on TFT screen. Tap the screen again to hide the buttons. Insert DVD disc insert VCD disc NOTE... -
Page 16: File Disc/Usb/Sd/Mmc Interface
In DVD mode touch it to enter TITLE MENU (Enable only if the DVD disc with title menu). Touch it to select previous or next track. ◆File DISC/USB/SD/MMC interface When a file disc, USB or a memory card is played, the screen will show following interface: Mute the sound. -
Page 17: Av-In Mode
◆AV-IN Mode To start AV-IN Mode, tap on AV-IN button from main menu screen. Connect the external audio/video signal source to this unit. Select AV-IN mode in the main menu or by pressing repeat Mode button on the front panel. Note: If there is no external video input, the TFT displays “NO SIGNAL”. -
Page 18: Display Control
DISPLAY CONTROL Tap DISPLAY button to show DISPLAY menu. SCREEN Screen setting 16:9, 4:3,FULL Backlight Backlight setting LOW, MID, HIGH RADIO CONTROL Tap RADIO button to show RADIO menu. Set AREA:EUROPE-U.S.A-SOUTH AREA AMERICA-RUSSIA STEREO Set STEREO ON or OFF LOCAL Set LOCAL ON or OFF GENERAL CONTROL Tap GENERAL Button to show GENERAL menu. - Page 19 [1]. Subtitle Lang setting: With this option you can select the preferred language for the subtitles. When the selected language is recorded on the disc then this language will automatically be shown. If not, the first language recorded on the disc is displayed. [2].Audio Lang setting: With this option you can select the preferred language for the audio output.
-
Page 20: System Information
[7] NTSC/ PAL: Select this menu item to set up your preferred video output format. PAL is commonly used in Europe, NTSC is commonly used in the USA and Japan. Auto is commonly used. [8] DEFAULT: Factory reset. Set all values to Factory default values including memory and preset stations. -
Page 21: Tv Section (For Pd-710T Only)
TV SECTION (For PD-710T only) Connect a TV antenna to the TV antenna jack of the unit. Select TV mode; press on the center of the touch screen, and following interface will be display: 1. In TV mode, press the Play/Pause buttons on remote once to enter TV menu setting, or press touch-screen to choose TV MENU icon to enter TV MENU. - Page 22 Select this menu item is to set TV system: SECAM => NTSC =>PAL ,press NTER button on the remote or tap the screen to select. Audio Select this menu item is to set the TV sound system: When system setting PAL, press ENTER on remote or tap the screen button to select TV sound system: D/K=>M/N=>...
-
Page 23: Notes On Disc
NOTES ON DISC Only use groundless loudspeakers. Use only loudspeakers of minimal 40Watt, using fewer watts may result in damaging your loud speakers at higher volumes. Use 4~8 Ω (Ohm impedance) loudspeakers only; using higher or lesser impedance may damage the unit. -
Page 24: Troubleshooting
TROUBLESHOOTING Symptom Cause Remedy Power does not turn Replace with fuse of the same amperage. Fuse is blown If the fuse blows again, consult your store (No sound is of purchase produced.) In correct wiring Consult your local retailer. 1. Turn off the unit. 2. - Page 25 TROUBLESHOOTING SYMPTOM CAUSE SOLUTION IF THE POWER SUPPLY IS PROPERLY THE CAR IGNITION IS CONNECTED TO THE CAR NOT ON. ACCESSORY SWITCH THE IGNITION KEY NO POWER TO “ACC”. THE FUSE IS BLOWN. REPLACE THE FUSE. DISC CANNOT BE PRESENCE OF DISC REMOVE THE DISC IN THE PLAYER LOADED.
-
Page 26: Technical Specifications
TECHNICAL SPECIFICATIONS General Power supply: 11~16V DC Current consumption: max. 15 A Maximum power output: 52W x 4 channels (max) DVD/SVCD/VCD/HDCD/MP3/MP4/VIDEO/CDDA/Picture Compatible formats: CDCD-R/-RW/DVD±R/±RW playback Dimensions (W x D x H) / 165*178*50 mm/2 kg weight: Working temperature -10℃ - +60℃ range: ESP function: 10 sec. - Page 27 INSTALLATION INSTRUCTIONS FOR PART INST-6000 APPLICATIONS Application Overview Chrysler/Ford/Mitsubishi 1974-2003* INST-6000 99-6000 99-6700 Chrysler/Dodge/Eagle/Jeep/ Crysler/Eagle/Ford/ Plymouth 1974-2003** Jeep 1974-2003** 99-6500 99-7000 INSTALLATION INSTRUCTION Chrysler/Dodge/Eagle/Ford/ Dodge/Eagle/Mitsubishi/ Jeep/Lincoln/Mercury/ Plymouth 1985-1996** • 99-6000 • 99-6501 • 99-7000 Plymouth 1974-2003** • 99-6500 • 99-6700 99-6501 Chrysler/Dodge/Eagle/Jeep/ Lincoln/Mercury/Plymouth...
- Page 28 INST-6000 99-6000 Contents Applications Section 1 Installation Instructions Section Chrysler/Dodge/Jeep/ Chrysler Dodge Jeep (continued) Cirrus 1995-2000 Cherokee 1997-2001 Lancer 1986-1989 Concorde 1993-1997 Magnum XE Grand Cherokee Plymouth 1974-2003 Cordoba 1975-1983 1978-1997 1993-1995 - 99-6000** ..........1.0 E-Class 1983-1993 Mirada 1979-1989 Grand Cherokee 99-6000 5th Avenue...
- Page 29 99-6000 Kit Preparation 99-6000 Chrysler Cirrus 1995- Table of Contents Chrysler/Dodge/Eagle/ 2000/Sebring 99-6000 Jeep/Plymouth (convertible) 1996-2000, Dodge Stratus (Except: Grand Cherokee 1993-1995, Cirrus, Kit Preparation 1995-1999/Plymouth Stratus, Sebring, Sebring convertible, and Avenger) – Chrysler/Dodge/Eagle/Jeep/Plymouth** ....1.1 Breeze 1996-1999 (Except: Grand Cherokee 1993-1995, Cirrus, Stratus, Sebring, 1.
- Page 30 Kit Preparation 99-6000 Kit Assembly 99-6000 99-6500 Chrysler Sebring/Dodge DIN radio provision Section 2 Avenger 1995-2000 1. Slide the DIN cage into the kit and secure Chrysler/Dodge/Eagle/ Cut and remove all mounting tabs on the by bending the metal locking tabs down. Ford/Jeep/Lincoln/Mercury/ the shaded tabs.
- Page 31 99-6500 Kit Preparation 99-6500 Applications Table of Contents Chrysler/Dodge/Eagle/Jeep/ 99-6500 Plymouth 1974-2003 Chrysler Dodge Jeep (continued) (continued) Concorde 1993-1997 Magnum XE Wrangler 1997-2002 Kit Preparation 1. Cut and remove all Cordoba 1975-1983 1978-1979 E-Class 1983-1993 Mirada 1979-1983 Lincolin mounting tabs on - Chrysler 1975-2000** .........
- Page 32 Kit Assembly 99-6500 99-6501 DIN radio provision Section 3 1. Remove the metal “DIN” cage from your 4. Slide the aftermarket radio into the cage Chrysler/Dodge/Eagle/Ford/ aftermarket radio. until secure. (Figure A) Jeep/Lincoln/ Mercury/ 2. Slide the cage into the kit and secure by Plymouth 1974-2003 5.
- Page 33 99-6501 Kit Preparation 99-6501 Applications Table of Contents Chrysler/Dodge/Eagle/ 99-6501 Jeep/Plymouth Chrysler Dodge Mercury (continued) Concorde 1993-1997 Diplomat 1976-1989 Colony Park (Except: Grand Cherokee 1993-1995, Kit Preparation Cordoba 1975-1983 Durango 1998-2000 1979-1989 Sebring and Avenger) E-Class 1983-1993 Dynasty 1988-1993 Cougar 1983-1988 –...
- Page 34 Kit Preparation 99-6501 Kit Assembly 99-6501 Ford/Lincoln/Mercury ISO DIN radio provision 1979-1989 1. Snap the ISO DIN faceplate into the radio housing and then slide the aftermarket radio into the back of the kit. 1. Cut and remove all mounting tabs on the Radio Housing EXCEPT the 2.
- Page 35 Kit Assembly 99-6501 ISO DIN radio DIN radio provision provision 1. If a surface-mount installation 4. Slide the DIN cage into the radio 7. Locate the factory wiring is desired, insert the spacer into housing and secure by bending harness in the dash. Metra 4.
- Page 36 99-6700 Dash Disassembly 99-6700 Applications Applications Section 4 Chrysler/Eagle/Ford/ Chrysler Avenger 1995-2000 1982-1983 Plymouth Reliant 1981-1989 1978-1997 Cirrus 1995-2000 Caravan 1984-1990 1983-1987 Acclaim 1989-1995 Scamp 1983-1984 Volare 1976-1980 Jeep 1974-2003 Concorde 1993-1997 Caravan 1991-1995 Breeze 1996-1999 Sundance 1987-1994 Voyager 1984-1990 Cordoba 1975-1978 Caravan 1996-2000 Eagle...
- Page 37 Dash Disassembly 99-6700 Chrysler/Dodge/Eagle/ Chrysler Cirrus 1995-2000/ Chrysler Sebring/Dodge Jeep/Plymouth Sebring 1996-2000, Avenger 1995-2000 (convertible) Dodge Status 1995-2000, (Except: Grand Cherokee 1993-1995, Cirrus, Stratus, 1. Cut and remove Sebring, Sebring convertible, and Avenger) Plymouth Breeze 1996-1999 all mounting tabs on the 1.
- Page 38 Kit Assembly 99-6700 DIN radio provision Notes 1. Slide the DIN cage into the kit and secure by bending the metal locking tabs down. 2. Slide the aftermarket radio into the cage until secure. (Figure A) 3. Locate the factory wiring harness in the dash.
- Page 39 99-7000 Dash Disassembly 99-7000 Table of Contents Applications Section 5 Dodge/Eagle/Mitsubishi/ Dodge Eagle Mirage 1989-1992 - Mitsubishi Mighty Max pick-up 1987-1996 ..5.2 (continued) Colt 1987-1988 Talon 1990-1994 Montero 1987-1991 - Mitsubishi Mirage/Dodge Colt 1985-1988 ..5.0-5.1 Colt 1989-1992 Sigma 1989-1990 Plymouth 1985-1996 D-50 pick-up Mitsubishi...
- Page 40 Dash Disassembly 99-7000 Dodge Colt 1987-1988, Dodge Colt/Eagle Summit/Mitsubishi Mitsubishi Mirage Mirage 1989-1992 1985-1988 1. Remove (2) Phillips screws 4. Snap the filler bar onto the 5. Cut and remove all mounting tabs on bracket Set #1 EXCEPT above the climate controls. equalizer housing and slide the 4.
- Page 41 Dash Disassembly 99-7000 Dodge D-50 pick-up 1987-1993 Dodge Raider/Mitsubishi Mitsubishi Mighty Max 1987-1996 Montero 1987-1991 1. Remove (2) screws located tabs on bracket Set #1 EXCEPT 1. Remove the climate control knobs and then disconnect the wiring. (Figure A) under the A/C vents. Remove the tabs “F”.
- Page 42 Dash Disassembly 99-7000 Eagle Summit 1992-1996, Mitsubishi Expo Dodge Raider/Mitsubishi (wagon) 1992-1995, Plymouth Colt Vista 1992-1994 Montero 1987-1991 7. Snap the filler bar onto the equalizer housing and 1. Remove (2) screws from the top 4. Remove the screws securing the 6.
- Page 43 Dash Disassembly 99-7000 Eagle Talon/Mitsubishi Mitsubishi Galant 1985-1988 Eclipse/Plymouth Mitsubishi Sigma 1989-1990 Laser 1990-1994 1. Unclip the radio trim bezel and remove. 4. Cut and remove all mounting tabs on bracket Set #1 EXCEPT tabs “H”. 1. Unclip the radio trim 2.
- Page 44 Dash Disassembly 99-7000 Mitsubishi Galant Mitsubishi Van 1989-1993 1987-1990 1. Unclip the radio trim 1. Remove (3) screws from the bottom edge of the this step and mounting the pocket under the radio bezel and remove. dash trim bezel and remove the bezel. housing during installation.
- Page 45 Kit Assembly 99-7000 2-Shaft radio provision DIN radio provision 1. Attach the faceplate to 1. Cut and remove the shaft supports. radio housing. 2. Slide the DIN cage into the radio 2. Slide the aftermarket radio into housing and secure by bending the the kit and secure with shaft nuts.
- Page 46 Dash Disassembly INST-6000 Table of Contents Section 6 Dash Disassembly - Chrysler LeBaron 1976-1981, Dodge - Dodge Pickup/Ramcharger 1974-1980, - Chrysler Cirrus/Dodge Stratus 1995-2000, Diplomat 1976-1989/Aspen 1976-1980, Plymouth Trailduster 1974-1980 .... 6.6 99-6000, 99-6500, 99-6501 Plymouth Breeze 1996-1999 ....6.1 Plymouth Gran Fury 1975-1985/ - Dodge Pickup/Ramcharger 1974-1980, - Chrysler Concorde/LHS 1995-1998, Dodge...
-
Page 47: Chrysler Cirrus/Dodge Stratus 1995-2000
Dash Disassembly INST-6000 Chrysler Cordoba/ Chrysler Cordoba 1979- Chrysler Cirrus/Dodge Stratus 1995-2000, 1983/Imperial 1982-1983/ Plymouth Fury 1975-1978, Plymouth Breeze 1996-1999 Newport 1980-1981/New Dodge Charger 1974-1978, Yorker 1980-1981, Dodge 1. Using a flat-blade Magnum XE 1978-1979 Mirada 1980-1983/St. screwdriver, pry out on the edges of the radio Regis 1979-1981 1. -
Page 48: Chrysler E-Class 1983-1984/Lebaron 1982-1985/New Yorker 1983-1987, Dodge Aries 1981-1989/400 1982-1983/600
Dash Disassembly INST-6000 Chrysler E-Class 1983-1984/ Chrysler 5th Avenue/ Chrysler Laser/Dodge LeBaron 1982-1985/New Imperial 1990-1994/New Daytona 1984-1989 Yorker 1983-1987 Yorker 1988-1995, Dodge 2. Pull out on the Dodge Aries 1981-1989/400 Dynasty 1988-1993 lower edge of the 1982-1983/600 1983-1987 bezel and remove. 1. -
Page 49: Chrysler Lebaron Gts 1985-1994, Dodge Lancer 1985-1989
Dash Disassembly INST-6000 Chrysler LeBaron GTS Chrysler LeBaron 1976- Chrysler Sebring/Dodge 1981, Dodge Diplomat 1985-1994, Dodge Lancer Avenger 1995-2000 1976-1989/Aspen 1985-1989 1. Unclip the radio trim 1976-1980, Plymouth Gran bezel and remove. 1. Remove (5) torx-head screws from the top of the Fury 1975-1985/Volare dash trim bezel. -
Page 50: Chrysler Town & Country 1990-1995, Dodge Caravan/Plymouth Voyager 1984-1990
Dash Disassembly INST-6000 Chrysler Town & Country Dodge Caravan/Plymouth Dodge Caravan/Chrysler Voyager 1991-1995 Town & Country/Plymouth 1990-1995, Dodge Voyager 1996-2000 Caravan/Plymouth 1. Remove the cigarette lighter. Voyager 1984-1990 3. Unclip the dash trim bezel, disconnect the 2. Using a panel 1. -
Page 51: Dodge Dakota 1987-1996
Dash Disassembly INST-6000 Dodge Dakota Dodge Dakota Dodge Durango 1987-1996 1997-2000 1997-2000 1. Remove (8) torx-head screws from the dash 1. Unclip the entire dash 1. Unclip the entire dash trim bezel. (Figure A) trim bezel. trim bezel. (Figure A) 2. -
Page 52: Dodge Omni/024/Rampage 1978-1982, Plymouth Horizon/Tc3 1978-1982/ Scamp 1983-1984
Dash Disassembly INST-6000 Dodge Ram 1994-2001, Dodge Omni/024/Rampage Dodge Pickup/Ramcharger 1978-1982, Plymouth 1974-1980, Plymouth Ram 2500/3500 2002 Horizon/TC3 1978-1982/ Trailduster 1974-1980 Scamp 1983-1984 1. Remove the ashtray. Remove (2) Phillips screws 4. Unclip the bezel exposed in the ashtray cavity and remove the and remove. -
Page 53: Dodge Shadow/Plymouth Sundance 1987-1994
Dash Disassembly INST-6000 Ford Bronco II/Ranger (mini) Dodge Shadow/Plymouth Dodge Van/Plymouth Van Sundance 1987-1994 1978-2003 1985-1988 1. Remove the ashtray. 1. Open the glove box 1. Remove (4) Phillips Unclip the dash trim and remove (2) Phillips screws from the bezel and remove. -
Page 54: Ford Thunderbird/Mercury Cougar 1985-1988
Dash Disassembly INST-6000 Ford Thunderbird/Mercury Jeep Grand Cherokee Jeep Grand Cherokee Cougar 1985-1988 1993-1995 1996-1998 1. Remove (2) screws 1. Remove (2) Phillips 5. Unclip the dash trim 4. Pry out on the bottom screws from the bezel and disconnect edge of the bezel and from the top of the bottom of the dash... -
Page 55: Lincoln Continental 1985-1987
Dash Disassembly INST-6000 INST-6000 Notes Lincoln Continental 1985-1987 1. Remove (2) #8 Phillips screws below the radio opening. 2. Open the ashtray and remove (2) #8 Phillips screws (it is NOT necessary to remove the center screw). 3. Unclip the dash trim bezel and remove. - Page 56 INST-6000 Notes...
- Page 57 INST-6000 Notes...
- Page 58 INSTALLATION INSTRUCTIONS FOR PART INST-6000 NOWLEDGE IS OWER Enhance your installation and fabrication skills by enrolling in the most recognized and respected mobile electronics school in our industry. Log onto www.installerinstitute.com or call 800-354-6782 for more information and take steps toward a better tomorrow.
- Page 59 INSTRUCCIONES DE INSTALACIÓN PARA LA PIEZA INST-6000 APLICACIONES Aplicación General Chrysler/Ford/Mitsubishi 1974-2003* INST-6000 99-6000 99-6700 Chrysler/Dodge/Eagle/Jeep/ Crysler/Eagle/Ford/ Plymouth 1974-2003** Jeep 1974-2003** 99-6500 99-7000 INSTRUCCIONES DE INSTALACIÓN Chrysler/Dodge/Eagle/Ford/ Dodge/Eagle/Mitsubishi/ Jeep/Lincoln/Mercury/ Plymouth 1985-1996** • 99-6000 • 99-6501 • 99-7000 Plymouth 1974-2003** • 99-6500 • 99-6700 99-6501 Chrysler/Dodge/Eagle/Jeep/ Lincoln/Mercury/Plymouth...
- Page 60 INST-6000 99-6000 Contenidos Aplicaciones Sección 1 Instrucciones de instalación Sección Chrysler/Dodge/Jeep/ Chrysler Dodge Jeep (seguido) Cirrus 1995-2000 Cherokee 1997-2001 Lancer 1986-1989 Concorde 1993-1997 Magnum XE Grand Cherokee Plymouth 1974-2003 Cordoba 1975-1983 1978-1997 1993-1995 - 99-6000** ..........1.0 E-Class 1983-1993 Mirada 1979-1989 Grand Cherokee 99-6000...
- Page 61 Preparación del kit 99-6000 99-6000 Indice Chrysler Cirrus 1995- Chrysler/Dodge/Eagle/ 99-6000 2000/Sebring Jeep/Plymouth (descapotable) 1996-2000, Dodge Stratus (Excepto: Grand Cherokee 1993-1995, Cirrus, Preparación del kit 1995-1999/Plymouth Stratus, Sebring, Sebring descapotable, y Avenger) – Chrysler/Dodge/Eagle/Jeep/Plymouth** ....1.1 Breeze 1996-1999 (Excepto: Grand Cherokee 1993-1995, Cirrus, Stratus, 1.
- Page 62 Preparación del kit 99-6000 Ensamble del kit 99-6000 99-6500 Provisión de radio DIN Chrysler Sebring/Dodge Sección 2 Avenger 1995-2000 1. Deslice la reja DIN en el kit y sujétela doblando Chrysler/Dodge/Eagle/ 1. Corte y retire todas las pestañas de montaje hacia abajo las pestañas de metal.
- Page 63 Preparación del kit 99-6500 99-6500 Aplicaciones Indice Chrysler/Dodge/Eagle/Jeep/ 99-6500 Plymouth 1974-2003 Chrysler Dodge Jeep (seguido) (seguido) Concorde 1993-1997 Magnum XE Wrangler 1997-2002 Preparación del kit 1. Corte y retire Cordoba 1975-1983 1978-1979 E-Class 1983-1993 Mirada 1979-1983 Lincolin todas las pestañas de - Chrysler 1975-2000** .........
- Page 64 Ensamble del kit 99-6500 99-6501 Provisión de radio DIN Sección 3 1. Corte y retire los soportes del eje de la 4. Ubique el arnés de cableado de fábrica Chrysler/Dodge/Eagle/Ford/ en el tablero. Metra recomienda el uso de carcasa del radio. Jeep/Lincoln/ Mercury/ un adaptador adecuado de acoplamiento 2.
-
Page 65: Chrysler/Dodge/Eagle/Jeep/Plymouth
Preparación del kit 99-6501 99-6501 Aplicaciones Indice Chrysler/Dodge/Eagle/ 99-6501 Jeep/Plymouth Chrysler Dodge Mercury (seguido) Concorde 1993-1997 Diplomat 1976-1989 Colony Park (Excepto: Grand Cherokee 1993-1995, Preparación del kit Cordoba 1975-1983 Durango 1998-2000 1979-1989 Sebring y Avenger) E-Class 1983-1993 Dynasty 1988-1993 Cougar 1983-1988 –... - Page 66 Preparación del kit 99-6501 Ensamble del kit 99-6501 Ford/Lincoln/Mercury Provisión de radio ISO DIN 1979-1989 1. Coloque a presión la placa frontal ISO DIN en la carcasa del radio y luego deslice la unidad central de mercado secundario en la parte posterior del kit. 1.
- Page 67 Ensamble del kit 99-6501 Provisión de radio Provisión de radio DIN ISO DIN 1. Si se desea una instalación 4. Deslice la reja DIN en la carcasa 6. Deslice la unidad central de de montaje superficial, del radio y sujétela doblando mercado secundario en la reja 4.
- Page 68 Desmontaje del tablero 99-6700 99-6700 Aplicaciones Aplicaciones Sección 4 Chrysler/Eagle/Ford/ Chrysler Avenger 1995-2000 1982-1983 Plymouth Reliant 1981-1989 1978-1997 Cirrus 1995-2000 Caravan 1984-1990 1983-1987 Acclaim 1989-1995 Scamp 1983-1984 Volare 1976-1980 Jeep 1974-2003 Concorde 1993-1997 Caravan 1991-1995 Breeze 1996-1999 Sundance 1987-1994 Voyager 1984-1990 Cordoba 1975-1978 Caravan 1996-2000 Eagle...
-
Page 69: Jeep Grand Cherokee 1993-1995
Desmontaje del tablero 99-6700 Chrysler Cirrus 1995-2000/ Chrysler/Dodge/Eagle/ Chrysler Sebring/Dodge Sebring 1996-2000, Jeep/Plymouth Avenger 1995-2000 (descapotable) Dodge Status 1995-2000, (Except: Grand Cherokee 1993-1995, Cirrus, Stratus, 1. Corte y retire Plymouth Breeze 1996-1999 Sebring, Sebring descapotable, y Avenger) todas las pestañas de 1. -
Page 70: Provisión De Radio Din
Ensamble del kit 99-6700 Provisión de radio DIN Notas 1. Deslice la reja DIN en el kit y sujétela doblando hacia abajo las pestañas de metal. 2. Deslice la unidad central de mercado secundario en la reja hasta que quede firme. (Figura A) 3. - Page 71 Desmontaje del tablero 99-7000 99-7000 Aplicaciones Indice Sección 5 Dodge/Eagle/Mitsubishi/ Dodge Eagle Mirage 1989-1992 - Mitsubishi Mighty Max pick-up 1987-1996 ..5.2 (seguido) Colt 1987-1988 Talon 1990-1994 Montero 1987-1991 - Mitsubishi Mirage/Dodge Colt 1985-1988 ..5.0-5.1 Colt 1989-1992 Sigma 1989-1990 Plymouth 1985-1996 D-50 pick-up Mitsubishi 1987-1990...
- Page 72 Desmontaje del tablero 99-7000 Dodge Colt 1987-1988, Dodge Colt/Eagle Summit/Mitsubishi Mitsubishi Mirage Mirage 1989-1992 1985-1988 1. Quite los (2) tornillos Phillips de 4. Coloque a presión la barra soportes #1, EXCEPTO las de relleno en la carcasa pestañas “B”. (Figura C) arriba de los controles del clima.
- Page 73 Desmontaje del tablero 99-7000 Dodge D-50 pick-up 1987-1993 Dodge Raider/Mitsubishi Mitsubishi Mighty Max 1987-1996 Montero 1987-1991 1. Quite los (2) tornillos localizados 6. Corte y quite todas las pestañas 1. Quite las perillas de control de clima y luego quite de fábrica y desconecte el debajo de las rejillas del aire cableado.
- Page 74 Desmontaje del tablero 99-7000 Eagle Summit 1992-1996, Mitsubishi Expo Dodge Raider/Mitsubishi (vagoneta) 1992-1995, Plymouth Colt Vista 1992-1994 Montero 1987-1991 7. Coloque a presión la barra de relleno en la carcasa 1. Quite los (2) tornillos de la parte 4. Quite los tornillos que sujetan la carcasa del radio.
- Page 75 Desmontaje del tablero 99-7000 Eagle Talon/Mitsubishi Mitsubishi Galant 1985-1988 Eclipse/Plymouth Mitsubishi Sigma 1989-1990 Laser 1990-1994 1. Desenganche el bisel de la moldura del de la carcasa del radio durante la instalación. radio y quite. 1. Desenganche el bisel 4. Corte y quite todas las pestañas de montaje del de la moldura del radio 2.
- Page 76 Desmontaje del tablero 99-7000 Mitsubishi Galant Mitsubishi Van 1989-1993 1987-1990 1. Desenganche el bisel 1. Quite los (3) tornillos del borde inferior del bisel de omitiendo este paso y montando la cavidad debajo de la moldura del radio la moldura del tablero y quite el bisel. de la carcasa del radio durante la instalación.
- Page 77 Ensamble del kit 99-7000 Provisión de radio 2-eje Provisión de radio DIN 1. Coloque la placa frontal en la 1. Corte y quite los soportes del eje. carcasa del radio. 2. Deslice la reja DIN en la carcasa del radio y sujétela doblando hacia 2.
-
Page 78: Chrysler/Dodge/Eagle/Ford/Jeep/Lincoln Mercury/Plymouth
Desmontaje del tablero INST-6000 Indice Sección 6 Desmontaje del tablero - Chrysler LeBaron 1976-1981, Dodge - Dodge Pickup/Ramcharger 1974-1980, - Chrysler Cirrus/Dodge Stratus 1995-2000, Diplomat 1976-1989/Aspen 1976-1980, Plymouth Trailduster 1974-1980 .... 6.6 99-6000, 99-6500, 99-6501 Plymouth Breeze 1996-1999 ....6.1 Plymouth Gran Fury 1975-1985/ - Dodge Pickup/Ramcharger 1974-1980, - Chrysler Concorde/LHS 1995-1998, Dodge... - Page 79 Desmontaje del tablero INST-6000 Chrysler Cordoba/ Chrysler Cordoba 1979- Chrysler Cirrus/Dodge Stratus 1995-2000, 1983/Imperial 1982-1983/ Plymouth Fury 1975-1978, Plymouth Breeze 1996-1999 Newport 1980-1981/New Dodge Charger 1974-1978, Yorker 1980-1981, Dodge 1. Usando un Magnum XE 1978-1979 Mirada 1980-1983/St. destornillador de paleta, haga palanca Regis 1979-1981 1.
- Page 80 Desmontaje del tablero INST-6000 Chrysler E-Class 1983-1984/ Chrysler 5th Avenue/ Chrysler Laser/Dodge LeBaron 1982-1985/New Imperial 1990-1994/New Daytona 1984-1989 Yorker 1983-1987 Yorker 1988-1995, Dodge 2. Jale hacia afuera el Dodge Aries 1981-1989/400 Dynasty 1988-1993 borde inferior del bisel 1982-1983/600 1983-1987 y retírelo. 1.
- Page 81 Desmontaje del tablero INST-6000 Chrysler LeBaron GTS Chrysler LeBaron 1976- Chrysler Sebring/Dodge 1981, Dodge Diplomat 1985-1994, Dodge Lancer Avenger 1995-2000 1976-1989/Aspen 1985-1989 1. Desenganche el bisel 1976-1980, Plymouth Gran de la moldura del radio 1. Quite los (5) tornillos de cabeza Torx de la parte Fury 1975-1985/Volare y quite.
- Page 82 Desmontaje del tablero INST-6000 Chrysler Town & Country Dodge Caravan/Plymouth Dodge Caravan/Chrysler Voyager 1991-1995 Town & Country/Plymouth 1990-1995, Dodge Voyager 1996-2000 Caravan/Plymouth 1. Quite el encendedor. Voyager 1984-1990 3. Desenganche el bisel 2. Usando una herramienta de la moldura del de remoción de panel, tablero, desconecte el 1.
- Page 83 Desmontaje del tablero INST-6000 Dodge Dakota Dodge Dakota Dodge Durango 1987-1996 1997-2000 1997-2000 1. Quite los (8) tornillos de cabeza Torx del bisel 1. Desenganche todo 1. Desenganche todo el bisel de la moldura el bisel de la moldura de la moldura del tablero. del tablero.
- Page 84 Desmontaje del tablero INST-6000 Dodge Ram 1994-2001, Dodge Omni/024/Rampage Dodge Pickup/Ramcharger 1978-1982, Plymouth 1974-1980, Plymouth Ram 2500/3500 2002 Horizon/TC3 1978-1982/ Trailduster 1974-1980 Scamp 1983-1984 1. Quite el cenicero. Quite el cenicero y los (2) 4. Desenganche el bisel tornillos Phillips expuestos en la cavidad del y quite.
- Page 85 Desmontaje del tablero INST-6000 Ford Bronco II/Ranger (mini) Dodge Shadow/Plymouth Dodge Van/Plymouth Van Sundance 1987-1994 1978-2003 1985-1988 1. Quite el cenicero. 1. Abra la guantera y 1. Quite los (4) tornillos Desenganche el bisel retire los (2) tornillos Phillips del borde de la moldura del Phillips expuestos.
- Page 86 Desmontaje del tablero INST-6000 Ford Thunderbird/Mercury Jeep Grand Cherokee Jeep Grand Cherokee Cougar 1985-1988 1993-1995 1996-1998 1. Quite los (2) tornillos 1. Quite los (2) tornillos columna de dirección. 4. Haga palanca Phillips de la parte hacia afuera en el de la parte superior 5.
- Page 87 Desmontaje del tablero INST-6000 INST-6000 Notas Lincoln Continental 1985-1987 1. Quite los (2) tornillos Phillips de debajo de la apertura del radio. 2. Abra el cenicero y retire los (2) tornillos Phillips #8 (no es necesario retirar el tornillo central). 3.
- Page 88 INST-6000 Notas...
- Page 89 INST-6000 Notas...
- Page 90 INSTRUCCIONES DE INSTALACIÓN PARA LA PIEZA INST-6000 EL CONOCIMIENTO ES PODER Mejore sus habilidades de instalación y NOWLEDGE IS OWER fabricación inscribiéndose en la escuela de Enhance your installation and fabrication skills by enrolling in the most recognized and respected dispositivos electrónicos móviles más reconocida mobile electronics school in our industry.
Need help?
Do you have a question about the PD-710B and is the answer not in the manual?
Questions and answers