Advertisement
OWNER'S MANUAL
Scan QR CODE to access installation and owner's manual on website.
https://www.toshiba-carrier.co.th/manuals/default.aspx
Manual are available in AR/BG/CZ/DA/DE/EL/EN/ES/ET/FI/FR/
HR/HU/IT/LT/LV/NL/NO/PL/PT/RO/RU/SK/SL/SV.
AIR CONDITIONER
For general public use
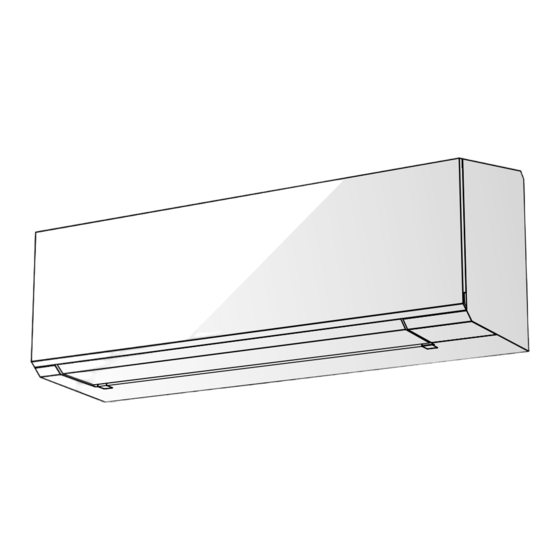
Indoor unit (Single Type)
RAS-B07, 10, 13, 16, 18, 22, 24G3KVSG-E
RAS-B07, 10, 13, 16, 18, 22, 24G3KVSGB-E
Outdoor unit (Single Type)
RAS-07, 10, 13, 16, 18, 22, 24J2AVSG-E1
Indoor unit (Multi Type)
RAS-M05G3KVSG-E
RAS-M05G3KVSGB-E
ENGLISH
ENGLISH
1144250207A
Advertisement
Table of Contents

Summary of Contents for Toshiba RAS-24J2AVSG-E1
- Page 1 OWNER’S MANUAL ENGLISH ENGLISH Scan QR CODE to access installation and owner’s manual on website. https://www.toshiba-carrier.co.th/manuals/default.aspx Manual are available in AR/BG/CZ/DA/DE/EL/EN/ES/ET/FI/FR/ HR/HU/IT/LT/LV/NL/NO/PL/PT/RO/RU/SK/SL/SV. AIR CONDITIONER For general public use Indoor unit (Single Type) RAS-B07, 10, 13, 16, 18, 22, 24G3KVSG-E RAS-B07, 10, 13, 16, 18, 22, 24G3KVSGB-E...
- Page 2 INDOOR UNIT DISPLAY REMOTE CONTROL 1 ECO (White) 1 Infrared signal emitter 2 Wi-Fi access (White) 2 Start/Stop button 3 Hi POWER (White) 3 Mode select button 4 Timer (White) 4 Temperature button 5 Operation mode 5 Fan speed button - Cool (Blue) 6 Menu select button - Heat (Orange)
-
Page 3: Menu Setup
MENU SETUP 9.1 LOUVER SWING and HADA CARE FLOW OPERATION For select more setting of Air conditioner such as Louver select, Comfortable air ow can select from feature. Hi Power, OFF Timer and other use MENU button Louver swing opearation: To distribute air ow in both vertical and horizontal by swing the louver automatically. - Page 4 9.2 SILENT OPERATION (Outdoor Unit) 9.3 Hi POWER OPERATION Keep outdoor unit operating silently to ensure either yourself or neighborhood To automatically control room temperature and air ow for faster cooling or will have a tight sleep in nighttime. By this feature, the cooling capacity will be heating operation (except in DRY and FAN ONLY mode) optimized to deliver such silent experience.
- Page 5 9.5 FIREPLACE OPERATION 9.6 TIMER OFF OPERATION Keep indoor unit’s fan blowing continuously during thermo off, to circulate heat To set the timer OFF when the air conditioner is operating. from other sources over the room. There are three setting parameters: 1.
-
Page 6: Self Cleaning Operation
MANUAL DEFORST OPERATION 9.7 POWER-SELECTION OPERATION To defrosting the heat exchanger of the outdoor unit during Heating operation This function is used when the circuit breaker is shared with other electrical appliances. It limits the maximum current and power consumption to 100%, Press and hold : for 5 seconds , then remote control display will 75%, or 50% and can be implemented by POWER-SELECTION. -
Page 7: Temporary Operation
TEMPORARY OPERATION MAINTENANCE In case of the misplaced or discharged remote control Firstly, turn off the circuit breaker. Pressing the RESET button, the unit can start or Indoor Unit and Remote Control stop without using the remote control. Clean the indoor unit and the remote control with a wet cloth when Operation mode is set on AUTOMATIC operation, needed. -
Page 8: Wireless Lan Connection
Android : Version 5.0 or later About Toshiba Home AC Control 1. Toshiba Home AC Control can control AC operation by Smartphone or tablet (mobile device) via internet connection. 2. Everywhere control, control software run on Cloud system and mobile device can set and monitor AC operation via internet connection. - Page 9 3 Enter user name and 4 Login successful. Log in. password. Add Wireless adapter for control by Toshiba Home AC Control application. Wireless adapter Built-in Active Wireless adapter by remote controller and Auto log in. 1 Select “Add AC (Adapter)” from both display above.
-
Page 10: Manual Input
Add Wireless adapter for control by Toshiba Home AC Control application. 3 AC (adapter) connect 4 Active Wireless adapter by Remote controller Press and hold MODE button 5 seconds Wireless LED mark will blink when AP mode active MODE MENU... - Page 11 Toshiba Home AC Control application Home screen Weekly schedule Setting Menu Add AC Sub menu all AC All AC On/Off Add Group Delete Group Group AC On/Off Operation Setting Each AC On/Off Sub menu group Select AC Change group name...
- Page 12 Mode and Condition setting. Enter operation mode of All AC Enter operation mode of Group AC Enter operation mode of each AC Mode select for Toshiba Home AC Control application. Provide for 5 operation modes Auto Cool Heat Fan only...
- Page 13 Setting in operation mode. Tab for select AC Weekly schedule OFF-ON timer set 0.5-12hrs. Mode select OFF-ON Timer set Temperature set Indoor temperature Outdoor temperature ON timer set from Off mode only Fan speed set Louver set Special feature Off mode...
-
Page 14: Group Operation
Group operation. Maximum 3 groups 1 Group maximum = 10 units. Add group Add AC in group Delete AC in group Please make sure Factory Reset is performed before deleting AC from mobile application. (See owner manual Press and hold MODE button on remote control for 5 second and active dL function ) - Page 15 Weekly schedule set. Day select Monday - Sunday Weekly schedule of all AC unit Weekly schedule of all AC unit Time select Weekly schedule set for each unit Mode select Select program for active by tick at select box Weekly schedule cancel. Weekly schedule not set Weekly schedule...
-
Page 16: Energy Monitoring
Energy monitoring Select Room for Energy monitoring 1 Select Energy monitoring 2 Energy monitoring display Set cost calculate and currency Select Energy monitoring display Export data and send by Email The power consumption displayed is just an estimate as it is calculated simply. It may sometimes differ from the result measured by the power meter. - Page 17 In case of have some problem can check from Help menu. Note : The Wireless Adapter must be installed, maintained, repaired and removed by a quali ed installer or quali ed service person. Contact dealer and/or service center when equipment is malfunction.


Need help?
Do you have a question about the RAS-24J2AVSG-E1 and is the answer not in the manual?
Questions and answers