Table of Contents
Advertisement
Available languages
Available languages
Quick Links
WARRANTY CONDITION
This product is guaranteed for a period of 2 years from the date of purchase* against
any failure resulting from a manufacturing or material defect. This warranty does not
EN
cover defects or damage resulting from incorrect installation, improper use or abnormal
wear of the product.
*as shown on the sales receipt.
CONDITION DE GARANTIE
Ce produit est garanti pour une période de 2 ans à partir de la date d'achat*, contre
toute défaillance résultant d'un vice de fabrication ou de matériau. Cette garantie ne
FR
couvre pas les vices ou les dommages résultant d'une mauvaise installation, d'une
utilisation incorrecte ou de l'usure anormale du produit.
*sur présentation du ticket de caisse.
GARANTIEVOORWAARDEN
Dit product wordt gegarandeerd voor een periode van 2 jaar vanaf de aankoopdatum*,
voor elke storing die het gevolg is van een fabricagefout of het materiaal. Gebreken of
NL
schade door slechte installatie, onjuist gebruik of abnormale slijtage van het product
worden niet gedekt door deze garantie.
*op vertoon van kassabon.
CONDICIONES DE GARANTÍA
El certificado de garantía de este producto tiene una duración de 2 años a partir de la
fecha de compra* que se limita a los defectos de fabricación y averías del material.
ES
Se excluyen de la garantía deficiencias o daños originados por una mala instalación,
errores en la manipulación o por un uso inadecuado.
*previa presentación del comprobante de compra.
ELECTRO DEPOT
1 route de Vendeville
59155 FACHES-THUMESNIL - FRANCE
2/2
Dryer
Sèche-linge
Droogkast
Secadora
977527 - DAV 7 C W566C2
INSTRUCTIONS FOR USE
....................02
CONSIGNES D'UTILISATION
....................14
GEBRUIKSAANWIJZINGEN
....................26
INSTRUCCIONES DE USO
................... 38
01/2023-V1
Advertisement
Chapters
Table of Contents

Subscribe to Our Youtube Channel
Related Manuals for HIGHONE DAV 7 C W566C2


Summary of Contents for HIGHONE DAV 7 C W566C2
- Page 1 *op vertoon van kassabon. 977527 - DAV 7 C W566C2 CONDICIONES DE GARANTÍA El certificado de garantía de este producto tiene una duración de 2 años a partir de la fecha de compra* que se limita a los defectos de fabricación y averías del material.
- Page 3 Thanks! T h a n k y o u f o r c h o o s i n g t h i s H I G H O N E p ro d u c t . Chosen, tested and recommended by ELECTRO DEPOT, t h e p ro d u c t s o f t h e H I G H O N E b r a n d a re e a s y t o u s e , re l i a b le a n d o f a n i m p e c c a b le s t a n d a rd .
-
Page 4: Table Of Contents
Table of contents Description of the appliance Preview of the Control panel appliance Technical Information Installation Using the appliance Drying programme table Cleaning and maintenance Useful information Troubleshooting Disposing of your old appliance The instructions are also available on the site http://www.electrodepot.fr/sav/notices/... -
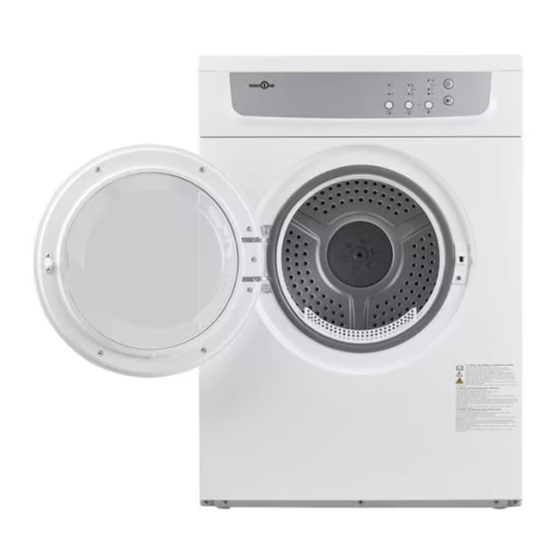
Page 5: Preview Of The Appliance
Preview of the appliance Description of the appliance Top platform Side panel Control panel Drum hatch Door Switch Lint filter Power cord Front panel Hose Control panel On/Off Start/Pause Programme (Blend/Cotton/Synthetic/1 Hour) Drying level (Extra/Standard/Low) Anti-crease NOTE • Press the [Program] button to select the desired program. •... -
Page 6: Installation
Using the appliance Installation • The dryer should be installed in a ventilated environment, at least 10 cm from the wall. There should be no obstacles within 1.5 m of the front of the dryer. The room must also be properly ventilated. - Page 7 Using the appliance Hose attachment: • Connect one end of the hose to the hole at the back of the machine. Tighten without straining. • The other end of the hose should face outwards. Refer to the illustrations below describing the installation mode.
-
Page 8: Use
Using the appliance Quick operation NOTE Before use, ensure that the appliance is correctly installed. Plug in Load Close the door Drying Turn on Select the default Start function or mode After drying The alarm sounds or the message “0:00” is displayed. Unload Clear the lint filter Unplug... - Page 9 Using the appliance 4. Do not over-dry your clothes; excessive drying may crease your laundry. 5. Do not dry laundry containing rubber or any other similar elastic material. 6. The door can only be opened when the dryer has finished its cycle. Be careful not to open the door too quickly, as hot surfaces of the machine and condensation may cause burns.
- Page 10 Using the appliance NOTE • Never overload the drum. • Do not load soaking wet laundry. The dryer may be damaged or catch fire. • Not suitable for drying wool or silk materials. Please note that some textiles are not suitable for tumble drying. Always refer to the following symbols: Drying Normal machine-dry...
-
Page 11: Drying Programme Table
Using the appliance Drying programme table Approximate residual Capacity Clothing type Programmes Drying level NOTE moisture (kg) level Please 7/3.5/1 Cotton Extra select the Cotton 7/3.5/1 Cotton Standard programme and drying 7/3.5 Cotton degree 7/3.5/1 Blend Extra according to Blend the type of 7/3.5/1 Blend... -
Page 12: Cleaning And Maintenance
Useful information Cleaning and maintenance Cleaning the filter • Clean the filter after each use. • Pull up to remove it. • Cleaning the filter Use a cloth or your fingers. • Reinsert the filter If the filter is cleaned with a damp cloth or water, let it dry before reinstalling it. Cleaning the machine body and drum •... - Page 13 Useful information Troubleshooting Problem Cause Solution Wait until the power is Power outage. restored. Check the plug and make The plug is not correctly sure the connection is connected. correct. Laundry placed in the dryer must have been The appliance will not start. The laundry load is too spun beforehand.
- Page 14 Useful information Problem Cause Solution Follow the label on the garments. If the fabric is likely to shrink, examine your clothes carefully when The laundry shrinks. Over-drying. dry. Take your laundry out when it is not very wet or too dry, then hang it out until it is completely dry.
- Page 15 Merci ! M e rc i d ’ a v o i r c h o i s i c e p ro d u i t VA L B E R G . Choisis, testés et recommandés par ELECTRO DEPOT, le s p ro d u i t s d e l a m a rq u e VA L B E R G v o u s a s s u re n t u n e u t i l i s a t i o n s i m p l e , u n e p e r f o r m a n c e f i a b l e e t u n e q u a l i t é...
- Page 16 Table de matières Description de l’appareil Aperçu de l’appareil Panneau de commande Spécifications techniques Installation Utilisation de Utilisation I’appareil Tableau des programmes de séchage Nettoyage et entretien Informations Dépannage pratiques Mise au rebut de votre ancien appareil Les notices sont aussi disponibles sur le site http://www.electrodepot.fr/sav/notices/...
-
Page 17: Aperçu De L'appareil
Aperçu de l’appareil Description de l’appareil Plateau supérieur Panneau latéral Panneau de commande Trappe du tambour Hublot Interrupteur Filtre Cordon d'alimentation Panneau avant Tuyau souple Panneau de commande On/Off Démarrage/pause Programme (Mélange/Coton/Synthétique/1 heure) Degré de séchage (Extra/Standard/Faible) Anti-froissage REMARQUE • Appuyez sur la touche [ Programme ] afin de sélectionner le programme de votre choix. -
Page 18: Installation
Utilisation de l’appareil Installation • Le sèche-linge doit être installé au sein d’un environnement ventilé, à 10 cm de distance du mur au minimum. Aucun obstacle ne doit se trouver à moins d’1,5 m de l’avant du sèche- linge. La pièce doit également être correctement ventilée. Réglage horizontal : Reliez un poids à... - Page 19 Utilisation de l’appareil Fixation du tuyau souple : • Reliez l’une des extrémités du tuyau souple à l’orifice situé à l’arrière de la machine. Serrez sans forcer. • L’autre extrémité du tuyau doit être dirigée vers l’extérieur. Reportez-vous aux illustrations ci-dessous pour connaître le mode d’installation.
-
Page 20: Utilisation
Utilisation de l’appareil Utilisation Prise en main rapide REMARQUE Avant toute utilisation, assurez-vous que l’appareil est correctement installé. Branchez Chargez Fermz le hublot Séchage Mise en Sélection de la Démarrage marche fonction ou mode par défaut Après séchage L’alarme retentit ou le message « 0:00 » s’affiche. Déchargez Nettoyez Le filtre Débranchez... - Page 21 Utilisation de l’appareil 4. Ne séchez pas excessivement votre linge ; un séchage excessif peut froisser votre linge. 5. Ne séchez pas de linge contenant du caoutchouc ou toute autre matière élastique similaire. 6. La porte ne peut être ouverte que si le sèche-linge a terminé son cycle. Attention à ne pas ouvrir la porte trop rapidement, les surfaces chaudes de la machine et la condensation peuvent entraîner des brûlures.
- Page 22 Utilisation de l’appareil REMARQUE • Ne surchargez jamais le tambour. • Ne chargez pas de linge détrempé. Le sèche-linge pourrait être endommagé ou prendre feu. • Ne convient pas au séchage de matière en laine ou en soie. Attention, certains textiles ne sont pas adaptés au séchage au sèche-linge. Reportez-vous systématiquement aux pictogrammes qui suivent : Séchage Séchage en machine normal...
-
Page 23: Tableau Des Programmes De Séchage
Utilisation de l’appareil Tableau des programmes de séchage Niveau Type de approximatif Capacité Degré de Programmes Remarque vêtements d'humidité (KG) séchage résiduelle Veuillez 70 % 7/3,5/1 Coton Extra sélectionner Coton 7/3,5/1 Coton Standard 60 % programme 7/3,5 Coton Faible et le degré de séchage 70 % 7/3,5/1... -
Page 24: Nettoyage Et Entretien
Informations pratiques Nettoyage et entretien Nettoyage du filtre • Nettoyez Le filtre après chaque utilisation. • Tirez vers le haut pour l’extraire. • Nettoyage du filtre Servez-vous d’un chiffon ou de vos doigts. • Réinstallez le filtre Si le filtre est nettoyé à l’aide d’un chiffon humide ou à l’eau, laissez-le sécher avant de le réinstaller. -
Page 25: Dépannage
Informations pratiques Dépannage Problème Cause Solution Attendez que le courant soit Panne d'électricité. rétabli. Contrôlez la prise, assurez- La fiche n'est pas vous que le branchement correctement branchée. est correct. Le linge introduit dans le L'appareil ne démarre pas. sèche-linge doit avoir été La charge de linge est trop préalablement essoré. - Page 26 Informations pratiques Problème Cause Solution Conformez-vous à l'étiquette présente sur les vêtements, si le tissu est susceptible de rétrécir, examinez bien Le linge rétrécit. Séchage excessif. vos vêtements une fois secs. Sortez votre linge lorsqu'il est peu humide ou trop sec, puis étendez-le jusqu'à...
- Page 27 Bedankt!
- Page 28 Beschrijving van het toestel Overzicht van het Bedieningspaneel toestel Technische eigenschappen Installatie Gebruik van het Gebruik toestel Tabel met droogprogramma’s Reiniging en onderhoud Praktische informatie Herstelling Afdanken van uw oude toestel...
- Page 29 Overzicht van het toestel Beschrijving van het toestel Bedieningspaneel On/Off Start/Pauze Programma (Gemengd/Katoen/Synthetisch/1 uur) Droogtegraad (Extra/Standaard/Zwak) Kreukbeveiliging OPMERKING • Druk op de toets [ Programma ] om het programma van uw keuze te kiezen. • Druk op de toets [ Droogtegraad ] om het droogtegraad van uw keuze te kiezen. •...
- Page 30 Gebruik van het toestel Installatie • De droogtrommel dient geïnstalleerd te worden in een geventileerde omgeving, op een afstand van ten minste 10 cm van de muur. Geen enkel obstakel mag zich op minder dan 1,5 m van de voorkant van de droogkast bevinden. De kamer dient correct geventileerd te worden. Horizontale afstelling: Hang een gewicht aan een draad aan de voorkant en zijkanten van het toestel.
- Page 31 Gebruik van het toestel Bevestiging van de slang: • Verbind één van de uiteinden van de slang met de opening aan de achterzijde van de machine. Zet vast zonder kracht te gebruiken. • Het andere uiteinde van de slang dient naar buiten gericht te worden. Zie bovenstaande tekeningen om de installatiewijze te kennen.
- Page 32 Gebruik van het toestel Gebruik Snelle ingebruikname OPMERKING Vergewis u ervan dat het toestel correct geïnstalleerd is vóór elk gebruik. Steek de stekker in Laad Sluit de deur het stopcontact Drogen Inwerkingstelling Selecteer Inschakeling de functie of standaardmodus Na het drogen Het alarm weerklinkt of het bericht ‘0:00’...
- Page 33 Gebruik van het toestel 4. Droog uw wasgoed niet overmatig; door overmatig te drogen zal uw wasgoed gaan kreuken. 5. Droog nooit wasgoed met rubber of een vergelijkbare elastische stof. 6. De deur mag pas geopend worden wanneer de droogkast zijn cyclus afgerond heeft. Let erop de deur niet te snel te openen, warme oppervlakken van de machine en de condens kunnen brandwonden veroorzaken.
- Page 34 Gebruik van het toestel OPMERKING Sommige textielsoorten zijn niet geschikt om in de droogkast gedroogd te worden. Kijk systematisch naar de volgende pictogrammen: Drogen Normaal drogen in de machine Drogen in de machine verboden Niet drogen Drogen op draad / ophangen Drogen door te laten uitdruipen Plat drogen Drogen in de schaduw...
- Page 35 Gebruik van het toestel Tabel met de wasprogramma’s Restvochtig- Volume Type kleding heidsgehalte bij Programma's Droogtegraad Opmerking (kg) benadering 70 % 7/3,5/1 Katoen Extra Katoen 7/3,5/1 Katoen Standaard Gelieve het 60 % programma 7/3,5 Katoen Zwak en de 70 % 7/3,5/1 Gemengd Extra...
- Page 36 Praktische informatie Reiniging en onderhoud Reiniging van de filter • Reinig de filter steeds na elk gebruik. • Trek naar boven om deze eruit te halen. • Reiniging van de filter • Gebruik een vod of uw vingers. • Plaats de filter terug •...
- Page 37 Praktische informatie Probleemoplossing Probleem Oorzaak Oplossing Wacht tot er opnieuw Elektriciteitspanne stroom is. Controleer het stopcontact De stekker zit niet correct en controleer of de in het stopcontact. aansluiting correct is. Het wasgoed in de droogtrommel dient eerst Het toestel start niet. gecentrifugeerd te worden.
- Page 38 Praktische informatie Probleem Oorzaak Oplossing Volg de voorschriften op het etiket van de kleding, wanneer de stof kan krimpen, onderzoekt u uw kleding goed Het wasgoed krimpt. Overmatig drogen. wanneer deze droog is. Haal uw wasgoed eruit wanneer het een beetje vochtig is of te droog is, en wacht tot het volledig droog is.
- Page 39 ¡Muchas gracias! M u c h a s g r a c i a s p o r h a b e r e le g i d o n u e s t ro p ro d u c t o H I G H O N E .
- Page 40 Descripción del aparato Índice Descripción del aparato Descripción del Panel de control aparato Características técnicas Instalación Utilización del Utilización aparato Tabla de los programas de secado Limpieza y mantenimiento Información práctica Solución de problemas Cómo desechar su antiguo aparato...
- Page 41 Descripción del aparato Descripción del aparato Placa superior Panel lateral Panel de control Puerta del tambor Puerta Interruptor Filtro Cable de alimentación Panel delantero Tubo flexible Panel de control On/Off Inicio/Pausa Programa (mezcla/algodón/sintético/1 hora) Grado de secado (extra/estándar/bajo) Antiarrugas OBSERVACIONES •...
- Page 42 Utilización del aparato Instalación • La secadora debe instalarse en un entorno ventilado, a 10 cm de distancia de la pared como mínimo. No debe haber ningún obstáculo a menos de 1,5 m delante de La secadora. La habitación también debe estar correctamente ventilada. Ajuste horizontal: Amarre un peso a una cuerda en la parte frontal y en los laterales del aparato.
- Page 43 Utilización del aparato Fijación del tubo flexible: • Conecte uno de los extremos del tubo flexible con el orificio situado en la parte posterior de la máquina. Apriete sin forzar. • El otro extremo del tubo debe dirigirse hacia el exterior. Consulte las ilustraciones a continuación para conocer el modo de instalación.
- Page 44 Utilización del aparato Utilización Utilización rápida OBSERVACIONES Antes de utilizar el aparato, asegúrese de que está correctamente instalado. Enchufe Cargue Cierre la puerta Secado Puesta en Selección de la Puesta en funcionamiento función o modo por marcha defecto Después del secado La alarma suena o se muestra el mensaje «0:00».
- Page 45 Utilización del aparato 4. Ne seque su ropa en exceso; un secado excesivo puede arrugar la ropa. 5. No seque ropa que tenga goma u otro material elástico similar. 6. La puerta no puede abrirse a menos que la secadora haya terminado su ciclo. Preste atención a no abrir la puerta demasiado rápido, las superficies calientes de la máquina y la condensación podrían producir quemaduras.
- Page 46 Utilización del aparato OBSERVACIONES • No sobrecargue nunca el tambor. • No introduzca ropa empapada. La secadora podría dañarse o salir ardiendo. • Las prendas de lana o de seda no pueden secarse en este aparato. Atención, algunos tejidos no se pueden meter en la secadora. Siga sistemáticamente los pictogramas siguientes: Secado Secado a máquina normal...
- Page 47 Utilización del aparato Tabla de programas de secado Nivel Tipo de aproximado Capacidad Grado de Programas Observación prendas de humedad (kg) secado residual 70 % 7/3,5/1 Algodón Extra Algodón 7/3,5/1 Algodón Estándar 60 % Seleccione 7/3,5 Algodón Bajo el programa y el grado 70 % 7/3,5/1...
- Page 48 Información práctica Limpieza y mantenimiento Limpieza del filtro • Limpie el filtro después de cada uso. • Tire hacia arriba para extraerlo. • Limpieza del filtro • Utilice un paño o sus dedos. • Vuelva a instalar el filtro • Si limpia el filtro con ayuda de un paño húmedo o con agua, deje que se seque antes de reinstalarlo.
- Page 49 Información práctica Solución de problemas Problème Cause Solution Espere a que la corriente se Avería eléctrica. restablezca. Revise el enchufe, El enchufe no está asegúrese de que está correctamente enchufado. correctamente conectado. La ropa debe centrifugarse El aparato no funciona. antes de introducirse en la Se ha cargado demasiada secadora.
- Page 50 Información práctica Problème Cause Solution Consulte la etiqueta presente en las prendas, si el tejido es susceptible de encoger, examine bien sus prendas una vez secas. La ropa se encoge. Secado excesivo. Saque su ropa cuando esté poco húmeda o demasiado seca, y después extiéndala hasta que esté...
Need help?
Do you have a question about the DAV 7 C W566C2 and is the answer not in the manual?
Questions and answers