Table of Contents
Advertisement
Available languages
Available languages
Quick Links
Assembly Instructions & User's Manual
for
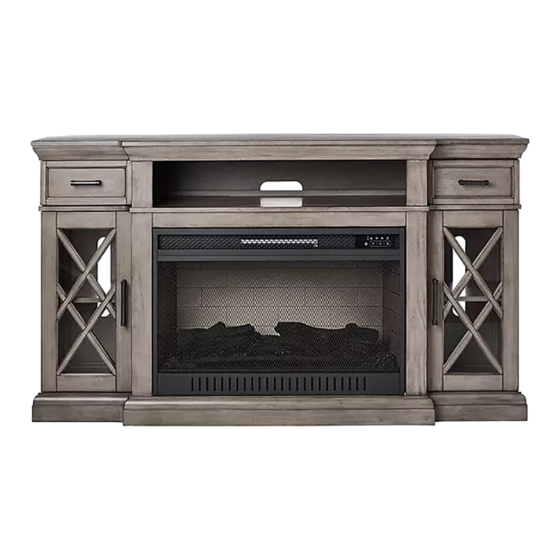
Lochlan Media Fireplace
Model Number: SMFPC-33-3 / SMFPC-33-3-E
Customer Assistance
: 1-866-942-5362
(spare/replacement parts)
or Email: parts@whalenfurniture.com
LOT NUMBER:
DATE PURCHASED:
/
/
THIS ASSEMBLY MANUAL CONTAINS IMPORTANT. SAFETY INFORMATION.
PLEASE READ AND KEEP FOR FUTURE REFERENCE.
1 |
P a g e
Need Assistance? Visit us at: samsclub.com/membersmarkhelp
Advertisement
Chapters
Table of Contents

Related Manuals for Member's Mark SMFPC-33-3


Summary of Contents for Member's Mark SMFPC-33-3
- Page 1 Assembly Instructions & User’s Manual Lochlan Media Fireplace Model Number: SMFPC-33-3 / SMFPC-33-3-E Customer Assistance : 1-866-942-5362 (spare/replacement parts) or Email: parts@whalenfurniture.com LOT NUMBER: DATE PURCHASED: THIS ASSEMBLY MANUAL CONTAINS IMPORTANT. SAFETY INFORMATION. PLEASE READ AND KEEP FOR FUTURE REFERENCE.
-
Page 2: Table Of Contents
Table of Contents Quality Statement ............................. 3 Important Safety Information ........................ 3 Before Assembly ............................3 Care & Use ..............................3 Package Contents ............................ 4 Product Information ..........................4 Components .............................. 5 Hardware ..............................5 Tools (Not Included) ..........................5 Step 1 ................................ -
Page 3: Quality Statement
Quality Statement Important Safety Information • Please read all instructions carefully before assembling this product. • Where applicable, and for your safety, assembly by an adult is strongly recommended. • Use only vendor-supplied hardware to assemble this item. Using unauthorized hardware could jeopardize the structural integrity of the item. -
Page 4: Package Contents
Package Contents Component Description Quantity Fireplace Adjustable Shelf Product Information Dimensions – 66” x 19” x 37” (167.6cm x 48.3cm x 94cm) Weight Capacity FITS UP TO MOST 190.5 cm / 75” DIAGONAL FLAT-PANEL TVs MAXIMUM LOAD 45.4 kg / 100 lb MAXIMUM LOAD 2.2 kg / 5 lb Place TV behind the stopper MAXIMUM LOAD 22.7 kg / 50 lb... -
Page 5: Components
Components Component A Component B Part No. not available Part No. 00SMFPC-33-3-B Qty 1 Qty 2 Hardware Shelf Support (H1) Acrylic Stopper (H2) Hex Wrench (H3) Part No. 00SMFPC-33-3-T Part No. 00SMFPC-33-3-U Part No. 00SMFPC-33-3-V Qty: 8+1 extra Qty: 1 Qty: 1 Touch-up Pen (H4) Tipping Restraint Hardware Kit (H5) -
Page 6: Step 1
Step 1 H1 x 8 a) Unpack the units and confirm that you have all hardware and required parts. b) Open the doors and insert four Shelf Supports (H1) in the holes at the desired height inside each compartment. Make sure you place the four Shelf Supports at the same level, so the shelf is not tilted. -
Page 7: Step 2
Step 2 Adjustment clip Release lever a) If you need to remove the drawer, please press the Release Levers on the mechanisms pre- attached underneath the drawer kit at both ends. b) If necessary, you can push the Adjustment Clips on the bottom mechanisms to adjust the top and bottom gaps of the drawer. -
Page 8: Step 3
Step 3 Cable channel a) The vented rear panel is removable for easy access to audio and video component hook-up. Be sure to route the cables through the cutout. P a g e Need Assistance? Visit us at: samsclub.com/membersmarkhelp... -
Page 9: Step 4 - Hinge Adjustment
Step 4 - Hinge adjustment Depth adjustment a) Loosen or tighten the indicated screw to adjust the gaps forward and backward between doors and console. Lateral adjustment b) Rotate the screw clockwise or counterclockwise to adjust the door horizontally as shown. Height adjustment c) Loosen or tighten the indicated screw to adjust the door vertically to the desired position. -
Page 10: Step 5
Step 5 H2 x 1 NOTE: To prevent your TV from tipping, you must follow these instructions if you place a flat panel television on top of your console. Otherwise, remove the acrylic stopper template directly a) Remove the paper backing from the Acrylic Stopper (H2) and place it in the cut-out of the acrylic stopper template on the front of the top panel. -
Page 11: Step 6
Step 6 Wooden stud Wall Connector Steel cable Short screw Wall Long screw Floor leveler Metal bracket a) Ask for assistance to position the assembled unit at the desired location against a wall. Open the door and you will see a hole at each front corner of the base, use the enclosed Hex Wrench (H3) to turn the leveler and adjust the height of the unit, until the unit is level. -
Page 12: Warning
Warning Please use your furniture correctly and safely. Improper use can cause safety hazards, or damage to your furniture or household items. Carefully read the following safety information. This unit is not intended for use with CRT TVs. The top surface maximum weight capacity is 100 lbs. (45.4 kg) and maximum load 75 in. -
Page 13: Troubleshooting
Troubleshooting Problem Possible Cause Prevention / Solution Tilting / wobbling Surface not level Adjust the floor levelers Scratches / Nicks Assembly or shipping damage Use touch-up pen to cover Refer to the hinge sticker for Doors are not level Hinges are not engaged properly adjustment Care &... - Page 14 14 | P a g e Need Assistance? Visit us at: samsclub.com/membersmarkhelp...
- Page 15 Instrucciones de ensamble & manual del usuario para Consola con chimenea para medios Lochlan Número del modelo: SMFPC-33-3 / SMFPC-33-3-E Asistencia al cliente : 1-866-942-5362 (partes extras/de repuesto) o mande un correo electrónico a: parts@whalenfurniture.com NÚMERO de LOTE: FECHA de COMPRA: ESTÉ...
- Page 16 Tabla de contenido Declaración de calidad ........................... 3 Información de seguridad importante ....................3 Antes del ensamble ..........................3 Cuidado y uso ............................3 Contenidos del paquete ......................... 4 Información del producto ........................4 Componentes ............................5 Material de ferretería ..........................5 Herramientas (no incluidas) ........................
-
Page 17: Declaración De Calidad
Declaración de calidad Información de seguridad importante Por favor lea todas las instrucciones antes de ensamblar el mueble. Donde se pueda, y por su seguridad, se recomienda el ensamble por un adulto. Use solo ferretería suplida por el vendedor para ensamblar la unidad. El uso de ferretería no autorizada podría poner en riesgo la integridad estructural de la unidad. -
Page 18: Contenidos Del Paquete
Contenidos del paquete Componente Descripción Cantidad Chimenea Repisa ajustable Información del producto Dimensiones – 66” x 19” x 37” (167.6cm x 48.3cm x 94cm) Capacidad de peso PARA LA MAYORÍA DE LAS TELEVISIONES CON PANTALLA PLANA DE 190.5 cm / 75” EN DIAGONAL CARGA MÁXIMA 45.4 kg / 100 lb CARGA MÁXIMA 2.2 kg / 5 lb PONER LA TV DETRÁS DEL TOPE... -
Page 19: Componentes
Componentes Componente A Componente B # de parte. no disponible # de parte. 00SMFPC-33-3-B Cantidad: 1 Cantidad: 2 Material de ferretería Soporte de repisa (H1) Tope de acrílico (H2) Llave hexagonal (H3) # de parte: 00SMFPC-33-3-T # de parte: 00SMFPC-33-3-U # de parte: 00SMFPC-33-3-V Cantidad: 8+1 extra Cantidad: 1... -
Page 20: Paso 1
Paso 1 H1 x 8 a) Desempacar la unidad y confirmar que se tiene todo el material de ferretería y partes requeridas b) Abrir las puertas e insertar 4 soportes de repisa (H1) en los agujeros en las alturas deseadas adentro de cada compartimiento. -
Page 21: Paso 2
Paso 2 Gancho de ajuste Palanca de liberación a) Si necesita retirar el cajón, por favor presione las palancas de liberación en los mecanismos pre-adjuntados abajo del juego de cajones en ambos lados. b) Si fuera necesario, usted puede empujar el gancho de ajuste en los mecanismos inferiores para ajustar los espacios superiores e inferiores del cajón. -
Page 22: Paso 3
Paso 3 Guía de cables a) El panel posterior ventilado es retirable para acceso fácil al enchufe del componente de audio y video. Asegúrese de encaminar los cables a través del recorte. P a g e ¿ Necesita asistencia? Visítenos en: samsclub.com/membersmarkhelp... -
Page 23: Paso 4- Ajuste De Bisagras
Paso 4- ajuste de bisagras Ajuste de profundidad a) Aflojar o apretar el perno indicado para ajustar los espacios frontales y posteriores entre las puertas y la consola. Ajuste lateral 2~3mm b) Rotar el perno a la derecha o a la izquierda para ajustar la puerta horizontalmente. Ajuste de altura c) Aflojar o apretar el perno indicado para ajustar la puerta verticalmente. -
Page 24: Paso 5
Paso 5 H2 x 1 NOTA: Para prevenir la inclinación de su TV, usted debe seguir las instrucciones para poner la TV de pantalla plana sobre la consola. De otra manera, retirar el templado del tope de acrílico directamente a) Retirar el papel del tope de acrílico (H2) y poner en su lugar en el recorte del templado del tope de acrílico en la parte frontal del panel superior. -
Page 25: Paso 6
Paso 6 Viga de madera Pared Conector Cable de acero Perno corto Pared Soporte de metal Perno largo Nivelador de piso a) Pedir asistencia para posicionar la unidad ensamblada en el lugar deseado contra la pared. Abrir la puerta y usted mirara un agujero en cada esquina frontal de la base, usar la llave hexagonal provista (H3) para voltear el nivelador y ajustar la altura de la unidad, hasta que la unidad este nivelada. -
Page 26: Advertencia
Advertencia Por favor use sus muebles de forma correcta y seguramente. El uso inapropiado puede causar riesgos a la seguridad, o daños a sus muebles u objetos de hogar. Leer cuidadosamente la siguiente información de seguridad. Esta unidad no debe utilizarse con TVs CRT. La carga máxima de la superficie superior es 100 lbs. (45.4 kg) y puede aguantar una TV de pantalla plana de 75 in. -
Page 27: Solución De Problemas
Solución de problemas Problema Posible Causa Prevención / Solución Ajustar los niveladores de Inclinación / tambaleo La superficie no está nivelada piso Rayaduras / Cortes Daños por el ensamble o envío Use el plumón para cubrir Las puertas están fuera de Las bisagras no están Consultar la etiqueta de las nivel. - Page 28 14 | P a g e ¿ Necesita asistencia? Visítenos en: samsclub.com/membersmarkhelp...
Need help?
Do you have a question about the SMFPC-33-3 and is the answer not in the manual?
Questions and answers