Table of Contents
Advertisement
Advertisement
Table of Contents

Related Manuals for Vivitar Vivicam 3826


Summary of Contents for Vivitar Vivicam 3826
-
Page 1: User Manual
V3826 User Manual English 040507TP... -
Page 2: Fcc Statement
FCC STATEMENT This device complies with Part 15 of the FCC Rules. Operation is subject to the following two conditions: 1. This device may not cause harmful interference, and 2. This device must accept any interference received, including interference that may cause undesired operation Note: This equipment has been tested and found to comply with the limits for Class B digital... - Page 3 Use of shielded cable is required to comply with Class B limits in Subpart B of Part 15 of the FCC rules. Do not make any changes or modifications to the equipment unless otherwise specified in the manual. If such changes or modifications should be made, you could be required to stop operation of the equipment.
-
Page 4: Trademark Information
1. The bundled driver, software, design, specifications and user's manual that were packaged with the camera are subject to change without notice. 2. The accessories that come with the ViviCam 3826 may vary between regions. 3. For driver updates, refer to our website or contact your dealer. - Page 5 WARNINGS Do not use the camera if it is emitting smoke, unusual odor or noise, becoming unusually hot to be touched, or if it is in any other abnormal state. Operating the camera in any of these circumstances may cause a fire or an electrical shock. Stop using the camera immediately, turn the camera off, and then disconnect the power source (batteries or AC power adapter).
- Page 6 If the camera has been dropped or if the camera case has been damaged, turn the camera off, and then disconnect the power source (batteries or AC power adapter.) (If you are using the AC power adapter, unplug the adapter form the AC power outlet after you have disconnected the camera.) Then contact to your dealer or authorized service facility.
- Page 7 CAUTIONS Do not place the camera in damp or dusty locations. This may cause a fire or an electrical shock. Do not place the camera in a location affected by oil fumes or steam, such as near a cooking stove or humidifier. This may cause a fire or an electrical shock. Do not cover or wrap the camera or the AC power adapter with a cloth or quilt.
- Page 8 When leaving the camera unused for long periods, such as during a vacation, always unplug the camera from the power source (batteries or AC power adapter) for safety. (If you are using the AC power adapter, unplug the adapter from the AC power outlet after you have disconnected the camera.) Failure to do so could result in a fire.
-
Page 9: Table Of Contents
GETTING STARTED ... 21 Installing the Batteries ... 21 Using an AC Power Adapter (Optional Accessory) ... 22 Loading an SD Memory Card (Optional Accessory) ... 23 Attaching the Camera Strap ... 24 Attaching the Lens Strap...24 VIVICAM 3826 ... 14... - Page 10 Choosing the OSD Language ... 25 Setting the Date and the Time ... 25 Setting the Image Resolution and Quality ... 26 CAPTURING IMAGES ... 28 Basic Settings ... Viewfinder ... 28 LCD Monitor ... 29 Zoom Functions ... 30 Self-Timer ...
- Page 11 TRANSFERRING IMAGES AND VIDEO CLIPS TO YOUR COMPUTER ... 52 Step 1: Installing the USB Driver on a Windows PC ... 53 Installing the USB Driver on a Macintosh Computer...53 Step 2: Connecting the ViviCam 3826 to Your Computer ... 54...
- Page 12 INSTALLING PHOTOSUITE ... 56 INSTALLING PHOTOVISTA ... 57 INSTALLING ACROBAT READER...58 USER’S MANUAL ON CD-ROM...59 MENU OPTIONS ... 60 Capture Menu ... 60 Playback Menu ... 67 Setup Menu ... 68 CONNECTING THE VIVICAM 3826 TO OTHER DEVICES ... 71 VIVICAM 3826 SPECIFICATIONS...72...
-
Page 13: Introduction
INTRODUCTION Overview Your new ViviCam 3826 delivers high quality, 2304 x 1728 resolution images using a 4.0 Megapixel CCD sensor. Using either the optical viewfinder or the color TFT image LCD display, you can compose images and then examine them in detail. An auto-flash sensor automatically detects the shooting (lighting) conditions and determines whether the flash should be used. -
Page 14: Package Contents
SD Memory Card The accessories that come with your ViviCam 3826 may be different from those described in this manual due to the fact that different retailers often specify slightly different product inclusions and accessories to suit their market requirements, customer demographics, and geographical preferences. -
Page 15: Getting To Know Your Vivicam 3826
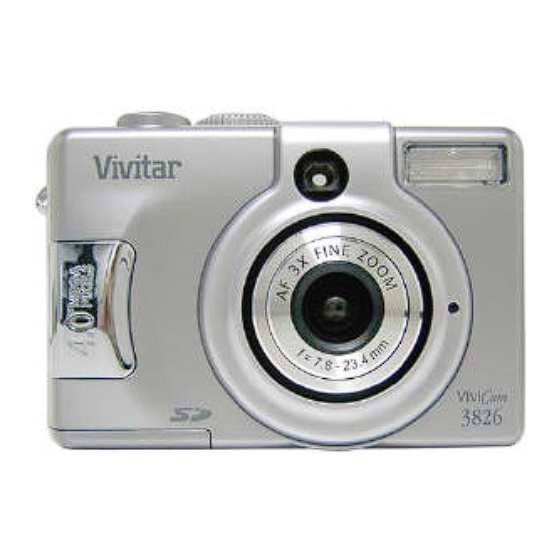
GETTING TO KNOW YOUR VIVICAM 3826 Front View 1. Mode dial/movie record button 2. Shutter button 3. Camera strap lug 4. A/V OUT (Audio/Video Out) terminal 5. USB port 6. DC-in connector 7. Power switch 8. Flash 9. Viewfinder window 10. -
Page 16: Rear View
Rear View Arrow button (Up) Flash button Arrow button (Right) Arrow button (Down) Self-timer button Arrow button (Left) 5. OK OK button 6. T Optical Zoom (Telephoto) Viewfinder LED indicator LCD monitor Delete button Tripod socket Digital zoom button W Optical Zoom (Wide) Thumbnail button Playback button Menu button... -
Page 17: Mode Dial
Mode Dial Mode Manual Mode Automatic Mode Macro Mode Portrait Mode Landscape Mode Night Scene Mode Sports Mode Setup Mode Movie Mode Description This manual mode lets you adjust additional image settings (Color, Saturation, Sharpness) Select this mode for "point-and-shoot" action. Select this mode to shoot a close-up of a subject. -
Page 18: Led Indicators
Blinking green Image is being recorded to the memory card LED indicator Blinking green USB communication/transfer in progress LED indicator Solid green The ViviCam 3826 is ready to record images Self-timer indicator Blinking red The self-timer function is activated ---- ----... -
Page 19: Lcd Monitor Information
LCD Monitor Information These indicators are displayed when recording still images: 1. Exposure mode [M] Manual mode [A] Automatic mode ] Macro mode ] Portrait mode ] Landscape mode ] Night Scene mode ] Sports mode 2. Image size (resolution) [ ] 2304 x 1728 pixels [ ] 1600 x 1200 pixels [ ] 1280 x 960 pixels... - Page 20 LCD Monitor Information 5. Sharpness ] High ] Medium ] Low 6. White balance Automatic ] Daylight ] Cloudy ] Sunset ] Tungsten ] Fluorescent 7. ISO Automatic 8. Flash mode ] Automatic flash ] Automatic with Red-eye reduction ] Fill flash (on) ] Flash off 9.
- Page 21 These indicators are displayed when recording video clips: 1. Movie mode 2. Recording indicator 3. Video counter 4. Battery level/ Adapter 5. Card indicator. These indicators are displayed when playing images back: 1. Reverse arrow 2. Card indicator 3. Forward arrow 4.Date (year.month.day) 5.
-
Page 22: Getting Started
You can use 2 AA size batteries (Alkaline or Ni-MH), one CR-V3, or an AC power adapter (3.0V/ 2.5A) to power the ViviCam 3826. Battery power is convenient for capturing images or recording video clips while an AC power adapter is useful when transferring images to your computer. -
Page 23: Using An Ac Power Adapter (Optional Accessory)
Using an AC Power Adapter (Optional Accessory) 1. Make sure the camera is turned off. 2. Open the ports cover and connect one end of the AC power adapter to the jack labeled "DC IN". 3. Connect the other end to an electrical outlet. Make sure to use only the AC power adapter specified for the camera. -
Page 24: Loading An Sd Memory Card (Optional Accessory)
Loading an SD Memory Card (Optional Accessory) The ViviCam 3826 comes with internal memory, allowing you to store images and video clips in the camera. However, you can expand the memory capacity by using an SD memory card so that you can store additional images and video clips. -
Page 25: Attaching The Camera Strap
Attaching the Camera Strap To prevent accidentally dropping your camera always use the camera strap. Attach the camera strap as follows: 1. Thread the small loop of the strap through the strap eyelet on the camera. 2. Pull the large loop through the small loop until the strap is firmly secured. -
Page 26: Choosing The Osd Language
Choosing the OSD Language When you turn on the ViviCam 3826 for the first time, the language setting screen appears, prompting you to choose a language for displayed information and the LCD monitor. Follow the steps below to set the OSD (On-Screen Display) language. -
Page 27: Setting The Image Resolution And Quality
Setting the Image Resolution and Quality Resolution and quality settings determine the pixel size (dimension), image file size, and compression ratio for your image. These settings affect the number of images that can be stored in the internal memory, or on an SD memory card. Higher resolution and higher quality images offer the best photographic results but take up more memory space. - Page 28 The table below shows the approximate number of shots that you can capture at each setting based on internal memory or an 8MB/16MB/32MB/128MB/256MB SD memory card. The above data shows the standard testing results. The actual capacity varies according to the shooting conditions and settings.
-
Page 29: Capturing Images
CAPTURING IMAGES Basic Settings Your ViviCam 3826 is equipped with both an optical viewfinder and a full color TFT LCD display to compose images. Capturing images using the optical viewfinder will conserve battery power. If your batteries are low, it is recommended to compose images using the optical viewfinder. -
Page 30: Lcd Monitor
LCD Monitor The LCD monitor can help you to compose an image while capturing images, to replay recorded images/video clips, or to adjust menu settings. The mode icons, text and numbers that are displayed on the LCD monitor vary according to the current settings. 1. -
Page 31: Zoom Functions
Zoom Functions The optical zoom lens moves during zoom photography. Zoom photography allows you to capture telephoto and wide-angle shots. By using the digital zoom, images can be brought even closer by pressing the (T) telephoto button. Objects may be made to appear smaller and farther away by pressing the (W) wide-angle button. -
Page 32: Self-Timer
Self-Timer By using the self-timer you can join into the scene when capturing group shots. You can capture images with the self-timer in any shooting mode (Manual, Automatic, Macro, Portrait, Landscape, Night Scene or Sports). The self-timer duration is 10 seconds. After the self-timer is set, the shutter automatically releases after 10 seconds. -
Page 33: Flash
LCD monitor. 4. Compose the image and press the shutter button. The ViviCam 3826 has four flash modes: Automatic Flash (default), Automatic with Red-Eye Reduction, Fill Flash (on), and Flash Off. The modes appear cyclically when you press the button on the rear side of the camera. - Page 34 The table below will help to choose the appropriate flash mode: Flash Modes ] Automatic Flash The flash fires automatically according to the ambient lighting conditions. Select this mode for general photography. ] Automatic with The flash emits a precursor-flash before the main flash fires. Red-Eye Reduction This causes the pupil in the human eye to constrict, reducing the red-eye phenomenon.
-
Page 35: Photography Modes
Photography Modes Your ViviCam 3826 offers you choices of seven "scenes modes", which include Manual, Automatic, Macro, Portrait, Landscape, Night Scene and Sports modes. In these modes, your camera is optimized for the selected subject-type, sparing you the burden of making individual settings and adjustments, one-by-one. -
Page 36: Manual Mode
Manual Mode You can capture images with precise control by manually adjusting conditions such as quality, size, saturation, sharpness, white balance, ISO speed, flash mode and EV compensation. 1. Turn the camera on by sliding the POWER switch. 2. Rotate the mode dial to [M]. 3. -
Page 37: Automatic Mode
Automatic Mode In this mode the camera adjusts the majority of the settings. Simply point the camera at the subject and then shoot. 1. Turn the camera on by sliding the POWER switch. 2. Rotate the mode dial to [ A ]. 3. -
Page 38: Macro Mode
Macro Mode Use macro mode to capture a close-up of a subject, such as flowers or insects. The effective range of focus is 8 to 24 inches in macro mode. 1. Turn the camera on by sliding the POWER switch. 2. -
Page 39: Portrait Mode
Portrait Mode The [ ] Portrait mode helps you to compose portraits in which the main subject stands out sharply and clearly against indistinct background's details. The effective range of focus is three feet or greater. 1. Turn the camera on by sliding the POWER switch. 2. -
Page 40: Landscape Mode
Landscape Mode The [ ] Landscape mode helps you to capture vivid and expansive landscape images by enhancing the image's color and saturation. The [ distance to the subject is 6 feet or greater. 1. Turn the camera on by sliding the POWER switch. 2. -
Page 41: Night Scene Mode
Night Scene Mode Capturing human subjects by using the [ balance between the main subject and the background. The people in an evening sky or night scene are illuminated by the flash while the background is captured at a slow shutter speed to prevent blurring and let both (people and the background) appear properly exposed. -
Page 42: Sports Mode
Sports Mode ] Sports mode helps you to capture fast-moving objects. 1. Turn the camera on by sliding the POWER switch. 2. Rotate the mode dial to [ 3. Press the Menu button. 4. To set Image size, Image quality, EV, White balance, Color, Saturation and Sharpness you may press press button to enter the submenu and choose the... -
Page 43: Playback Mode
PLAYBACK MODE playback mode, you can view, magnify, delete images, play video clips, or run a slide show. Playback mode also provides a thumbnail image display, allowing you to quickly scan for the image you want. In Playback mode, pressing the In Playback mode, pressing the shutter button will change into Capture mode and automatically capture the current image. -
Page 44: Viewing Images
Viewing Images You may view your recorded images on the LCD display by pressing the 1. Turn the camera on by sliding the POWER switch. 2. Press the button, then press the menu button and the playback menu displays on the screen. 3. -
Page 45: Zoom Playback
Zoom Playback While reviewing your images, you may enlarge a selected portion of an image. This magnification allows you to view fine details. 1. Turn the camera on by sliding the POWER switch. 2. Press the button. 3. View and select your recorded images by using the button. -
Page 46: Displaying Thumbnail Images
Displaying Thumbnail Images This function allows you up to view nine thumbnail images on the LCD monitor simultaneously so that you can quickly scan for a particular image. 1. Turn the camera on by sliding the POWER switch. 2. Press the button and then the Nine thumbnail images appear on the LCD monitor (assuming there are nine or more recorded images in... -
Page 47: Slide Show Display
Slide Show Display The slide show function enables you to play your images back automatically in sequential order as a slide show. This is a very useful and entertaining feature for reviewing recorded images and video clips for presentations. 1. Turn the camera on by sliding the POWER switch. 2. -
Page 48: Deleting Images/Video Clips
Deleting Images/Video Clips To delete one image or video clip at a time, use the To delete all images or video clips at once, use the delete function in Playback menu. Delete One Image/Video Clip at a Time 1. Turn the camera on by sliding the POWER switch. 2. -
Page 49: Delete All Images/Video Clips At A Time
Delete All Images/Video Clips at a Time 1. Turn the camera on by sliding the POWER switch. 2. Press the button on the rear side of the camera to see captured images and video clips. 3. Then press the button. 4. -
Page 50: Formatting An Sd Card Or Internal Memory
Formatting an SD card or Internal Memory Using this option you may format internal memory or an SD memory card. 1. Turn the camera on by sliding the POWER switch. 2. Press the [ ] Playback button on the rear side of the camera. -
Page 51: Movie Mode
MOVIE MODE Recording Video Clips The movie mode allows you to record video clips at a resolution of 320 x 240 pixels. 1. Turn the camera on by sliding the POWER switch. 2. Press (and hold briefly) the The record time, REC icon, card indicator, and battery level will display on the LCD monitor. -
Page 52: Viewing Video Clips
Viewing Video Clips To view a video clip, follow these steps below: 1. Turn the camera on by sliding the POWER switch. 2. Press the button. 3. Select a video clip using the 4. Press the OK button to view the recorded video clip. While viewing a video clip the image number and duration will be displayed. -
Page 53: Transferring Images And Video Clips To Your Computer
You can share recorded images/ video clips with your family or friends via e-mail or post them on the Web. Before doing those things, you need to connect the ViviCam 3826 to your computer by using the USB cable and then transfer the images/video clips. -
Page 54: Step 1: Installing The Usb Driver On A Windows Pc
After the USB driver installation is complete, restart your computer. Installing the USB Driver on a Macintosh Computer For Mac OS 9.0 or higher version, the computer will automatically recognize the ViviCam 3826 and load its own USB drivers. -
Page 55: Step 2: Connecting The Vivicam 3826 To Your Computer
Step 2: Connecting the ViviCam 3826 to Your Computer 1. Connect one end of the USB cable to an available USB port on your computer. 2. Connect the other end of the USB cable to the USB connector on the camera. -
Page 56: Step 3: Downloading Images/Video Clips
Step 3: Downloading Images/Video Clips When the ViviCam 3826 is turned on and connected to your computer, it is considered to be a disk drive, just like a floppy disk or CD. You can download (transfer) images by copying them from the "removable disk"... -
Page 57: Installing Photosuite
Get your images ready and go explore this amazing program. To Install PhotoSuite 1. Inset the CD-ROM packaged with the ViviCam 3826 into the CD-ROM drive. The welcome screen appears. 2. Click "Install PhotoSuite". Follow the on-screen instructions to complete the installation. -
Page 58: Installing Photovista
To Install PhotoVista: 1. Insert the CD-ROM packaged with the ViviCam 3826 into the CD-ROM drive. The welcome screen appears. 2. Click "Install PhotoVista". Follow the on-screen instructions to complete the installation. -
Page 59: Installing Acrobat Reader
INSTALLING ACROBAT READER The CD-ROM includes a PDF (portable document format) copy of the user’s manual. To view a PDF you must have Acrobat Reader installed in your computer. Acrobat Reader is included on the camera CD ROM. Using Acrobat Reader, you can read the user’s manual and print sections of interest. -
Page 60: User's Manual On Cd-Rom
USER’S MANUAL ON CD-ROM A copy of the user’s manual on is provided on the CD-ROM in PDF format. It is a backup copy of the printed manual. If you misplace the printed guide, you may print another copy from the CD-ROM. -
Page 61: Menu Options
MENU OPTIONS Capture Menu In the Capture menu, you can specify camera settings you would like to use such as resolution, image quality, EV compensation, white balance, ISO, color mode, saturation and sharpness. 1. Turn the camera on by sliding the POWER switch. 2. -
Page 62: Image Size
This is called EV compensation. The EV compensation of your ViviCam 3826 can be adjusted from [-2.0 EV] to [+2.0 EV] in 0.5 EV steps. To adjust EV, you may press... - Page 63 Effective Subjects and Set Values Positive (+) Compensation Copying of printed text (black characters on white paper) Backlit portraits Very bright scenes (such as snowfields) and highly reflective subjects Shots made up predominantly of sky Negative (-) Compensation Spot lighted subjects, particularly against dark backgrounds Imaging of printed text (white characters on black paper) Scenes with low reflectivity, such as shots of green or dark foliage...
-
Page 64: White Balance
Digital still cameras also see a white object as white by averaging the light around the subject. The ViviCam 3826 determines the white balance by averaging the various kinds of light that enters the lens. You may specify the white balance when capturing images under specific lighting conditions (Automatic, Daylight, Cloudy, Sunset, Tungsten and Fluorescent). - Page 65 Select the photographic ISO to be used for image capture. The higher the ISO sensitivity value, the greater sensitivity, but the greater the noise. With a higher sensitivity selected, images can be captured with less light. When recording in dark situations or recording a fast moving subject, use a higher ISO setting.
- Page 66 Color To capture an image, the ViviCam 3826 offers three types of color (Full Color/ Black & White/ Sepia) for you to match as your wish. Your images will demonstrate different impression by choosing different types of color. To set Color (Full color/ Black & White/ Sepia) you may press button in the main menu or press the submenu and choose the setting.
- Page 67 Sharpness Your ViviCam 3826 can automatically emphasize the borders between light and dark areas of the image. This will make the image’s edges look sharper. In some scenes you may prefer sharper edge detail. In other scenes you may prefer softer edge detail.
-
Page 68: Playback Menu
Playback Menu Using the Playback menu to transfer your recorded images/video clips to a memory card or to create an on-camera slide show displaying. You can also use the Playback menu to delete images, and format the memory card or the internal memory and also record your voices as your preference. -
Page 69: Setup Menu
Setup Menu You can select your preferences for camera settings in Setup mode. Rotate the mode dial to Setup position and navigate to the option you wish to configure by using the Date & Time Refer to "Setting the Date and the Time" in GETTING STARTED. You can view your images on a TV. - Page 70 Beeper The ViviCam 3826 makes a sound (beep) each time you press Beeper a camera button if this function is enabled. Press the OK button. Then select beeper [Louder], [Soft] or [Off] by using the button and then OK button to confirm.
- Page 71 Power off time If the ViviCam 3826 remains unused for a specified period of time while the camera is powered on, the camera will switch to an "idle" mode, and eventually turn itself off to conserve the power. Inactivity period...
-
Page 72: Connecting The Vivicam 3826 To Other Devices
CONNECTING THE VIVICAM 3826 TO OTHER DEVICES VIDEO Cable USB Cable Computer SD Card Reader SD Card Reader PCMCIA Adapter Printer Notebook... -
Page 73: Vivicam 3826 Specifications
VIVICAM 3826 SPECIFICATIONS Item Description Image sensor 1/1.8" CCD Effective pixels 4.0 Million Image resolution Still Image: 2304 x 1728 1600 x 1200 1280 x 960 640 x 480 Movie image: 320 x 240 Image quality Fine Normal Economy Recording media 16 MB internal memory (14 MB available for image storage);... - Page 74 LCD monitor 1.5" color TFT LCD Self-timer 10-second delay Zoom Optical: 3X Digital: Capture mode: 4X/ Playback mode: 6X Exposure compensation Automatic; Manual: -2.0 ~ +2.0 EV (0.5 EV) White Balance Automatic; Manual: Daylight, Cloudy, Sunset, Tungsten, Fluorescent Compressed format JPEG, MPEG 1 Level I for video clip Standards JPEG, EXIF 2.1, MPEG 1 Level I Interface...
Need help?
Do you have a question about the Vivicam 3826 and is the answer not in the manual?
Questions and answers