Table of Contents
Advertisement
Advertisement
Table of Contents

Subscribe to Our Youtube Channel
Related Manuals for Vivitar Vivicam 355


Summary of Contents for Vivitar Vivicam 355
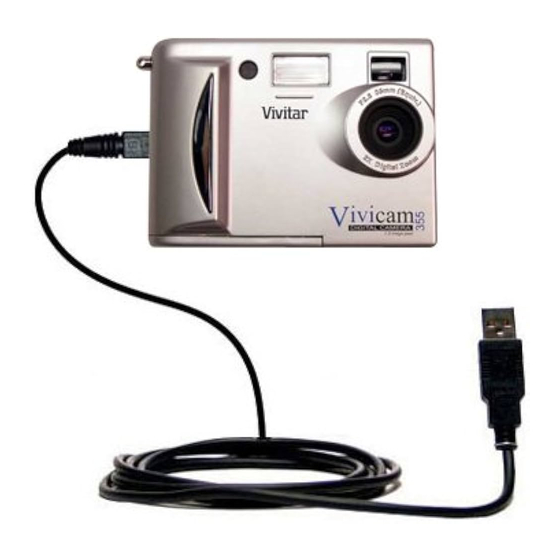
- Page 1 Vivicam 355 Vivicam 355...
-
Page 2: Table Of Contents
CONTENTS Your package...2 Electromagnetic Compatibility Notice...3 Trademarks acknowledgement...4 Precautions...5 Features of the camera...6 Batteries used for Vivicam 355 Digital Camera...7 Input Compact Flash card...8-9 Nomenclature...10 Buttons Description...11 LCD monitor menu...11-12 Remarks...12-14 Status LCD Display...15 Flash Strobe modes...15 Playback on LCD monitor...16 Download to computer...16... -
Page 3: Your Package
The Vivicam 355 Camera kit includes the following items: Vivicam 355 Camera Software CD ROM USB cable TV (video) cable User's Manual Quick Start Guide Warranty Card Hand Strap Alkaline Batteries (AA) Default settings - When you insert the batteries and power-up the camera for the first time, the camera will... -
Page 4: Electromagnetic Compatibility Notice
Electromagnetic Compatibility Notice This device complies with Part 15 of FCC regulations. Operation is subject to the following two conditions: This device may not cause harmful interference This device must accept any interference received, including interference that may cause undesired operation. Warning: Changes or modifications to this camera not expressly approved by the party responsible for compliance could void the user's authority to operate the equipment. -
Page 5: Trademarks Acknowledgement
Trademark acknowledgements: Vivicam is a trademark of Vivitar Corporation. The Vivicam TWAIN driver is developed by Conexant Systems, Inc., USA. Microsoft, Windows 98/Me/2000/XP are the registered trademarks of Microsoft Corporation. Pentium is a registered trademark of Intel Corporation. The Photo Fantasy, Photo Printer Pro and Photo Studio is licensed to Arcsoft, USA. -
Page 6: Precautions
Precautions: Thank you for selecting the Vivitar Vivicam 355 digital camera. Please read these instructions carefully for a thorough understanding of your new camera before taking pictures. • This camera is not water resistant and should not be used outdoors in snow or rain. -
Page 7: Features Of The Camera
Features of the Vivicam 355 camera: High speed image processing with multiple functions High quality images with SXGA (1280 x 1024) resolution Large aperture glass lens (F2.8) Short shot-to-shot time (~3 seconds for Full * mode) Two resolutions: SXGA - 1024 x 1024 and VGA - 640 x 480 Three levels of image of quality at each resolution setting 1.8-inch color LCD monitor (280x220 pixels) -
Page 8: Batteries Used For Vivicam 355 Digital Camera
Notice: The Vivicam 355 has 1MB of internal memory. 500KB is dedicated to camera functionality (the camera operating program). The remaining 500KB of internal memory is available for image storage. This is adequate about six images when the camera is set to " HALF * " (VGA mode - economy quality). It is strongly recommended that you purchase an optional Compact Flash memory card to use with your camera. -
Page 9: Input Compact Flash Card
Inserting a Compact Flash Card (Optional CF Card - not included in kit): 1. Open the CF cardholder cover and lift the ejector arm 2. Insert the CF card as shown 3. Lock the ejector (flip it down) 4. Close the CF cardholder cover 5. - Page 10 Removing a Compact Flash Card: 1. Turn off the camera 2. Open the CF holder door 3. Unlock the ejector (flip up) 4. Push down on the CF ejector to release the card 5. Remove the CF card by grasping with your fingers 6.
-
Page 11: Nomenclature
Nomenclature: Hand Strap Mount Power View Finder 1.8'' TFT Display Shutter Status LCD View Finder Flash Strobe Lens Mode Dial CF card door LCD monitor control buttons Flash/ Timer/ Resolution Tripod port TV out USB port... -
Page 12: Buttons Description
Description of the Camera Control Buttons: 1. RES: (Resolution) Change from Full* to Half***, Half**, Half*, Full***, Full**. 2. Timer: Turn on/off self-timer (10 second delay) 3. Flash: Toggle between Auto, Red Eye, On (Fill flash), and Off (no flash) 4. -
Page 13: Remarks
If you do not delete the image, it will be saved to memory. White Balance - A digital camera is different from the human eye. Your eyes can see a white subject regardless of the lighting conditions. A digital camera includes internal firmware (a computer program) that is designed to automatically correct your images in order to reproduce a true color image. - Page 14 EV Compensation - If the background of your scene is very bright compared to your subject (eg. Sunny day, snow mountain), the exposure may be too low for the intended subject. You may wish to increase the exposure by increasing the exposure value - eV (from +0.3 to +1.5).
- Page 15 Language - Any one of seven common languages can be selected for the LCD monitor menus: English, French, German, Spanish, Japanese, Portuguese and Italian. English is preset. Format Media - It takes about 2 seconds to format a CF memory card (~1s to erase the internal memory).
-
Page 16: Status Lcd Display
Status LCD display - Icon descriptions 1. Battery icon: 2 Levels of battery power indication 2. 4-digit 7-segment display: • In Record mode - shows the total number of images left • In Play mode - shows the number of the last image (eg. 0008) 3. -
Page 17: Playback On Lcd Monitor
Playback on LCD monitor • Turn Mode Dial to "Play" mode • Press the “UP” or “DOWN” buttons to review your images • Press the "MENU" button to set the following: - LCD Brightness, Video Mode, Slide Show, Folder, Protect Files - Video Mode (select NTSC/PAL TV system) - Slide Show time interval (from 1 to 10 seconds) - Folder (select the folder you want to review) -
Page 18: Cf Memory Card
The actual number of images you can store varies according to the image environment (visual complexity). • Only CF type 1 memory cards are suitable for the Vivicam 355 camera. • Using quality CF memory cards e.g. San Disk, Lexar, Kodak is recommended. -
Page 19: Self Timer/Digital Zoom / Shot To Shot Time/ Rapid Fire Mode
Self-Timer - Press the Timer button to turn on the self-timer. The self-timer icon is shown on the status LCD display. Press the shutter fully down to trigger the self-timer. You will hear beep after the 7th second. The camera will take an image after the 10th second. The front LED will blink during the 10-second period. -
Page 20: Install The Arcsoft Programs And Camera Drivers In Windows 98/98Se/Me Os
Install Arcsoft programs and camera drivers in Windows 98/98SE/Me OS Note: The graphics shown are based on the user interface in Windows 98SE 1. Put the CD-ROM into your CD-ROM drive. It will automatically start and run 2. Select your desired language and click OK button 3. - Page 21 6. Select the Arcsoft programs you wish to install and click Next button 7. Change the name of the program folder if necessary and click Next button 8. Files will be copied to your computer 9. Click Finish button to install camera drivers...
- Page 22 Install Camera drivers - 10. Click Next button to start the camera driver installation 11. When installation is complete, click Finish button to restart your computer 12. After the computer is restarted, power up your camera 13. Switch the Mode dial to PC mode 14.
-
Page 23: Install The Arcsoft Programs And Camera Drivers In Windows2000/Xp Os
1. Press MENU, DOWN, ENTER buttons on the camera to select Silent Video mode 2. Search through Start>Settings>Control Panel>System>Device Manager>Imaging Devices>Vivicam 355 Video Camera Install Arcsoft programs and camera drivers in Windows 2000/XP OS Note: The graphics shown are based on the user interface in Windows XP 1. - Page 24 4. Click Yes button to accept the license agreement 5. Change the Destination Folder by clicking Browse button if necessary and click Next button 6. Select the Arcsoft programs you wish to install and click Next button 7. Change the name of the program folder if necessary and click Next button...
- Page 25 8. Files are being copied to your computer 9. Click Finish button to install camera drivers Install camera drivers - 10. Click Next button to start camera driver installation 11. Click Continue Anyway button (for Win XP) or Yes button (for Win 2000) when you see the warning message...
- Page 26 12. When Setup is complete, click Finish button to restart your computer 13. After your computer is restarted, power up your camera 14. Switch the Mode dial to PC mode 15. Connect the camera and computer with the USB cord 16.
- Page 27 18. Click Continue Anyway button (for Win XP) or Yes button (Win 2000) when you see the warning message 19. Click the Finish button 20. Drivers installation is complete Note: In rare occasions, the camera driver may possibly conflict other USB devices in your computer system.
- Page 28 3. Search through Removable disk>Dcim>100cnxnt and double-click on 100cnxnt folder 4. The image files are shown on the right pane Check the video driver 1. Press MENU, DOWN, ENTER buttons on the camera to select Silent Video mode 2. Search through Start>Control Panel>System>Hardware>Device Manager>Imaging devices>Vivicam 355 Video Camera...
-
Page 29: Download Photos By Using Photostudio
2. Search through File and click Select Source icon from the pull-down menu 3. Highlight Vivicam 355 Digital Camera and click Select button. Make sure your camera is in Mass Storage mode and connected to your computer. - Page 30 5. Click Disk Folder icon at the bottom to view/change the folder to which the images will be copied. Default folder is C:\WINDOWS\Desktop\My Photos. 6. Highlight the images you want to save (or click Select All icon to highlight all photos) and click Save icon.
-
Page 31: Use Photoprinter Pro
Use PhotoPrinter Pro NOTE: The graphics shown are based on the user interface in Windows 98SE. 1. Search through Start>Programs (“All Programs” for Windows XP) >Vivicam 355 Digital Camera Suite and click PhotoPrinter 2000 Pro icon OR double-click the shortcut created on your computer desktop 2. -
Page 32: Use Photofantasy
Use PhotoFantasy NOTE: The graphics shown are based on the user interface in Windows 98SE. 1. Search through Start>Programs (“All Programs” for Windows XP) >Vivicam 355 Digital Camera Suite and click PhotoFantasy 2000 icon OR double-click the shortcut created on your computer desktop... - Page 33 4. Click get photo icon and then click Add icon at the bottom NOTE: You can also download photos from your digital camera by clicking on the acquire photo icon. Please go to “Download Photos by using PhotoStudio” section for similar...
-
Page 34: Use Your Digital Camera As A Web Camera
5. From Open dialog box, look in your preset folder; highlight the image file and click Open button. 6. Click Okay icon 7. You can modify the image as desired Use your digital camera as a web camera 1. Start Windows Net Meeting (or other similar program) and set up an account. -
Page 35: Open User's Manual
Open User’s Manual 1. Search through Start>Programs (“All Programs” for Windows XP) >Vivicam 355 Digital Camera Suite > User Manual Uninstall Arcsoft programs 1. Search through Start>Programs (“All Programs” for Windows XP) > Vivicam 355 Digital Camera Suite > Uninstall... -
Page 36: Troubleshooting
Make sure you have selected 'silent video' mode • Vivicam 355 Digital Camera’s installation CD includes an “auto-check” program to detect if your PC has any software conflicts between other devices and the camera. If the “auto-checker”... -
Page 37: Product Specifications
PRODUCT SPECIFICATIONS Resolution Image Quality Lens Number of Images (Built-in memory) 1.8-inch LCD monitor LCD monitor Menu Special Features Others Buttons and Switch 10. Strobe Flash 11. Battery Power 12. Auto-Off 13. Self timer 14. TV video out 15. White Balance 16. - Page 38 System Requirements: 1. Pentium 300MHz or above. 2. Operating Systems: PC Win98/ 98SE/ 2000/Me/XP* 3. 32MB SDRAM minimum for Win98/98SE 64MB SDRAM for WinMe/Win2000 128MB for WinXP. 4. Minimum 300MB hard disk free capacity, 1GB for WinXP. 5. With USB port and CD-ROM drive. * Camera driver installation on Windows XP is done at users’...
- Page 39 Rev. 020310...
Need help?
Do you have a question about the Vivicam 355 and is the answer not in the manual?
Questions and answers