Advertisement
Advertisement
Table of Contents

Related Manuals for Toshiba Carrier MMD-UP0121VHG-UL


Summary of Contents for Toshiba Carrier MMD-UP0121VHG-UL
- Page 1 Vertical Air Handling Unit Installation, Operation and Maintenance Manual Model name: For Commercial Use MMD-UP0121VHG-UL MMD-UP0181VHG-UL MMD-UP0241VHG-UL MMD-UP0301VHG-UL MMD-UP0361VHG-UL MMD-UP0421VHG-UL MMD-UP0481VHG-UL MMD-UP0601VHG-UL 035-000051-002 Page 1 of 64 MMD IOM 1.3 8-15-2023...
- Page 2 THIS PAGE INTENTIONALLY LEFT BLANK 035-000051-002 Page 2 of 64 MMD IOM 1.3 8-15-2023...
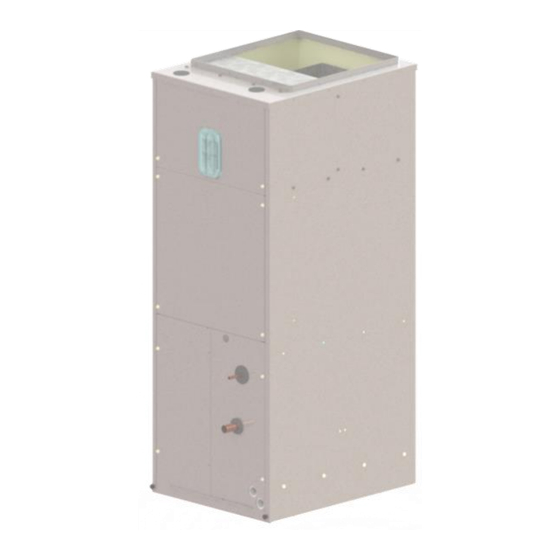
- Page 3 MMD Series Air Handling Unit Installation, Operation and Maintenance Manual Installation, Start-Up and Service Instructions 035-000051-002 Page 3 of 64 MMD IOM 1.3 8-15-2023...
- Page 4 THIS PAGE INTENTIONALLY LEFT BLANK 035-000051-002 Page 4 of 64 MMD IOM 1.3 8-15-2023...
-
Page 5: General Information
GENERAL INFORMATION DANGER NEVER enter an enclosed fan cabinet or reach into a unit while the fan is running. LOCK OPEN AND TAG the fan motor power dis- connect switch before working on a fan. Take fuses with you and note removal on tag. Electric shock GENERAL can cause personal injury or death. -
Page 6: Product Nomenclature
PRODUCT NOMENCLATURE 035-000051-002 Page 6 of 64 MMD IOM 1.3 8-15-2023... - Page 7 PRODUCT NOMENCLATURE—ACCESSSORIES 035-000051-002 Page 7 of 64 MMD IOM 1.3 8-15-2023...
-
Page 8: Installation
INSTALLATION WARNING-AUXILIARY DRAIN RECOMMMENDED: Pre-installation This product has an auxiliary condensate drain 1. Check items received against packing list. which should be piped to a condensate overflow 2. Do not stack unit components or accesso- sensor or safe drain location or both to protect ries during storage. - Page 9 INSTALLATION Figure 1 Return Configurations and Unit Orientations 035-000051-002 Page 9 of 64 MMD IOM 1.3 8-15-2023...
- Page 10 INSTALLATION—SERVICE CLEARANCES CLEARANCE DIMENSION (INCHES) UNIT SIZE 12/18/24 36.0 36.0 36.0 22.0 6.0 30/36 36.0 36.0 36.0 25.0 6.0 10.0 42/48 36.0 36.0 36.0 27.0 6.0 11.0 36.0 36.0 36.0 31.0 6.0 11.0 12/18/24 12.0 7.0 19.4 35.7 45.0 30/36 12.0 7.0 23.5 40.6 50.0 42/48 12.0 7.0 26.3 43.6 54.0...
- Page 11 INSTALLATION Ceiling Suspension: Mount the unit in ceiling- suspended horizontal orientation per suspen- sion details (Figure 4a). Unit is NOT intended to be wall mounted. Consult a qualified struc- tural engineer for special mounting considera- tions. Install the unit so that it pitches slightly –(1/8 inch) –...
- Page 12 Figure 4a CEILING SUSPENSION DETAILS 035-000051-002 Page 12 of 64 MMD IOM 1.3 8-15-2023...
- Page 13 INSTALLATION CAUTION Direct-expansion coils are shipped pressurized with dry nitrogen. Release pressure from the coil through valves in protective caps before remov- ing caps. Do not leave piping open to the atmosphere un- necessarily. Water and water vapor are detri- mental to the refrigerant system.
- Page 14 INSTALLATION—ELECTRIC HEAT Electric Heater Accessory The electric heater may be factory-installed or DANGER field-installed. See Figures 5 through 8. WARNING: Hazardous voltage. Only qualified Removal Procedure: personnel must install the electrical service. Dis- To remove the electric heater, connect and Lock Out all incoming power sources 1.
- Page 15 INSTALLATION—ELECTRIC HEAT DANGER WARNING: Hazardous voltage. Only qualified Electric Heater Accessory-MMD size 12, 18 personnel must install the electrical service. Dis- and 24 connect and Lock Out all incoming power sources The electric heater must be adjusted to fit unit before connecting to electrical service.
- Page 16 INSTALLATION-ELECTRIC HEAT DANGER Install Procedure: WARNING: Hazardous voltage. Only qualified To install the electric heater, personnel must install the electrical service. Dis- 1. Disconnect and lock out electrical power from connect and Lock Out all incoming power sources the unit. Remove heater access panel. Discon- before connecting to electrical service.
-
Page 17: Installation-Electrical
INSTALLATION-ELECTRICAL DANGER DANGER NEVER enter an enclosed fan cabinet or reach into a unit while the fan is running. WARNING: Hazardous voltage. Only qualified LOCK OPEN AND TAG the fan motor power dis- personnel must install the electrical service. Dis- connect switch before working on a fan. - Page 18 DANGER INSTALLATION-ELECTRICAL WARNING: Hazardous voltage. Only qualified Provide strain relief where field wiring passes personnel must install the electrical service. Dis- through cabinet. Wiring within the cabinet has connect and Lock Out all incoming power sources been positively located and supported so that it before connecting to electrical service.
- Page 19 INSTALLATION-ELECTRICAL (cont’d) TYPICAL WIRING DIAGRAM 035-000051-002 Page 19 of 64 MMD IOM 1.3 8-15-2023...
-
Page 20: Typical Wiring Diagrams
INSTALLATION-ELECTRICAL (cont’d) TYPICAL WIRING DIAGRAMS— Electric Heat: 1-6kW and 8-9.5kW TYPICAL WIRING—ELECTRIC HEAT TYPICAL WIRING—ELECTRIC HEAT 035-000051-002 Page 20 of 64 MMD IOM 1.3 8-15-2023... - Page 21 START-UP Pre-Startup Building Envelope—All building windows and doors should be installed and closed before starting unit. During summer construction, avoid unit sweating by allowing for gradual pull down: use reduced capacity and use maximum available airflow. Temperature Controls-Check that unit is connected to the controls system and communicating properly.
- Page 22 DANGER NEVER enter an enclosed fan cabinet or reach into a unit while the fan is running. LOCK OPEN AND TAG the fan motor power dis- MOTOR HARNESS & connect switch before working on a fan. Take fus- CONNECTORS es with you and note removal on tag. Electric shock can cause personal injury or death.
- Page 23 DANGER NEVER enter an enclosed fan cabinet or reach into a unit while the fan is running. LOCK OPEN AND TAG the fan motor power dis- connect switch before working on a fan. Take fus- es with you and note removal on tag. Electric shock can cause personal injury or death.
-
Page 24: Service-Filters
SERVICE—Filters Filters FILTER SECTIONS — Open or remove filter panel to replace old filter with a new filter. See physical data tables for filter data. See Figure 21. Figure 22 Access Panels The 3 sections of the unit can be reached using the front access panels, removable Figure 21 using 5/16”... - Page 25 SERVICE-Coil Removal and Reinstallation Procedure 1. Perform procedure on the ground for safety. If tions for proper unit operation. working at heights USE EXTREME CAUTION ob- 10. Re-install wiring to PMV. serve all FALL SAFETY considerations. Under all 11. Re-install unit access panels. conditions, LOCK OUT all power supplies before 12.
-
Page 26: Airflow Performance
AIRFLOW PERFORMANCE Figure 15 MMD-UP0121VHG-UL (1 ton) MMD-UP0181VHG-UL (1.5 ton) Increasing ESP setting MMD-AP0180VHG2UL(1.5ton) Terminal 1 Terminal 2 Terminal 3 Terminal 4 Terminal 5 As Shipped Higher Fan Setting 1000 Air flow rate(cfm) MMD-UP0241VHG-UL (2 ton) MMD-AP0240VHG2UL(1.5ton) MMD-UP0301VHG-UL (2.5 ton) MMD-AP0300VHG2UL(2.5ton) Terminal 1 Terminal 2... - Page 27 AIRFLOW PERFORMANCE MMD-UP0421VHG-UL (3.5 ton) MMD-AP0360VHG2UL(3ton) MMD-UP0361VHG-UL (3 ton) MMD-AP0420VHG2UL(3.5ton) Terminal 1 Terminal 1 Terminal 2 Terminal 2 Terminal 3 Terminal 3 Terminal 4 Terminal 4 Terminal 5 Terminal 5 1000 1200 1400 1600 1000 1200 1400 1600 1800 2000 Air flow rate(cfm) Air flow rate(cfm) MMD-AP0480VHG2UL(4ton)
- Page 28 UNIT ELECTRICAL RATINGS MMD Electrical Data TOTAL ELECTRIC MINIMUM CIRCUIT Maximum MOTOR UNIT FLA Unit Motor WIRE ELECTRIC HEAT AMPACITY (MCA) Overcurrent Size SIZE HT (KW) CIRCUIT 1 CIRCUIT 1 CIRCUIT 1 CIRCUIT 1 AWG* 240-208V NONE NONE MMD12 12.5 10.8 13.8 12.1...
- Page 29 UNIT DIMENSIONS MMD12-60 Elec Heat Ready RH Drain Connections, Bottom Return TOP VIEW .250 RIGHT VIEW FRONT VIEW 035-000051-002 Page 29 of 64 MMD IOM 1.3 8-15-2023...
- Page 30 SPECIAL FACTORY OPTIONS Special construction unit defined by standard model number plus product number (from nameplate): Option Descriptions Table Options Option Suffix Descriptions Number Unit Size Factory Installed Heater - 1kW Factory Installed Heater - 3kW Product Number -TMA Factory Installed Heater - 5kW indicates ducted vertical Factory Installed Heater - 6kW AHU, generation A)
-
Page 31: Electrical Work
SPECIAL INSTRUCTIONS—ELECTRICAL WORK ELECTRICAL WORK WARNING •Securely connect the specified wires so that the external tension does not affect the termi- nal connectors. Improper connection may cause an electric shock or a fire. •Connect earth grounding wire. Incomplete grounding will cause an electric shock. Do not connect ground wires to gas pipes, water pipes, lightning rods, or the grounding wires of telephone lines. - Page 32 SPECIAL INSTRUCTIONS—ELECTRICAL WORK ▼ Power supply Power supply 208 / 230V 1ph 60Hz Wire size Refer to “MMD electrical data” table Power supply wiring Up to 164’1” (50m) 035-000051-002 Page 32 of 64 MMD IOM 1.3 8-15-2023...
- Page 33 SPECIAL INSTRUCTIONS—ELECTRICAL WORK 035-000051-002 Page 33 of 64 MMD IOM 1.3 8-15-2023...
- Page 34 SPECIAL INSTRUCTIONS—ELECTRICAL WORK 035-000051-002 Page 34 of 64 MMD IOM 1.3 8-15-2023...
- Page 35 SPECIAL INSTRUCTIONS—ELECTRICAL WORK 035-000051-002 Page 35 of 64 MMD IOM 1.3 8-15-2023...
- Page 36 SPECIAL INSTRUCTIONS—ELECTRICAL WORK 035-000051-002 Page 36 of 64 MMD IOM 1.3 8-15-2023...
- Page 37 SPECIAL INSTRUCTIONS—CONTROLS 035-000051-002 Page 37 of 64 MMD IOM 1.3 8-15-2023...
- Page 38 SPECIAL INSTRUCTIONS—CONTROLS 035-000051-002 Page 38 of 64 MMD IOM 1.3 8-15-2023...
- Page 39 SPECIAL INSTRUCTIONS—CONTROLS 035-000051-002 Page 39 of 64 MMD IOM 1.3 8-15-2023...
- Page 40 SPECIAL INSTRUCTIONS—CONTROLS 035-000051-002 Page 40 of 64 MMD IOM 1.3 8-15-2023...
- Page 41 SPECIAL INSTRUCTIONS—CONTROLS 035-000051-002 Page 41 of 64 MMD IOM 1.3 8-15-2023...
- Page 42 SPECIAL INSTRUCTIONS—TEST RUN 035-000051-002 Page 42 of 64 MMD IOM 1.3 8-15-2023...
- Page 43 SPECIAL INSTRUCTIONS—TEST RUN-Continued 035-000051-002 Page 43 of 64 MMD IOM 1.3 8-15-2023...
-
Page 44: Troubleshooting
TROUBLESHOOTING 035-000051-002 Page 44 of 64 MMD IOM 1.3 8-15-2023... - Page 45 CHECK CODES 035-000051-002 Page 45 of 64 MMD IOM 1.3 8-15-2023...
- Page 46 CHECK CODES 035-000051-002 Page 46 of 64 MMD IOM 1.3 8-15-2023...
- Page 47 CHECK CODES 035-000051-002 Page 47 of 64 MMD IOM 1.3 8-15-2023...
- Page 48 CHECK CODES 035-000051-002 Page 48 of 64 MMD IOM 1.3 8-15-2023...
- Page 49 SPECIAL INSTRUCTIONS—WARNINGS ON REFRIGERANT LEAKAGE 035-000051-002 Page 49 of 64 MMD IOM 1.3 8-15-2023...
-
Page 50: Replacement Parts
REPLACEMENT PARTS 035-000051-002 Page 50 of 64 MMD IOM 1.3 8-15-2023... - Page 51 REPLACEMENT PARTS 035-000051-002 Page 51 of 64 MMD IOM 1.3 8-15-2023...
- Page 52 REPLACEMENT PARTS 035-000051-002 Page 52 of 64 MMD IOM 1.3 8-15-2023...
- Page 53 REPLACEMENT PARTS 035-000051-002 Page 53 of 64 MMD IOM 1.3 8-15-2023...
- Page 54 REPLACEMENT PARTS 035-000051-002 Page 54 of 64 MMD IOM 1.3 8-15-2023...
- Page 55 REPLACEMENT PARTS 035-000051-002 Page 55 of 64 MMD IOM 1.3 8-15-2023...
- Page 56 REPLACEMENT PARTS 035-000051-002 Page 56 of 64 MMD IOM 1.3 8-15-2023...
- Page 57 REPLACEMENT PARTS 035-000051-002 Page 57 of 64 MMD IOM 1.3 8-15-2023...
- Page 58 REPLACEMENT PARTS THERMISTORS MOTOR ADAPTER HARNESS PMV WIRE HARNESS MOTOR ADAPTER HARNESS 035-000051-002 Page 58 of 64 MMD IOM 1.3 8-15-2023...
-
Page 59: Startup Report
MMD Series Air Handling Unit Start-up Report Job Name City Sales Order # Unit Tag Model Number Serial Number Installer Quantity of Units STARTUP REPORT Group Checklist Item Does electrical service correspond to unit nameplate? -Nameplate Supply Voltage/Phase: Rated_________ Measured___________ -Nameplate Rated FLA motor current: Rated_______ Measured__________ Does all field wiring conform to unit wiring diagram? Is field-provided freeze protection present? (if required) - Page 60 THIS PAGE INTENTIONALLY LEFT BLANK 035-000051-002 Page 60 of 64 MMD IOM 1.3 8-15-2023...
- Page 61 THIS PAGE INTENTIONALLY LEFT BLANK 035-000051-002 Page 61 of 64 MMD IOM 1.3 8-15-2023...
- Page 62 MMD Series Air Handling Unit Installation, Operation and Maintenance Manual 035-000051-002 Page 62 of 64 MMD IOM 1.3 8-15-2023...
Need help?
Do you have a question about the Carrier MMD-UP0121VHG-UL and is the answer not in the manual?
Questions and answers