Sign In
Upload
Download
Table of Contents
Contents
Add to my manuals
Delete from my manuals
Share
URL of this page:
HTML Link:
Bookmark this page
Add
Manual will be automatically added to "My Manuals"
Print this page
×
Bookmark added
×
Added to my manuals
Manuals
Brands
Garmin Manuals
GPS
foretrex 301
Owner's manual
Garmin foretrex 301 Owner's Manual
Hide thumbs
1
2
3
4
Table Of Contents
5
6
7
8
9
10
11
12
13
14
15
16
17
18
19
20
21
22
23
24
25
26
27
28
29
30
31
32
33
34
35
36
37
38
39
40
page
of
40
Go
/
40
Contents
Table of Contents
Bookmarks
Table of Contents
Manual Conventions
Product Registration
Contact Garmin
Optional Accessories
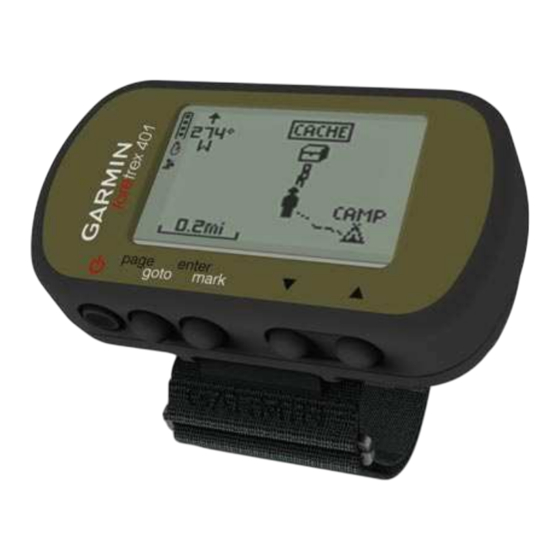
Foretrex ® Features
Table of Contents
Getting Started
Buttons
Installing Batteries
Turning on Your Foretrex
Acquiring GPS Satellite Signals
Using the Backlight
Using the Main Pages
Map Page
Compass Page
Elevation Page
Trip Computer
Main Menu
Waypoints, Tracks, and Routes
Waypoints
Editing Waypoints
Hunt and Fish
Sun and Moon
Recording Your Tracks
Creating and Navigating Routes
Settings
Map Menu Options
Compass Menu Options
Elevation Menu Options
Trip Computer Options
Main Menu Options
Data Field Options
Timer
Timer Options
Gps
Setting GPS Mode
Satellite Reception
Signal Strength
Sky View
Appendix
Pairing the Foretrex 401
Wireless Data Transfers
Connecting Your Foretrex to a Computer
Jumpmaster
Storing the Foretrex
Battery Information
Optimizing Battery Life
Resetting the Foretrex
Clearing User Data
Replacing the Wristband
Cleaning the Unit and Wristband
Speciications
Software License Agreement
Declaration of Conformity (Doc)
FCC Compliance
Index
Advertisement
Quick Links
Download this manual
owner's manual
®
f o ret rex
301 an d 401
®
PERSONAL NAVIGATOR
Table of
Contents
Previous
Page
Next
Page
1
2
3
4
5
Advertisement
Table of Contents
Need help?
Do you have a question about the foretrex 301 and is the answer not in the manual?
Ask a question
Questions and answers
Related Manuals for Garmin foretrex 301
GPS Garmin Forerunner 205 Owner's Manual
Gps-enabled trainer for runners (76 pages)
GPS Garmin Forerunner 305 User Manual
Gps receiver with heart rate monitor (10 pages)
GPS Garmin Foretrex 401 Owner's Manual
Personal navigator (40 pages)
GPS Garmin Dakota 10 Safety And Product Information
Garmin dakota 10: supplementary guide (40 pages)
GPS Garmin Foretrex 301 Quick Start Manual
Personal navigator (13 pages)
GPS Garmin Approach G3 North America Important Safety Instructions Manual
Important safety and product information (36 pages)
GPS Garmin Forerunner 10 Owner's Manual
Owner's manual (10 pages)
GPS Garmin Forerunner 10 Declaration Of Conformity
Declaration of conformity (6 pages)
GPS Garmin Forerunner 10 Quick Start Manual
Quick start manual (4 pages)
GPS Garmin Approach S4 Product Information
Important safety and product information (60 pages)
GPS Garmin forerunner 620 Quick Manual
Sports and fitness gps-devices (25 pages)
GPS Garmin Foretrex 201 Owner's Manual
Garmin personal navigator owner's manual foretrex 201 (72 pages)
GPS Garmin Foretrex 201 Quick Start Manual
Garmin foretrex 201: quick start (2 pages)
GPS Garmin Foretrex 101 Quick Start Manual
Garmin foretrex 101: quick start (2 pages)
GPS Garmin 101 Owner's Manual
Personal navigator (72 pages)
GPS Garmin FORETREX 601 Owner's Manual
Ballistic edition (18 pages)
This manual is also suitable for:
Foretrex 401
Table of Contents
Print
Rename the bookmark
Delete bookmark?
Delete from my manuals?
Login
Sign In
OR
Sign in with Facebook
Sign in with Google
Upload manual
Upload from disk
Upload from URL


Need help?
Do you have a question about the foretrex 301 and is the answer not in the manual?
Questions and answers