Table of Contents
Advertisement
Quick Links
Advertisement
Table of Contents

Related Manuals for Canon RF 24-105mm F2.8 L IS USM Z


Summary of Contents for Canon RF 24-105mm F2.8 L IS USM Z
- Page 1 Instructions...
- Page 2 Thank you for purchasing a Canon product. Canon RF24-105mm F2.8 L IS USM Z is a large Camera Firmware and aperture standard zoom lens for use with EOS R Camera Applications series cameras. “IS” stands for Image Stabilizer. Please use the latest versions of firmware and applications with the camera in use.
-
Page 3: Safety Precautions
Safety Precautions Precautions to ensure that the camera is used Details pertaining to risks that may Caution safely. Read these precautions thoroughly. Make result in injury or damage to other objects. sure all details are observed in order to prevent Do not leave the product in places exposed to risks and injury to the user and other people. -
Page 4: General Precautions
General Precautions Handling Precautions Do not leave the product in excessive heat such as in a car in direct sunlight. High temperatures can cause the product to malfunction. If the lens is taken from a cold environment into a warm one, condensation may develop on the lens surface and internal parts. - Page 5 This device complies with Part 15 of the FCC Rules. CAN ICES-3(B)/NMB-3(B) Operation is subject to the following two conditions: (1) This device may not cause harmful interference, and (2) this device must accept any interference received, including interference that may cause undesired operation. Do not make any changes or modifications to the equipment unless otherwise specified in the instructions.
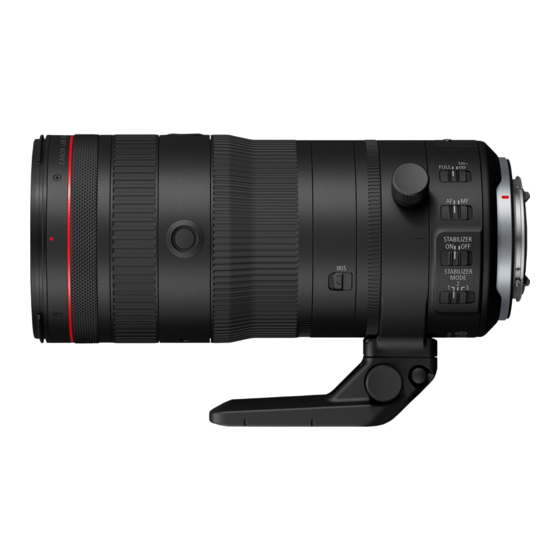
- Page 6 Nomenclature Power zoom adapter attachment holes [PZ] Zoom gear [PZ] Power zoom adapter contacts [PZ] Lens holder/thumb rest Orientation locking knob attachment holes (→ 19) (→ 18) Focusing distance range Lens function selector switch (→ 8) buttons (AF stop buttons) (→ 12) Focus mode switch Hood mount (→...
- Page 7 Detaching the Lens Turn the lens counterclockwise while pressing Rubber rings can be replaced at a Canon the camera’s lens release button. Detach the Service Center. (chargeable) lens once it has stopped turning.
-
Page 8: Setting The Focus Mode
2. Setting the Focus Mode Focus mode switch Quickly turning the focusing ring may result in delayed focus. The lens’ focusing ring is electronic. With a camera capable of electronic full-time manual focus, manual focusing is always possible while the camera is operable. However, this requires a change in camera settings. - Page 9 3. Setting the Focusing 4. Zooming Distance Range To zoom, turn the lens’ zoom ring. Focusing distance range selector switch Be sure to finish zooming before focusing. Zooming after focusing can affect the focus. You can set the focusing distance range with a Blurring may temporarily occur if the zoom ring is switch.
-
Page 10: Control Ring
There are cases in which the sound of control ring operations may be recorded when shooting movies. The clicking sensation of the control ring can be removed by the Canon Service Center. (chargeable) The focus ring can be used as the control ring by changing the camera settings*. However, when the focus ring is used as the control ring, the original control ring operation will be disabled. - Page 11 6. Manual/ Auto Aperture Operation The aperture value can be set using the iris ring. At the time of shipment, it is set to auto aperture operation. Iris ring lock release switch Iris ring Manual aperture operation Auto aperture operation While sliding the iris ring lock release switch While sliding the iris ring lock release switch in the direction of the arrow, turn the iris ring...
- Page 12 Manual/ Auto Aperture Operation For manual aperture operation with the Iris Ring and when shooting movies, the aperture value changes in 1/32 steps, regardless of the camera settings. Consequently, the actual aperture value when shooting movies may vary from the aperture value displayed on the camera. Some cameras *¹...
- Page 13 7. Lens Function Buttons (AF Stop Buttons) In the default settings, the lens function button Use as a AF stop button serves as a AF stop button. You can assign During autofocus operation, you can press an different functions to the button from the AF stop button to temporarily pause autofocus, [Customize buttons] section of the camera.
-
Page 14: Image Stabilizer
8. Image Stabilizer Image stabilization corrects vibrations that occurs with hand-held shots. Image stabilizer switch Image stabilizer mode selector switch Set the STABILIZER switch to ON. Select an Image Stabilizer mode according to the application and shooting conditions. The Image Stabilizer will work in combination with cameras with in-body Image Stabilizer. - Page 15 Image Stabilizer The Image Stabilizer for this lens is suited to hand-held shots in the following conditions. MODE 1 Shooting still subjects In semi-darkened areas such as indoors or outdoors at night. In locations where a flash cannot be used, such as art museums and theater stages.
- Page 16 Image Stabilizer The Image Stabilizer cannot compensate for a blurred shot caused by a subject that moved. The Image Stabilizer might not be fully effective in the following conditions: • Large shake or fast vibration • Panning in MODE 1 When using a tripod, the Image Stabilizer might not be fully effective or it might be better to set the STABILIZER switch to OFF, depending on the type of tripod and where the tripod is located, as well as on the camera’s settings such as shutter speed.
- Page 17 9. Hood The custom lens hood reduces unwanted light that causes flare and ghosting and protects the front of the lens from rain, snow, and dust. Attachment position mark Red dot Button Red dot Red dot Detaching the Hood Attachment position mark Stop position mark Keep your finger pressed down on the button Attaching the Hood...
-
Page 18: Using The Tripod Mount
10. Using the Tripod Mount A tripod or monopod attaches to the tripod Attaching the Tripod Mount mount on the lens. Slide the tripod mount in the direction indicated by arrow ④ until you hear a click. Tripod mount attachment foot Rotate the tripod mount knob in the direction indicated by arrow ②... - Page 19 Using the Tripod Mount Adjusting the Tripod Mount By loosening the orientation locking knob, you can rotate the camera to set the image for any vertical or horizontal position. ENG-18...
- Page 20 11. Lens holder LH-E1 (sold separately) For stable shooting, using the Canon lens holder LH-E1 (sold separately) attached to the lens and fixed to the rig (rod) is recommended. Lens holder/thumb rest attachment holes Lens holder Hole to attach the rig (rod) Attaching the lens holder Use the hex key to attach the lens holder to the lens holder/thumb rest attachment holes.
- Page 21 12. Filters (Sold separately) 13. POWER ZOOM ADAPTER (sold separately) You can attach filters (ø82) to the filter mounting thread on the front of the lens. The Power Zoom Adapter PZ-E2, PZ-E2B can be attached to this lens in order to perform motorized zooming.
-
Page 22: Specifications
Specifications Focal Length/Aperture 24-105mm f/2.8 Lens Construction 18 groups, 23 elements Maximum Aperture f/2.8 Minimum Aperture f/22 Angle of View Horizontal: 74° - 19°20’, Vertical: 53° - 13°, Diagonal: 84° - 23°20’ Min. Focusing Distance 0.45 m/1.48 ft. Max. Magnification 0.29x (at 105 mm) Approx. - Page 23 Multiple exposure shooting is not possible when using this lens on certain cameras*. * EOS R, RP, Ra, R5, R5C, R6 All data listed is measured according to Canon standards. Product specifications and appearance are subject to change without notice.
- Page 24 CT1-D317-A 0823SZ © CANON INC. 2023...
Need help?
Do you have a question about the RF 24-105mm F2.8 L IS USM Z and is the answer not in the manual?
Questions and answers