
Related Manuals for Visioneer 6200


Summary of Contents for Visioneer 6200
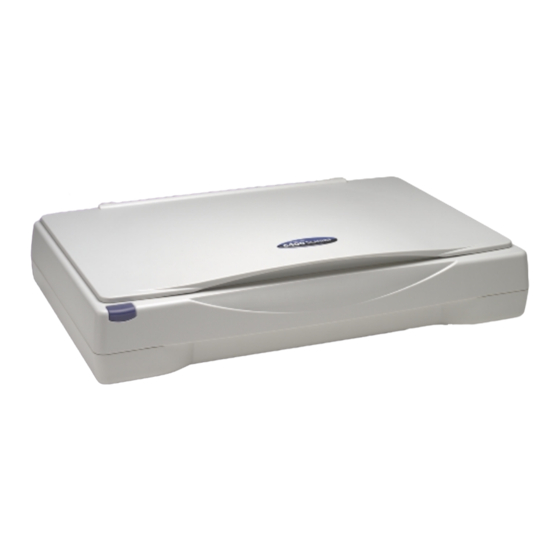
- Page 1 Visioneer 6200/6400 Scanner ® ARALLEL ONNECTION Installation Guide...
- Page 2 Visioneer's Limited Product Warranty If you find physical defects in the materials or the workmanship used in making the product described in this document, Visioneer will repair, or at its option, replace, the product at no charge to you, provided you return it (postage prepaid, with proof of your purchase from the original reseller) during the 12-month period after the date of your original purchase of the product.
-
Page 3: Table Of Contents
What’s in the Box ........1 The Visioneer 6200/6400 Scanner ......2 What You Need . - Page 4 About the Predefined Scan Settings in PaperPort ... . 46 Cleaning the Scanner Glass ....... 47...
-
Page 5: Welcome
OneTouch software. You can connect the Visioneer 6400 scanner to either your computer’s USB or parallel port; however, the Visioneer 6200 scanner must be connected to a USB port. This guide contains instructions for connecting to either port: For USB port instructions, see page 5. -
Page 6: The Visioneer 6200/6400 Scanner
Document cover Document pad Glass Reference frame OneTouch button Rear of 6400 Scanner Power jack ADF/TPA port Host Parallel port USB port (behind sliding latch) Printer Parallel port Rear of 6200 Scanner Power jack ADF/TPA port USB port 6200/6400 S CANNER... - Page 7 USB port. On the 6400 scanner, a sliding latch covers and protects the USB port. Slide the latch to the side to see the USB port. On the 6200 scanner, the USB port is clearly visible. Plug one end of the USB cable into this port; plug the other end into a USB port on the computer or keyboard.
-
Page 8: What You Need
To use the Visioneer scanner and software, you need the following: IBM PC (or 100-percent compatible) Pentium or equivalent Microsoft Windows 95, Windows 98, or Microsoft NT 4.0 One available Universal Serial Bus (USB) port or one available parallel port on your computer; Microsoft Windows 98 is required when using... -
Page 9: Part 1: Installing Your Scanner
NSTALLING TO A This section of the guide contains instructions for connecting your Visioneer scanner to a USB port. If you are connecting the 6400 scanner to a parallel port, see “Installing to a Parallel Port” on page 11 for more information. - Page 10 3. Follow the instructions on the screen to install the PaperPort software on your computer. During installation, a message tells you to connect the scanner to the computer. 4. Follow the steps in the next section to connect the scanner. When you’re finished, click Finish in the dialog box above.
-
Page 11: Step 2: Connecting To Ausb Port
2. If you are connecting the 6400 scanner, slide the latch on the back of the scanner to uncover its USB port. If you are connecting a 6200 scanner, the USB port is shown in the following figure. USB port... - Page 12 3. Plug the other end of the USB cable into the scanner’s USB port. 6400 scanner 6200 scanner If the plug does not attach easily, make sure that you are plugging it in correctly. Do not force the plug into the connection.
- Page 13 5. Turn the scanner over to see the locking tab on the bottom. Slide the locking tab to the unlocked position. Unlocked position 6. Plug the power adapter into an AC (wall) outlet. The following diagram shows the 6400 scanner connected to a computer.
- Page 14 The following diagram shows the 6200 scanner connected to a computer. Power cord Your computer recognizes that a scanner has been plugged into the USB port and automatically loads the appropriate software from the CD to run the scanner. When the software has finished loading, the Finish button on the dialog box becomes active.
-
Page 15: Installing To A Parallel Port
ARALLEL This section explains how to connect the Visioneer scanner to a parallel port. If you are connecting a 6200 scanner, you must connect it to a USB port. For more information, see “Installing to a USB Port” on page 5. - Page 16 4. Plug one end of the scanner cable into the port on the back of the scanner marked “Host.” 5. Plug the other end of the scanner cable into the parallel port on the back of your computer. On some older computers the serial port and parallel port both have 25-pin connectors that fit the scanner cable.
- Page 17 “Printer” port on the scanner. 7. Plug the power adapter cable into the jack on the scanner. 8. Turn the scanner over to see the locking tab on the bottom. Slide the locking tab to the unlocked position. Unlocked position...
-
Page 18: Step 2: Installing The Paperport Software
10. Turn on your computer. You’re now ready to install the software. Note: The locking tab protects the scanner’s scan head by holding it securely in position. Lock the scanner when transporting it from one location to another, but always remember to unlock it before scanning. -
Page 19: Checking Your Scanner
CD drive and store the CD in a safe place. 5. Restart the computer. That completes the installation. Please see “Checking Your Scanner” on page 15 to continue setting up your Visioneer scanner. HECKING CANNER Depending on whether your scanner is connected to a parallel port or USB port, you use different ways to check if the scanner is properly connected. -
Page 20: Checking A Scanner Connected To A Parallel Port
figure. Scanner Icon If the icon has a red X through it, the scanner is not properly connected. See the section, “If the Scanner Is Not Properly Connected” on page 19 for the steps to fix the problem. -
Page 21: Checking A Scanner Connected To Ausb Port
HECKING A CANNER ONNECTED TO A After you have installed the scanner to a USB port, you can check if it is properly connected using the Scanners and Cameras setting in the Windows Control Panel. To check the status of the scanner: 1. - Page 22 2. Double-click the Scanners and Cameras icon. The Scanners and Cameras Properties dialog box appears. The following example shows the Visioneer 6400 scanner connected to your computer. If you have a video camera or other scanner connected, those devices may appear in this dialog box.
-
Page 23: If The Scanner Is Not Properly Connected
• If you connected the scanner to a parallel port, are you using an older computer that has 25-pin connectors for both serial and parallel ports? You may have plugged the scanner cable into a serial port instead of the parallel port. -
Page 24: Scanning For The First Time
If you try all the troubleshooting procedures described above and in the Readme file and the scanner is not working, see the technical support card that came with your scanner for technical assistance telephone numbers. Also visit our web site at www.visioneer.com for additional technical information. CANNING FOR THE IRST To scan an item, you simply press the button on the scanner. - Page 25 finished. You can change the destination application and will learn how later in this guide. To test your scanner: 1. Before starting, find an item to scan, such as a letter, magazine article, or report.
- Page 26 Thumbnail image For more information about using PaperPort or scanning with PaperPort, see “Scanning from the PaperPort Software” on page 39.
-
Page 27: Part 2: Configuring The Onetouch Software And Scanning Items
Part 2: Configuring the OneTouch Software and Scanning Items When you scan with your Visioneer scanner, there are different ways to scan items. You can scan items by: Pressing the button on the scanner and using the OneTouch software. Using the PaperPort software (or other Twain software). -
Page 28: Configuring The Onetouch Software
Programs. Click the PaperPort folder, and choose OneTouch Configure. The Visioneer OneTouch Configuration dialog box appears. Note: If the scanner is connected to a parallel port, press and hold the button on the scanner to display the Visioneer OneTouch Configuration dialog box. OFTWARE... - Page 29 Note: If you want to select a configuration prior to scanning, click Configure before Scan. When you press the scanner button, the Visioneer Scan Manager dialog box appears first and you can select a configuration before scanning. See “Scanning an Item with the Twain Button”...
-
Page 30: About The Onetouch Configuration Dialog Box
BOUT THE The OneTouch Configuration dialog box shows the current settings for the scanner button. The dialog box has two tabs: Scan and Preferences. The following figure shows the current settings for scanning: Autocrop Scan Photograph to the PaperPort Desktop. - Page 31 2. Choose Configure from the shortcut menu. The Configuration dialog box appears. To display the Configuration dialog box if the scanner is connected to a USB port: 1. In Windows, choose Programs from the Start menu. 2. From the PaperPort folder, choose OneTouch Configure.
-
Page 32: Getting Help In The Onetouch Software
Scan single page Scan multiple pages Note: JPEG compression is not available with the 6200 scanner. Properties—displays a dialog box for selecting options about the destination application for the scanned image. Each destination application has its own properties dialog box. -
Page 33: Selecting A Different Configuration
ONFIGURATION You can select a new destination application, configuration, and image format for a scanner button to optimize it for the type of scanning you want to do. You use the Configuration dialog box to select new options. To create a new configuration: 1. -
Page 34: Creating New Configurations
If you want to select a configuration prior to scanning, click the option, Configure before Scan. When you press a scanner button, the Visioneer Scan Manager dialog box appears first and you can select a configuration before scanning. See “Scanning an Item with the Twain Button”... - Page 35 Select Grayscale to scan items such as documents containing drawings or black and white photographs. The scanning produces an image in varying shades of gray. Select Color to scan color photographs and other color items. Dialog box for 6200 scanner...
- Page 36 AutoCrop—Select this option to let the scanner automatically determine the size of the item being scanned. For example, if you put a photo in the middle of the glass, the scanner will automatically determine the size of the photo. When AutoCrop is...
- Page 37 first pass senses the item’s size, and the second pass scans the image. This option overrides the Page Size menu selection. DeScreen—Select this option when scanning a picture from a newspaper or magazine article, or other item that contains images with patterns or dots.
-
Page 38: About Jpeg Compression
Enable hardware compression (JPEG)—Click to make the JPEG compression options active. Minimize Image Size (Maximum compression)—Select this option to produce the smallest file size for the image; image quality is lowest. Best Image Quality—Select this option to produce the best quality image;... - Page 39 The JPEG compression options only apply to: Destination applications used for graphics, photos, and artwork images. Word processing applications, fax applications, and other text-based destination applications do not use JPEG compression. Scan modes for color or grayscale scanning. JPEG compression does not apply to the Black &...
-
Page 40: Setting Preferences
ETTING REFERENCES The preferences apply to the scanner button and the scanner. To set preferences: 1. On the Configuration dialog box, select the tab for a button to set its preferences. 2. Click the Preferences tab on the Configuration dialog box. - Page 41 This option is only available if your scanner is connected to a parallel port. Show Scanner Icon in Windows Taskbar—Select this option to see the small icon representing the Visioneer scanner in the Windows taskbar. This option is only available if your scanner is connected to a parallel port.
-
Page 42: Changing The Linked Application
OneTouch software; however, if your scanner is connected to a USB port, Scanners and Cameras in the Control Panel shows to which application the scanner is linked. If you want to select a different application, use the Events tab in the Scanners and Cameras dialog box. -
Page 43: Scanning From The Paperport Software
5. In the Events tab, select the check box of the application to which you want to scan. The sample below shows the Visioneer OneTouch software as the selected target application. If you select more than one application, a dialog box appears each time you scan asking you to select the application. -
Page 44: Scanning An Item With The Twain Button
PaperPort software. You can scan many types of items, from small business cards to A4-sized pages. Note: Your Visioneer scanner is initially set to scan from the PaperPort software with the setting Color Document—Faster. To scan a black-and-white image, select one of the other settings. To scan at a higher resolution for a color image, select Color Document—Better... - Page 45 Note: You can also scan from other applications that have the Twain capability. See the user’s guides that you received with those applications for their specific steps to scan. The Visioneer Scan Manager dialog box appears. Select one of these preset options if it’s appropriate for how you want to use the scanned item.
- Page 46 TrueColor, Grayscale, Black & White, JPEG Color Compressed, and JPEG Gray Compressed. The JPEG modes are not available with the 6200 scanner. Res—This is the resolution setting for the scan in dots-per-inch (dpi). The higher the dpi, the sharper the image. Higher dpi settings also produce larger files sizes.
- Page 47 8. When you’re satisfied with the image settings, click the Scan button. The scanner now re-scans the item and displays the final image as a thumbnail on the PaperPort Desktop. The small icon in the lower left corner of the thumbnail indicates the sample photo was scanned as a bitmap image.
-
Page 48: Adjusting The Brightness And Contrast
To adjust the brightness and contrast: 1. Click the Twain icon on the Command Bar, or choose Acquire from the File menu. The Visioneer Scan Manager appears. 2. Click the Adv. Settings button. The Advanced Settings dialog box appears. Drag to adjust brightness Drag to adjust contrast 3. -
Page 49: Getting Help With The Paperport Software
To see help information, press the F1 key, or from the Help menu, choose PaperPort Help Topics to display the Help Topics window. Tip: Also see the technical support card included with your scanner. -
Page 50: About The Predefined Scan Settings In Paperport
BOUT THE Selecting the proper scan setting before final scanning provides the best results for a scanned item. The scan setting determines the sharpness of the item and the number of possible shades of gray or color. These selections also affect the speed of the scan and the file size. The following table describes PaperPort’s predefined scan settings. -
Page 51: Cleaning The Scanner Glass
Scanning items that have excessive amounts of dirt or dust may dirty the scanner’s glass. To ensure the best quality scanned item, wipe the scanner glass with a soft clean cloth to rid the glass of dust or other debris. -
Page 52: Visioneer Scanner Specifications
ISIONEER CANNER Bit Depth Scanning resolution Maximum Item sizes Scanner dimensions Height Width Length Weight Operating temperature Relative humidity Power supply Input voltage/frequency Output voltage/watt Safety and agency certifications Hardware warranty PECIFICATIONS 36-Bit color (internal), 10-Bit gray (internal), 1-Bit line art/text...
Need help?
Do you have a question about the 6200 and is the answer not in the manual?
Questions and answers
can you download software from computer if you lost or damaged the cd