
Related Manuals for Kogan SMARTERHOME KASHFH20WGA

Summary of Contents for Kogan SMARTERHOME KASHFH20WGA
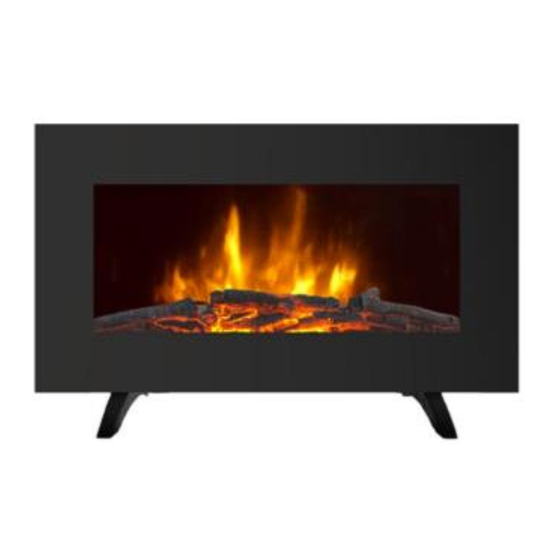
- Page 1 KOGAN SMARTERHOME PORTABLE ELECTRIC FIREPLACE HEATER (WITH LOG FUEL EFFECT, 2000W) KASHFH20WGA...
-
Page 2: Table Of Contents
Safety & Warnings Components Installation Overview Connect to SmarterHome Operation Specifications... -
Page 3: Safety & Warnings
• If the power cord is damaged, cease use immediately and contact help.Kogan.com for support. It must be replaced by the Kogan.com, its service agent or similarly qualified persons in order to avoid a hazard. - Page 4 • Do not clean the appliance with abrasive or harsh chemicals. • Do not use any accessories that are not supplied by Kogan.com. • Never route the mains cable beneath carpet. • Do not use aerosols near the heater.
-
Page 5: Components
COMPONENTS • Heater • Wall brackets, screws and wall anchors. • Feet x2 • Screws for feet x4 • Remote control • User guide INSTALLATION Attaching the Feet Before using the heater, the feet must be fitted to the heater (unless wall mounting). - Page 6 Attach the feet to the base of the heater with 2 screws for each foot and tighten with a screwdriver to secure. Place the front glass panel over the front of the heater aligning the hooks at each side of the glass panel with the slots on each side of the heater body. Then slide down the glass panel in place.
- Page 7 Wall Mounting WARNING: licensed trade professional. This heater comes with a mounting kit to mount the heater to a wall. This appliance is designed to be permanently fixed to a wall at a minimum height of 300mm.The wall bracket must be fitted horizontally and the cable routed to the bottom right of the heater.
- Page 8 Attach the wall brackets using the supplied wall anchors and screws. Carefully lift the heater up ensuring that the rear slots of heater engage the wall bracket and is sitting centrally. Wall bracket Gently bring the heater level with the wall. Mark the two bottom screw holes.
- Page 9 12. Refit the heater to the wall fixing bracket and rotate the bottom fixing bracket down again and use the screws provided to permanently secure the heater in place. 13. Place the front glass panel over the front of the heater aligning the hooks at each side of the glass panel with the slots at each side of the heater body.
-
Page 10: Overview
OVERVIEW Control Panel Control panel is located at the top right side of the heater. Note: The master switch must be switched on firstly for all operations. Heating Wi-Fi Power indicator indicator indicator 1000W 2000W High Power power power button Master power switch Remote... -
Page 11: Connect To Smarterhome Tm App
CONNECT TO SMARTERHOME If you already have a SmarterHome The system will automatically recognise your country. If needed, you can manually select your country from the drop-down box. Enter your email address and tap Get Verification Code to continue. A 6-digit code will be sent to the submitted email address. Enter this code before the one-minute timer expires. - Page 12 Select the product type from the list of options in the app (Heating & Cooling → Kogan Smart Fireplace). Enter your Wi-Fi details. It is important that your SmarterHome device and the app are connected to the same Wi-Fi network during setup.
- Page 13 Ensure that the device is in pairing mode, with the Wi-Fi indicator flashing rapidly, indicator rapidly blink The device will commence the pairing process and connect to the app. Ensure your Wi-Fi router, mobile phone, and the SmarterHome device are kept close until connection is complete.
- Page 14 Using AP Mode to add device Follow the previous steps to select your product type (Heating & Cooling → Kogan Smart Fireplace). Adjust your connection method by tapping on the mode type in the top-right corner of the screen. Select for the set-up type.
- Page 15 Enter your Wi-Fi details. It is important that your SmarterHome device and the app are connected to the same Wi-Fi network during setup. Follow the in-app prompts to continue AP Mode connection, which will pair your -Fi hotspot to ensure a connection. This may be If the Wi-Fi hotspot does not appear on your phone in the list of available networks, your device may not be set in AP Pairing Mode correctly.
-
Page 16: Operation
OPERATION Controls Once the heater has been connected to the SmarterHome App, the smartphone will take control and communicate with the control box. If your home network is not working, it is still possible to operate the heater via the control panel on the heater or with the remote control. - Page 17 Changing Power Mode Note: The heater only starts working when the set temperature is higher than the room temperature. Setting Flame Brightness → Setting Timer → Schedule a new timer. the setting of switch-on time. -off time. Slide the timer settings leftwards to delete unwanted timers. Viewing Timer Setting →...
- Page 18 Control Panel Operation Turn heater off. Turn heater to standby mode. • Press to switch the flame effect on/off. • Press and hold to toggle between 5 different flame brightness levels. Press to activate low level heating 1000W. The 1000W heating pilot light will appear green to indicate that the function is ON.
-
Page 19: Specifications
SPECIFICATIONS Supply 220-240V~ 50Hz Rated power 2000W Lighting LEDs... - Page 20 Need more information?
Need help?
Do you have a question about the SMARTERHOME KASHFH20WGA and is the answer not in the manual?
Questions and answers