Table of Contents
Advertisement
Quick Links
Advertisement
Table of Contents

Related Manuals for AEQ BRAVO


Summary of Contents for AEQ BRAVO
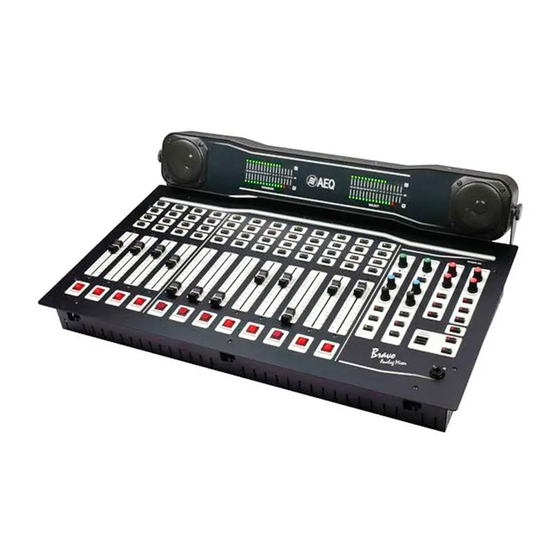
- Page 1 AEQ BRAVO Broadcast Mixing Console USER’S MANUAL ED. 12/07 V. 1.9 - 04/02/2015...
-
Page 2: Table Of Contents
6.1. Mono Mic./Line inputs……………………............6.2. Stereo Line inputs.................... 6.3. Program output....................6.4. Recording outputs.................... 24 6.5. Studio monitor output..................24 6.6. Signaling......................6.7. Power supply....................6.8. Dimensions and weight..................25 6.8.1. Dimensions..................6.8.2. Weight....................7. ADDITIONAL INFORMATION..................BRAVO Broadcasting Console... -
Page 3: Introduction
Maintenance operations on this unit should only be carried out by qualified technical personnel. AEQ does not accept responsibility for any damage or injury to the equipment caused by maintenance by unauthorised persons, nor for any damage or injury to other equipment or persons caused by any unauthorised repair or maintenance operation. -
Page 4: Warranty
AEQ shall not be liable for loss of information in the disks or data support that have been altered or found to be inexact, neither for any accidental damage caused by the user or other persons manipulating the product. -
Page 5: Equipment Power Supply
2 Amp. Slow Blow fuses, one of them used as a spare. 2.2. Switching on the equipment. AEQ BRAVO is prepared for connection to the electrical mains. Prior to connection of the power cord, ensure that power supply switch POWER is in the off position. -
Page 6: Audio Connections
Negative power return and power Power A-B * If a balanced microphone is connected to an unbalanced amplifier input, the input contact 3 is connected to contact 1. NOTE: This equipment does NOT have a “Phantom” Microphone Power Supply. BRAVO Broadcasting Console... -
Page 7: General Diagram
3.2. General diagram. BRAVO Broadcasting Console... -
Page 8: Functional Description
4. FUNCTIONAL DESCRIPTION. 4.1. Mono Mic./Line channels. The AEQ BRAVO mixer has four independent Mic/Line inputs: four electronically balanced inputs at microphone level with Female XLR-3 connectors and four asymmetrical at line level with RCA connectors: Each Mic./Line input has a fine adjustment for input gain. An specific tool is needed in order to... - Page 9 PROGRAM, AUDITION, PHONE and CUE buses (when respective sending buttons are pressed). “PROGRAM“ push button: it sends the connected Mic or Line signal to PROGRAM bus. Indicator will illuminate in red color when it’s pressed. BRAVO Broadcasting Console...
-
Page 10: Stereo Double Line Channels
4.2. Stereo double line channels. The AEQ BRAVO mixer is equipped with eight independent stereo double Line inputs. Those are asymmetrical inputs at line level with RCA connectors: Each input has a double fine adjustment of input gain. An specific tool is needed in order to... - Page 11 PROGRAM, AUDITION, PHONE and CUE buses (when respective sending buttons are pressed). “PROGRAM“ push button: it sends the selected Line signal to PROGRAM bus. Indicator will illuminate in red color when it’s pressed. BRAVO Broadcasting Console...
-
Page 12: Monitoring And Control Area
4.3. Monitoring and control area. Monitoring and control area allows you to access and control a series of functions that are described next. BRAVO Broadcasting Console... -
Page 13: Program Output
AUDITION output adjustment PROGRAM output adjustment 4.3.2. AUDITION output. The AEQ BRAVO mixer has this stereo output available on the back panel through Hartmann type connectors for L and R channels. These outputs are transformer balanced. See adjustment on section 4.3.1. -
Page 14: Control Room Monitoring
(down on the left) through ¼” stereo Jack connector. This control room monitoring system also has an internal power amplifier that sends the selected signal to two speakers located on the front VU-meters panel through the following back connector: BRAVO Broadcasting Console... -
Page 15: Studio Room Monitoring
180 degrees out of phase (logically, in the consoles that leave the Factory with that new amplifier board, that polarity is yet inverted in the right speaker of the VU-meters panel). BRAVO Broadcasting Console... -
Page 16: Air" Or "External" Input
“AIR (EXT.)” input is stereo and the RCA connectors are located on the back panel. 4.3.7. Internal telephone hybrids or four-wire interfaces for external hybrids. The AEQ BRAVO mixer has 1 double telephone channel with 2 internal telephone hybrids. It’s configurable through internal programming jumpers (P.J.) to work with internal hybrids (this is the usual Factory setting) or with external hybrids. - Page 17 Connections for the internal hybrids can be made by using the RJ-11 connectors on the back panel for the phone line (“LINE”) and for an auxiliary telephone (“SET”). It’s also possible to connect to the phone line by using the 2 pins Hartmann type connectors “TELPH. L1” y “TELPH. L2”. BRAVO Broadcasting Console...
-
Page 18: Adjusting The Internal Hybrids
4.3.7.1. Adjusting the internal hybrids. The two hybrids built into the AEQ BRAVO mixer are analog-type hybrids. This type of hybrids requires some previous adjustments for perfect hook-up to the phone line. There are two adjustment mechanisms for this purpose: one for the line’s resistive component, with... -
Page 19: Studio Monitors Muting
(P.J.) that are used for studio monitor muting configuration. See section 5.1. 4.3.11. Remote control of external equipments. The AEQ BRAVO mixer has four Hartmann type connectors (named “REMOTE”) for remote control of external equipments. These controls will only operate with the four first stereo double line channels and each one of them is activated/deactivated by activating/deactivating one of those channel through its “PROGRAM”... -
Page 20: Vu-Meters Panel
4.4. VU-meters panel. The AEQ BRAVO mixer has a panel with two stereo VU-meters, named “PROGRAM” and “SELECT”, and two speakers that receive the signal selected on the control room monitoring area. Those signals reach the panel through a flat cable (see section 4.3.4). -
Page 21: Internal Programming And Connection Diagrams
5. INTERNAL PROGRAMMING AND CONNECTION DIAGRAMS. 5.1. Programming and internal adjustments. The AEQ BRAVO mixer has a series of internal adjustments and programming jumpers (P.J.) that allows you to change some of the factory-set functions. These adjustments and programming jumpers should only be accessed by staff qualified for this type of operations, as the adjustment mechanisms and P.J. -
Page 22: Audio Connection
5.2. Audio connection. The following diagram shows an example of typical connection for radio broadcast studios: BRAVO Broadcasting Console... -
Page 23: External Hybrids Connection
The red lamp switches on when a microphone is C2 contact opened and switches off when it’s closed. C1 contact The green lamp switches C3 contact on when a microphone is closed and switches off when it’s opened. See section 4.3.10. BRAVO Broadcasting Console... -
Page 24: Technical Specifications
“Hartman” type. Output voltage: 24 V. Maximum admissible load: 6 VA. Signaling fuse: 0.4A (Slow Blow type). 6.7. Power supply. Input voltage: 100/240 V AC, 50-60 Hz. Maximum consumption: 100 VA. Power supply fuse: 2A (Slow Blow type). BRAVO Broadcasting Console... -
Page 25: Dimensions And Weight
6.8.1. Dimensions. Placed on a table. Cut-out for built-in: 580mm x 400mm [22,83 x 15,75 inches] Sunk into custom woodwork. Cut-out for built-in: 580mm x 380mm [22,83 x 14,96 inches] 6.8.2. Weight. Approximately 10 Kilograms (22 pounds). BRAVO Broadcasting Console... -
Page 26: Additional Information
Operation of this equipment in a residential area is likely to cause harmful interference in which case the user will be required to correct the interference at his own expense. BRAVO Broadcasting Console...
Need help?
Do you have a question about the BRAVO and is the answer not in the manual?
Questions and answers